Get support for KitchenAid KHMC1857WSS - Microwave Hood Combination Oven

KitchenAid KHMC1857WSS Support Question

KitchenAid KHMC1857WSS Support Question

Find answers below for this question about KitchenAid KHMC1857WSS - Microwave Hood Combination Oven.
Need a KitchenAid KHMC1857WSS manual? We have 3 online manuals for this item!
Question posted by twiggers on July 28th, 2012

What Is Cardboard Rectangle On Interior Of Oven?

The person who posted this question about this KitchenAid product did not include a detailed explanation. Please use the "Request More Information" button to the right if more details would help you to answer this question.

Current Answers

Answer #1: Posted by FullWolfMoon on July 29th, 2012 12:44 AM
This answer was accepted by the poster of the original question.
FullWolfMoon

Member since:
January 9th, 2012

Points: 469,820
1,090
points
There shouldn't be cardboard in an oven. I would remove it as it might just have been placed in there so it didn't get banged around and damaged during shipping.

Answer #2: Posted by neilboardman on December 23rd, 2013 5:30 PM
neilboardman

Member since:
December 23rd, 2013

Points: 0
100
points
If it is silverish than it is the waveguide cover and should not be removed!

Related KitchenAid KHMC1857WSS Manual Pages

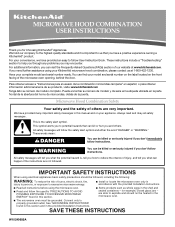
Use & Care Guide - Page 1

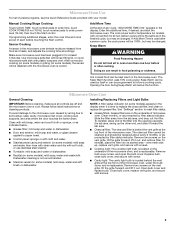
...this section and in the shell and sealed containers - For your KitchenAid microwave hood combination, please contact us that can find your appliance. are very important. ...or seriously injured if you need further assistance using the microwave oven. ■ Read and follow instructions. MICROWAVE HOOD COMBINATION USER INSTRUCTIONS Thank you don't follow the safety alert symbol...
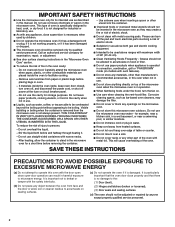
Use & Care Guide - Page 2

...; To reduce the risk of the microwave oven when the microwave oven is specifically designed to be allowed to accumulate on hood or filter. ■ Do not use paper products when appliance is operated in convection, combination, grill or "PAN BROWN" mode (on top of fire in the microwave oven. Carefully attend the microwave oven when paper, plastic, or other...
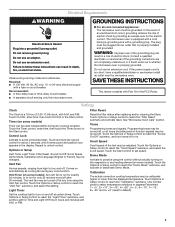
Use & Care Guide - Page 3

...convection cooking temperature may be grounded. Observe all cord connected appliances: The microwave oven must be changed. Consult a qualified electrician or serviceman if the grounding...time-delay fuse or time-delay circuit breaker. ■ A separate circuit serving only this microwave oven. In the event of an electrical short circuit, grounding reduces the risk of electric shock. ...
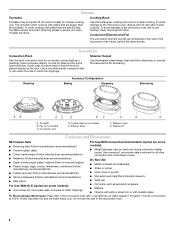
Use & Care Guide - Page 4

...-safe cookware to the microwave oven, always remove rack after 2-level cooking. Cooking Rack Use the rectangular cooking rack only for convection cycles (baking or roasting). Turntable B. Use ovenproof, microwave-safe cookware for all other convection and combination cycles. ■ Melamine (Follow manufacturer recommendations.) ■ Paper towels, paper plates, napkins (Use...
Use & Care Guide - Page 5

...accordingly. If programming additional stages, enter the cook time and cook power of the microwave oven, and is used by filter status indicator. If Add More Time is replaceable.... filter status. ■ Grease filters: Grease filters are off and the microwave oven is time to the microwave oven caused by filter status indicator. Remove two screws on the vent grille, tilt...
Use & Care Guide - Page 6

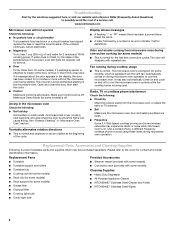
... ■ Magnetron Try to the cover for 5 minutes or more without the microwave oven being used. On some models, if a packaging spacer is attached to avoid unintended ...Control Make sure control is off . It may also automatically come on and cycle on during microwave oven operation. Replacement Parts Provided Accessories ■ Turntable ■ Turntable support and rollers ■...
Use & Care Guide - Page 7

... ■ Solid state touch control system parts SECOND THROUGH TENTH YEAR LIMITED WARRANTY On microwave ovens only, in the second through due to defects in accordance with electrical or plumbing codes... correspondence. Please keep this limited warranty does not apply. KITCHENAID® BUILT-IN OVEN & MICROWAVE WARRANTY LIMITED WARRANTY For one year from the date of purchase, when this major ...
Dimension Guide - Page 1

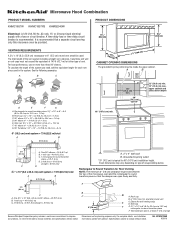
... height. Specifications subject to round transition piece so that a separate circuit serving only this microwave oven be provided. 17 " (43.8 cm) 16 " (41.3 cm) VENTING REQUIREMENTS ... cabinet and side cabinet depth 2 ft (0.6 m) C A. diameter round vent C. Microwave Hood Combination PRODUCT MODEL NUMBERS KHMC1857W KHMC1857XS KHMS2040W PRODUCT DIMENSIONS Electrical: A 120-Volt, 60-Hz,...
Installation Guide - Page 1

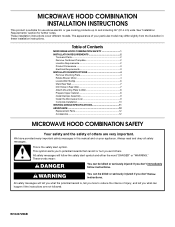
... alert symbol. Table of Contents MICROWAVE HOOD COMBINATION SAFETY 1 INSTALLATION REQUIREMENTS 2 Tools and Parts 2 Remove Cardboard Template 2 Location Requirements 2 Product...Damper Assembly 9 Install the Microwave Oven 9 Complete Installation 10 VENTING DESIGN SPECIFICATIONS 11 ASSISTANCE 12 Replacement Parts 12 Accessories 12 MICROWAVE HOOD COMBINATION SAFETY Your safety and the...
Installation Guide - Page 2

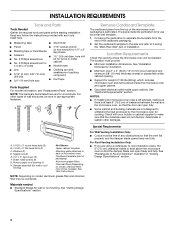
... that the door can open fully. ■ Some cabinet and building materials are not designed to back of microwave oven) Cardboard template (part of 150 lbs (68 kg), which includes microwave oven and items placed inside the microwave oven and upper cabinet. ■ Grounded electrical outlet inside the perforation is for use appropriate fasteners. Damper assembly (for...
Installation Guide - Page 3

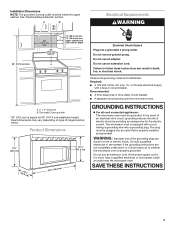
... Requirements" section. Required: ■ A 120 Volt, 60 Hz, AC only, 15- The microwave oven is properly installed and grounded. upper cabinet and side cabinet depth Electrical Shock Hazard Plug into an ... 3 prong outlet *30" (76.2 cm) is properly grounded. Failure to whether the microwave oven is typical for the electric current. Do not use an extension cord. If the power supply...
Installation Guide - Page 4

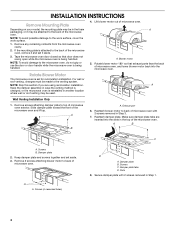
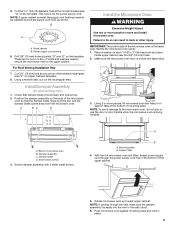
... holes) D A. NOTE: To avoid damage to the microwave oven, do not grip or use the door or door handle while the microwave oven is attached to the back of the microwave oven, remove it may be attached to back of the microwave oven. Slide damper plate toward the front of microwave oven exterior. Screws B. Keep damper plate and screws together...
Installation Guide - Page 5

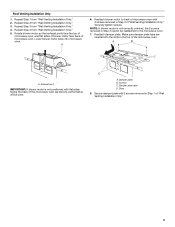
... blower motor face back of "Wall Venting Installation Only." 5 Reattach blower motor to the microwave oven. 7. Secure damper plate with 2 screws removed in Step 3 cannot be reattached to back of microwave oven with flat sides facing the back of the microwave oven (as shown), performance will be poor. Make sure damper plate tabs are inserted into...
Installation Guide - Page 6

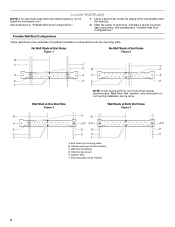
... Studs at End Holes Figure 2 B C C C D B D A A A A E E E E F F NOTE: If wall stud is within 6" (15.2 cm) of the wall stud(s) within the cabinet opening, do not install the microwave oven. 1. Holes for lag screws E. Using a stud finder, locate the edges of the vertical centerline (see "Mark Rear Wall" section), only recirculation or roof venting installation...
Installation Guide - Page 7

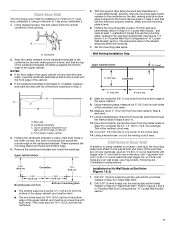
...Refer to complete the 12" x 4" (30.5 x 10.2 cm) rectangle. Rear wall B. Front edge of the upper cabinet, and must be ...3 of "Mark Rear Wall." 2. Mark Rear Wall The microwave oven must align with front edge of cabinet. or if both ...wall at both end holes. A A. D A C B A. Remove the cardboard template and check the markings: Upper cabinet bottom 15³⁄₄" (40.0...
Installation Guide - Page 8

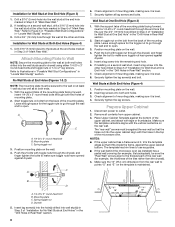
...Position mounting plate on the rear wall. Insert a lag screw into both end holes of the microwave oven. Securely tighten the lag screw(s) and bolt. Place Upper Cabinet Template against drywall. 5. Spring.... 1. The template has trim lines to use as guides. ■ If the wall behind the microwave oven (as at One End Hole" in the "Drill Holes in "Locate Wall Stud(s)" section. 3. ...
Installation Guide - Page 9

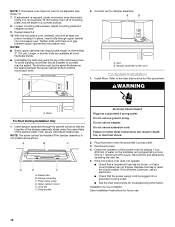
... that damper blade moves freely, and opens fully. 2. Place a washer on the template. NOTE: To avoid damage to move and install microwave oven. A B A. Push microwave oven against mounting plate and hold in the wall cutout. 6. NOTE: If upper cabinet is being handled. Metal cabinet B. Drill 3/8" (10 mm) holes at one corner ...
Installation Guide - Page 10

...at most hardware stores. ■ Overtightening bolts may warp the top of the microwave oven. Do not remove ground prong. Save Installation Instructions for filter placement. Vent ... ■ Check that a circuit breaker has not tripped. WARNING A. If adjustment is plugged into microwave oven. A B C D E F A. Do not use an extension cord. Longer or shorter bolts...
Installation Guide - Page 11

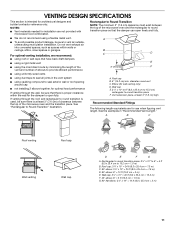
... vent length. Vent extension piece, at least 3" (7.6 cm) of clearance between the top of the microwave oven and the rectangular to round transition piece so that there is proper clearance within walls or ceilings, attics, crawl... with microwave hood combination. ■ We do not recommend using the most direct route by minimizing the length of the vent and number of the microwave oven and ...
Installation Guide - Page 12

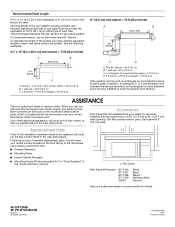
...m) + 6 ft (1.8 m) straight = 8 ft (2.4 m) If the existing vent is a list of the microwave oven opening . The filler panels come in China You will need additional assistance, call us at our toll free number or...and wall or roof caps must be used in the User Instructions. The total length of the microwave oven. See the following examples: 3¹⁄₄" x 10" (8.3 x 25.4 cm) vent...

KitchenAid Knowledge Base Results

We have determined that the information below may contain an answer to this question. If you find an answer, please remember to return to this page and add it here using the "I KNOW THE ANSWER!" button above. It's that easy to earn points!

  • My microwave oven will not run
    ...) attached to heat one cup (250 mL) of your product model number in and microwave combination ovens Can I use of the door? Assistance or service Call the KitchenAid Customer eXperience Center... only the Vent Fan and Light pads will not run Why won't my microwave oven run? Try to the inside of the microwave oven. See "Child Lock" section below . See "Assistance or service" section ...
  • User Preferences menu
    ... for 3 seconds. Ultima built-in ovens Fahrenheit to change the temperature display. Sabbath Mode (SAB) IMPORTANT: This preference does not disable interior lights. On - All control panel lights...) will be enabled. Set your preferences by shutting the refrigerator compartment door. built-in oven with steam Off - Use the Freezer (+) or (-) touch pads to restore the control...
  • Whirlpool Recall Information
    ...® PRO LINE® Series Toaster -   All rights Reserved | KitchenAid ® Coffee Maker - Free Standing range, Double Oven And Oven Microwave Combination - Copyright©2005 Whirlpool Corporation. United States Dishwasher - Over The Range Microwave Hood Combination - 24-inch Washer and Gas Dryer - United States Canada Gas Water Heater - Dehumidifier -  Please click...

Similar Questions

Ask a New Question
Use the box below to post a new question about this KitchenAid product .
Points & Prizes
  • You can earn points for nearly everything you do on HelpOwl.com
  • You can trade in those points for gift cards at leading retailers such as Amazon.com and Walmart
  • It's that simple!
See How it Works
Create a Free Account

KitchenAid Manuals

Find free KitchenAid KHMC1857WSS - Microwave Hood Combination Oven manuals and user guides available at ManualOwl.com. Try out our unique manual viewer allowing you to interact with manuals from directly within your browser!

KitchenAid Reviews

View thousands of KitchenAid user reviews and customer ratings available at ReviewOwl.com.

Contact Information

Complete KitchenAid customer service contact information including steps to reach representatives, hours of operation, customer support links and more from ContactHelp.com.

Scoreboard Ratings

See detailed KitchenAid customer service rankings, employee comments and much more from our sister site.

KitchenAid Recalls

Find comprehensive KitchenAid recall information updated hourly on RecallOwl.com.