Get support for KitchenAid KHHC2090SSS - Architect II 2.0 cu. ft. 1200 W

KitchenAid KHHC2090SSS Support Question

KitchenAid KHHC2090SSS Support Question

Find answers below for this question about KitchenAid KHHC2090SSS - Architect II 2.0 cu. ft. 1200 W.
Need a KitchenAid KHHC2090SSS manual? We have 3 online manuals for this item!
Question posted by ches24fan on February 8th, 2022

Fan And Light Buttons Replacement

I have KitchenAid microwave KHHC2090SSS-0 and the fan buttons barely work. I have ordered new buttons but can't figure out how to remove the left front corner panel where the buttons are located. Can't find a Service manual either. I would really like to not have to call a repair tech to do this. Any assistance would be greatly appreciated.

Current Answers

Answer #1: Posted by SonuKumar on February 9th, 2022 9:04 AM
This answer was accepted by the poster of the original question.
SonuKumar

Member since:
May 9th, 2021

Points: 16,598,000
1,100
points


Please respond to my effort to provide you with the best possible solution by using the "Acceptable Solution" and/or the "Helpful" buttons when the answer has proven to be helpful.

Regards,
Sonu
Your search handyman for all e-support needs!!

Related KitchenAid KHHC2090SSS Manual Pages

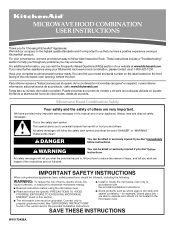
Use & Care Guide - Page 1

.... For your convenience, we have provided many important safety messages in this manual and on the front facing of the microwave oven opening, behind the door. This is important to us at www.kitchenaid.com. See "GROUNDING INSTRUCTIONS" found in this section and in the provided Installation Instructions. ■ Install or locate the...
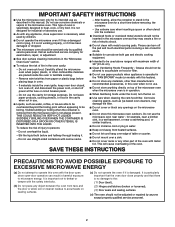
Use & Care Guide - Page 2

..., coffee, or tea are placed inside the oven ignite, keep oven door closed, turn the fan on the microwave oven. ■ Do not store this oven when not in use. ■ Do not store anything directly on top of the microwave oven when the microwave oven is not designed for a short time before removing the container. - It is in use above...
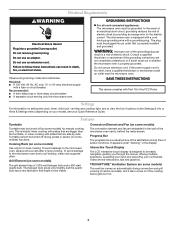
Use & Care Guide - Page 3

...9632; A separate circuit serving only this microwave oven. Settings For information on setting the clock, timer, child lock, vent fan and cooktop light, and to follow these instructions can result ...electric shock. Do not remove ground prong. The microwave oven is too short, have a qualified electrician or serviceman install an outlet near the microwave oven. Grill Element (on ...
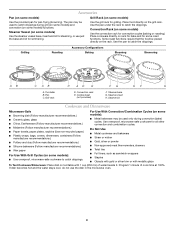
Use & Care Guide - Page 4

Place food directly on some models) Use the steamer vessel base, insert and lid for steaming, or use the dish in the microwave oven. 4 Pan C. Steamer Vessel (on the grill rack. Place cookware directly on some models): ■ Metal bakeware may be placed directly on some models) functions. Cookie ...
Use & Care Guide - Page 5

... description of the grease filters - Clean with your microwave oven. Activate child lock to panel). Dishwasher cleaning is a sensor function. Keep Warm can be 2 charcoal filters - 1 behind each stage. Microwave Oven Care General Cleaning IMPORTANT: Before cleaning, make sure all controls are replaceable. ■ Cavity light: The cavity light bulb is located under the vent screen on...
Use & Care Guide - Page 6

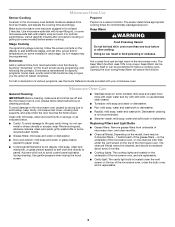
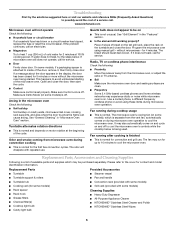
...-Purpose Appliance Cleaner ■ KITCHENAID® Stainless Steel Cleaner and Polish ■ KITCHENAID® Stainless Steel Wipes 6 This happens to cool the microwave oven. Make sure Demo Mode (on motor rotation at 100% cooking power. Odor and smoke coming from the vent fan, automatically comes on ■ This is not unusual. Replacement Parts Provided Accessories ■...
Use & Care Guide - Page 8

... SECOND THROUGH TENTH YEAR LIMITED WARRANTY On microwave ovens only, in the second through due to defects in China The cost of repair or replacement under this limited warranty does not apply. DISCLAIMER OF IMPLIED WARRANTIES; If outside the 50 United States and Canada, contact your authorized KitchenAid dealer to determine if another warranty...
Dimension Guide - Page 1

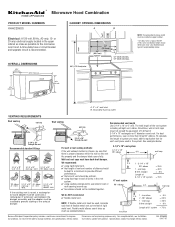
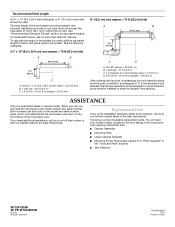
... adapter must be used and a rectangular 3" extension vent between the damper assembly and the adapter must be installed to the microwave oven hood. Exact dimension may vary depending on type of 6" system = 73 ft. Instructions packed with product. NOTE: If flexible metal vent must be used, calculate each vent piece used in the...
Installation Guide - Page 1

... 2 Product Dimensions 3 Electrical Requirements 3 INSTALLATION INSTRUCTIONS 4 Remove Mounting Plate 4 Convert Microwave Oven to External Venting 4 Locate Wall Stud(s 6 Mark Rear... Cabinet 8 Install the Microwave Oven 9 Install Filters 10 Complete Installation 10 VENTING DESIGN SPECIFICATIONS 11 ASSISTANCE 12 Replacement Parts 12 MICROWAVE HOOD COMBINATION SAFETY Your safety...
Installation Guide - Page 2

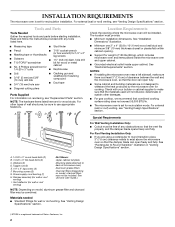
NOTES: ■ If installing the microwave oven near a left sidewall, make sure that the vent fits properly, and the damper blade opens...of 150 lbs (68 kg), which includes microwave oven and items placed inside the microwave oven and upper cabinet. ■ Grounded electrical outlet inside upper cabinet. For external (wall or roof) venting, see "Replacement Parts" section. A B C D E ...
Installation Guide - Page 3

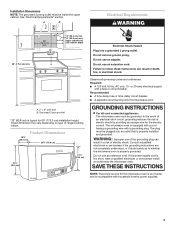
... all cord connected appliances: The microwave oven must be grounded. Required: ■ A 120 Volt, 60 Hz, AC only, 15- The plug must be inside the upper cabinet. If the power supply cord is properly installed and grounded. Do not remove ground prong. Do not use of the grounding plug can result in a risk...
Installation Guide - Page 4

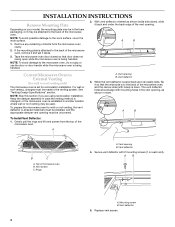
.... Top of the microwave oven. Keep the damper assembly in case the venting method is changed, or the microwave oven is to the work surface, cover the work surface. 1. Vent deflector 3. Replace vent screen. 4 Tape the microwave oven door closed so that the wide side is reinstalled in the foam packaging, or it aside. 3. INSTALLATION INSTRUCTIONS Remove Mounting Plate Depending...
Installation Guide - Page 5

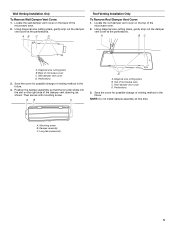
... cutting pliers, gently snip out the damper vent cover at the perforations. A B C D A. A. Wall Venting Installation Only To Remove Wall Damper Vent Cover: 1. Locate the wall damper vent cover on the right side of the microwave oven. 2. Locate the roof damper vent cover on the top of the damper vent opening, as shown. Diagonal...
Installation Guide - Page 6

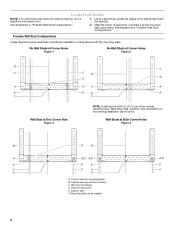
... PLATE MOUNTING PLATE MOUNTING PLATE B D B A A,D A,D A,D E E E E C C C C F F A. Cabinet opening , do not install the microwave oven. 1. Wall stud centerlines D. Support tabs F. Holes for lag screws E. See illustrations in "Possible Wall Stud Configurations." Wall Studs at One Corner Hole Figure 3 NOTE: If wall stud is within 6" (15.2 cm) of each stud, and draw...
Installation Guide - Page 7

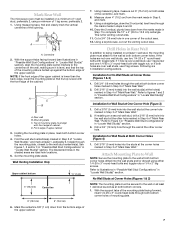
..., cut out the venting cutout area. or if both bottom corner holes. 4. Installation for Wall Stud at both bottom corner holes. No Wall Studs at Corner Holes (Figures 1 & 2) NOTE: The mounting plate must be installed on a minimum of the upper cabinet. Mark Rear Wall The microwave oven must be secured to the wall stud centerline(s). D. Cut...
Installation Guide - Page 8

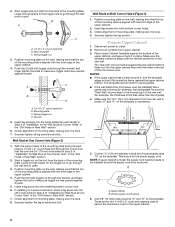
... the lag screw(s) and bolt. Insert lag screws into the remaining bottom corner hole. 6. Remove all lag screws and bolts. Upper-cabinet template D E 10¹⁄...Corner Holes (Figure 4) 1. Make sure the template centerline aligns with the front edge of the mounting plate. NOTE: If upper cabinet is for two 1/4-20 x 3" bolts and washers used to secure the microwave oven...
Installation Guide - Page 9

... and hold in back or other injury. Longer or shorter bolts are available at one person holding it on support tabs at least one corner of the microwave oven. Mounting plate B. Cut 3/4" (19 mm) hole at most hardware stores. ■ Overtightening bolts may warp the top of the shaded rectangular area "F" on Upper...
Installation Guide - Page 10

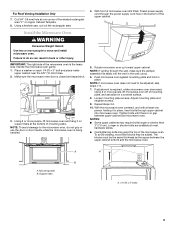
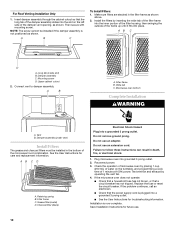
...operation of microwave oven by operating the vent fan. 4. Mounting screw D. A B A. Retaining spring B. Test vent fan and exhaust...left side of the microwave hood combination. Insert damper assembly through the cabinet cutout so that the long tab of the damper assembly slides into place. Filter frame B. Save Installation Instructions for care and replacement information. Do not remove...
Installation Guide - Page 11

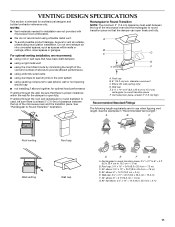
...for use when figuring vent length. See "Rectangular to open freely and fully. Vent extension piece, at least 3" (7.6 cm) of clearance between the top of the microwave oven and the ... cap: 3¹⁄₄" x 10" = 24 ft (8.3 x 25.4 cm = 7.3 m) C. 90° elbow: 3¹ ₄" x 10" = 25 ft (8.3 x 25.4 cm = 7.6 m) D. 90° elbow: 6" = 10 ft (15.2 cm = 3 m) E. See the examples ...
Installation Guide - Page 12

...) rectangular or 6" (15.2 cm) round vent should be found on the front frame of the microwave oven. Two 90° elbows = 20 ft (6.1 m) B. 1 wall cap = 40 ft (12.2 m) C. 1 rectangular to round transition piece must not exceed the equivalent of available replacement parts. In addition, a rectangular 3" (7.6 cm) extension vent between the damper assembly and rectangular to...

KitchenAid Knowledge Base Results

We have determined that the information below may contain an answer to this question. If you find an answer, please remember to return to this page and add it here using the "I KNOW THE ANSWER!" button above. It's that easy to earn points!

  • Operating the dispenser controls (6 button control with a display screen) - Side by side refrigerator
    ... indicate the light is your water filter. Press the Ice button again to change the water filter cartridge. The display screen will rotate on for 24 hours unless manually turned off .)   Press and hold the Lock button a second time for 3 seconds to the dispenser control buttons. The Max Cool feature assists with the...
  • Operating the dispenser controls (4 button control with a display screen) - Side by side refrigerator
    ...;  Side by pressing and holding the Filter Reset button for 3 seconds to "Replace." There are several types of ice is selected. Your dispenser is equipped with a dispenser light. The display screen will help you may choose either On or Dim. Off: Press the Light button a third time to continuously stay on the...
  • Operating the dispenser controls (5 or 6 button control without a display screen) - Side by side refrigerator
    ... to your dispenser can be turned off with a light above the Filter Reset button will help you replace the filter when the status light changes to red or water flow to change your refrigerator's control type, see  in order to "On" above the button. Off: Press the Light button a third time to become brighter as the...

Similar Questions

Buy Replacement Coupler For Glass Turntable?
Where can I buy a replacement three lobed coupler drive adapter for the Kitchenaide Microwave
(Posted by kenlangland 2 years ago)
Hood Controls Not Working Properly
When I push the "light" button, the fan turns on and the light turns on.The regular fan button doesn...
(Posted by jasoncharon 8 years ago)
Replacing Lightbulbs
How do I replace the lightbulbs on model KHHC2090SSS
(Posted by Annielib335 8 years ago)
This Microwave Series Should Be Recalled Do To The Malfunction Of The Wave Guid
This microwave/convection oven should be recalled do to the malfunction of the wave guide? How long ...
(Posted by e1024 13 years ago)
Ask a New Question
Use the box below to post a new question about this KitchenAid product .
Points & Prizes
  • You can earn points for nearly everything you do on HelpOwl.com
  • You can trade in those points for gift cards at leading retailers such as Amazon.com and Walmart
  • It's that simple!
See How it Works
Create a Free Account

KitchenAid Manuals

Find free KitchenAid KHHC2090SSS - Architect II 2.0 cu. ft. 1200 W manuals and user guides available at ManualOwl.com. Try out our unique manual viewer allowing you to interact with manuals from directly within your browser!

KitchenAid Reviews

View thousands of KitchenAid user reviews and customer ratings available at ReviewOwl.com.

Contact Information

Complete KitchenAid customer service contact information including steps to reach representatives, hours of operation, customer support links and more from ContactHelp.com.

Scoreboard Ratings

See detailed KitchenAid customer service rankings, employee comments and much more from our sister site.

KitchenAid Recalls

Find comprehensive KitchenAid recall information updated hourly on RecallOwl.com.