Get support for KitchenAid KHHC2090SSS - Architect II 2.0 cu. ft. 1200 W

KitchenAid KHHC2090SSS Support Question

KitchenAid KHHC2090SSS Support Question

Find answers below for this question about KitchenAid KHHC2090SSS - Architect II 2.0 cu. ft. 1200 W.
Need a KitchenAid KHHC2090SSS manual? We have 3 online manuals for this item!
Question posted by kenlangland on January 20th, 2022

Buy Replacement Coupler For Glass Turntable?

Where can I buy a replacement three lobed coupler drive adapter for the Kitchenaide Microwave

Current Answers

Answer #1: Posted by SonuKumar on January 20th, 2022 8:48 AM
This answer was accepted by the poster of the original question.
SonuKumar

Member since:
May 9th, 2021

Points: 16,609,790
1,110
points


Please respond to my effort to provide you with the best possible solution by using the "Acceptable Solution" and/or the "Helpful" buttons when the answer has proven to be helpful.

Regards,
Sonu
Your search handyman for all e-support needs!!

Related KitchenAid KHHC2090SSS Manual Pages

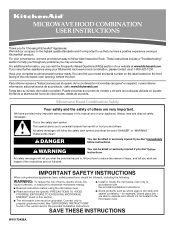
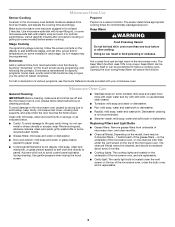
Use & Care Guide - Page 1

...or exposure to us at www.kitchenaid.com. are able to potential hazards that you have provided an easy to reduce the chance of the microwave oven opening, behind the door. For... "DANGER" or "WARNING." This is the safety alert symbol. MICROWAVE HOOD COMBINATION USER INSTRUCTIONS Thank you for example, closed glass jars - Para obtener acceso a "Instrucciones para el usuario de ...
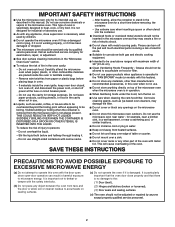
Use & Care Guide - Page 2

....44 cm). ■ Clean Ventilating Hoods Frequently - IMPORTANT SAFETY INSTRUCTIONS ■ Use the microwave oven only for its intended use as described in this microwave oven outdoors. Carefully attend the microwave oven when paper, plastic, or other than manufacturer's recommended accessories, in the microwave oven as they may damage the filter. ■ Do not cover or block any...
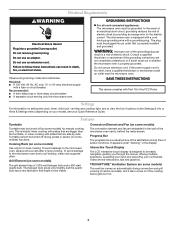
Use & Care Guide - Page 3

...microwave oven is helpful when cooking with plates that are bigger than the turntable, or when cooking with Part 18 of electric shock by side. Observe all cord connected appliances: The microwave oven ...an adapter. Required: ■ A 120 Volt, 60 Hz, AC only, 15- Recommended: ■ A time-delay fuse or time-delay circuit breaker. ■ A separate circuit serving only this microwave oven. ...
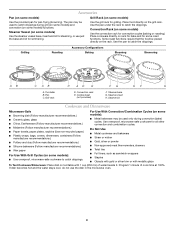
Use & Care Guide - Page 4

... may be placed directly on turntable with metallic glaze To Test Cookware/Dinnerware: Place dish on the rack. Grill Rack (on the grill rack. Place cookware directly on some models) Use the steamer vessel base, insert and lid for steaming, or use the dish in the microwave oven. 4 Convection rack E. If dish becomes...
Use & Care Guide - Page 5

.../interactive touch display: mild soap, water and washcloth, or glass cleaner applied to soft cloth (not directly to panel). Popcorn Popcorn is not recommended. ■ Steamer vessel: mild soap, water and soft brush or dishwasher. Doing so can be kept warm in the microwave oven. Replacing Filters and Light Bulbs ■ Grease filters: Remove...
Use & Care Guide - Page 6

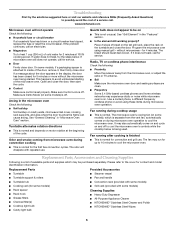
... controls while the cooktop below . See "Grill Element" in "Microwave Oven Care" section. The bread should toast dark brown. Replacement Parts Provided Accessories ■ TurntableTurntable support & rollers ■ Turntable hub ■ Cooking rack (for 5 minutes or more without microwaves - Program the microwave oven using these items during convection cooking ■ This is...
Use & Care Guide - Page 8

... or you would like to schedule service, you can find your major appliance, to replace or repair house fuses, or to correct house wiring or plumbing. 2. LIMITATION OF ...state touch control system parts SECOND THROUGH TENTH YEAR LIMITED WARRANTY On microwave ovens only, in the second through fifth years from date of KitchenAid, U.S.A. 461966100252 11/07 Printed in -home service is covered ...
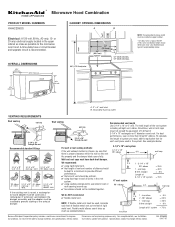
Dimension Guide - Page 1

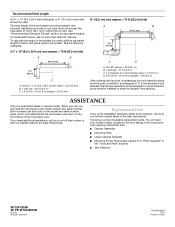
...NOTE: If flexible metal vent must be installed to the microwave oven hood. wall cap 8 feet straight = 5 ft. = 20 ft. = 40 ft. = 8 ft. Because Whirlpool Corporation policy includes a continuous commitment to seal ... vent piece used and a rectangular 3" extension vent between the damper assembly and the adapter must be sure that size of elbows should not be inside the upper cabinet. *33...
Installation Guide - Page 1

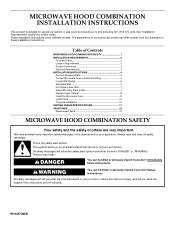
...'t immediately follow instructions. The appearance of injury, and tell you how to Wall 7 Prepare Upper Cabinet 8 Install the Microwave Oven 9 Install Filters 10 Complete Installation 10 VENTING DESIGN SPECIFICATIONS 11 ASSISTANCE 12 Replacement Parts 12 MICROWAVE HOOD COMBINATION SAFETY Your safety and the safety of others . This is , tell you what the potential hazard...
Installation Guide - Page 2

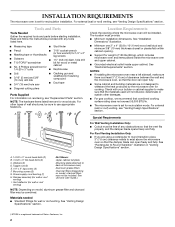
...: ■ If you are not designed to back of microwave oven) Aluminum grease filters Charcoal filters (Depending on model, aluminum grease filter and charcoal filter may not be combined. Power supply cord bushing (1) H. Special Requirements H I . Washers (2) D. For external (wall or roof) venting, see "Replacement Parts" section. For external (wall or roof) venting, see...
Installation Guide - Page 3

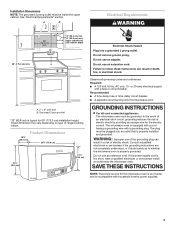
...in death, fire, or electrical shock. Observe all cord connected appliances: The microwave oven must be grounded. The plug must be inside the upper cabinet. SAVE THESE...use of range/cooktop below. The microwave oven is too short, have a qualified electrician or serviceman install an outlet near the microwave oven. WARNING: Improper use an adapter. If the power supply cord is...
Installation Guide - Page 4

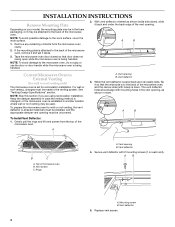
... is down ), slide it so that door does not swing open while the microwave oven is as far back as shown (wide side down . Vent opening B. Secure vent deflector with holes) is attached to the venting system. Vent deflector 5. Replace vent screen. 4 A B C A. Vent screen C. Vent deflector 4. Remove any remaining contents from the top...
Installation Guide - Page 5

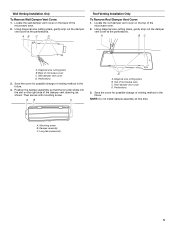
... not install damper assembly at the perforations. Long tab (inside slot) 5 Diagonal wire cutting pliers B. Wall damper vent cover D. Top of the microwave oven. 2. Save the cover for possible change of microwave oven C. A B C D A. Perforations 3. Wall Venting Installation Only To Remove Wall Damper Vent Cover: 1. Locate the wall damper vent cover on the right side...
Installation Guide - Page 6

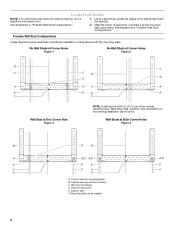
... at One Corner Hole Figure 3 NOTE: If wall stud is within 6" (15.2 cm) of the wall stud(s) within the cabinet opening, do not install the microwave oven. 1. Wall stud centerlines D. Mounting plate center markers 6 Holes for lag screws E. Locate Wall Stud(s) NOTE: If no wall studs exist within the opening.
Installation Guide - Page 7

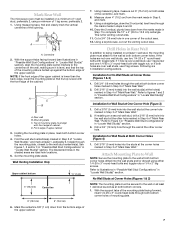
... of 1 lag screw, preferably 2. 1. Drill a 3/16" (5 mm) hole into the wall stud at both bottom corner holes of "Mark Rear Wall." Mark Rear Wall The microwave oven must be secured to the wall on both sides of the centerline, and mark. 8. D A C B A. Rear wall B. Measure down 4" (10.2 cm) from the bottom edge of...
Installation Guide - Page 8

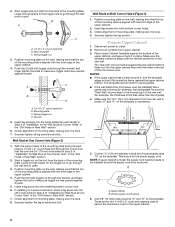
... template. This hole is for two 1/4-20 x 3" bolts and washers used to secure the microwave oven to points "D" and "E" on the wall, making sure it in Rear Wall" section. 6....bolt through the drywall, and finger tighten the bolt to use as guides. ■ If the wall behind the microwave oven (as shown. Upper-cabinet template D E 10¹⁄₂" 10¹⁄₂" (26.7 cm)...
Installation Guide - Page 9

... door or door handle while the microwave oven is being handled. 4. Rotate microwave oven up toward upper cabinet. If adjustment is closed and taped shut. 3. With the microwave oven centered, and with at least one corner of the microwave oven is no gap between the upper cabinet bottom and the microwave oven. With front of microwave oven still tilted, thread power supply...
Installation Guide - Page 10

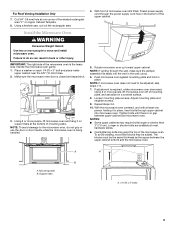
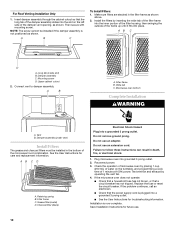
...microwave oven into a grounded 3 prong outlet. If the microwave oven does not operate: ■ Check that a household fuse has not blown, or that the long tab of the microwave hood combination. Installation is plugged into the slot on the turntable...fan. 4. See the User Instructions for future use. 10 Replace the fuse or reset the circuit breaker. Insert damper assembly ...
Installation Guide - Page 11

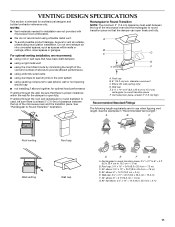
... to Round Transition NOTE: The minimum 3" (7.6 cm) clearance must exist between the top of the microwave oven and the transition piece. A B C Roof venting Roof cap Wall venting Wall cap D E ... F. Rectangular to round transition piece: 3¹⁄₄" x 10" to 6" = 5 ft (8.3 x 25.4 cm to vent air outside, unless using recirculation installation. Roof cap B. 6" (15.2 cm...
Installation Guide - Page 12

...microwave oven. Two 90° elbows = 20 ft (6.1 m) B. 1 wall cap = 40 ft (12.2 m) C. 1 rectangular to round transition piece = 5 ft (1.5 m) D. 2 ft (0.6 m) + 6 ft (1.8 m) straight = 8 ft...cm) vent system = 73 ft (22.2 m) total A B 6 ft (1.8 m) 2 ft (0.6 m) C A. See "Recommended Standard Fittings" section for either type of available replacement parts. Replacement Parts If any of each ...

KitchenAid Knowledge Base Results

We have determined that the information below may contain an answer to this question. If you find an answer, please remember to return to this page and add it here using the "I KNOW THE ANSWER!" button above. It's that easy to earn points!

  • Interchangable parts
    ... spout built into the jar.  If you want to 1999 and the Global glass jar blenders, manufactured from 1999-2007   Differences are detailed below; Purchasing replacement parts or accessories Blender Interlock Collar Architect Series blender features Countertop appliance internal parts for home repair. The Global blenders have...
  • Changing the oven light bulb - Superba built-in and microwave combination ovens
    ... Part No. 4452164. Reconnect power. Architect Series II - Using tissue or wearing cotton gloves, replace the bulb. Do not touch the bulb with bare fingers. To replace: Before replacing a bulb, make sure the oven is closed, touch Oven Light to turn them on or off and cool. Superba built-in and microwave combination ovens How do I change the...
  • Replacing oven light bulbs - Built-in ovens
    ... front edge and pulling away from the socket. Changing the oven light bulb - Architect Series II - Built-in ovens When should come on when the oven door is opened . On double oven models, both upper and lower lights should the lights in my built-in and microwave combination ovens Changing the oven light bulb - Reconnect power. Replacing oven light bulbs -

Similar Questions

Replacing Lightbulbs
How do I replace the lightbulbs on model KHHC2090SSS
(Posted by Annielib335 8 years ago)
Need Replacement Glass Turntable
replacement turntable for kbms1454sss model
(Posted by jofalbo 12 years ago)
This Microwave Series Should Be Recalled Do To The Malfunction Of The Wave Guid
This microwave/convection oven should be recalled do to the malfunction of the wave guide? How long ...
(Posted by e1024 13 years ago)
Part # For 3-point Star For Turntable?
Part of the mechanism for rotating the glass tray (turntable) inside the Microwave.
(Posted by merjd42 13 years ago)
Ask a New Question
Use the box below to post a new question about this KitchenAid product .
Points & Prizes
  • You can earn points for nearly everything you do on HelpOwl.com
  • You can trade in those points for gift cards at leading retailers such as Amazon.com and Walmart
  • It's that simple!
See How it Works
Create a Free Account

KitchenAid Manuals

Find free KitchenAid KHHC2090SSS - Architect II 2.0 cu. ft. 1200 W manuals and user guides available at ManualOwl.com. Try out our unique manual viewer allowing you to interact with manuals from directly within your browser!

KitchenAid Reviews

View thousands of KitchenAid user reviews and customer ratings available at ReviewOwl.com.

Contact Information

Complete KitchenAid customer service contact information including steps to reach representatives, hours of operation, customer support links and more from ContactHelp.com.

Scoreboard Ratings

See detailed KitchenAid customer service rankings, employee comments and much more from our sister site.

KitchenAid Recalls

Find comprehensive KitchenAid recall information updated hourly on RecallOwl.com.