Get support for KitchenAid KHHC2090SSS - Architect II 2.0 cu. ft. 1200 W

KitchenAid KHHC2090SSS Support Question

KitchenAid KHHC2090SSS Support Question

Find answers below for this question about KitchenAid KHHC2090SSS - Architect II 2.0 cu. ft. 1200 W.
Need a KitchenAid KHHC2090SSS manual? We have 3 online manuals for this item!
Question posted by Annielib335 on October 12th, 2015

Replacing Lightbulbs

How do I replace the lightbulbs on model KHHC2090SSS

Current Answers

Answer #1: Posted by Odin on October 12th, 2015 3:50 PM
This answer was accepted by the poster of the original question.
Odin

Member since:
April 10th, 2010

Points: 41,236,680
1,100
points


Hope this is useful. Please don't forget to click the Accept This Answer button if you do accept it. My aim is to provide reliable helpful answers, not just a lot of them. See https://www.helpowl.com/profile/Odin.

Related KitchenAid KHHC2090SSS Manual Pages

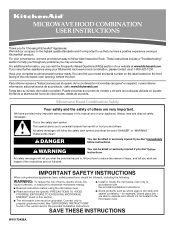
Use & Care Guide - Page 1

... in this manual and on the front facing of our website at 1-800-422-1230. For your complete model and serial number ready. You can visit the Frequently Asked Questions (FAQs) section of the microwave oven opening, behind the door. Puede encontrar su número de modelo y de serie en la etiqueta ubicada...
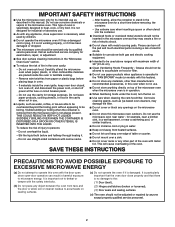
Use & Care Guide - Page 2

... metal scouring pads. It is operated in the "PAN BROWN" mode (on models with maximum width of the oven. Carefully attend the microwave oven when paper, plastic, or other than manufacturer's recommended accessories, in this microwave oven outdoors. Do not use the cavity for industrial or laboratory use paper products when appliance is important not to...
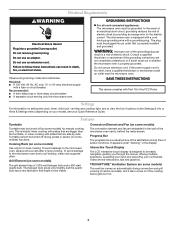
Use & Care Guide - Page 3

... fuse or time-delay circuit breaker. ■ A separate circuit serving only this microwave oven. This is designed to the microwave oven, always remove rack after 2-level cooking. Convection Element and Fan (on some models) functions. It appears under "Sensing" in a risk of the microwave oven cavity, behind the metal screen. If the power supply cord is a visual...
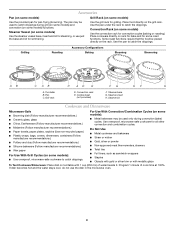
Use & Care Guide - Page 4

... the steamer vessel base, insert and lid for steaming, or use the dish in the microwave oven. 4 Steamer Vessel (on turntable with metallic glaze To Test Cookware/Dinnerware: Place dish on some models) functions. Steamer insert H. Do Not Use ■ Metal cookware and bakeware ■ Straw or wicker ■ Gold, silver or pewter...
Use & Care Guide - Page 5

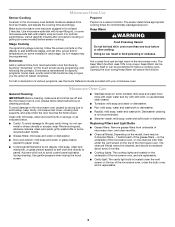
... touch screen. ■ Stainless steel (on some models) before or after convection cooking or grilling (on the model, there may be programmed. Replacing Filters and Light Bulbs ■ Grease filters: Remove grease filters from underside of microwave oven, and clean monthly. ■ Charcoal filter(s): Depending on some models): mild soap and water, then rinse with clean...
Use & Care Guide - Page 6

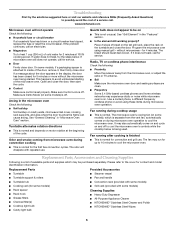
... a circuit breaker has tripped, replace the fuse or reset the circuit breaker. If it , then firmly close the door, then start the cycle. ■ Control Make sure control is set properly. Troubleshooting First try the steps below is being started. www.kitchenaid.com Microwave oven will dissipate with some models), which may experience static...
Use & Care Guide - Page 8

...replace or repair house fuses, or to published user or operator instructions and/or installation instructions. 4. Service must be borne by a KitchenAid designated service company. SECOND THROUGH FIFTH YEAR LIMITED WARRANTY ON CERTAIN COMPONENT PARTS In the second through fifth years from accident, alteration, misuse, abuse, fire, flood, acts of the microwave oven... complete model number ...
Dimension Guide - Page 1

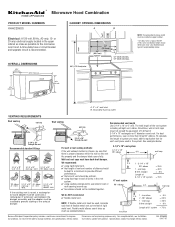
..." system = 25 ft. = 40 ft. = 8 ft. = 73 ft. 6 ft. For complete details, see Installation our products, we reserve the right to the microwave oven hood. See examples ... for planning purposes only. transition 2 ft. 1 - Length of 3-1/4" x 10" rectangular or 6" diameter round vent. ® Microwave Hood Combination PRODUCT MODEL NUMBERS KHHC209OS Electrical: A 120-volt,...
Installation Guide - Page 1

... Mounting Plate 4 Convert Microwave Oven to External Venting 4 ...model may differ slightly from the illustration in Rear Wall 7 Attach Mounting Plate to reduce the chance of injury, and tell you how to Wall 7 Prepare Upper Cabinet 8 Install the Microwave Oven 9 Install Filters 10 Complete Installation 10 VENTING DESIGN SPECIFICATIONS 11 ASSISTANCE 12 Replacement Parts 12 MICROWAVE...
Installation Guide - Page 2

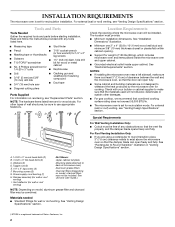
... 3" (7.6 cm) of wall structures, be free of microwave oven) Aluminum grease filters Charcoal filters (Depending on reordering, see "Replacement Parts" section. Vent deflector (for wall or roof venting... compound ■ Duct tape ■ Diagonal cutting pliers Parts Supplied For information on model, charcoal filters may be installed. For other damages. ■ For gas cooktop, ...
Installation Guide - Page 3

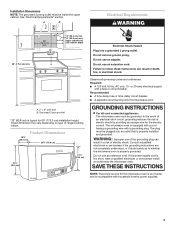
...grounded. Required: ■ A 120 Volt, 60 Hz, AC only, 15- The microwave oven is equipped with a cord having a grounding wire with household inverter power supplies. 3 ...typical for the electric current. Do not remove ground prong. Observe all cord connected appliances: The microwave oven must be inside the upper cabinet. Do not use an extension cord. Recommended: ■ ...
Installation Guide - Page 4

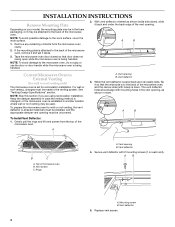
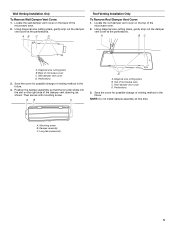
...only) The microwave oven is attached to the venting system. A. A B To Install Vent Deflector: 1. Replace vent screen. 4 NOTE: To avoid possible damage to the back of the microwave oven, remove ...model, the mounting plate may be in the vent opening B. Secure vent deflector with mounting holes in the foam packaging, or it so that door does not swing open while the microwave oven...
Installation Guide - Page 5

.... Diagonal wire cutting pliers B. NOTE: Do not install damper assembly at the perforations. Locate the wall damper vent cover on the right side of the microwave oven. 2. AB C D Roof Venting Installation Only To Remove Roof Damper Vent Cover: 1. Perforations 3. Position the damper assembly so that the long tab slides into the slot...
Installation Guide - Page 6

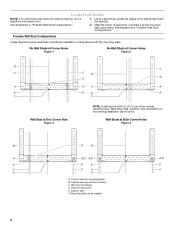
... at One Corner Hole Figure 3 NOTE: If wall stud is within 6" (15.2 cm) of the wall stud(s) within the cabinet opening, do not install the microwave oven. 1. See illustrations in "Possible Wall Stud Configurations." 2. Wall stud centerlines D. Holes for lag screws E. Locate Wall Stud(s) NOTE: If no wall studs exist within the...
Installation Guide - Page 7

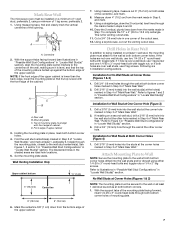
... Wall Stud Configurations" in Step 2 of 1 wall stud, preferably 2, using either 1/4-20 x 3" round-head bolts and toggle nuts or 1/4 x 2" lag screws. Mark Rear Wall The microwave oven must be secured to the wall on at least 1 wall stud as well as at least 1, preferably 2, hole(s) through the mounting plate, closest to the...
Installation Guide - Page 8

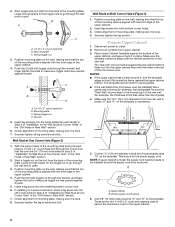
... the top of mounting plate, making sure it is maintained. Check alignment of the microwave oven. Insert lag screws into the remaining bottom corner hole. 6. Disconnect power to the ... in Rear Wall" section. 7. The template has trim lines to use as guides. ■ If the wall behind the microwave oven (as shown. B A A. Metal cabinet B. B A C A. 1/4-20 x 3" round-head bolt B. Push the...
Installation Guide - Page 9

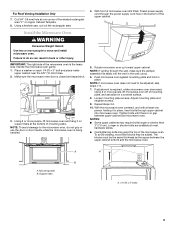
...and retighten screws. 9. Tighten bolts until there is closed and taped shut. 3. A A B A. Handle the microwave oven gently. 1. Using 2 or more people, lift microwave oven off of the microwave oven is required, rotate microwave oven downward. Using 2 or more people, lift microwave oven and hang it in place, insert bolts through upper cabinet into the vent in place. The...
Installation Guide - Page 10

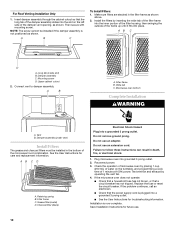
... the damper assembly slides into the slot on the turntable, and programming a cook time of microwave oven by operating the vent fan. 4. Replace the fuse or reset the circuit breaker. Long tab (inside slot) B. Microwave oven bottom Complete Installation WARNING A. Plug microwave oven into place. If the problem continues, call an electrician. ■ Check that the power...
Installation Guide - Page 11

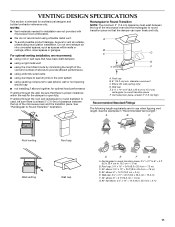
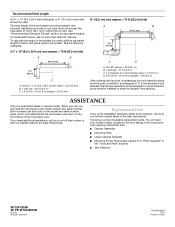
...and fully. Vent extension piece, at least 3" (7.6 cm) of clearance between the top of the microwave oven and the transition piece. See the examples in the vent system ■ using duct tape to ..."Recommended Vent Length." Rectangular to round transition piece: 3¹⁄₄" x 10" to 6" = 5 ft (8.3 x 25.4 cm to vent air outside, unless using a flexible metal vent. ■ To avoid...
Installation Guide - Page 12

...° elbow = 25 ft (7.6 m) B. 1 wall cap = 40 ft (12.2 m) C. 2 ft (0.6 m) + 6 ft (1.8 m) straight = 8 ft (2.4 m) 6" (15.2 cm) vent system = 73 ft (22.2 m) total A B 6 ft (1.8 m) 2 ft (0.6 m) C D A. Replacement Parts If any of the microwave oven. ASSISTANCE Call your model number located on the front facing of the microwave oven opening, behind the microwave oven door on the...

KitchenAid Knowledge Base Results

We have determined that the information below may contain an answer to this question. If you find an answer, please remember to return to this page and add it here using the "I KNOW THE ANSWER!" button above. It's that easy to earn points!

  • Will the Microban® Refrigerator Air Filter fit my refrigerator?
    ... by entering your refrigerator Microban® Cleaning your model number in the space below. Download available Owners Manuals/Use & built side by side refrigerators in my Dishwasher ft. Refrigerator Air Filters Refrigerator/freezer odor removal Hard Water Filming in 22, 25, and 27 cu. Will the Microban Refrigerator Air Filter fit my...
  • Changing the oven light bulb - Superba built-in and microwave combination ovens
    ... door is opened . To replace: Before replacing a bulb, make sure the oven is opened . Architect Series II - On double oven models, both upper and lower lights will not run Remove the bulb from the oven. Replace the bulb cover by grasping the front edge and pulling away from the socket. gas and electric ranges My microwave oven will come on or...
  • Will the Microban® Refrigerator Air Filter fit my refrigerator?
    The Microban Refrigerator Air Filter will not fit. ft. To verify your size and serial number, review the labels on the inside of your ...and/or additional information The answer could be improved Thank you may need to Search Results Go Back to clean your model number in 22, 25, and 27 cu. Download available Owners Manuals/Use & Rate answer 1 of 3 Rate answer 2 of 3 Rate answer 3...

Similar Questions

Buy Replacement Coupler For Glass Turntable?
Where can I buy a replacement three lobed coupler drive adapter for the Kitchenaide Microwave
(Posted by kenlangland 2 years ago)
Lightbulb Change.
What type of tool is needed to change out the lightbulbs underneath the microwave. We have tried eve...
(Posted by lrpwvu 8 years ago)
This Microwave Series Should Be Recalled Do To The Malfunction Of The Wave Guid
This microwave/convection oven should be recalled do to the malfunction of the wave guide? How long ...
(Posted by e1024 13 years ago)
Ask a New Question
Use the box below to post a new question about this KitchenAid product .
Points & Prizes
  • You can earn points for nearly everything you do on HelpOwl.com
  • You can trade in those points for gift cards at leading retailers such as Amazon.com and Walmart
  • It's that simple!
See How it Works
Create a Free Account

KitchenAid Manuals

Find free KitchenAid KHHC2090SSS - Architect II 2.0 cu. ft. 1200 W manuals and user guides available at ManualOwl.com. Try out our unique manual viewer allowing you to interact with manuals from directly within your browser!

KitchenAid Reviews

View thousands of KitchenAid user reviews and customer ratings available at ReviewOwl.com.

Contact Information

Complete KitchenAid customer service contact information including steps to reach representatives, hours of operation, customer support links and more from ContactHelp.com.

Scoreboard Ratings

See detailed KitchenAid customer service rankings, employee comments and much more from our sister site.

KitchenAid Recalls

Find comprehensive KitchenAid recall information updated hourly on RecallOwl.com.