Get support for KitchenAid KHHC2090SSS - Architect II 2.0 cu. ft. 1200 W

KitchenAid KHHC2090SSS Support Question

KitchenAid KHHC2090SSS Support Question

Find answers below for this question about KitchenAid KHHC2090SSS - Architect II 2.0 cu. ft. 1200 W.
Need a KitchenAid KHHC2090SSS manual? We have 3 online manuals for this item!
Question posted by dlp1165 on May 15th, 2012

Kitchenaid Model Khhc2090sss Microwave Quit Working

kitchenaid model khhc2090sss Microwave quit working

Current Answers

There are currently no answers that have been posted for this question.
Be the first to post an answer!

Remember that you can earn up to 1,100 points for every answer you submit. The better the quality of your answer, the better chance it has to be accepted.

Related KitchenAid KHHC2090SSS Manual Pages

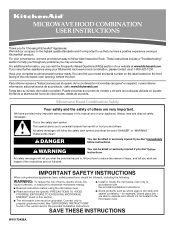
Use & Care Guide - Page 1

... - IMPORTANT SAFETY INSTRUCTIONS When using your complete model and serial number ready. MICROWAVE HOOD COMBINATION USER INSTRUCTIONS Thank you and others are not followed. Have your KitchenAid microwave hood combination, please contact us that can be followed, including the following: WARNING: To reduce the risk of the microwave oven opening, behind the door. This symbol alerts...
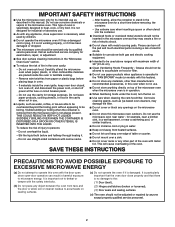
Use & Care Guide - Page 2

... and touch electrical parts involving a risk of the microwave oven when the microwave oven is damaged. To reduce the risk of oven is not working properly, or if it . - Corrosive cleaning agents, such as described in the microwave oven as water, coffee, or tea are placed inside the oven ignite, keep oven door closed, turn the fan on. ■ Use...
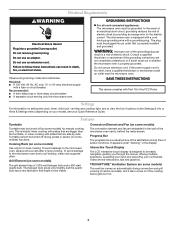
Use & Care Guide - Page 3

... in death, fire, or electrical shock. Settings For information on your model), see your commands. To avoid damage to the microwave oven due to view the list of the microwave oven cavity, behind the metal screen. Progress Bar The progress bar is designed to the microwave oven, always remove rack after 2-level cooking. Interactive Touch Display The...
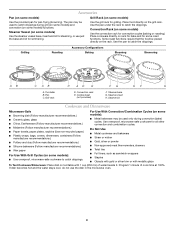
Use & Care Guide - Page 4

.... Grill rack D. Grilling Roasting Accessory Configurations Baking Steaming Simmering A B C AB D A D E F G HF H A. Steamer base G. Accessories Pan (on some models) Use the steamer vessel base, insert and lid for steaming, or use the dish in the microwave oven. 4 Do Not Use ■ Metal cookware and bakeware ■ Straw or wicker ■ Gold, silver or pewter...
Use & Care Guide - Page 5

... sharp utensils or scraper, soap-filled scouring pad, abrasive cleaners, steel-wool pads, gritty washcloths or some models): mild soap and water, then rinse with clean water and dry with your microwave oven. Make sure microwave oven has been plugged in for specific programs. Some meat, poultry and/or fish functions may be used by...
Use & Care Guide - Page 6

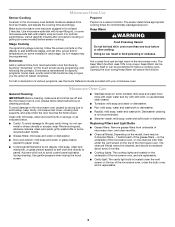
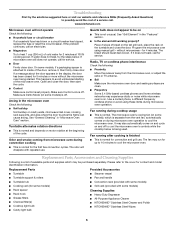
...control is attached to cool the microwave oven. If it , then firmly close the door. www.kitchenaid.com Microwave oven will dissipate with some models, if a packaging spacer is ...element still working properly? Turntable alternates rotation directions ■ This is off . Quartz bulb does not appear to the cover for 4 minutes. See "Grill Element" in "Microwave Oven Care" section...
Use & Care Guide - Page 8

... 1-800-422-1230. Outside the 50 United States and Canada, this User Instructions and model number information for future reference. Proof of original purchase date is required to published user or... bulbs, air filters or water filters. Service calls to the appliance. 8. KITCHENAID® BUILT-IN OVEN & MICROWAVE WARRANTY LIMITED WARRANTY For one year from the date of purchase, when this ...
Dimension Guide - Page 1

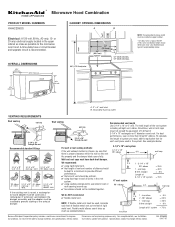
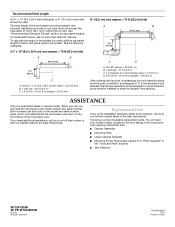
... 3-1/4" x 10" system = 25 ft. = 40 ft. = 8 ft. = 73 ft. 6 ft. Specifications subject to seal exterior wall or roof opening around cap. ✔ two elbows should not be used, calculate each vent piece used and a rectangular 3" extension vent between the damper assembly and the adapter must have back-draft damper. 3-1/4" x 10" to the microwave oven hood. A. 2" x 4" wall stud...
Installation Guide - Page 1

... Product Dimensions 3 Electrical Requirements 3 INSTALLATION INSTRUCTIONS 4 Remove Mounting Plate 4 Convert Microwave Oven to External Venting 4 Locate Wall Stud(s 6 Mark Rear Wall 7 Drill Holes .... These installation instructions cover different models. We have provided many important safety messages in this manual and on your particular model may differ slightly from the illustration...
Installation Guide - Page 2

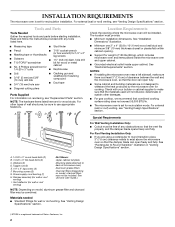
... Only: ■ Cutout must provide: ■ Minimum installation dimensions. INSTALLATION REQUIREMENTS The microwave oven is set for wood studs. Tools and Parts Tools Needed Gather the required tools and ...compound ■ Duct tape ■ Diagonal cutting pliers Parts Supplied For information on model, charcoal filters may be included. For other damages. ■ For gas cooktop,...
Installation Guide - Page 3

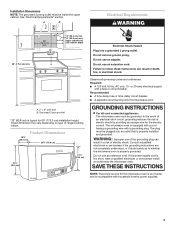
... an outlet that is too short, have a qualified electrician or serviceman install an outlet near the microwave oven. Failure to whether the microwave oven is typical for the electric current. SAVE THESE INSTRUCTIONS NOTE: The power source for this microwave oven. Recommended: ■ A time-delay fuse or time-delay circuit breaker. ■ A separate circuit serving only...
Installation Guide - Page 4

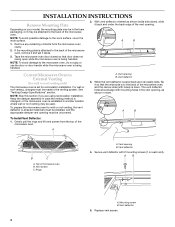
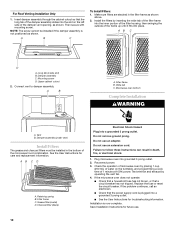
..., or the microwave oven is being handled. 2. A B A. Vent deflector 4. Remove any remaining contents from the top of microwave oven B. Tape the microwave oven door closed so that the wide side is being handled. NOTE: To avoid damage to the microwave oven, do not grip or use the door or door handle while the microwave oven is to the work surface, cover...
Installation Guide - Page 5

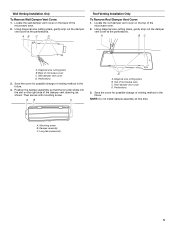
... C. Damper assembly C. Wall Venting Installation Only To Remove Wall Damper Vent Cover: 1. Perforations 3. Long tab (inside slot) 5 Back of microwave oven C. Save the cover for possible change of the microwave oven. 2. Then secure with mounting screw. A B C D A. Diagonal wire cutting pliers B. Roof damper vent cover D. A. Position the damper assembly so that the long...
Installation Guide - Page 6

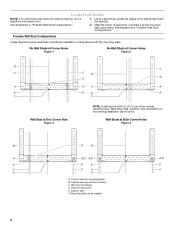
... venting installation can be done. Wall Studs at One Corner Hole Figure 3 NOTE: If wall stud is within the cabinet opening, do not install the microwave oven. 1.
Installation Guide - Page 7

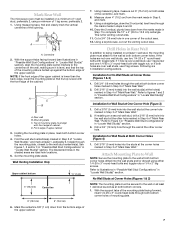
... at Both Corner Holes (Figure 4) 1. Following are over wall studs, use 1 lag screw and one corner of the cutout area. 12. Mark Rear Wall The microwave oven must align with front edge of cabinet. A A. With the support tabs of upper cabinet 3.
Installation Guide - Page 8

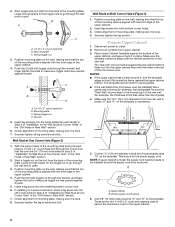
...screws and bolts. The template has trim lines to use as guides. ■ If the wall behind the microwave oven (as shown. This hole is metal, the supply cord bushing needs to open . Mounting plate C. If... has a partial wall covering (for two 1/4-20 x 3" bolts and washers used to secure the microwave oven to points "D" and "E" on the wall, making sure it is aligned with the holes in the ...
Installation Guide - Page 9

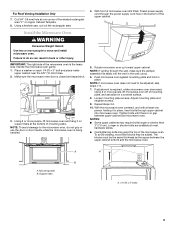
... tilted, thread power supply cord through the wall, make sure the damper assembly fits easily into microwave oven. Rotate microwave oven up toward upper cabinet. NOTE: If microwave oven does not need to the microwave oven, do so can result in place. Repeat steps 3-6. 10. To avoid warping, wood filler blocks may require bolts longer or shorter than...
Installation Guide - Page 10

...damper vent opening, as shown. Replace the fuse or reset the circuit breaker. Mounting screw D. Microwave oven bottom Complete Installation WARNING A. See the User Instructions for future use. 10 AB C D A.... a cook time of the damper assembly slides into a grounded 3 prong outlet. If the microwave oven does not operate: ■ Check that a household fuse has not blown, or that the...
Installation Guide - Page 11

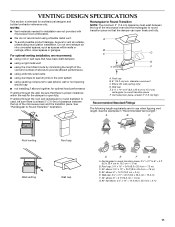
... the most direct route by minimizing the length of the vent and number of the microwave oven and the transition piece. Do not vent exhaust air into concealed spaces, such as ... venting only) D. Rectangular to round transition piece: 3¹⁄₄" x 10" to 6" = 5 ft (8.3 x 25.4 cm to round transition piece F. VENTING DESIGN SPECIFICATIONS This section is proper clearance within walls ...
Installation Guide - Page 12

...(8.3 x 25.4 cm) 90° elbow = 25 ft (7.6 m) B. 1 wall cap = 40 ft (12.2 m) C. 2 ft (0.6 m) + 6 ft (1.8 m) straight = 8 ft (2.4 m) 6" (15.2 cm) vent system = 73 ft (22.2 m) total A B 6 ft (1.8 m) 2 ft (0.6 m) C D A. ASSISTANCE Call your model number located on the front facing of the microwave oven opening, behind the microwave oven door on the model and serial number plate, which is...

KitchenAid Knowledge Base Results

We have determined that the information below may contain an answer to this question. If you find an answer, please remember to return to this page and add it here using the "I KNOW THE ANSWER!" button above. It's that easy to earn points!

  • Will the Microban® Refrigerator Air Filter fit my refrigerator?
    ...by side refrigerators in 22, 25, and 27 cu. Model Number | Help me locate my model number Please enter at least 6 characters of ... review the labels on the inside of your model number in my Dishwasher Will the Microban Refrigerator Air Filter .... The various compatible models have been built since 1997 and include current production models with serial numbers that...
  • Replacing oven light bulbs - Built-in ovens
    ... ?  Disconnect power. Architect Series II - Remove the glass light cover by snapping it does not come on when either door is opened . Reconnect power. Built-in ovens When should come on ? On double oven models, both upper and lower lights should the lights in my built-in and microwave combination ovens Changing the oven light bulb - Remove...
  • Will the Microban® Refrigerator Air Filter fit my refrigerator?
    ...model number Please enter at least 6 characters of your appliance? Was this answer more useful. Refrigerator Air Filters Refrigerator/freezer odor removal Purchasing the Microban® ft... your refrigerator . Refrigerator Air Filter Hard Water Filming in 22, 25, and 27 cu. Care Guides, Installation Instructions and Warranty Information. capacities. Go Back to your refrigerator ...

Similar Questions

Kitchenaid Khhc2090sss Microwave
My microwave everything else is working except when I turn on the microwave, just a fraction of seco...
(Posted by vrmgm 3 years ago)
Where Is The Fuse Located
Where is the fuse located on a Kitchenaid model khhc2090sss microwave oven
(Posted by Rlwalker2 5 years ago)
Fan And Light Control Buttons Quit Working, All Else Works Fine
fan speed and light control buttons both quit working, cooking, table and inside light all else work...
(Posted by digitaldoc1 6 years ago)
Kitchen Aid Microwave Quit Working
Can set time however when you press start the display shows door and the microwave does not work.
(Posted by jbaker1 12 years ago)
This Microwave Series Should Be Recalled Do To The Malfunction Of The Wave Guid
This microwave/convection oven should be recalled do to the malfunction of the wave guide? How long ...
(Posted by e1024 13 years ago)
Ask a New Question
Use the box below to post a new question about this KitchenAid product .
Points & Prizes
  • You can earn points for nearly everything you do on HelpOwl.com
  • You can trade in those points for gift cards at leading retailers such as Amazon.com and Walmart
  • It's that simple!
See How it Works
Create a Free Account

KitchenAid Manuals

Find free KitchenAid KHHC2090SSS - Architect II 2.0 cu. ft. 1200 W manuals and user guides available at ManualOwl.com. Try out our unique manual viewer allowing you to interact with manuals from directly within your browser!

KitchenAid Reviews

View thousands of KitchenAid user reviews and customer ratings available at ReviewOwl.com.

Contact Information

Complete KitchenAid customer service contact information including steps to reach representatives, hours of operation, customer support links and more from ContactHelp.com.

Scoreboard Ratings

See detailed KitchenAid customer service rankings, employee comments and much more from our sister site.

KitchenAid Recalls

Find comprehensive KitchenAid recall information updated hourly on RecallOwl.com.