KitchenAid KEMS308SSS Support Question
KitchenAid KEMS308SSS Support Question
Find answers below for this question about KitchenAid KEMS308SSS - 30"BI M/W COMBO OVEN SS KITCHE.Need a KitchenAid KEMS308SSS manual? We have 4 online manuals for this item!
Question posted by DCpump on July 7th, 2015
Do You Have To Pull The Unit Out Of The Wall To Replacing The Baking Element?
The person who posted this question about this KitchenAid product did not include a detailed explanation. Please use the "Request More Information" button to the right if more details would help you to answer this question.
Current Answers
Related KitchenAid KEMS308SSS Manual Pages
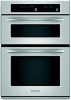
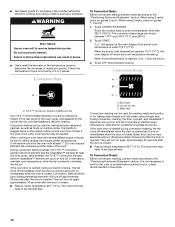
Use & Care Guide - Page 5
... cavity walls, ceiling or floor. Always use another metal object with its nonstick surface and detachable handle, has been specifically designed for microwave use, and is designed specifically for this oven. Damage may have some or all of the hub. s See "Assistance or Service" section to reorder.
Light (inaccessible, in the oven. Broil element...
Use & Care Guide - Page 6

A
s Baking Tray can be used only with water.
Check that the turntable turns freely before using.
Lid: Always use oven mitts or pot
holders when handling. Base: For steam cooking, place water in base. Always use the lid when steaming. s See "Assistance or Service" section to order replacements. s Do not overfill with convection cooking...
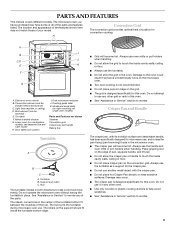
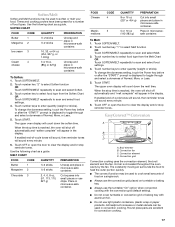
Use & Care Guide - Page 11
... fish fillets. If not used in microwave oven. Positioning Baking Tray
Baking tray can occur and cause damage to touch the inside cavity
walls, ceiling or floor.
†®STYROFOAM is level. Use baking tray only in the microwave oven. For example, 70%=7=Medium-High. Do not use oven mitts or pot holders when removing dishes from...
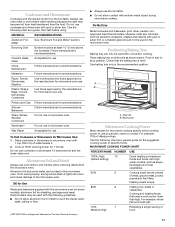
Use & Care Guide - Page 16
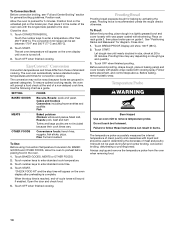
... Crisp feature uses the broil element and microwaves to clear the display...oven will shut off automatically and "cooking complete" will appear in a single layer
Boneless chicken breasts, 2 pieces
Side 1: 4:00 Side 2: 3:00
5-6 oz (142-170 g) each
Hamburger patties, 2 Side1: 3:30...oven display will become very hot. s Do not place the crisper pan on turntable.
1. s Do not cover baked...
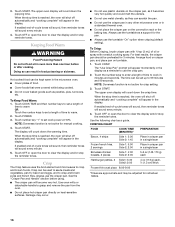
Use & Care Guide - Page 17
... plastic wrap or paper products. s Do not cover turntable or convection grid or baking tray with the convection grid (default setting).
Touch SOFTEN/MELT.
2. Touch number ... of Normal, More, or Less.
5.
The upper oven display will appear in microwave-safe container. Convection grid
Convection cooking uses the convection element, the broil element and the fan. Chocolate 3
2, 4, 6, 8 oz...
Use & Care Guide - Page 18
... cloth or sponge are not included because their cook times vary. Damage may not be touched twice.
4. The oven can be replaced by the increasing temperature. Position convection grid on turntable in microwave oven or
place baking tray on slide rails and close the door.
8. "Preheating" and "Lo" will sound every minute.
9. If enabled...
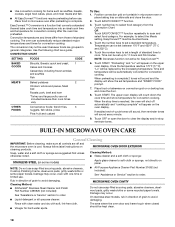
Use & Care Guide - Page 19
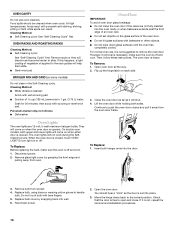
... place.
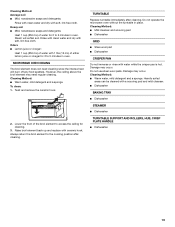
MICROWAVE OVEN CEILING
The broil element does not need regular cleaning. Twist and remove the ceramic hook.
2. Odors s Lemon juice or vinegar: Heat 1 cup (250 mL) of water for 2 to access the ceiling for 2 to the cooking position after cleaning. Cleaning Method: s Warm water, mild detergent and a sponge. TURNTABLE
Replace turntable immediately...
Use & Care Guide - Page 21
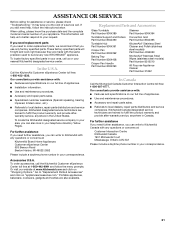
...product warranty and provide after-warranty service, anywhere in the United States. For further assistance If you need further assistance, you... Center 553 Benson Road Benton Harbor, MI 49022-2692
Replacement Parts and Accessories
Glass Turntable Part Number 8304389
Turntable Support...Hub Part Number 8304391
Crisper Pan Part Number 8304392
Baking Tray Part Number 8304408
Crisper Pan Handle Part ...
Use & Care Guide - Page 22
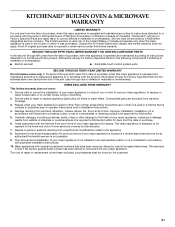
...replace or repair house fuses, or to correct house wiring or plumbing.
2.
Write down the following components if defective in materials or workmanship:
■ Electric element
■ Solid state touch control system parts
SECOND THROUGH TENTH YEAR LIMITED WARRANTY On microwave ovens.... Outside the 50 United States and Canada, ...attached to KitchenAid within 30 days from your sales ...
Use & Care Guide - Page 3
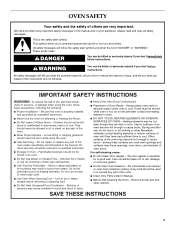
...elements. Interior surfaces of an oven become hot enough to a qualified technician.
■ Storage in oven.
■ DO NOT TOUCH HEATING ELEMENTS OR INTERIOR SURFACES OF OVEN - among these openings, oven doors, and windows of oven doors. No commercial oven cleaner or oven... repair or replace any part of the oven.
■ Clean Only Parts Listed in desired location while oven is the safety...
Use & Care Guide - Page 4
... defects, or other reproductive harm.
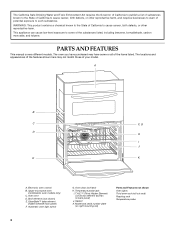
Gasket
K. Broil elements (not shown)
E. Oven door lock latch
H. T.H.E.™ (Third Hidden Element) convection element and fan (in back panel)
J.
Oven vent D. Automatic oven light switch
G. CleanBake™ bake element (hidden beneath floor panel)
F. Electronic oven control B. Temperature probe jack
I J
E
K
A. This appliance can...
Use & Care Guide - Page 7
...before starting the Bake cycle. "SABBATH MODE" will automatically turn off and the heating elements will appear on the display and remain on the lower oven display. See the... little more
20°F (10°C)
...moderately more
30°F (15°C)
...much less
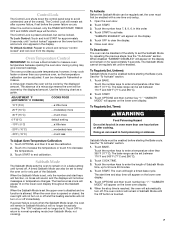
To Adjust Oven Temperature Calibration: 1.
The bake range can be set the Sabbath Mode by the displayed amount...
Use & Care Guide - Page 8
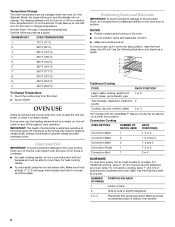
... type of space around bakeware and oven walls. Make sure that no bakeware piece is heavily soiled. Aluminum Foil
IMPORTANT: To avoid permanent damage to the oven bottom finish, do not line the oven bottom with bakeware on rack below dish. The heating elements will not change temperature. NUMBER KEY
OVEN TEMPERATURE
1
170°F (77°...
Use & Care Guide - Page 9
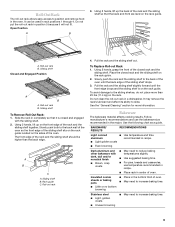
... Sliding shelf
To Remove Roll-Out Rack: 1. Rack guide C. To Replace Roll-out Rack 1. To avoid damage to the sliding shelves, do not...baking time.
9 BAKEWARE/ RESULTS
RECOMMENDATIONS
Light colored
■
aluminum
■ Light golden crusts
■ Even browning
Use temperature and time recommended in position 5 because it is on the sides of oven. Open Position
A
B
3. Pull...
Use & Care Guide - Page 10
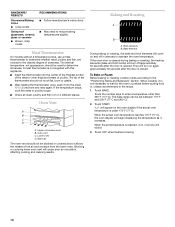
... and fish, are cooked to determine doneness. Oven vent C. Baking and Roasting
A
B
A. Broil elements B. They will cycle on again approximately 30 seconds after the door is closed. Touch BAKE. Touch the number keys to reduce baking temperatures slightly. When the actual oven temperature reaches 170°F (77°C), the oven display will cause poor air circulation, affecting cooking...
Use & Care Guide - Page 11
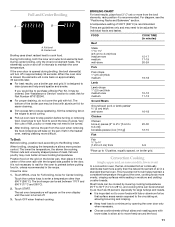
... on the grid on the edges to avoid curling.
■ Pull out oven rack to reduce spattering. Close the door.
1.
Touch OFF when finished cooking. Times are guidelines only and may be set oven temperature will bake on some models, lower oven)
In a convection oven, the fan-circulated hot air continually distributes heat more from the...
Use & Care Guide - Page 12
.... Touch OFF when finished cooking.
If the oven is opened during preheating) elements will turn on and off approximately 30 seconds after the door is full, extra cooking time may be used for baking delicate cakes and pastries, as well as a toothpick.
Convection Bake
To Convection Bake: Before convection baking, position racks according to enter a temperature other...
Use & Care Guide - Page 14
... on the oven display after preheating is turned off.
3. Do not touch broil element. Position food on the unheated grid on the broiler pan, then place it in baking pan(s) and.... Position rack.
EasyConvect™ Conversion
Convection temperatures and times differ from the oven when removing food.
14 Touch BAKED GOODS, MEATS or OTHER FOODS. 2. Follow same placement, and control steps ...
Use & Care Guide - Page 18
...See "Self-Cleaning Cycle" first.
Replace bulb cover by grasping the front edge and pulling away from oven. You should be cleaned when oven cools. Move the hinge levers ...Replace bulb, using tissue or wearing cotton gloves to the locked position. Lift the oven door while holding both hanger arms into wall. 6. Continue to push the oven door closed , touch OVEN LIGHT to remove the oven...
Use & Care Guide - Page 21
...9632; Electric element
■ Solid state touch control system parts
SECOND THROUGH TENTH YEAR LIMITED WARRANTY
On microwave ovens only, in ...available.
9. This limited warranty is valid only in the United States or Canada and applies only when the major appliance... and is reported to KitchenAid within 30 days from the date of repair or replacement under this limited warranty. Repairs to...
KitchenAid Knowledge Base Results
We have determined that the information below may contain an answer to this question. If you find an answer, please remember to return to this page and add it here using the "I KNOW THE ANSWER!" button above. It's that easy to earn points!-
Removing and replacing the lower shelf
... the dispenser drip tray - Side by side refrigerator Rusty racks/dishes in freezer compartment - To remove and replace lower shelf: Remove the shelf by lowering it forward. Replace the shelf by lifting it up and pulling it on the guides. Answers others found helpful Frost and ice buildup in my dishwasher Removing and... -
My crisper is stuck/does not close freely
... the slide control of items in the correct position, pull the drawer out to full extension, tilt up the front of the drawer, and pull to see if your refrigerator is not riding on the glides..., use a soft cloth and a mild dish soap to clean the frame. Side by side refrigerator Replace the drawer into place. If the spillover is that it to avoid interference with the drawers. My ... -
Removing and replacing the can rack - under-counter refrigerator
Replace the rack by tilting it forward and pulling it out. To remove and replace the can rack: Remove the can rack by placing the rear of my under the support on the door and sliding into place. under-counter refrigerator How do I remove and repalce the can rack - Removing and replacing the can rack in the door of the rack under -counter refrigerator?
Similar Questions

Bake Heating Element
Were any of these ovens manufactured without a bake element?
Were any of these ovens manufactured without a bake element?
(Posted by rgrush 8 years ago)

Kems308sss00. Should This Oven Have A Bottom Element.
Parts list show that this oven has a bottom element. Ours doesnt have that element. The oven doesnt ...
Parts list show that this oven has a bottom element. Ours doesnt have that element. The oven doesnt ...
(Posted by grassiphil 9 years ago)

Oven Wont Heat
the microwave works fine. the oven says preheating and the display works fine but the bake element n...
the microwave works fine. the oven says preheating and the display works fine but the bake element n...
(Posted by neildwyer 9 years ago)

Bake Element Not Broiling, Is This Easy To Install And Uninstall
(Posted by mimtimalty 11 years ago)

In The Microwave, The Element At The Top Is Falling
In the microwave, the element at the top is falling. Is there a bracket that holds the element
In the microwave, the element at the top is falling. Is there a bracket that holds the element
(Posted by amark 11 years ago)