Kenmore 9961 Support Question
Kenmore 9961 Support Question
Find answers below for this question about Kenmore 9961 - Elite 40 in. Electric.Need a Kenmore 9961 manual? We have 2 online manuals for this item!
Question posted by lieberosebud on September 22nd, 2012
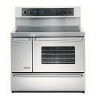
Kenmore Elite Model 99613
what are the electrical specifications for the Kenmore Elite electric range Model #99613
Current Answers
Related Kenmore 9961 Manual Pages
Use and Care Guide - Page 2
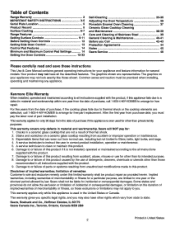
...Range...contains general operating instructions for several models. limitation of detergents, cleaners,...Kenmore Elite Warranty When installed, operated and maintained according to all instructions supplied with the product. 9. This warranty gives you specific... legal rights, and you must be liable for only 90 days from the date of Stainless Steel 39
General Cleaning & Maintenance 40...
Use and Care Guide - Page 3
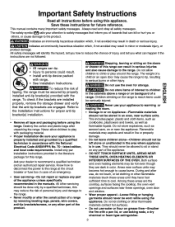
... to safety messages that inform you of the appliance unless specifically recommended in serious injuries and also cause damage to the range. Do not allow children to cause burns. They should ...and towels, as well as
aerosol cans, on grease fires---Smother the fire with the National Electrical Code ANSl/NFPA No. 70--latest edition, and local code requirements. Do not store explosives,...
Use and Care Guide - Page 4
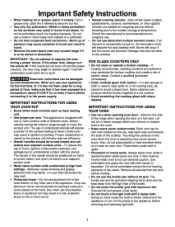
... and spillovers may cause severe burns. Do not use a towel or other part of electric shock. Contact a qualified technician immediately.
• Clean cooktop glass with sharp
objects.
... off . Food left unattended could melt or
ignite. • Placement of the range when opening oven door--Stand to cover the surface unit. Electronic controllers can
produce harmful...
Use and Care Guide - Page 5
... off during the self-cleaning cycle of any kind should be kept clean. You will find the model and serial number printed on .
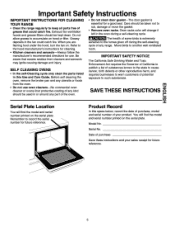
Important Safety Instructions
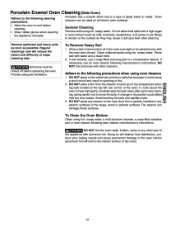
IMPORTANT INSTRUCTIONS FOR CLEANING YOUR RANGE
• Clean the range regularly to keep all parts free of grease that excess residue from the oven.
• Do not...
Use and Care Guide - Page 7
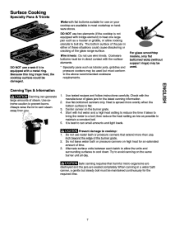
For glass smoothtop models, only flat bottomed woks (without support rings) may be maintained continuously for the latest canning information.
...The bottom surface of the pan in direct contact with bridge element) to heat one
inch beyond the edge of the glass range surface. Heat is spread more than one large pan such as a roaster or griddle, or allow the units and
surrounding ...
Use and Care Guide - Page 9
... of cookware used . MEDIUM HIGH (5-8) Continue a rapid boil, fry, deep fat fry
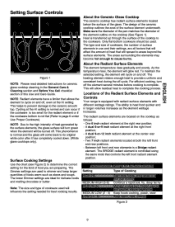
Note: The size and type of the Radiant Surface Elements and Controls Your range is complete, rn This will come back to the cookware. The design of the ceramic cooktop outlines the area of the cooktop to its original...
Use and Care Guide - Page 11
...2.
You may appear to OFF.
11
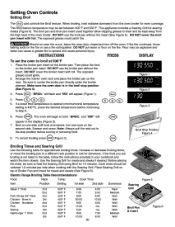
Start most cooking operations on . Note: The specific Hot Surface Indicator light for the element will continue to glow until the glass cooktop is ...be used to a moderate level. Setting Surface Controls
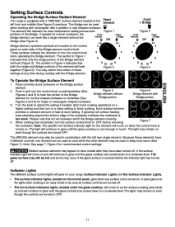
Operating the Bridge Surface Radiant Element
The range is equipped with a "BRIDGE" surface element located at each side of the cookware indicates...
Use and Care Guide - Page 30
.... Season and serve. Use the Searing Grill for 10 minutes. Before placing the meat, be kept away from the oven broiler for searing meats (Figure 6). Electric Range Broiling Table Recommendations
Food
Rack
Temp
Cook Time
Item
Steak 1" thick
Pork Chops 3/4" thick Chicken - The exposed grease could ignite. 2. Then place the food on...
Use and Care Guide - Page 32
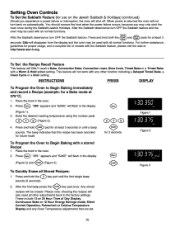
... and the oven may be used with the Sabbath feature, please visit the web at least 3
seconds. These include 12 or 24 Hour Time of models with all other function including a Delayed Timed Bake, a Clean Cycle or a Broil setting.
You should remove the food when the power failure occurs, because you...
Use and Care Guide - Page 37
...gloves when cleaning the appliance manually.
Ammonia must be used on the electrical controls or switches because it could cause the Z oven to heat improperly... can be rinsed oft before
cleaning. Prov de adequate vent at the top left rear corner of the range, wood or painted surfaces.
Oven cleaners can damage these surfaces. Doing so will destroy heat distribution, produce...
Use and Care Guide - Page 39
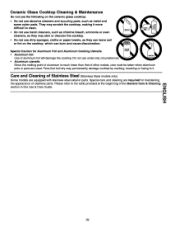
... cleaners and scouring pads, such as metal and some nylon pads.
Please refer to the table provided at the beginning of Stainless Steel (stainlesssteelmodelsonly)
Some models are equipped with stainless steel exterior parts. Care and Cleaning of the General Care & Cleaning m section in this Use & Care Guide.
39
Use and Care Guide - Page 40
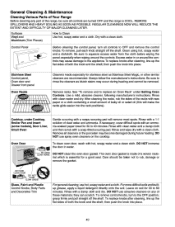
... of clear water and ammonia.
See "To remove and to 40 minutes. Cooktop, under Setting Oven Controls. If necessary, cover ...an Oven Rack" under Cooktop, Broiler Pan and Insert (some models), Door Liner, Small Oven
Oven Door
Gentle scouring with an ... materials; General Cleaning & Maintenance
Cleaning Various Parts of Your Range Before cleaning any of both the knob and the shaft;...
Use and Care Guide - Page 41
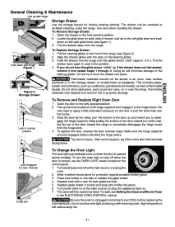
... then need to facilitate cleaning under the range. To reset, see Setting the Clockand Minute Timer
in ). 7. General Cleaning & Maintenance
Pull up with a new 40 watt appliance bulb. 5. The drawer can...to apply a little downward pressure on when the door isopened (some models). Grab the door by the sides, pull the bottom of the range (see figure 1). 3. Use care when handling the drawer. To...
Use and Care Guide - Page 42
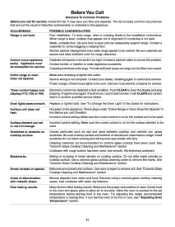
... cooking and will become less visible with metallic sheen, Poor baking results. Do not slide metal utensils on cooktop surface. Entire range or oven does not operate. Contact your local electric company for ceramic-glass cooktop have sufficient room for the surface unit to be sure. Oven lights does notwork.
Incorrect control...
Installation Instructions - Page 1
...
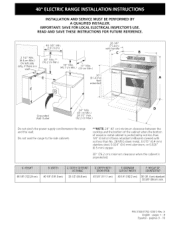
**NOTE: 24" (61 cm) minimum clearance between the range and the wall. INSTALLATION AND SERVICE MUST BE PERFORMED BY A QUALIFIED INSTALLER. p_iginas 9 - 16 IMPORTANT: SAVE FOR LOCAL ELECTRICAL INSPECTOR'S USE.
P/N 318201702 (0301) Rev.A English - ..._iii++_++ii_i_i+i__i_
48 1/8"(122.24cm) 40 1/8"(101.9cm) 25 1/2"(64.8cm)
43 3/4"(111.1cm) 40 1/4"(102.2cm) 36"(91.4cm) standard 35 3/8" (90 cm) min....
Installation Instructions - Page 2
... risk of
tipping of this or any other utensils before connecting the electrical supply to the range.
• Do not store items of range and MUST be dangerous.
• Do not store or use the oven as range leveling legs (see "Leveling the Range", page 7) 4. This creates a potentially hazardous situation.
• Never use of the...
Installation Instructions - Page 3
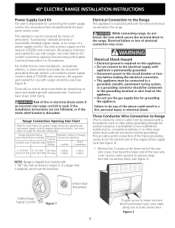
.../250 volts minimum, 40 amperes minimum and marked for cord kit connection opening size and power supply cord kit ampere rating information. Range Connection Opening Size Chart
Refer to the range. If a larger hole is permanently grounded. • Disconnect power to the circuit breaker or fuse
box before making the electrical connection. • This...
Installation Instructions - Page 5
...
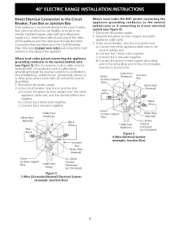
Black
Green (or Bare Copper) WEre
CabNefrom
Conduit
Appmiance
Connector
(or CSAmisted)
Figure 6
4-Wire Electrical System
(example: Junction Box) Green (or Bare Copper)
Cable from Range
UoL.o[isted Conduit Connector
(or CSA misted)
Figure S 3-Wire (Grounded Neutral) Electrical System
(example: Junction Box)
Where local codes DO NOT permit connecting the appliance grounding conductor...
Installation Instructions - Page 7
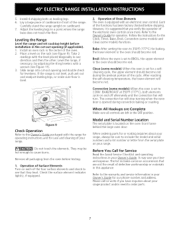
... not level, pull unit out and readjust leveling legs, or make sure floor is located on your range. Follow the instructions for operation.
Convection (some models)-When the oven is opened during the preheat portion of the electronic oven controls once more. When All Hookups are Complete Make sure all packaging ...
Installation Instructions - Page 8
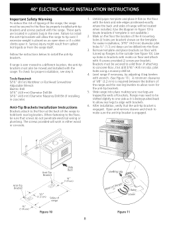
... the anti-tip bracket is being pushed back to allow rear legs to align with the range. pilot holes using a masonry drill bit.
4. Slide range into the floor.
3. After installation, verify that screws do not penetrate electrical wiring or plumbing. Figure 11 Those parts are trapped by ends of brackets. To check for...
Similar Questions

Side Oven Rack Of Kenmore Elite 40 Model 7560
What is the number of the side oven rack? My range came with one rack and I need to have a second ra...
What is the number of the side oven rack? My range came with one rack and I need to have a second ra...
(Posted by Jasmin1233 1 year ago)

Clock And Oven Controls Do Not Work
after a power surge my oven controls and clock do not work but the burners do, what could be the pro...
after a power surge my oven controls and clock do not work but the burners do, what could be the pro...
(Posted by Jtmjr 7 years ago)

How To Remove The Top Off Of A 40 Inch Dual Fuel Kenmore Elite Range
(Posted by Tiffsugar 10 years ago)

My Kenmore Elite Electric Range Is Displaying An F11 Code. What Does That Mean?
(Posted by roberthwjr 10 years ago)
Kenwood Elite Range Flashing F10 And F11 Codes.
My Kenwood Elite range is beeping and flashing a F10 and F11 code. Even after shutting off the oven ...
My Kenwood Elite range is beeping and flashing a F10 and F11 code. Even after shutting off the oven ...
(Posted by traceynfox 12 years ago)