Hunter 82023 Support Question
Hunter 82023 Support Question
Find answers below for this question about Hunter 82023.Need a Hunter 82023 manual? We have 1 online manual for this item!
Question posted by maroney914 on October 13th, 2015
Why Am I Unable To Remove Glass Cover To Replace Bulbs?
Have been trying to remove the glass cover on my Hunter 82023 to replace bulbs for some time now. Finial unscrews but so far but does not come off. Feels like the entire bolt to which it is attached is also turning inside unit but no matter how much counter-clockwise turning, it does not detach. Fan functioning fine, but no light! Not sure what may be causing this or how to resolve. Please advise.
Current Answers
Answer #1: Posted by TommyKervz on October 14th, 2015 3:43 AM
TommyKervz

Member since:
January 10th, 2013 Points: 17,776,813

Member since:
January 10th, 2013 Points: 17,776,813
Click here and follow the instructions.
Related Hunter 82023 Manual Pages
Owner's Manual - Page 1

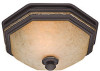
Belle Meade
Bath Ventilator with Light
English
Español
Página 21
42950-01 20110909 ©2011 Hunter Fan Co. Owner's Manual
Model
82023
1
42950-01 09/09/2011
Owner's Manual - Page 2

...unit must be vented to the outlet box and associated wall switch location. Do not use over a bathtub or shower when connected to a 12/12 pitch (45 degrees). Ductwork must always be done by turning off the circuit breakers to the outdoors.
off position, securely attach...
BEFORE SERVICING UNIT
PREVENTATIVE MAINTENANCE
A clean fan provides better service. To remove motor plate...
Owner's Manual - Page 3

...
N
97266-01-000
O
P 76081-01-308
Before Installation
1
Tools Needed. (Not supplied.) Estimated assembly time: 30 to 60 minutes
NOTE: Remove all the parts. Not Included. If damaged, call 1-888-830-1326 for replacements.
Check all packing materials before installation.
2 J
F
Turn off the power source.
3
42950-01 09/09/2011
Loosen screws. x4 A
*B *C
3/8" Cable...
Owner's Manual - Page 4

3
4
I
F
Remove the motor/blower from the housing.
5
Remove packing material.
6
Remove the pre-loaded screw tip covers.
7
H
Back out the pre-loaded screw tips until flush with the side of the housing.
8
G
Remove the wiring cover screw.
4
42950-01 09/09/2011
Remove the wiring cover.
Owner's Manual - Page 5

suspended between joists go to step A11, page 5 For New Construction - attaching to joist go to step C11, page 11 For Existing Construction - Use second if needed. B
Insert the strain relief (not included)... - accessible from below go to step B11, page 8 For Existing Construction - 9
10
F C
Pop out the first wiring access slug. attaching to step D11, page15
New Construction -
Owner's Manual - Page 6

...
White
White
3 Pin Black Light *Option
*Option Fan & Main Light Together
Ground Green
A
Bare Copper Black Main Switch 1 (AC In)
White
Black Switch 2 (AC In)
Connect wires as shown. Tape joints.
Make sure all wiring connections are inside the box or under
the wiring cover plate. If ducting does not fit securely, an...
Owner's Manual - Page 7

...WIRING HARNESS.
A19
A20
J
Secure the motor by inserting the tabs and pushing up into position.
A17 0
A18 0
Connect wiring harness.
Turn on page 17
to step
E1
OFF
on the power source. If the motor does not run, check the plug connection.
7
42950-01... and the housing. Test the motor. I
Reinstall the motor by tightening the 2 screws.
A21
ON
A22
Go to attach grille.
Owner's Manual - Page 8

... your sheetrock. New Construction -
Drill a hole in the center of screws by using holes as a template. Screws are not provided.
8
42950-01 09/09/2011
Attach the rails onto the screws.
B13
B14
F
1/8" bit
Mark position of each outline. suspended between the screw head and the joist.
Owner's Manual - Page 9

... Light
Black 2 Pin
White
White
3 Pin Black Light *Option
*Option Fan & Main Light Together
Ground Green
A
Bare Copper Black Main Switch 1 (AC In)
White
Black Switch 2 (AC In)
Connect wires as shown. B20
B21
G
H
Install the wiring cover plate.
Connect 4" duct and vent to be purchased.
9
42950-01 09/09/2011 If...
Owner's Manual - Page 10

... not run, check the plug connection.
10
42950-01 09/09/2011
DO NOT ALLOW THE MOTOR TO HANG FROM THE WIRING HARNESS. Turn on page 17
to attach grille. Test the motor.
B24
B25
J
Secure the motor by inserting the tabs and pushing up into position.
B26
ON
B27
Go to...
Owner's Manual - Page 11

... position.
8"
8 1/2"
C12
F
E
Cut out an opening is large enough to make sure the opening for the housing. accessible from above
C11 EXISTING FAN
NO EXISTING FAN
OR
Remove an existing fan and check to accommodate the new
motor housing (8"x 8 1/2"). C13
Slide the mounting rails into brackets.
Existing Construction - Mark position of your sheetrock. Use...
Owner's Manual - Page 12

... space between the screw head and the joist.
C19
Tighten screws. If ducting does not fit securely, an adapter may need to the outside. C18
Attach the rails onto the screws.
Tape joints. C20
Connect 4" duct and vent to be purchased.
12
Route wires through the strain relief.
42950-01 09...
Owner's Manual - Page 13

... Light
Black 2 Pin
White
White
3 Pin Black Light *Option
*Option Fan & Main Light Together
Ground Green
A
Bare Copper Black Main Switch 1 (AC In)
White
Black Switch 2 (AC In)
Connect wires...01 09/09/2011 Connect wiring harness. C21
Tighten the strain relief screws.
Make sure all wiring connections are inside the box or under the wiring cover plate. C23
C24
G
I
H
Install the wiring...
Owner's Manual - Page 14

...
Go to step
E1
on the power source. Make sure the wires are not pinched between the motor and the housing. C27
C28
ON
OFF
Turn on page 17 to attach grille. Test the motor.
J
Secure the motor by inserting the tabs and pushing up into position.
Owner's Manual - Page 15

...-loaded screws into position above the ceiling
D13
D14
2 1
Route wires through strain relief. Existing Construction - ing (8"x 8 1/2").
D15
Attach existing ducting to be purchased. accessible only from below
D11 EXISTING FAN
D12
F
Remove an existing fan and check to make sure the opening is large enough to accommodate the new motor hous- Tape joints.
Owner's Manual - Page 16

...
*Option Fan & Main Light Together
Ground Green
A
Bare Copper Black Main Switch 1 (AC In)
White
Black Switch 2 (AC In)
Connect wires as shown. DO NOT ALLOW THE MOTOR TO HANG FROM THE WIRING HARNESS. D17
D18
G
H
Install the wiring cover plate.
D20
I
Connect wiring harness. Make sure the wires are inside the box...
Owner's Manual - Page 17

... THE FIXTURE TO HANG FROM THE WIRING HARNESS.
Position the strain relief bracket under the motor as shown.
17
42950-01 09/09/2011
E4
J
Remove the strain relief bracket screw. D21
Turn on the power source. E2
K
Connect wiring harness. If the motor does not run, check the plug connection...
Owner's Manual - Page 18

L
Attach thumbscrews. E9
M
Align glass dome and push up.
WARNING: To reduce the risk of electrical shock, all 4 thumbscrews MUST be properly installed. E7
E8
Install bulbs (not included). E5
E6
K
Align posts A, B, C and D (stamped into motor housing) with posts A, B, C and D (stamped into position.
18
42950-01 09/09/2011
Complete.
N
Screw finial into light...
Owner's Manual - Page 19

... to feel the air movement. • Turn power on . Solution: • Check and tighten all fasteners. • Check the glass to make sure it is noisy. hunterfan.com.
19
42950-01 09/09/2011 Problem: Fan is secure. • Check the flapper to make sure it moves freely. Problem: Light does not come on , replace fuse...
Owner's Manual - Page 20
... fan or provide a replacement free of charge. If your Hunter bath exhaust fan motor fails at any time within...Hunter Fan Company Bath Exhaust Fan LIMITED WARRANTY
Hunter Fan Company makes the following limited warranty to the original user or consumer purchaser of this Hunter bath exhaust fan:
If any part of your Hunter bath exhaust fan (except for glass fixtures and light bulbs) fails at any time...
Similar Questions

Fan Speed Proper, Lights Rapid Pulse With Remote, Also Same Without Remote
(Posted by hooksetter85 3 years ago)

Fan Works Ok, Lights Blink, 2 Different Fans.
fan works OK, lights blink, 2 different fans.
fan works OK, lights blink, 2 different fans.
(Posted by Andrew7285 4 years ago)
How Do I Install My Fan Without The Light Kit?
how do I install my fan without the light kit
how do I install my fan without the light kit
(Posted by Mgdel634 7 years ago)


Can I Install This Fan Without The Light Kit?
Can I purchase a cap to cover the light kit mount so this fan can be installed without the light kit...
Can I purchase a cap to cover the light kit mount so this fan can be installed without the light kit...
(Posted by evadwest 10 years ago)