Get support for Gigabyte GA-B250M-DS3H

Gigabyte GA-B250M-DS3H Support Question

Gigabyte GA-B250M-DS3H Support Question

Find answers below for this question about Gigabyte GA-B250M-DS3H.
Need a Gigabyte GA-B250M-DS3H manual? We have 2 online manuals for this item!
Question posted by david1997 on November 23rd, 2023

En Que Plataforma

En que plataforma descargo actualizacion del Bios

Current Answers

Answer #1: Posted by SonuKumar on November 23rd, 2023 9:52 AM
This answer was accepted by the poster of the original question.
SonuKumar

Member since:
May 9th, 2021

Points: 16,565,630
1,100
points
Para descargar la actualización del BIOS de la Gigabyte GA-B250M-DS3H, debes visitar el sitio web de soporte de Gigabyte. Una vez en el sitio web, busca la sección "Tarjetas Madre". Luego, selecciona la pestaña "Soporte y Descargas".

En la página de Soporte y Descargas, selecciona la plataforma de tu computadora. En este caso, la plataforma es "Intel". Luego, selecciona el modelo de tu tarjeta madre, que en este caso es "GA-B250M-DS3H".

Una vez que hayas seleccionado la plataforma y el modelo de tu tarjeta madre, se mostrará una lista de actualizaciones de BIOS disponibles. Selecciona la actualización más reciente y haz clic en el botón "Descargar".

La actualización del BIOS se descargará en tu computadora. Una vez que la descarga se haya completado, puedes instalarla siguiendo las instrucciones que se proporcionan en el archivo de actualización.

En el caso de la Gigabyte GA-B250M-DS3H, la actualización del BIOS se puede instalar de dos maneras:

Modo de actualización BIOS Q-Flash: Esta es la forma más sencilla de instalar una actualización del BIOS. Simplemente conecta tu computadora a una fuente de alimentación y conecta un dispositivo de almacenamiento USB a un puerto USB de la placa madre. Luego, copia el archivo de actualización del BIOS al dispositivo de almacenamiento USB.

Para iniciar el modo de actualización BIOS Q-Flash, apaga tu computadora y luego presiona la tecla "BIOS" o "Q-Flash" durante unos segundos. La computadora se iniciará en el modo de actualización BIOS Q-Flash.

Una vez que estés en el modo de actualización BIOS Q-Flash, selecciona el archivo de actualización del BIOS y haz clic en el botón "Actualizar". La actualización del BIOS se instalará automáticamente.

Modo de actualización BIOS tradicional: Esta forma de instalar una actualización del BIOS es más compleja, pero te permite actualizar el BIOS incluso si tu computadora no se inicia.

Para instalar una actualización del BIOS en modo tradicional, debes descargar el archivo de actualización del BIOS del sitio web de soporte de Gigabyte. Una vez que hayas descargado el archivo de actualización, copia el archivo a una unidad flash USB formateada en FAT32 o NTFS.

A continuación, apaga tu computadora y desconecta todos los dispositivos periféricos, excepto el monitor, el teclado y el mouse. Luego, conecta la unidad flash USB al puerto USB de la placa madre.

Ejecuta el archivo de actualización del BIOS desde la unidad flash USB. El archivo de actualización iniciará el proceso de actualización del BIOS.

Una vez que se complete la actualización del BIOS, la computadora se reiniciará automáticamente.

Te recomendamos que sigas las instrucciones que se proporcionan en el archivo de actualización del BIOS para obtener instrucciones específicas sobre cómo instalar la actualización.


Please respond to my effort to provide you with the best possible solution by using the "Acceptable Solution" and/or the "Helpful" buttons when the answer has proven to be helpful.

Regards,
Sonu
Your search handyman for all e-support needs!!

Related Gigabyte GA-B250M-DS3H Manual Pages

Audio Setup Guide - Page 2

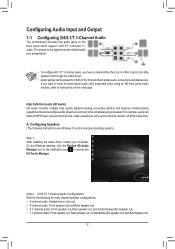
... next page. If you have an Internet chat, make a telephone call over the Internet, and etc. A. Configuring Audio Input and Output 1-1 Configuring 2/4/5.1/7.1-Channel Audio The motherboard provides five audio jacks on both of the front and back panel audio connections simultaneously. The picture to the following instructions use Windows 10 as...
Users Manual - Page 1

GIGABYTE works with you to protect the environment. To reduce the impacts on global warming, the packaging materials of this product are recyclable and reusable. GA-B250M-DS3H User's Manual Rev. 1001 For more product details, please visit GIGABYTE's website.
Users Manual - Page 2

Motherboard GA-B250M-DS3H Motherboard GA-B250M-DS3H Nov. 18, 2016 Nov. 18, 2016 Copyright © 2016...related information, check on our website at: http://www.gigabyte.com Identifying Your Motherboard Revision The revision number on your motherboard revision before updating motherboard BIOS, drivers, or when looking for technical information. Disclaimer Information in this manual ...
Users Manual - Page 3

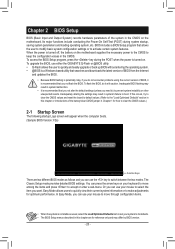
Table of Contents GA-B250M-DS3H Motherboard Layout 4 Chapter 1 Hardware Installation 5 1-1 Installation Precautions 5 1-2 Product Specifications 6 1-3 Installing the CPU 9 1-4 Installing the Memory 9 1-5 Installing an Expansion Card 10 1-6 Back Panel Connectors 10 1-7 Internal Connectors 12 Chapter 2 BIOS Setup 20 2-1 Startup Screen 20 2-2 M.I.T...21 2-3 System...27 2-4 BIOS...28 2-5 ...
Users Manual - Page 4

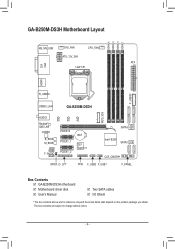
... COM F_AUDIO PCIEX1_1 PCIEX1_2 42 BAT iTE® Super I/O SATA3 1 3 0 2 Intel® B250 SATA3 5 4 CLR_CMOS SPDIF_O LPT TPM F_USB2 F_USB1 F_PANEL Box Contents 55 GA-B250M-DS3H otherboard 55 Motherboard driver disk 55 User's Manual 55 Two SATA cables 55 I/O Shield * The box contents above are subject to change without notice. - 4 - The box contents...
Users Manual - Page 5

...installation, make sure they are connected tightly and securely. •• When handling the motherboard, avoid touching any installation steps or have it on top of an antistatic pad or ...or unplugging the power supply cable from the power outlet before installing or removing the motherboard or other hardware components. •• When connecting hardware components to the internal...
Users Manual - Page 8

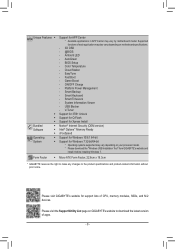
... the product specifications and product-related information without prior notice. Fast Boot - System Information Viewer - Supported functions of each application may vary depending on motherboard specifications. - 3D OSD - @BIOS - V-Tuner Support for 3TB+ Unlock Support for Q-Flash Support for Xpress Install Norton® Internet Security (OEM version) Intel® Optane™ Memory...
Users Manual - Page 9

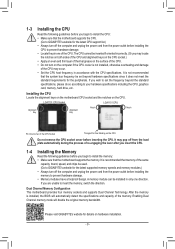
It is installed, the BIOS will double the original memory bandwidth. Dual Channel Memory Configuration This motherboard provides four memory sockets and supports Dual Channel ... •• Always turn on the computer if the CPU cooler is not recommended that the motherboard supports the memory. It is not installed, otherwise overheating and damage of the memory. Enabling Dual...
Users Manual - Page 10

... two channels and each channel has two memory sockets as following guidelines before you begin to install an expansion card: •• Make sure the motherboard supports the expansion card. When enabling Dual Channel mode with your expansion card. •• Always turn off the computer and unplug the power cord...
Users Manual - Page 11

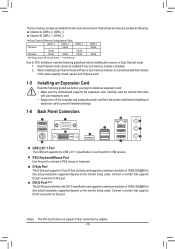
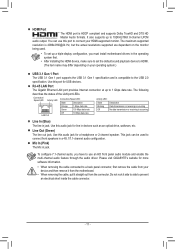
...dependent on the monitor being used to connect your device and then remove it from the motherboard. •• When removing the cable, pull it side to side to 192KHz/16bit ...supports Dolby TrueHD and DTS HD Master Audio formats. To configure 7.1-channel audio, you must install motherboard drivers in the operating system first. •• After installing the HDMI device, make sure ...
Users Manual - Page 12

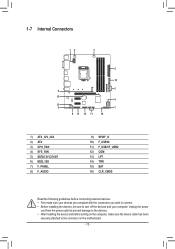
... 8) F_AUDIO 9) SPDIF_O 10) F_USB30 11) F_USB1/F_USB2 12) COM 13) LPT 14) TPM 15) BAT 16) CLR_CMOS Read the following guidelines before turning on the motherboard. - 12 -
Users Manual - Page 13

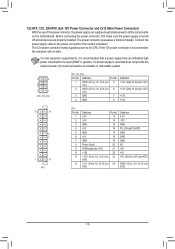
... the power supply is not connected, the computer will not start. If the 12V power connector is turned off and all the components on the motherboard. The 12V power connector mainly supplies power to the power connector in the correct orientation. 1/2) ATX_12V_2X4/ATX (2x4 12V Power Connector and 2x12 Main Power...
Users Manual - Page 14

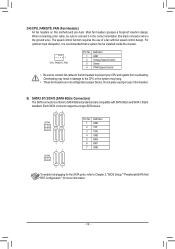
... SATA 1.5Gb/s standard. Most fan headers possess a foolproof insertion design. Do not place a jumper cap on this motherboard are compatible with fan speed control design. For optimum heat dissipation, it in damage to Chapter 2, "BIOS Setup," "Peripherals\SATA And RST Configuration," for the SATA ports, refer to the CPU or the system...
Users Manual - Page 15

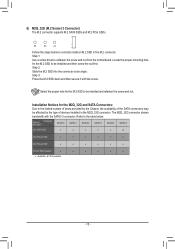
... the M.2 SSD to be installed and refasten the screw and nut. _0 Installation Notices for the M.2 SSD to unfasten the screw and nut from the motherboard.
Users Manual - Page 16

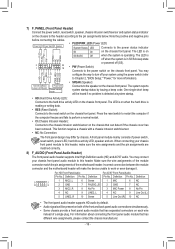
...damage it. When connecting your system using the power switch (refer to Chapter 2, "BIOS Setup," "Power," for more information). •• SPEAK (Speaker): Hard Drive ... to the speaker on the chassis to this header. Incorrect connection between the module connector and the motherboard header will be heard if no problem is on the chassis front panel. Definition 9 1 10...
Users Manual - Page 17

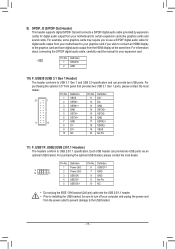
... information about connecting the S/PDIF digital audio cable, carefully read the manual for your motherboard to certain expansion cards like graphics cards and sound cards. Definition 1 1 SPDIFO ...off your graphics card if you to use a S/PDIF digital audio cable for digital audio output from your motherboard to USB 3.1 Gen 1 and USB 2.0 specification and can provide two USB ports via an 1 23...
Users Manual - Page 20

.../clear CMOS jumper in system malfunction. •• It is turned off, the battery on the motherboard supplies the necessary power to the CMOS to select the item you can use either the GIGABYTE Q-Flash or @BIOS utility. •• Q-Flash allows the user to quickly and easily upgrade or back up...
Users Manual - Page 25

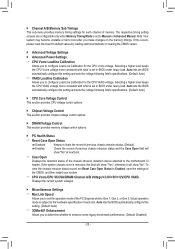
... higher level keeps the CPU VAXG voltage more consistent with what is subject to the motherboard CI header. Note: Your system may become unstable or fail to boot after you to... Settings && Max Link Speed Allows you make changes on the memory timings. Auto lets the BIOS automatically configure this setting and sets the voltage following Intel's specifications. (Default: Auto) && VAXG...
Users Manual - Page 27

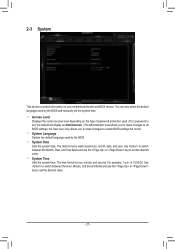
... Date Sets the system date. The time format is set the system time. && Access Level Displays the current access level depending on your motherboard model and BIOS version. The date format is 13:00:00. For example, 1 p.m. the User level only allows you to make changes to all . && System Language Selects the...
Users Manual - Page 38

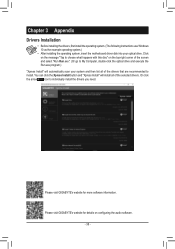
..., first install the operating system. (The following instructions use Windows 10 as the example operating system.) •• After installing the operating system, insert the motherboard driver disk into your system and then list all of the selected drivers. Click on the message "Tap to install. Please visit GIGABYTE's website for...

Similar Questions

Gigabyte Ga-b250m-ds3h
mi placa Gigabyte GA-B250M-DS3H crea un bucle al encenderlo y se reinicia sin llegar a dar video ,,q...
(Posted by mompellersebastian86 1 year ago)
Mi Gigabyte B250m Ds3h Prende Y Se Apaga Constantemente Y No Da Pitidos
Mi gigabyte b250M DS3H le doy power y prende y apaga constantemente el LED amarillo de la board y no...
(Posted by robertojp 1 year ago)
Motherboard Ga-8vm800m-775
motherboard open & hang how problem
(Posted by barikshibu 10 years ago)
Ask a New Question
Use the box below to post a new question about this Gigabyte product .
Points & Prizes
  • You can earn points for nearly everything you do on HelpOwl.com
  • You can trade in those points for gift cards at leading retailers such as Amazon.com and Walmart
  • It's that simple!
See How it Works
Create a Free Account

Gigabyte Manuals

Find free Gigabyte GA-B250M-DS3H manuals and user guides available at ManualOwl.com. Try out our unique manual viewer allowing you to interact with manuals from directly within your browser!

Gigabyte Reviews

View thousands of Gigabyte user reviews and customer ratings available at ReviewOwl.com.

Contact Information

Complete Gigabyte customer service contact information including steps to reach representatives, hours of operation, customer support links and more from ContactHelp.com.

Scoreboard Ratings

See detailed Gigabyte customer service rankings, employee comments and much more from our sister site.