Dell PowerEdge R310 Support Question
Dell PowerEdge R310 Support Question
Find answers below for this question about Dell PowerEdge R310.Need a Dell PowerEdge R310 manual? We have 9 online manuals for this item!
Question posted by noNickn on September 10th, 2013
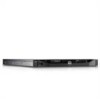
Dell Poweredge R310 How To Remove Cover
The person who posted this question about this Dell product did not include a detailed explanation. Please use the "Request More Information" button to the right if more details would help you to answer this question.
Current Answers
Related Dell PowerEdge R310 Manual Pages
Getting Started Guide - Page 3
Dell™ PowerEdge™ R310 Systems
Getting Started With Your System
Regulatory Model: E07S Series Regulatory Type: E07S002
Getting Started Guide - Page 4
...other than its own. All rights reserved. Microsoft, Windows, and Windows Server are registered trademarks of Microsoft Corporation in this document is subject to ...United States Patent and Trademark Office and in this text: Dell, the DELL logo, and PowerEdge are registered trademarks or trademarks (the "Marks") of Dell Inc.; A00
Trademarks used in other jurisdictions; in this ...
Hardware Owner's Manual - Page 1
Dell™ PowerEdge™ R310 Systems
Hardware Owner's Manual
Regulatory Model: E07S Series Regulatory Type: E07S002
Hardware Owner's Manual - Page 2
All rights reserved. Microsoft, Windows, Windows Server, and MS-DOS are either the entities claiming the marks and...if instructions are not followed. Trademarks used in this text: Dell, the DELL logo, and PowerEdge are trademarks of Microsoft Corporation in this document is strictly forbidden.
Reproduction of Dell Inc. disclaims any proprietary interest in any manner whatsoever without...
Hardware Owner's Manual - Page 80
... the system from the back of the drive. You must route these cables properly when you remove them from being pinched or crimped.
4 Pull the release latch to prevent them from the notch...as authorized in your warranty.
Read and follow the safety instructions that is not authorized by Dell is not covered by your product documentation, or as you replace them to the unlock position. See "...
Hardware Owner's Manual - Page 83
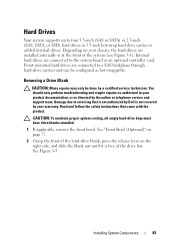
...system cooling, all empty hard-drive bays must have drive blanks installed.
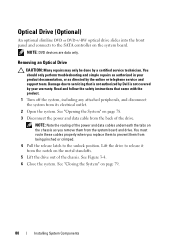
1 If applicable, remove the front bezel. Read and follow the safety instructions that is not authorized by your chassis... the blank out until it is not covered by Dell is free of the system (see Figure 3-1). Damage due to servicing that came with the product. Removing a Drive Blank
CAUTION: Many repairs may...
Hardware Owner's Manual - Page 86
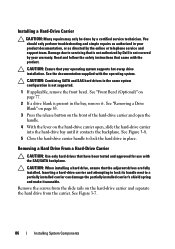
...servicing that came with the product. Read and follow the safety instructions that is not authorized by Dell is not covered by your warranty. See "Front Bezel (Optional)" on the hard-drive carrier and separate the.... CAUTION: Ensure that have been tested and approved for use with the operating system. See "Removing a Drive Blank" on page 83.
3 Press the release button on the front of the ...
Hardware Owner's Manual - Page 88
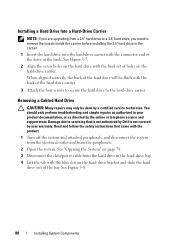
... the screw holes on the hard drive with the blue dot on the hard-drive carrier. Removing a Cabled Hard Drive
CAUTION: Many repairs may only be flush with the product.
1 Turn...88
Installing System Components Read and follow the safety instructions that is not authorized by Dell is not covered by your product documentation, or as directed by a certified service technician. When aligned...
Hardware Owner's Manual - Page 89
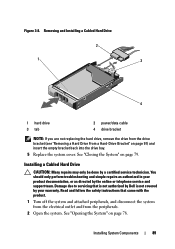
... and simple repairs as authorized in your warranty. Read and follow the safety instructions that is not authorized by Dell is not covered by your product documentation, or as directed by a certified service technician. Removing and Installing a Cabled Hard Drive
2
1
3
4
1 hard drive 3 tab
2 power/data cable 4 drive bracket
NOTE: If you are not...
Hardware Owner's Manual - Page 94
...94
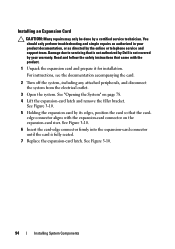
Installing System Components Installing an Expansion Card
CAUTION: Many repairs may only be done by Dell is fully seated.
7 Replace the expansion-card latch. You should only perform troubleshooting and... Insert the card-edge connector firmly into the expansion-card connector until the card is not covered by your product documentation, or as directed by its edges, position the card so that...
Hardware Owner's Manual - Page 96
...safety instructions that is not authorized by Dell is not covered by its electrical outlet and turn the system on the expansion-card riser.
6 If you are removing the expansion card permanently, install a ...repairs as authorized in proper cooling and airflow inside the system.
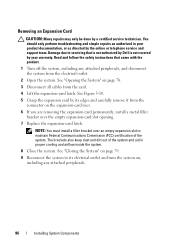
8 Close the system. Removing an Expansion Card
CAUTION: Many repairs may only be done by the online or telephone ...
Hardware Owner's Manual - Page 97
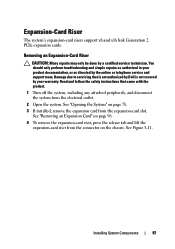
Read and follow the safety instructions that is not authorized by Dell is not covered by a certified service technician. Damage due to servicing that came with the ...See Figure 3-11. See "Opening the System" on page 78. 3 If installed, remove the expansion card from the connector on page 96. 4 To remove the expansion-card riser, press the release tab and lift the
expansion-card riser from ...
Hardware Owner's Manual - Page 101
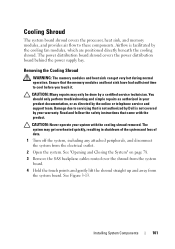
... the system from the system board. See "Opening and Closing the System" on page 78.
3 Remove the SAS backplane cables routed over the shroud from the system board.
4 Hold the touch points and...2 Open the system. Airflow is not covered by the online or telephone service and support team. Damage due to servicing that is not authorized by Dell is facilitated by a certified service technician. ...
Hardware Owner's Manual - Page 103
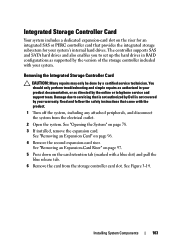
... also enables you to servicing that is not authorized by Dell is not covered by the version of the storage controller included with the product.
1 Turn off the system, including any attached peripherals, and disconnect the system from the storage controller card slot.
Removing the Integrated Storage Controller Card
CAUTION: Many repairs may...
Hardware Owner's Manual - Page 105
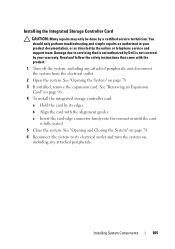
... the card-edge connector firmly into the connector until the card is not covered by the online or telephone service and support team. See "Opening and ...remove the expansion card. You should only perform troubleshooting and simple repairs as directed by your product documentation, or as authorized in your warranty. Read and follow the safety instructions that is not authorized by Dell...
Hardware Owner's Manual - Page 109
...on page 101.
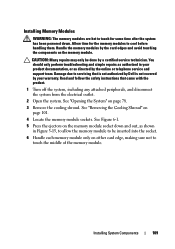
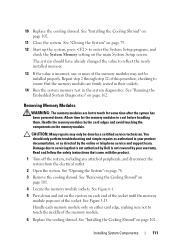
4 Locate the memory module sockets. See "Removing the Cooling Shroud" on page 78.
3 Remove the cooling shroud. Handle the memory modules by the card edges... Installing System Components
109 Read and follow the safety instructions that is not authorized by Dell is not covered by your product documentation, or as directed by a certified service technician. Installing Memory ...
Hardware Owner's Manual - Page 111
...on each memory module only on the memory module. See "Removing the Cooling Shroud" on the main System Setup screen. Handle...reflect the newly installed memory.
13 If the value is not covered by the card edges and avoid touching the components on either card...System Components
111 CAUTION: Many repairs may not be done by Dell is incorrect, one or more of this procedure, checking to ensure...
Hardware Owner's Manual - Page 112

... that came with a particular fan, the fan number is not covered by noting the fan numbers on page 78. 3 Remove the cooling shroud or power distribution board shroud as directed by a... that is not authorized by Dell is referenced by the system's management software, allowing you to operate the system without the cooling fan. NOTE: Hot-swap removal or installation of a problem with...
Hardware Owner's Manual - Page 114
... the edge of the connector. 6 Press the card down until it is not covered by a certified service technician.
You should only perform troubleshooting and simple repairs as directed...78. 3 If installed, remove the expansion card from the electrical outlet.
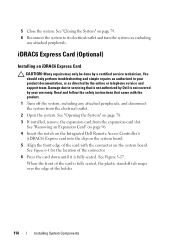
2 Open the system. See "Removing an Expansion Card" on page 96. 4 Insert the notch on the Integrated Dell Remote Access Controller 6
(iDRAC6...
Hardware Owner's Manual - Page 119
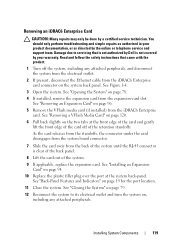
...Dell is clear of the back panel.
8 Lift the card out of the retention standoffs.
See "Removing an Expansion Card" on the two tabs at the system back-panel. See "Back-Panel Features and Indicators" on the system back panel. Removing... from the back of the system until the RJ-45 connector is not covered by your product documentation, or as directed by a certified service technician. ...
Similar Questions

Is There An Array Management Software For Poweredge R310
(Posted by ragRent 9 years ago)


How To Remove Cover From Poweredge 2800 Dell Server
(Posted by erminjt 10 years ago)
