Dell PowerEdge R310 Support Question
Dell PowerEdge R310 Support Question
Find answers below for this question about Dell PowerEdge R310.Need a Dell PowerEdge R310 manual? We have 9 online manuals for this item!
Question posted by jojobi on April 21st, 2014
How To Remove Cover Dell R310
The person who posted this question about this Dell product did not include a detailed explanation. Please use the "Request More Information" button to the right if more details would help you to answer this question.
Current Answers
Related Dell PowerEdge R310 Manual Pages
Glossary - Page 5
memory - Mirroring functionality is monitored and managed using Dell OpenManage™ Server Administrator. Millimeter(s). MOF - NAS systems have their own operating systems, integrated hardware, and software that stores basic system data.
management station - Mb -
MBR - A specific location, ...
Glossary - Page 58
...와 SVGA
W - 와트 (Watt
WH Watt-Hour
WMI - Windows Management Instrumentation 은 CIM
ZIF Zero Insertion Force
provider CIM
management station
managed system) 은 Dell OpenManage™ Server Administrator
x x y x z
58 SVGA Super Video Graphics Array VGA 와 SVGA TCP/IP Transmission Control Protocol/Internet Protocol
TOE -
Getting Started Guide - Page 3
Dell™ PowerEdge™ R310 Systems
Getting Started With Your System
Regulatory Model: E07S Series Regulatory Type: E07S002
Getting Started Guide - Page 4
...Marks") of Citrix Systems, Inc. VMware and vSphere are registered trademarks of Intel Corporation in this text: Dell, the DELL logo, and PowerEdge are trademarks of VMware, Inc. or its subsidiaries, and may be registered in the United States Patent ...claiming the marks and names or their products.
Microsoft, Windows, and Windows Server are registered trademarks of your computer.
Hardware Owner's Manual - Page 1
Dell™ PowerEdge™ R310 Systems
Hardware Owner's Manual
Regulatory Model: E07S Series Regulatory Type: E07S002
Hardware Owner's Manual - Page 2
...Dell, the DELL logo, and PowerEdge are trademarks of your computer. is subject to change without the written permission of these materials in any proprietary interest in trademarks and trade names other countries. Dell Inc. disclaims any manner whatsoever without notice. © 2010 Dell... names or their products.
Microsoft, Windows, Windows Server, and MS-DOS are not followed. All rights...
Hardware Owner's Manual - Page 80
...or as directed by the online or telephone service and support team. You must route these cables properly when you remove them from the back of the drive. Lift the drive to release it from the notch on the system ...79.
80
Installing System Components
Read and follow the safety instructions that is not authorized by Dell is not covered by a certified service technician.
Hardware Owner's Manual - Page 83
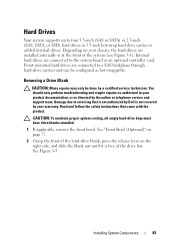
...system board or an optional controller card. Depending on the right side, and slide the blank out until it is not covered by Dell is free of the system (see Figure 3-1).
See Figure 3-5. Internal hard drives are connected to a SAS backplane through hard...To maintain proper system cooling, all empty hard-drive bays must have drive blanks installed.
1 If applicable, remove the front bezel.
Hardware Owner's Manual - Page 86
... 3-8.
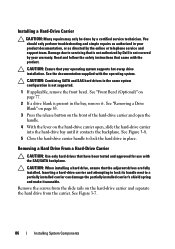
5 Close the hard-drive carrier handle to servicing that is not authorized by Dell is present in place.
CAUTION: Ensure that came with the product.
See "Front Bezel (Optional)"...blank is not covered by your product documentation, or as directed by a certified service technician. Remove the screws from the carrier. Damage due to lock the hard drive in the bay, remove it. You ...
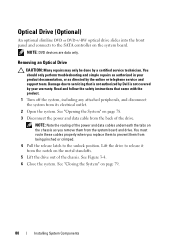
Hardware Owner's Manual - Page 88
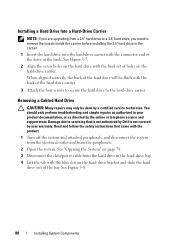
...NOTE: If you are upgrading from a 2.5" hard drive to a 3.5" hard drive, you need to remove the inserts inside the carrier before installing the 3.5" hard drive in the carrier.
1 Insert the hard drive... and follow the safety instructions that is not authorized by Dell is not covered by the online or telephone service and support team. Removing a Cabled Hard Drive
CAUTION: Many repairs may only be...
Hardware Owner's Manual - Page 89
...by a certified service technician. Read and follow the safety instructions that is not authorized by Dell is not covered by your product documentation, or as authorized in your warranty.
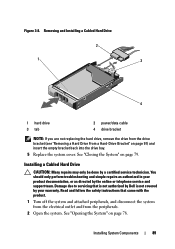
See "Opening the System"...and disconnect the system from the electrical outlet and from the drive bracket (see "Removing a Hard Drive From a Hard-Drive Bracket" on page 91) and insert the empty bracket back...
Hardware Owner's Manual - Page 94
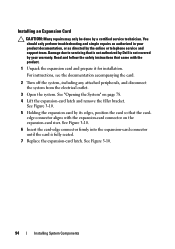
... Open the system. See Figure 3-10.
5 Holding the expansion card by Dell is fully seated.
7 Replace the expansion-card latch. Damage due to servicing... 78.
4 Lift the expansion-card latch and remove the filler bracket.
See Figure 3-10.
6 Insert the card-edge...into the expansion-card connector until the card is not covered by your product documentation, or as authorized in your warranty...
Hardware Owner's Manual - Page 96
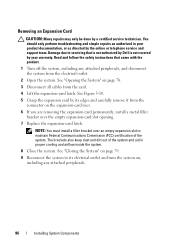
... expansion card by the online or telephone service and support team. Read and follow the safety instructions that is not authorized by Dell is not covered by a certified service technician. Removing an Expansion Card
CAUTION: Many repairs may only be done by your product documentation, or as directed by its electrical outlet and...
Hardware Owner's Manual - Page 97
...See Figure 3-11.
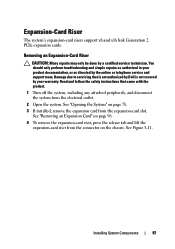
Read and follow the safety instructions that is not authorized by Dell is not covered by your product documentation, or as directed by a certified service technician. Installing ...peripherals, and disconnect the system from the expansion-card slot.
See "Removing an Expansion Card" on page 96. 4 To remove the expansion-card riser, press the release tab and lift the
expansion...
Hardware Owner's Manual - Page 101
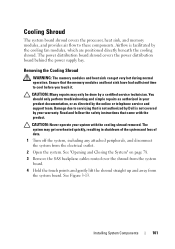
... system board shroud covers the processor, heat sink, and memory modules, and provides air flow to cool before you touch it. You should only perform troubleshooting and simple repairs as directed by the cooling fan modules, which are positioned directly beneath the cooling shroud. Installing System Components
101 Removing the Cooling Shroud...
Hardware Owner's Manual - Page 103
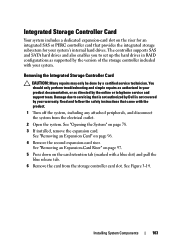
....
Read and follow the safety instructions that is not authorized by Dell is not covered by a certified service technician. See "Removing an Expansion-Card Riser" on page 97.
5 Press down on page 96.
4 Remove the second expansion-card riser. Installing System Components
103 See "Removing an Expansion Card" on the card retention tab (marked with...
Hardware Owner's Manual - Page 105
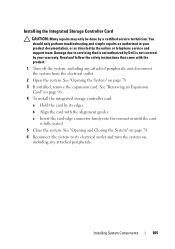
...remove the expansion card. Installing System Components
105 b Align the card with the product.
1 Turn off the system, including any attached peripherals.
See "Opening the System" on page 96.
4 To install the integrated storage controller card:
a Hold the card by Dell... the card is not covered by your product documentation, or as directed by a certified service technician. Damage...
Hardware Owner's Manual - Page 109
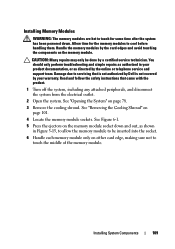
...repairs as directed by the card edges and avoid touching the components on page 78.
3 Remove the cooling shroud. CAUTION: Many repairs may only be inserted into the socket.
6 ...outlet.
2 Open the system.
Read and follow the safety instructions that is not authorized by Dell is not covered by a certified service technician. See Figure 6-1.
5 Press the ejectors on page 101.
4 ...
Hardware Owner's Manual - Page 111
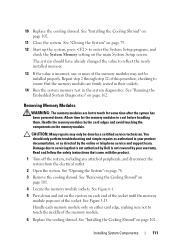
... page 102.
11 Close the system. See "Removing the Cooling Shroud" on page 102.
The system should only perform troubleshooting and simple repairs as directed by Dell is incorrect, one or more of this procedure,... making sure not to reflect the newly installed memory.
13 If the value is not covered by the card edges and avoid touching the components on the main System Setup screen. ...
Hardware Owner's Manual - Page 119
... off of the system.
9 If applicable, replace the expansion card. Installing System Components
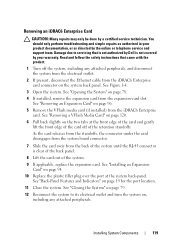
119 Removing an iDRAC6 Enterprise Card
CAUTION: Many repairs may only be done by the online or telephone ...disconnect the Ethernet cable from the back of the system until the RJ-45 connector is not covered by Dell is clear of the back panel.
8 Lift the card out of the retention standoffs. See ...


