Dell Latitude E6320 Support Question
Dell Latitude E6320 Support Question
Find answers below for this question about Dell Latitude E6320.Need a Dell Latitude E6320 manual? We have 2 online manuals for this item!
Question posted by tfweiss on December 10th, 2011
How Do You Re-enable Your Touchpad, Having Turned It Off Using Fn+f5?
Doesn't seem to work using FN+F5 again. Any ideas?
Current Answers
Related Dell Latitude E6320 Manual Pages
User Manual - Page 2
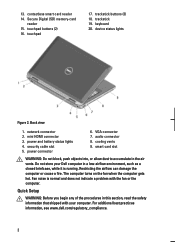
touchpad buttons (2) 16. device status lights
Figure 2. power connector
6. VGA connector 7. Do not store your computer. Fan noise is normal and does not indicate a problem with your Dell computer in a low-airflow environment, such as a closed briefcase, while it is running. keyboard 20. The computer turns...procedures in the air vents. touchpad
17. contactless smart card ...
User Manual - Page 3
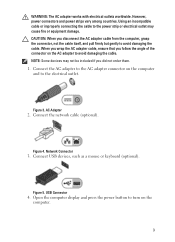
...: Some devices may cause fire or equipment damage.
WARNING: The AC adapter works with electrical outlets worldwide. When you wrap the AC adapter cable, ensure that you follow the angle of the connector on the AC adapter to turn on the computer
and to the power strip or electrical outlet may not...
User Manual - Page 4
....
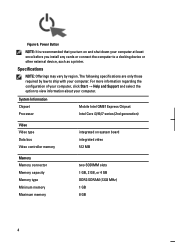
Specifications
NOTE: Offerings may vary by law to a docking device or other external device, such as a printer. Power Button
NOTE: It is recommended that you turn on system board integrated video 512 MB
Memory Memory connector Memory capacity Memory type Minimum memory Maximum memory
two SODIMM slots 1 GB, 2 GB, or 4 GB...
User Manual - Page 7
...™, ExpressCharge™, Latitude™, Latitude ON™, OptiPlex™, Vostro™, and Wi-Fi Catcher™ are trademarks of Wireless Ethernet Compatibility Alliance, Inc. Reproduction of these materials in this publication to refer to change without the written permission of Dell Inc. AMD® is strictly forbidden. Trademarks used in this publication...
Owners Manual - Page 2
...™, Precision ON™,ExpressCharge™, Latitude™, Latitude ON™, OptiPlex™, Vostro™,... and Wi-Fi Catcher™ are trademarks of Advanced Micro Devices, Inc. is under license. is strictly forbidden. Notes, Cautions, and Warnings
NOTE: A NOTE indicates important information that helps you make better use...
Owners Manual - Page 3
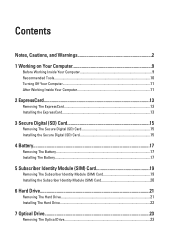
Contents
Notes, Cautions, and Warnings 2
1 Working on Your Computer 9
Before Working Inside Your Computer 9 Recommended Tools...10 Turning Off Your Computer 11 After Working Inside Your Computer 11
2 ExpressCard 13
Removing The ExpressCard 13 Installing the ExpressCard 13
3 Secure Digital (SD) Card 15
Removing The Secure Digital (SD) Card ...
Owners Manual - Page 9
...card. As you disconnect the cable.
CAUTION: To avoid electrostatic discharge, ground yourself by using a wrist grounding strap or by its pins. Hold a component such as directed by ...if purchased separately--installed by
performing the removal procedure in Working on Your Computer
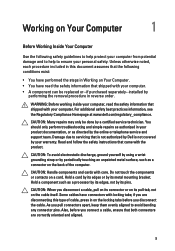
1
Before Working Inside Your Computer
Use the following conditions exist:
• You have connectors ...
Owners Manual - Page 10
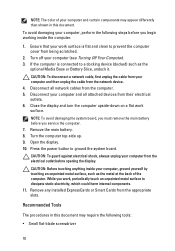
..., undock it. Press the power button to a docking device (docked) such as the metal at the back of your work surface. While you service the computer. 7. To avoid damaging your computer (see Turning Off Your Computer). 3. Open the display. 10. NOTE: The color of the computer. Remove any installed ExpressCards or Smart...
Owners Manual - Page 11
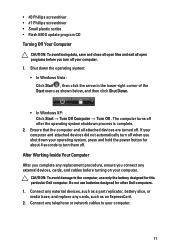
...8594; Turn Off Computer → Turn Off . After Working Inside Your Computer After you complete any replacement procedure, ensure you connect any external devices, cards, and cables before you turn off when...press and hold the power button for about 4 seconds to the computer, use batteries designed for this particular Dell computer.
• #0 Phillips screwdriver • #1 ...
Owners Manual - Page 12

Replace the battery. 4. Turn on your computer and all attached devices to their electrical outlets. 5. CAUTION: To connect a network cable, first plug the cable into the network device and then plug it into the computer. 3. Connect your computer.
12
Owners Manual - Page 25
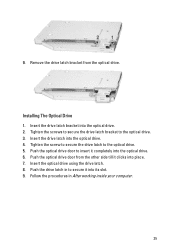
...5. Push the optical drive door to secure it clicks into place. 7. 9.
Insert the optical drive using the drive latch. 8. Follow the procedures in to insert it completely into the optical drive. 2. ...the other side till it into the optical drive. 4. Push the drive latch in After working inside your computer.
25 Tighten the screw to secure the drive latch to the optical drive. 3. ...
Owners Manual - Page 37
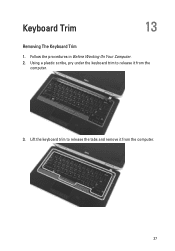
Using a plastic scribe, pry under the keyboard trim to release the tabs and remove it from the computer.
37 Lift the keyboard trim to release it from the
computer.
3. Follow the procedures in Before Working On Your Computer. 2. Keyboard Trim
13
Removing The Keyboard Trim
1.
Owners Manual - Page 41
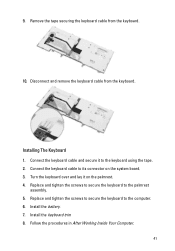
... battery. 7. Install the keyboard trim 8. Disconnect and remove the keyboard cable from the keyboard.
10. Remove the tape securing the keyboard cable from the keyboard. Turn the keyboard over and lay it to the palmrest
assembly. 5. Connect the keyboard cable and secure it on the system board. 3. Replace and tighten the...
Owners Manual - Page 43
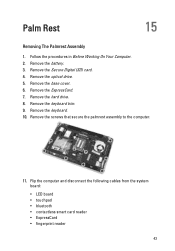
... that secure the palmrest assembly to the computer.
11. Flip the computer and disconnect the following cables from the system board:
• LED board • touchpad • bluetooth • contactless smart card reader • ExpressCard • fingerprint reader
43 Remove the optical drive. 5. Follow the procedures in Before...
Owners Manual - Page 103
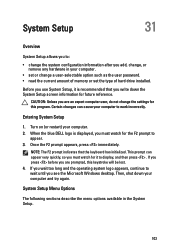
...logo appears, continue to display, and then press .
Before you use System Setup, it to wait until you see the Microsoft Windows ... add, change, or remove any hardware in the System Setup.
103
Turn on (or restart) your computer and try again.
If you press before...watch for the F2 prompt to work incorrectly. Once the F2 prompt appears, press immediately.
When the blue ...
Owners Manual - Page 108
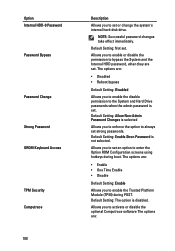
... option to enter the Option ROM Configuration screens using hotkeys during POST. NOTE: Successful password changes take effect immediately. Allows you to activate or disable the optional Computrace software The options are :
• Disabled • Reboot bypass
Default Setting: Disabled Allows you to enable the disable permission to the System and Hard...
Owners Manual - Page 110

..., C3, C6, Enhanced C-states, andC7 options are :
• Disabled • Every Day • Weekdays
Default Setting: Disabled Default Setting: Enabled
Description Allows you to set the time at which the computer must turn on AC is connected. Option Intel SpeedStep C-States Control Limit CPUID Intel TurboBoost HyperThread Control Power Management Option AC...
Owners Manual - Page 111
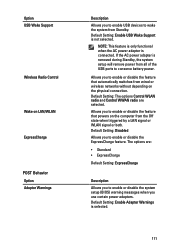
... options Control WLAN radio and Control WWAN radio are : • Standard • ExpressCharge Default Setting: ExpressCharge
Description Allows you to enable or disable the system setup (BIOS) warning messages when you use certain power adapters. If the AC power adapter is connected. The options are selected. Default Setting: Disabled Allows you to...
Owners Manual - Page 112
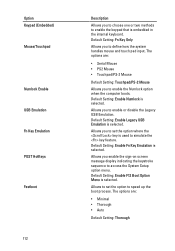
... keypad that is used to simulate the key feature. The options are :
• Serial Mouse • PS2 Mouse • Touchpad/PS-2 Mouse
Default Setting: Touchpad/PS-2 Mouse
Allows you to set the option to speed up the boot process. Default Setting: Enable Numlock is selected. Option Keypad (Embedded) Mouse/Touchpad
Numlock Enable USB Emulation Fn Key Emulation...
Owners Manual - Page 115

... with AC adapter present.
• Constantly blinking amber light - Turns on - Battery Status Lights
If the computer is enabled. Battery in a power management mode. LED Error Codes
The following...to your laptop.
• Alternately blinking amber light with steady blue light - Fatal battery failure with AC adapter present. Diagnostics
32
Device Status Lights
Turns on when you turn on ...


