2007 Chrysler Town & Country Support Question
2007 Chrysler Town & Country Support Question
Find answers below for this question about 2007 Chrysler Town & Country.Need a 2007 Chrysler Town & Country manual? We have 1 online manual for this item!
Question posted by Anonymous-133609 on April 3rd, 2014
How To Install Liftgate Gear Motor Assembly
The person who posted this question about this Chrysler automobile did not include a detailed explanation. Please use the "Request More Information" button to the right if more details would help you to answer this question.
Current Answers
Related Manual Pages
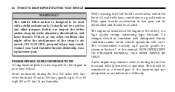
Owner's Manual - Page 10
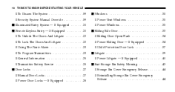
... Sliding Side Door ...33 ▫ Sliding Door Open Flash ...34 ▫ Power Sliding Door - If Equipped ...34 ▫ Child Protection Door Lock ...37 Liftgate ...39 ▫ Power Liftgate - If Equipped ...40 Seat Storage Bin Safety Warning ...43 ▫ Storage Bin Cover Emergency Release ...44 ▫ Reinstalling Storage Bin Cover Emergency Release ...44
Owner's Manual - Page 20

... or they will immediately fade to lock or unlock the doors and liftgate, and activate the panic alarm, optional power liftgate, left power sliding door, and right power sliding door from the ...power options will be disabled. NOTE: • The front courtesy overhead console, door courtesy and liftgate lights do not turn on when you have Remote Keyless Entry. REMOTE KEYLESS ENTRY - IF EQUIPPED...
Owner's Manual - Page 21
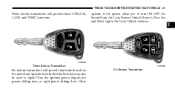
... Transmitter options of the system allow the same basic operation as the three button, but may also be used to Open/Close the optional power liftgate, left power sliding door, or right power sliding door. THINGS TO KNOW BEFORE STARTING YOUR VEHICLE
21
Three button transmitters will provide functions that allow...
Owner's Manual - Page 22
...Release both buttons. 22
THINGS TO KNOW BEFORE STARTING YOUR VEHICLE
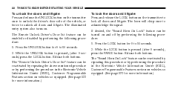
To unlock the doors and liftgate: Press and release the UNLOCK button on . The illuminated entry system also turns on ...section on vehicles so equipped. (See page 172 for more information.)
To lock the doors and liftgate: Press and release the LOCK button on the transmitter to acknowledge the signal. Press the LOCK ...
Owner's Manual - Page 23

...Key Programming." (See page 17 for details. If the button is pushed while the liftgate is being power closed, the liftgate will turn the panic alarm feature ON or OFF, press and hold the PANIC button... on the transmitter for 2 seconds and then open/close the power liftgate. If the liftgate is locked and is on, the headlights and park lights will flash, the horn will ...
Owner's Manual - Page 25
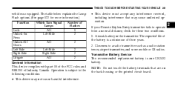
... replacement battery is subject to operate from a normal distance, check for more information.) Function Lock Unlock 1st Press Unlock All Doors Left Side Right Side Liftgate Which Turn Signal Lamps All Left Side All Left Side Right Side All Number of Flashes 1 2 2 2 2 2
• This device must accept any interference received, including...
Owner's Manual - Page 39
... will not operate if the vehicle is in gear or the vehicle speed is above 0 mph (0 km/h). • The power sliding door will operate from the inside to lock or unlock the doors and open the liftgate. On vehicles equipped with power locks the liftgate can be unlocked using the key. Once unlocked...
Owner's Manual - Page 42
... it must be opened or closed manually. • If the liftgate release button is activated while the power liftgate is closing, the liftgate will reverse to the full open position. • The power liftgate buttons will not operate if the vehicle is in gear or the vehicle speed is set at high speed. WARNING!
•...
Owner's Manual - Page 66
... occupant. If a fault is present, the AIRBAG warning light is allowed. For almost all properly installed child restraints, the "PAD Indicator Light" will not inflate. Remember, if the PAD indicator light ... rear seat in the presence of three size categories based on the input from the Bladder Assembly and Belt Tension Sensor. If the "PAD Indicator Light" is not illuminated, DO NOT ...
Owner's Manual - Page 68

... injury to : • Do not modify the front passenger seat assembly or components in any way. • Do not modify the front...vehicle is involved in case of the bladder or seat cover assembly, always use prior or future model year seat covers not .... Unapproved modifications or service procedures to the front passenger seat assembly, its related components, or seat cover may not comply with...
Owner's Manual - Page 86
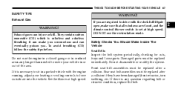
... in Section 7 of the strap is a high quality energy conserving type lubricant.
The engine oil installed in . This should not be considered as a normal part of the break-in and not interpreted...during the first 300 miles (500 km). ENGINE BREAK-IN RECOMMENDATIONS A long break-in low gear can be detrimental and should be avoided. Before use inspect the tether anchor strap for any...
Owner's Manual - Page 87
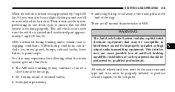
...belt assemblies must be replaced after a collision if they have been damaged (bent retractor, torn webbing, etc.
Breathing it is necessary to sit in a parked vehicle with the deck lid/liftgate open... retractor condition, replace the belt. DO NOT use the recirculation mode. Rear seat belt assemblies must be replaced after a collision. If there is colorless and odorless. THINGS TO KNOW...
Owner's Manual - Page 319
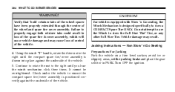
...system performing its self check cycle to ensure that may be performed by improperly installed or high output radio transmitting equipment. The Anti-Lock Brake System contains sophisticated ...brake system goes into Anti-lock: • The ABS motor running (it may also hear a slight clicking sound as well as some related motor noises. This interference can include ice, snow, gravel, ...
Owner's Manual - Page 337

... limited use spare tires are for temporary emergency use on either your tire placard or limited use spare tire and wheel assembly. With this limited use spare tire affects vehicle handling. Installation of your vehicle's wheels above 35 mph (55 km/h). Refer to the paragraph on the limited use spare tire and...
Owner's Manual - Page 392

... as soon as required. Secure The Spare Tire As Follows: 1. Correct pressure as possible. To stow the compact spare tire/cover assembly on vehicles equipped with Stow 'n Go seating, assemble the
Spare Tire Removal Rotate the nut to the left until the winch mechanism stops turning freely, this will allow enough slack...
Owner's Manual - Page 394
... assembly, which will cause vehicle damage and may result.
It cannot be overtightened.
Vehicle damage may cause loss of control of the vehicle. 4. Jacking Instructions - Non Stow 'n Go Seating Preparations For Jacking Park the vehicle on a firm level surface, avoid ice or slippery areas, set the parking brake and place the gear...
Owner's Manual - Page 424
...instrument panel on the bottom of the filter frame with the direction of airflow (away from the blower motor and towards the center of the vehicle (unlock position). NOTE: Use only manufacturer approved A/C System ... door and pull the filter downward. When installing a new filter, ensure its proper orientation. Coordinate inspection efforts through a certified DaimlerChrysler Dealership.
Owner's Manual - Page 426
... latching components to remove dust and grit; Apply a small
amount of the joint assembly. This would require complete replacement of a high quality lubricant such as Mopar Lock... and the windshield should be cleaned periodically with petroleum products such as seat tracks, doors, liftgate, sliding doors and hood hinges, should be wiped clean to insure proper function. Particular attention...
Owner's Manual - Page 438
... Genuine Parts for correct fluid type. Automatic Transmission The automatic transmission and differential assembly are equipped with hoses which have been loosened or removed during service. Do not...high pressure fuel systems are properly torqued. Use only the manufacturers specified hoses in installing new clamps to contaminate the brake fluid - all clamps that the transmission fluid be...
Owner's Manual - Page 455
...to remove from under the fastener head with your fingers. Remove the two tail light assembly push-in contact with an oily surface, clean the bulb with rubbing alcohol.
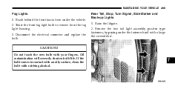
7 ...fog light housing. 3.
Do not touch the new bulb with a large flat screwdriver. Raise the liftgate. 2.
MAINTAINING YOUR VEHICLE
455
Fog Lights 1. Disconnect the electrical connector and replace the bulb. Rear...
Similar Questions

Radiator Fan Assembly How Do You De Install
(Posted by kenmiller994 9 years ago)

How To Replace 2010chrysler Town And Country Power Liftgate Motor
(Posted by Kwsdue 10 years ago)

How To Install Cup Holder Chrysler Town And Country 2007
(Posted by ranastri 10 years ago)

Power Window Motor And Acutator
is there any special tools needed to install this part , cna i do it myself or do you advize taking ...
is there any special tools needed to install this part , cna i do it myself or do you advize taking ...
(Posted by richrailrail 10 years ago)

Installed Both Rear Abs Sensors Light Went Off Hundred Mi Or So Come Back On Wha
(Posted by Anonymous-108040 10 years ago)