
Owner's Manual
Page 23
... panic alarm by turning the ignition switch to manually access the liftgate area. 2 To Open/Close Power Liftgate - If Equipped Press the LIFTGATE button twice within five seconds to the radio frequency noises of the system. NOTE: When you to the ON position. If the button is pushed while the liftgate is on, the headlights and park lights will flash, the horn...
... panic alarm by turning the ignition switch to manually access the liftgate area. 2 To Open/Close Power Liftgate - If Equipped Press the LIFTGATE button twice within five seconds to the radio frequency noises of the system. NOTE: When you to the ON position. If the button is pushed while the liftgate is on, the headlights and park lights will flash, the horn...
Owner's Manual
Page 27
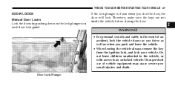
... on each door trim panel. Unsupervised use of an accident, lock the vehicle doors as you drive as well as when you shut the door, the door will lock. Do not leave children unattended in the event of vehicle equipment may cause severe personal injuries and death. THINGS TO KNOW BEFORE STARTING YOUR VEHICLE 27 DOOR LOCKS Manual Door Locks Lock the doors by pushing down when you park and leave...
... on each door trim panel. Unsupervised use of an accident, lock the vehicle doors as you drive as well as when you shut the door, the door will lock. Do not leave children unattended in the event of vehicle equipment may cause severe personal injuries and death. THINGS TO KNOW BEFORE STARTING YOUR VEHICLE 27 DOOR LOCKS Manual Door Locks Lock the doors by pushing down when you park and leave...
Owner's Manual
Page 29
... after the vehicle has been driven (shifted out of the power door locks (Lock or Unlock). 2 Within 30 seconds, press the driver's door lock switch in the LOCK position ( Do not start the engine ). 5. This will not operate if there is any chiming that may confuse you during this feature, repeat the above procedure. Fasten your vehicle and close all of the doors of four times; To...
... after the vehicle has been driven (shifted out of the power door locks (Lock or Unlock). 2 Within 30 seconds, press the driver's door lock switch in the LOCK position ( Do not start the engine ). 5. This will not operate if there is any chiming that may confuse you during this feature, repeat the above procedure. Fasten your vehicle and close all of the doors of four times; To...

Owner's Manual
Page 30
... 30 seconds, press the driver's door lock switch in accordance with power door locks if: 1. Enter your seat belt (fastening the seat belt will cancel any chimes that may be changed . 7. NOTE: Use the Auto Door Locks and Auto Unlock features in the UNLOCK direction. 6. Insert the key into the ignition. 4. 30 THINGS TO KNOW BEFORE STARTING YOUR VEHICLE Auto Unlock On Exit Programming - If Equipped The doors will unlock automatically on vehicles so equipped.
... 30 seconds, press the driver's door lock switch in accordance with power door locks if: 1. Enter your seat belt (fastening the seat belt will cancel any chimes that may be changed . 7. NOTE: Use the Auto Door Locks and Auto Unlock features in the UNLOCK direction. 6. Insert the key into the ignition. 4. 30 THINGS TO KNOW BEFORE STARTING YOUR VEHICLE Auto Unlock On Exit Programming - If Equipped The doors will unlock automatically on vehicles so equipped.

Owner's Manual
Page 61
... Restraint Controller (ORC) • AIRBAG Light • Driver Airbag • Front Passenger Airbag • Supplemental Side Curtain Airbags (If Equipped) • Front Impact Sensors • Side Impact Sensors (If Equipped) • Steering Wheel and Column • Instrument Panel • Interconnecting Wiring • Seat Belt Reminder Light • Knee Impact Bolster • Driver Inflatable Knee Blocker • Front Passenger Seat Occupant Classification System (OCS) - If Equipped − Occupant Classification Module − Passenger Airbag Disabled (PAD) Indicator Light...
... Restraint Controller (ORC) • AIRBAG Light • Driver Airbag • Front Passenger Airbag • Supplemental Side Curtain Airbags (If Equipped) • Front Impact Sensors • Side Impact Sensors (If Equipped) • Steering Wheel and Column • Instrument Panel • Interconnecting Wiring • Seat Belt Reminder Light • Knee Impact Bolster • Driver Inflatable Knee Blocker • Front Passenger Seat Occupant Classification System (OCS) - If Equipped − Occupant Classification Module − Passenger Airbag Disabled (PAD) Indicator Light...

Owner's Manual
Page 70
... protect you. Only manufacturer approved seat accessories may not function properly if modifications are not there to an authorized dealer for persons with power door locks will illuminate until the ignition switch is necessary to fail when you in any advanced airbag system service. Have the airbags, front seat belt buckle pretensioners and driver inflatable knee blocker replaced by an authorized dealer as soon...
... protect you. Only manufacturer approved seat accessories may not function properly if modifications are not there to an authorized dealer for persons with power door locks will illuminate until the ignition switch is necessary to fail when you in any advanced airbag system service. Have the airbags, front seat belt buckle pretensioners and driver inflatable knee blocker replaced by an authorized dealer as soon...

Owner's Manual
Page 90
... Fold & Tumble Rear Seat Removal ...137 ▫ 3 - Passenger Bench Seats ...139 ▫ Plastic Grocery Bag Retainer ...140 ▫ Rear-Most Bench Seat ...140 ▫ Rear Seat Descriptions ...141 ▫ Rear Bench Seating Flexibility ...141 ▫ Rear Quad And 50/50 Seating Flexibility ...142 Driver Memory Seat - If Equipped ...145 ▫ Setting Memory Positions And Linking Remote Keyless Entry Transmitter To Memory ...146 ▫ Memory Position Recall ...147 ▫...
... Fold & Tumble Rear Seat Removal ...137 ▫ 3 - Passenger Bench Seats ...139 ▫ Plastic Grocery Bag Retainer ...140 ▫ Rear-Most Bench Seat ...140 ▫ Rear Seat Descriptions ...141 ▫ Rear Bench Seating Flexibility ...141 ▫ Rear Quad And 50/50 Seating Flexibility ...142 Driver Memory Seat - If Equipped ...145 ▫ Setting Memory Positions And Linking Remote Keyless Entry Transmitter To Memory ...146 ▫ Memory Position Recall ...147 ▫...
Owner's Manual
Page 116
...-medium vehicle speed, • low road noise, • smooth road surface, • fully closed windows, and • dry weather condition. • Operation from OFF to either ON or ACC position, or after a reset, you must wait at far end can generally be reduced by switching the phone off/on. 116 UNDERSTANDING THE FEATURES OF YOUR VEHICLE Far End Audio Performance • Audio quality...
...-medium vehicle speed, • low road noise, • smooth road surface, • fully closed windows, and • dry weather condition. • Operation from OFF to either ON or ACC position, or after a reset, you must wait at far end can generally be reduced by switching the phone off/on. 116 UNDERSTANDING THE FEATURES OF YOUR VEHICLE Far End Audio Performance • Audio quality...

Owner's Manual
Page 216
... INSTRUMENT PANEL WARNING! A chime will remain on momentarily when the engine is started. This light does not show how much oil is corrected. The engine oil level must apply the brakes before shifting from high or low beam. The light will sound for 4 minutes when this manual. The light should turn signal lever towards the steering wheel to look under the hood yourself, see Section 7 of this light turns on while driving...
... INSTRUMENT PANEL WARNING! A chime will remain on momentarily when the engine is started. This light does not show how much oil is corrected. The engine oil level must apply the brakes before shifting from high or low beam. The light will sound for 4 minutes when this manual. The light should turn signal lever towards the steering wheel to look under the hood yourself, see Section 7 of this light turns on while driving...
Owner's Manual
Page 221
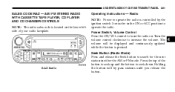
... of your radio faceplate. Operating Instructions - Radio NOTE: Power to increase the volume. Turn the volume control clockwise to operate the radio is controlled by pass stations until you release the button. 4 RAZ Radio Power Switch, Volume Control Press the ON/VOL control to operate the radio. UNDERSTANDING YOUR INSTRUMENT PANEL 221 SALES CODE RAZ - AM/ FM STEREO RADIO WITH CASSETTE TAPE PLAYER, CD PLAYER AND CD CHANGER CONTROLS NOTE: The radio sales code is located...
... of your radio faceplate. Operating Instructions - Radio NOTE: Power to increase the volume. Turn the volume control clockwise to operate the radio is controlled by pass stations until you release the button. 4 RAZ Radio Power Switch, Volume Control Press the ON/VOL control to operate the radio. UNDERSTANDING YOUR INSTRUMENT PANEL 221 SALES CODE RAZ - AM/ FM STEREO RADIO WITH CASSETTE TAPE PLAYER, CD PLAYER AND CD CHANGER CONTROLS NOTE: The radio sales code is located...
Owner's Manual
Page 285
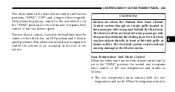
... vehicle. UNDERSTANDING YOUR INSTRUMENT PANEL 285 The center knob on the front climate control unit is set to the "REAR" position, the second seat occupants have control of the rear blower speed. The heater outlets are located in the passenger side trim panel behind the sliding door. Interior air enters the Manual Rear Zone Climate Control system through an intake grille located in the passenger side trim panel just behind the third seat. The rear blower control, located in the "REAR...
... vehicle. UNDERSTANDING YOUR INSTRUMENT PANEL 285 The center knob on the front climate control unit is set to the "REAR" position, the second seat occupants have control of the rear blower speed. The heater outlets are located in the passenger side trim panel behind the sliding door. Interior air enters the Manual Rear Zone Climate Control system through an intake grille located in the passenger side trim panel just behind the third seat. The rear blower control, located in the "REAR...
Owner's Manual
Page 295
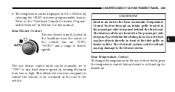
... passenger side trim panel behind the sliding door. Rear Blower Control The rear blower control, located in Section 3 of blower speeds. Interior air enters the Rear Automatic Temperature Control System through an intake grille located in U.S. Refer to the "Overhead Console-Customer Programmable Features" in the headliner near the center of the vehicle has an "OFF", "AUTO" and a range of this manual. The heater outlets are located in front of the inlet grille or heater outlets. CAUTION! Rear Temperature Control...
... passenger side trim panel behind the sliding door. Rear Blower Control The rear blower control, located in Section 3 of blower speeds. Interior air enters the Rear Automatic Temperature Control System through an intake grille located in U.S. Refer to the "Overhead Console-Customer Programmable Features" in the headliner near the center of the vehicle has an "OFF", "AUTO" and a range of this manual. The heater outlets are located in front of the inlet grille or heater outlets. CAUTION! Rear Temperature Control...

Owner's Manual
Page 310
... power to get it may be dangerous if done improperly. 310 STARTING AND OPERATING WARNING! If the engine has been flooded, it started , ignite and damage the converter and vehicle. Unburned fuel could enter the catalytic converter and once the engine has started . Release the accelerator pedal and the key once the engine is released. Do not attempt to push or tow your vehicle to continue running when the key is running...
... power to get it may be dangerous if done improperly. 310 STARTING AND OPERATING WARNING! If the engine has been flooded, it started , ignite and damage the converter and vehicle. Unburned fuel could enter the catalytic converter and once the engine has started . Release the accelerator pedal and the key once the engine is released. Do not attempt to push or tow your vehicle to continue running when the key is running...

Owner's Manual
Page 401
... area immediately with an automatic transmission cannot be sure it started this procedure carefully. Unburned fuel could enter the catalytic converter and once the engine has started, ignite and damage the converter and vehicle. Do not use a booster battery or any other . Battery fluid is raised. You can be overtightened. A battery generates hydrogen gas which is drawn into place against the tire several times to touch each other...
... area immediately with an automatic transmission cannot be sure it started this procedure carefully. Unburned fuel could enter the catalytic converter and once the engine has started, ignite and damage the converter and vehicle. Do not use a booster battery or any other . Battery fluid is raised. You can be overtightened. A battery generates hydrogen gas which is drawn into place against the tire several times to touch each other...

Owner's Manual
Page 408
... Vacuum/Vapor Harnesses ...434 ▫ Fuel System Connections ...435 ▫ Brakes ...435 ▫ Master Cylinder - Brake Fluid Level Check . . 437 ▫ Fuel System Hoses ...438 ▫ Automatic Transmission ...438 ▫ Front And Rear Wheel Bearings ...441 ▫ Appearance Care And Protection From Corrosion ...441 ▫ Cleaning The Instrument Panel And Underseat Cup Holders ...446 Fuses - Integrated Power Module ...448 Vehicle Storage ...451 Replacement Light Bulbs ...451 Bulb Replacement ...452 ▫ Headlights ...452 ▫ Front Park/Turn Signal And Sidemarker Lights...
... Vacuum/Vapor Harnesses ...434 ▫ Fuel System Connections ...435 ▫ Brakes ...435 ▫ Master Cylinder - Brake Fluid Level Check . . 437 ▫ Fuel System Hoses ...438 ▫ Automatic Transmission ...438 ▫ Front And Rear Wheel Bearings ...441 ▫ Appearance Care And Protection From Corrosion ...441 ▫ Cleaning The Instrument Panel And Underseat Cup Holders ...446 Fuses - Integrated Power Module ...448 Vehicle Storage ...451 Replacement Light Bulbs ...451 Bulb Replacement ...452 ▫ Headlights ...452 ▫ Front Park/Turn Signal And Sidemarker Lights...
Owner's Manual
Page 411
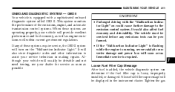
... need towing, see your vehicle will soon occur. Immediate service is required. 7 Loose Fuel Filler Cap Message After fuel is added, the vehicle diagnostic system can be performed. • If the "Malfunction Indicator Light" is flashing while the engine is running, severe catalytic converter damage and power loss will usually be displayed in making repairs. The vehicle must be serviced before any of the emissions, engine, and automatic transmission control systems...
... need towing, see your vehicle will soon occur. Immediate service is required. 7 Loose Fuel Filler Cap Message After fuel is added, the vehicle diagnostic system can be performed. • If the "Malfunction Indicator Light" is flashing while the engine is running, severe catalytic converter damage and power loss will usually be displayed in making repairs. The vehicle must be serviced before any of the emissions, engine, and automatic transmission control systems...
Owner's Manual
Page 424
... lock toward the rear of the car). Remove the access door and pull the filter downward. Power Steering - Fluid Check Checking the power steering fluid level at a defined service interval is found behind the filter access door located under the instrument panel on the bottom of the filter frame with the direction of airflow (away from the blower motor and towards the center of the vehicle (unlock position). Refer to the "Maintenance Schedules...
... lock toward the rear of the car). Remove the access door and pull the filter downward. Power Steering - Fluid Check Checking the power steering fluid level at a defined service interval is found behind the filter access door located under the instrument panel on the bottom of the filter frame with the direction of airflow (away from the blower motor and towards the center of the vehicle (unlock position). Refer to the "Maintenance Schedules...
Owner's Manual
Page 451
... your vehicle dormant for more , run the air conditioning system at idle for service. REPLACEMENT LIGHT BULBS LIGHT BULBS - Interior Bulb Number Center & Rear Dome Light ...578 Center & Rear Reading Lights ...578 Front Door Courtesy Light ...578 Front Header Reading Lights - If Equipped ...578 Instrument Cluster Lights ...PC74 Liftgate Light(s)...578 Overhead Console Reading Lights ...PC579 Removable Console Light - If Equipped ...194 Visor Vanity Lights ...6501966 7 The Power Windows are fused by a 30 Amp circuit breaker located under the instrument panel near the steering column...
... your vehicle dormant for more , run the air conditioning system at idle for service. REPLACEMENT LIGHT BULBS LIGHT BULBS - Interior Bulb Number Center & Rear Dome Light ...578 Center & Rear Reading Lights ...578 Front Door Courtesy Light ...578 Front Header Reading Lights - If Equipped ...578 Instrument Cluster Lights ...PC74 Liftgate Light(s)...578 Overhead Console Reading Lights ...PC579 Removable Console Light - If Equipped ...194 Visor Vanity Lights ...6501966 7 The Power Windows are fused by a 30 Amp circuit breaker located under the instrument panel near the steering column...

Owner's Manual
Page 496
... Schedule "B" ...463 Maintenance, Sunroof ...183 Malfunction Indicator Light (Check Engine) . . 217,412 Manual, Service ...482 Map/Reading Lights ...166 Memory Feature (Memory Seat) ...145 Memory Seat ...97,145 Mini-Trip Computer ...170 Mirrors ...94 Automatic Dimming ...94 Electric Remote ...96 Exterior Folding ...96 Heated ...97 Memory ...145 Outside ...95 Rearview ...94 Vanity ...97 Modifications/Alterations, Vehicle ...7 Monitor, Tire Pressure System ...343 Mopar Parts ...413,481 Multi-Function Control Lever ...154 Navigation Radio...
... Schedule "B" ...463 Maintenance, Sunroof ...183 Malfunction Indicator Light (Check Engine) . . 217,412 Manual, Service ...482 Map/Reading Lights ...166 Memory Feature (Memory Seat) ...145 Memory Seat ...97,145 Mini-Trip Computer ...170 Mirrors ...94 Automatic Dimming ...94 Electric Remote ...96 Exterior Folding ...96 Heated ...97 Memory ...145 Outside ...95 Rearview ...94 Vanity ...97 Modifications/Alterations, Vehicle ...7 Monitor, Tire Pressure System ...343 Mopar Parts ...413,481 Multi-Function Control Lever ...154 Navigation Radio...
Owner's Manual
Page 499
... ...403 Roof Rack (Luggage Rack) ...197 Rotation, Tires ...342 Safety Checks Inside Vehicle ...87 Safety Checks Outside Vehicle ...88 Safety Defects, Reporting ...481 Safety, Exhaust Gas ...42 Safety Information, Tire ...323 Safety Tips ...87 Satellite Radio ...268 Satellite Radio Antenna ...271 Schedule, Maintenance ...460 Seat Belt Maintenance ...446 Seat Belt Reminder ...53,54 Seat Belts ...45 Adjustable Shoulder Belt ...51 Adjustable Upper Shoulder Anchorage ...51 And Pregnant Women ...55 Center Lap Belt ...52 Child Restraint ...73,75 Extender ...55 Front Seat ...46...
... ...403 Roof Rack (Luggage Rack) ...197 Rotation, Tires ...342 Safety Checks Inside Vehicle ...87 Safety Checks Outside Vehicle ...88 Safety Defects, Reporting ...481 Safety, Exhaust Gas ...42 Safety Information, Tire ...323 Safety Tips ...87 Satellite Radio ...268 Satellite Radio Antenna ...271 Schedule, Maintenance ...460 Seat Belt Maintenance ...446 Seat Belt Reminder ...53,54 Seat Belts ...45 Adjustable Shoulder Belt ...51 Adjustable Upper Shoulder Anchorage ...51 And Pregnant Women ...55 Center Lap Belt ...52 Child Restraint ...73,75 Extender ...55 Front Seat ...46...


