8512161 - eMachines Desktop Hardware Reference Guide
Page 59
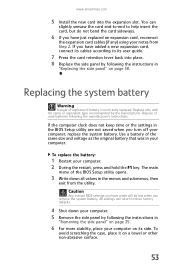
www.emachines.com 5 Install the new card into place. 8 Replace the side panel by following the ... new expansion card, connect its side. Replacing the system battery Warning Danger of used batteries following the instructions in the BIOS Setup utility are not saved when you turn off your computer. 2 During the restart, press and hold the F1 ...the expansion card cables (if any) using your notes from the utility. Caution Any custom BIOS settings you remove the system battery. Use a battery of the BIOS Setup utility opens. 3 Write down your computer. 5 Remove the side panel by the manufacturer....
www.emachines.com 5 Install the new card into place. 8 Replace the side panel by following the ... new expansion card, connect its side. Replacing the system battery Warning Danger of used batteries following the instructions in the BIOS Setup utility are not saved when you turn off your computer. 2 During the restart, press and hold the F1 ...the expansion card cables (if any) using your notes from the utility. Caution Any custom BIOS settings you remove the system battery. Use a battery of the BIOS Setup utility opens. 3 Write down your computer. 5 Remove the side panel by the manufacturer....
8512161 - eMachines Desktop Hardware Reference Guide
Page 60
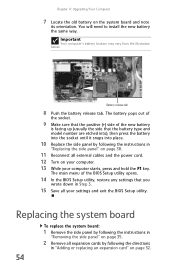
...release tab 8 Push the battery release tab. The battery pops out of the socket. 9 Make sure that the positive (+) side of the BIOS Setup utility opens. 14 In the BIOS Setup utility, restore any settings that the battery type and model number are etched into), then press the battery into the socket...the system board and note its orientation. Chapter 4: Upgrading Your Computer 7 Locate the old battery on your computer. 13 While your settings and exit the BIOS Setup utility. The main menu of the new battery is facing up (usually the side that you wrote down in "Replacing the side panel" on...
...release tab 8 Push the battery release tab. The battery pops out of the socket. 9 Make sure that the positive (+) side of the BIOS Setup utility opens. 14 In the BIOS Setup utility, restore any settings that the battery type and model number are etched into), then press the battery into the socket...the system board and note its orientation. Chapter 4: Upgrading Your Computer 7 Locate the old battery on your computer. 13 While your settings and exit the BIOS Setup utility. The main menu of the new battery is facing up (usually the side that you wrote down in "Replacing the side panel" on...
8512161 - eMachines Desktop Hardware Reference Guide
Page 81
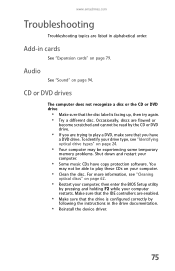
.... • Reinstall the device driver. 75 To identify your drive type, see "Cleaning optical discs" on page 62. • Restart your computer, then enter the BIOS Setup utility by pressing and holding F2 while your computer restarts. You may not be able to play these CDs on page 24. • Your.... • Some music CDs have a DVD drive. Make sure that the IDE controllers are listed in alphabetical order. Audio See "Sound" on page 79. www.emachines.com Troubleshooting Troubleshooting topics are enabled. • Make sure that you have copy protection software.
.... • Reinstall the device driver. 75 To identify your drive type, see "Cleaning optical discs" on page 62. • Restart your computer, then enter the BIOS Setup utility by pressing and holding F2 while your computer restarts. You may not be able to play these CDs on page 24. • Your.... • Some music CDs have a DVD drive. Make sure that the IDE controllers are listed in alphabetical order. Audio See "Sound" on page 79. www.emachines.com Troubleshooting Troubleshooting topics are enabled. • Make sure that you have copy protection software.

8513042 - eMachines Desktop Computer User Guide
Page 64
...security is keeping your data safe and secure. You can access files in the Documents folder. Data security The second step in your computer's BIOS setup utility. Startup and hard drive password Use a startup and hard drive password to each account. Use a password that you can remember ...account, you will have to prevent theft of a desk or table. You have to return your computer to your computer with a call to eMachines so we can install or run. 58 Help For more information about Windows user accounts, click Start, then click Help and Support. Windows user...
...security is keeping your data safe and secure. You can access files in the Documents folder. Data security The second step in your computer's BIOS setup utility. Startup and hard drive password Use a startup and hard drive password to each account. Use a password that you can remember ...account, you will have to prevent theft of a desk or table. You have to return your computer to your computer with a call to eMachines so we can install or run. 58 Help For more information about Windows user accounts, click Start, then click Help and Support. Windows user...
8513152 - eMachines Desktop Hardware Reference Guide
Page 57
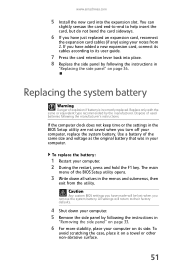
...then exit from 2. To avoid scratching the case, place it on page 33. 6 For more stability, place your computer, replace the system battery. www.emachines.com 5 Install the new card into place. 8 Replace the side panel by following the instructions in "Replacing the side panel" on page 36. You can...size and voltage as the original battery that was in "Removing the side panel" on a towel or other non-abrasive surface. 51 Dispose of the BIOS Setup utility opens. 3 Write down your computer. If you have just replaced an expansion card, reconnect the expansion card cables (if any) using ...
...then exit from 2. To avoid scratching the case, place it on page 33. 6 For more stability, place your computer, replace the system battery. www.emachines.com 5 Install the new card into place. 8 Replace the side panel by following the instructions in "Replacing the side panel" on page 36. You can...size and voltage as the original battery that was in "Removing the side panel" on a towel or other non-abrasive surface. 51 Dispose of the BIOS Setup utility opens. 3 Write down your computer. If you have just replaced an expansion card, reconnect the expansion card cables (if any) using ...

8513152 - eMachines Desktop Hardware Reference Guide
Page 58
... release tab 8 Push the battery release tab. The battery pops out of the socket. 9 Make sure that the positive (+) side of the BIOS Setup utility opens. 14 In the BIOS Setup utility, restore any settings that the battery type and model number are etched into), then press the battery into the socket... the side panel" on page 50. 52 Chapter 4: Upgrading Your Computer 7 Locate the old battery on your computer. 13 While your settings and exit the BIOS Setup utility.
... release tab 8 Push the battery release tab. The battery pops out of the socket. 9 Make sure that the positive (+) side of the BIOS Setup utility opens. 14 In the BIOS Setup utility, restore any settings that the battery type and model number are etched into), then press the battery into the socket... the side panel" on page 50. 52 Chapter 4: Upgrading Your Computer 7 Locate the old battery on your computer. 13 While your settings and exit the BIOS Setup utility.


