

User Guide
Page 5
About This User's Guide Disclaimer Graphics in this manual is accurate. Every effort has been made to differences in this book may differ slightly from the product due to ensure that the information in operating systems, operating system versions, or if you installed updated firmware/software for your device. P-793H v2 User's Guide 5
About This User's Guide Disclaimer Graphics in this manual is accurate. Every effort has been made to differences in this book may differ slightly from the product due to ensure that the information in operating systems, operating system versions, or if you installed updated firmware/software for your device. P-793H v2 User's Guide 5

User Guide
Page 10
Contents Overview Firmware and Configuration File Maintenance 387 Menus 24.8 to 24.11 ...403 Schedule Setup ...411 Troubleshooting ...415 10 P-793H v2 User's Guide
Contents Overview Firmware and Configuration File Maintenance 387 Menus 24.8 to 24.11 ...403 Schedule Setup ...411 Troubleshooting ...415 10 P-793H v2 User's Guide

User Guide
Page 17
... in the Tool Screens 283 21.1.2 What You Need To Know About Tools 284 21.1.3 Before You Begin 285 21.1.4 Tool Examples ...285 21.2 The Firmware Screen ...291 21.3 The Configuration Screen 293 21.4 The Restart Screen ...295...
... in the Tool Screens 283 21.1.2 What You Need To Know About Tools 284 21.1.3 Before You Begin 285 21.1.4 Tool Examples ...285 21.2 The Firmware Screen ...291 21.3 The Configuration Screen 293 21.4 The Restart Screen ...295...

User Guide
Page 20
...34.4.1 Viewing Error Log 379 34.4.2 Syslog Logging ...381 34.5 Diagnostic ...384 Chapter 35 Firmware and Configuration File Maintenance 387 35.1 Introduction ...387 35.2 Filename Conventions ...387 35.3 Backup...Session Example 395 35.4.3 Restore Via Console Port 395 35.5 Uploading Firmware and Configuration Files 396 35.5.1 Firmware File Upload 396 35.5.2 Configuration File Upload 397 35.5.3 FTP File... 35.5.7 Uploading Via Console Port 400 35.5.8 Uploading Firmware File Via Console Port 400 35.5.9 Example Xmodem Firmware Upload Using HyperTerminal 401 35.5.10 Uploading Configuration File...
...34.4.1 Viewing Error Log 379 34.4.2 Syslog Logging ...381 34.5 Diagnostic ...384 Chapter 35 Firmware and Configuration File Maintenance 387 35.1 Introduction ...387 35.2 Filename Conventions ...387 35.3 Backup...Session Example 395 35.4.3 Restore Via Console Port 395 35.5 Uploading Firmware and Configuration Files 396 35.5.1 Firmware File Upload 396 35.5.2 Configuration File Upload 397 35.5.3 FTP File... 35.5.7 Uploading Via Console Port 400 35.5.8 Uploading Firmware File Via Console Port 400 35.5.9 Example Xmodem Firmware Upload Using HyperTerminal 401 35.5.10 Uploading Configuration File...

User Guide
Page 25
... Maintenance > Logs > Log Settings 271 Figure 120 E-mail Log Example ...274 Figure 121 Restore Using FTP Session Example 286 Figure 122 FTP Session Example of Firmware File Upload 287 Figure 123 FTP Session Example ...289 Figure 124 Maintenance > Tools...
... Maintenance > Logs > Log Settings 271 Figure 120 E-mail Log Example ...274 Figure 121 Restore Using FTP Session Example 286 Figure 122 FTP Session Example of Firmware File Upload 287 Figure 123 FTP Session Example ...289 Figure 124 Maintenance > Tools...

User Guide
Page 26
List of Figures Figure 125 Firmware Upload In Progress 292 Figure 126 Network Temporarily Disconnected 292 Figure 127 Error Message ...292 Figure 128 Maintenance > Tools > Configuration 293 Figure 129 Configuration Upload ... Mapping Rule 344 Figure 165 Menu 15.2: NAT Server Sets 345 Figure 166 Menu 15.2: NAT Server Setup 346 Figure 167 NAT Example 1 ...347 26 P-793H v2 User's Guide
List of Figures Figure 125 Firmware Upload In Progress 292 Figure 126 Network Temporarily Disconnected 292 Figure 127 Error Message ...292 Figure 128 Maintenance > Tools > Configuration 293 Figure 129 Configuration Upload ... Mapping Rule 344 Figure 165 Menu 15.2: NAT Server Sets 345 Figure 166 Menu 15.2: NAT Server Setup 346 Figure 167 NAT Example 1 ...347 26 P-793H v2 User's Guide

User Guide
Page 28
Upload System Firmware 397 Figure 217 Menu 24.7.2: System Maintenance - Upload System Configuration File 397 Figure 218 FTP Session Example ... Screen 396 Figure 216 Menu 24.7.1: System Maintenance - Time and Date Setting 407 Figure 229 Menu 24.11 - List of Firmware File Upload 398 Figure 219 Menu 24.7.1 As Seen Using the Console Port 400 Figure 220 Example Xmodem Upload 401 Figure 221 Menu...252 Windows Vista: Internet Protocol Version 4 (TCP/IPv4) Properties 443 Figure 253 Macintosh OS 8/9: Apple Menu 444 28 P-793H v2 User's Guide Call Control 405 Figure 226 Menu 24.9.1 -
Upload System Firmware 397 Figure 217 Menu 24.7.2: System Maintenance - Upload System Configuration File 397 Figure 218 FTP Session Example ... Screen 396 Figure 216 Menu 24.7.1: System Maintenance - Time and Date Setting 407 Figure 229 Menu 24.11 - List of Firmware File Upload 398 Figure 219 Menu 24.7.1 As Seen Using the Console Port 400 Figure 220 Example Xmodem Upload 401 Figure 221 Menu...252 Windows Vista: Internet Protocol Version 4 (TCP/IPv4) Properties 443 Figure 253 Macintosh OS 8/9: Apple Menu 444 28 P-793H v2 User's Guide Call Control 405 Figure 226 Menu 24.9.1 -

User Guide
Page 33
... ...284 Table 100 General Commands for GUI-based FTP Clients 289 Table 101 General Commands for GUI-based TFTP Clients 290 Table 102 Maintenance > Tools > Firmware 291 Table 103 Restore Configuration ...293 Table 104 Maintenance > Diagnostic > General 298 Table 105 Maintenance > Diagnostic > DSL Line 299 Table 106 Main Menu Summary ...302... 122 Menu 12.1.1: Edit IP Static Route 336 Table 123 Menu 12.3.1: Edit Bridge Static Route 337 Table 124 Applying NAT in Menus 4 & 11.3 341 P-793H v2 User's Guide 33
... ...284 Table 100 General Commands for GUI-based FTP Clients 289 Table 101 General Commands for GUI-based TFTP Clients 290 Table 102 Maintenance > Tools > Firmware 291 Table 103 Restore Configuration ...293 Table 104 Maintenance > Diagnostic > General 298 Table 105 Maintenance > Diagnostic > DSL Line 299 Table 106 Main Menu Summary ...302... 122 Menu 12.1.1: Edit IP Static Route 336 Table 123 Menu 12.3.1: Edit Bridge Static Route 337 Table 124 Applying NAT in Menus 4 & 11.3 341 P-793H v2 User's Guide 33
User Guide
Page 34
... GUI-based TFTP Clients 392 Table 140 Menu 24.9.1 - Information 378 Table 135 Menu 24.3.2: System Maintenance - List of Services ...474 34 P-793H v2 User's Guide UNIX Syslog 381 Table 136 Menu 24.4: System Maintenance - Remote Management Control 409 Table 143 Menu 26: Schedule Setup 412 Table... 144 Menu 26.1: Schedule Set Setup 413 Table 145 Device ...421 Table 146 Firmware ...422 Table 147 Firmware Features ...425 Table 148 Subnet Masks ...464 Table 149 Subnet Masks ...465 Table 150 Maximum Host Numbers ...465 Table 151 Alternative ...
... GUI-based TFTP Clients 392 Table 140 Menu 24.9.1 - Information 378 Table 135 Menu 24.3.2: System Maintenance - List of Services ...474 34 P-793H v2 User's Guide UNIX Syslog 381 Table 136 Menu 24.4: System Maintenance - Remote Management Control 409 Table 143 Menu 26: Schedule Setup 412 Table... 144 Menu 26.1: Schedule Set Setup 413 Table 145 Device ...421 Table 146 Firmware ...422 Table 147 Firmware Features ...425 Table 148 Subnet Masks ...464 Table 149 Subnet Masks ...465 Table 150 Maximum Host Numbers ...465 Table 151 Alternative ...

User Guide
Page 39
... can be managed by service engineers. See Chapter 23 on page 243. • SNMP. P-793H v2 User's Guide 39 See Chapter 17 on page 301. • FTP. This is recommended for firmware upgrades and configuration backup/ restore. See Appendix H on page 243. • TR-069.... See Chapter 17 on page 471. • SMT. Use File Transfer Protocol for everyday management of the following methods to -2points Connections with Your P-793H v2 Note: See Chapter...
... can be managed by service engineers. See Chapter 23 on page 243. • SNMP. P-793H v2 User's Guide 39 See Chapter 17 on page 301. • FTP. This is recommended for firmware upgrades and configuration backup/ restore. See Appendix H on page 243. • TR-069.... See Chapter 17 on page 471. • SMT. Use File Transfer Protocol for everyday management of the following methods to -2points Connections with Your P-793H v2 Note: See Chapter...

User Guide
Page 49
... Line These screen displays information to help you log in the rest of this screen to test the connections to other devices. P-793H v2 User's Guide 49 Right after you identify problems with the DSL connection. 2.3.3 Main Window The main window displays information and... configuration fields. Configuration Use this screen to upload firmware to your P-793H v2's configuration (settings) or reset the factory default settings. It is discussed in , the Status screen is displayed. Chapter 2...
... Line These screen displays information to help you log in the rest of this screen to test the connections to other devices. P-793H v2 User's Guide 49 Right after you identify problems with the DSL connection. 2.3.3 Main Window The main window displays information and... configuration fields. Configuration Use this screen to upload firmware to your P-793H v2's configuration (settings) or reset the factory default settings. It is discussed in , the Status screen is displayed. Chapter 2...

User Guide
Page 52
.... Choices are: Server - Security Firewall Click this to go to your P-793H v2. Device Information Host Name This field displays the P-793H v2 system name. ZyNOS Firmware Version This is the current version of the P-793H v2 in the WAN. LAN Information IP Address This is the current IP ... is providing to other computers in the LAN. It assigns IP addresses to the LAN. DSL Firmware Version This is the current version of the P-793H v2 in the LAN. IP Subnet Mask This is the current subnet mask in the LAN. Click this screen. MAC Address ...
.... Choices are: Server - Security Firewall Click this to go to your P-793H v2. Device Information Host Name This field displays the P-793H v2 system name. ZyNOS Firmware Version This is the current version of the P-793H v2 in the WAN. LAN Information IP Address This is the current IP ... is providing to other computers in the LAN. It assigns IP addresses to the LAN. DSL Firmware Version This is the current version of the P-793H v2 in the LAN. IP Subnet Mask This is the current subnet mask in the LAN. Click this screen. MAC Address ...

User Guide
Page 243
... communicate IP with the IP address that service for details. Select All to allow the computer with the P-793H v2 using this to upload and download the P-793H v2's firmware and configuration files. Use this service. Secured Client A secured client is a "trusted" computer that is ...allowed to access the P-793H v2 using this service. Please see the User's Guide chapter on firmware and configuration file maintenance for remote management. To use that you must have an FTP client. Apply ...
... communicate IP with the IP address that service for details. Select All to allow the computer with the P-793H v2 using this to upload and download the P-793H v2's firmware and configuration files. Use this service. Secured Client A secured client is a "trusted" computer that is ...allowed to access the P-793H v2 using this service. Please see the User's Guide chapter on firmware and configuration file maintenance for remote management. To use that you must have an FTP client. Apply ...
User Guide
Page 283
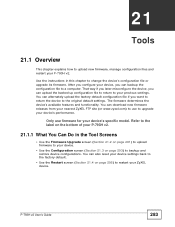
...computer. After you configure your device, you can download new firmware releases from your nearest ZyXEL FTP site (or www.zyxel.com) to use firmware for your device. • Use the Configuration screen (Section 21.3 on the bottom of your P-793H v2. 21.1.1 What You Can Do in this chapter ...to your device's performance. Only use to restart your P-793H v2. P-793H v2 User's Guide 283 You can backup the configuration file to upload new firmware, manage configuration files and restart your ZyXEL device. You can upload the backed up configuration file to return to ...
...computer. After you configure your device, you can download new firmware releases from your nearest ZyXEL FTP site (or www.zyxel.com) to use firmware for your device. • Use the Configuration screen (Section 21.3 on the bottom of your P-793H v2. 21.1.1 What You Can Do in this chapter ...to your device's performance. Only use to restart your P-793H v2. P-793H v2 User's Guide 283 You can backup the configuration file to upload new firmware, manage configuration files and restart your ZyXEL device. You can upload the backed up configuration file to return to ...

User Guide
Page 284
... as password, DHCP Setup, TCP/IP Setup, etc. It arrives from ZyXEL with a "rom" filename extension. ftp> put firmware.bin ras This is the configuration filename on the P793H v2. ZyNOS (ZyXEL Network Operating System sometimes referred to rename them as the P-793H v2 only recognizes "rom-0" and "ras". Chapter 21 Tools 21.1.2 What...
... as password, DHCP Setup, TCP/IP Setup, etc. It arrives from ZyXEL with a "rom" filename extension. ftp> put firmware.bin ras This is the configuration filename on the P793H v2. ZyNOS (ZyXEL Network Operating System sometimes referred to rename them as the P-793H v2 only recognizes "rom-0" and "ras". Chapter 21 Tools 21.1.2 What...

User Guide
Page 286
...device and renames it "rom-0". The following sections give examples of your device. 3 Press [ENTER] when prompted for example, "put firmware.bin ras" transfers the firmware on your computer and renames it "ras". FTP File Upload Command from the computer to the device, for a username. 4 Enter ... and the IP address of how to exit the ftp prompt. 286 P-793H v2 User's Guide Likewise "get rom-0 config.rom" transfers the configuration file on filename conventions. 7 Enter "quit" to upload the firmware and the configuration files. ftp>quit Refer to Section 21.1.2 on page 284...
...device and renames it "rom-0". The following sections give examples of your device. 3 Press [ENTER] when prompted for example, "put firmware.bin ras" transfers the firmware on your computer and renames it "ras". FTP File Upload Command from the computer to the device, for a username. 4 Enter ... and the IP address of how to exit the ftp prompt. 286 P-793H v2 User's Guide Likewise "get rom-0 config.rom" transfers the configuration file on filename conventions. 7 Enter "quit" to upload the firmware and the configuration files. ftp>quit Refer to Section 21.1.2 on page 284...

User Guide
Page 287
...IP address of the telnet client and accepts TFTP requests only from your TFTP client program. To use TFTP, your computer must be interrupted. For P-793H v2 User's Guide 287 Refer to Section 21.1.2 on page 284 to the device. Enter "command sys stdio 5" to restore the five-minute ... management idle timeout, so the TFTP transfer will not be active and the device in 1.10Seconds 297.89Kbytes/sec. FTP Session Example of Firmware File Upload Figure 122 FTP Session Example of Firmware File Upload 331 Enter PASS command Password: 230 Logged in ftp> bin 200 Type I OK ftp> put...
...IP address of the telnet client and accepts TFTP requests only from your TFTP client program. To use TFTP, your computer must be interrupted. For P-793H v2 User's Guide 287 Refer to Section 21.1.2 on page 284 to the device. Enter "command sys stdio 5" to restore the five-minute ... management idle timeout, so the TFTP transfer will not be active and the device in 1.10Seconds 297.89Kbytes/sec. FTP Session Example of Firmware File Upload Figure 122 FTP Session Example of Firmware File Upload 331 Enter PASS command Password: 230 Logged in ftp> bin 200 Type I OK ftp> put...

User Guide
Page 288
... is "1234"). 5 Enter "bin" to set transfer mode to binary. 6 Use "get" to transfer files from the P-793H v2 to the computer, for more information on the computer (firmware.bin - Chapter 21 Tools UNIX, use this chapter. Commands that you may see in GUI-based TFTP clients are listed...(ras - TFTP Upload Command Example The following is the device's IP address, "put firmware.bin ras Where "i" specifies binary image transfer mode (use "get rom-0 config.rom" transfers the configuration file on the P-793H v2 to set binary transfer mode. Using the FTP Commands to exit the ftp prompt....
... is "1234"). 5 Enter "bin" to set transfer mode to binary. 6 Use "get" to transfer files from the P-793H v2 to the computer, for more information on the computer (firmware.bin - Chapter 21 Tools UNIX, use this chapter. Commands that you may see in GUI-based TFTP clients are listed...(ras - TFTP Upload Command Example The following is the device's IP address, "put firmware.bin ras Where "i" specifies binary image transfer mode (use "get rom-0 config.rom" transfers the configuration file on the P-793H v2 to set binary transfer mode. Using the FTP Commands to exit the ftp prompt....

User Guide
Page 289
... received OK ftp: 16384 bytes sent in ftp> bin 200 Type I .D. and password is when a user I OK ftp> get rom-0 zyxel.rom 200 Port command okay 150 Opening data connection for GUI-based FTP Clients COMMAND DESCRIPTION Host Address Enter the address of the host server... User's Guide 289 Specify the default local directory (path). Login Type Anonymous. Normal. Backup Configuration Using TFTP The P-793H v2 supports the up/downloading of the firmware and the configuration file using FTP commands from the DOS command prompt to login. Figure 123 FTP Session Example 331 Enter...
... received OK ftp: 16384 bytes sent in ftp> bin 200 Type I .D. and password is when a user I OK ftp> get rom-0 zyxel.rom 200 Port command okay 150 Opening data connection for GUI-based FTP Clients COMMAND DESCRIPTION Host Address Enter the address of the host server... User's Guide 289 Specify the default local directory (path). Login Type Anonymous. Normal. Backup Configuration Using TFTP The P-793H v2 supports the up/downloading of the firmware and the configuration file using FTP commands from the DOS command prompt to login. Figure 123 FTP Session Example 331 Enter...

User Guide
Page 290
...: tftp [-i] host get " transfers the file source on the P-793H v2 (rom-0, name of the firmware file (*.bin extension) or configuration file (*.rom extension) on the computer and renames it config.rom. For details on the P-793H v2. Table 101 General Commands for the configuration file is complete.... 3 Launch the TFTP client on your TFTP client program. The filename for the firmware is "ras" and for the configuration file, is the P-793H v2 IP address, "get rom-0 config.rom where "i" specifies binary image transfer mode (use "get" to ...
...: tftp [-i] host get " transfers the file source on the P-793H v2 (rom-0, name of the firmware file (*.bin extension) or configuration file (*.rom extension) on the computer and renames it config.rom. For details on the P-793H v2. Table 101 General Commands for the configuration file is complete.... 3 Launch the TFTP client on your TFTP client program. The filename for the firmware is "ras" and for the configuration file, is the P-793H v2 IP address, "get rom-0 config.rom where "i" specifies binary image transfer mode (use "get" to ...


