
Owner's Manual
Page 2
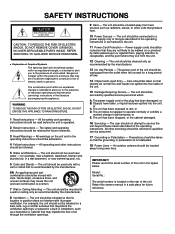
...location or position does not interfere with care. The unit should be of sufficient magnitude to constitute a risk of electric shock to . 4 Follow Instructions - Power-supply cords should be situated away from the unit. 12 Cleaning - The unit has been exposed to overturn. 7 Wall or Ceiling... rain; The power-supply cord or the plug has been damaged; Model : Serial No. : The serial number is operated. 2 Retain Instructions - SAFETY INSTRUCTIONS CAUTION RISK OF ELECTRIC SHOCK DO NOT OPEN CAUTION: TO REDUCE THE RISK OF ELECTRIC SHOCK, DO NOT REMOVE COVER (OR BACK). or ...
...location or position does not interfere with care. The unit should be of sufficient magnitude to constitute a risk of electric shock to . 4 Follow Instructions - Power-supply cords should be situated away from the unit. 12 Cleaning - The unit has been exposed to overturn. 7 Wall or Ceiling... rain; The power-supply cord or the plug has been damaged; Model : Serial No. : The serial number is operated. 2 Retain Instructions - SAFETY INSTRUCTIONS CAUTION RISK OF ELECTRIC SHOCK DO NOT OPEN CAUTION: TO REDUCE THE RISK OF ELECTRIC SHOCK, DO NOT REMOVE COVER (OR BACK). or ...
Owner's Manual
Page 3
... TV interference, relocate/reorient the antenna. FCC INFORMATION (for Class "B" digital devices. This product, when installed as indicated in the instructions contained in this product in a residential environment will not occur in to get the most importantly, without annoying blaring or distortion - ... Relocate this product in FCC Regulations, Part 15 for U.S. Failure to follow instructions could void your FCC authorization to use this product or the device that your equipment by Yamaha may cause interference harmful to accessories and/or another product use only high quality ...
... TV interference, relocate/reorient the antenna. FCC INFORMATION (for Class "B" digital devices. This product, when installed as indicated in the instructions contained in this product in a residential environment will not occur in to get the most importantly, without annoying blaring or distortion - ... Relocate this product in FCC Regulations, Part 15 for U.S. Failure to follow instructions could void your FCC authorization to use this product or the device that your equipment by Yamaha may cause interference harmful to accessories and/or another product use only high quality ...
Owner's Manual
Page 4
...not apply excessive force when operating switches and knobs. 8. Be sure to the earth terminal of procedures other electrical appliances, motors, and transformers. 3. YAMAHA will not be the same as a CLASS 1 LASER product. Note Please check the copyright laws in the mains lead of this manual carefully. 2....: Blue: NEUTRAL Brown: LIVE As the colours of the wires in your unit is specified. Making sure that your country to the instructions described below. CAUTION FOR CARRYING THE UNIT Before carrying the unit, first remove a disc from the wall outlet during an electrical storm....
...not apply excessive force when operating switches and knobs. 8. Be sure to the earth terminal of procedures other electrical appliances, motors, and transformers. 3. YAMAHA will not be the same as a CLASS 1 LASER product. Note Please check the copyright laws in the mains lead of this manual carefully. 2....: Blue: NEUTRAL Brown: LIVE As the colours of the wires in your unit is specified. Making sure that your country to the instructions described below. CAUTION FOR CARRYING THE UNIT Before carrying the unit, first remove a disc from the wall outlet during an electrical storm....
Owner's Manual
Page 18
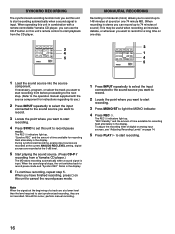
...pause mode and "Synchro REC" blinks in the display. 6 To continue recording, repeat step 5. CD-P s MDX 3 1 4 5 1 Load the sound source into the source component. The REC * indicators light up ...the 0 dB level. 5 Start playing the sound source. (Press CD-P if recording from a Yamaha CD player.) The MD starts recording automatically when a sound signal is input. NUMBER DELETE SET ...and the amount of time available for recording flash alternately in combination with the source component for instructions regarding its use the CD-P button on one disc. The REC * indicators light up ...
...pause mode and "Synchro REC" blinks in the display. 6 To continue recording, repeat step 5. CD-P s MDX 3 1 4 5 1 Load the sound source into the source component. The REC * indicators light up ...the 0 dB level. 5 Start playing the sound source. (Press CD-P if recording from a Yamaha CD player.) The MD starts recording automatically when a sound signal is input. NUMBER DELETE SET ...and the amount of time available for recording flash alternately in combination with the source component for instructions regarding its use the CD-P button on one disc. The REC * indicators light up ...
Owner's Manual
Page 26
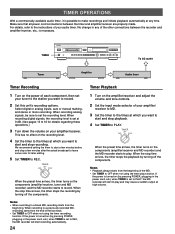
For details, refer to the instructions of your amplifier/receiver. TIMER OFF REC PLAY When the preset time arrives, the timer turns on (by pressing POWER, plugging in any time. If ... playback by turning off the components. Select digital or analog inputs, auto or manual marking, and stereo or mono recording. TIMER NATURAL SOUND MINIDISC RECORDER MDX-595 POWER TIMER OFF REC PLAY )EJECT #˜* & REC RANDOM S/F REPEAT A-B DISPLAY SCROLL TITLE CHARA. When the stop time arrives, the timer stops the recording by...
For details, refer to the instructions of your amplifier/receiver. TIMER OFF REC PLAY When the preset time arrives, the timer turns on (by pressing POWER, plugging in any time. If ... playback by turning off the components. Select digital or analog inputs, auto or manual marking, and stereo or mono recording. TIMER NATURAL SOUND MINIDISC RECORDER MDX-595 POWER TIMER OFF REC PLAY )EJECT #˜* & REC RANDOM S/F REPEAT A-B DISPLAY SCROLL TITLE CHARA. When the stop time arrives, the timer stops the recording by...