Whirlpool WMMF7330RV Support and Manuals
Get Help and Manuals for this Whirlpool item
View All Support Options Below
Free Whirlpool WMMF7330RV manuals!
Problems with Whirlpool WMMF7330RV?
Ask a Question
Free Whirlpool WMMF7330RV manuals!
Problems with Whirlpool WMMF7330RV?
Ask a Question
Popular Whirlpool WMMF7330RV Manual Pages
Bump Out Kit Installation Instructions - Page 1
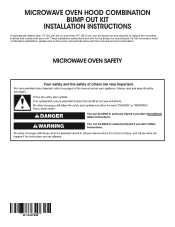
....6 cm), use the bump out mounting kit to the owner manual that comes with the microwave hood combination. MICROWAVE OVEN HOOD COMBINATION BUMP OUT KIT
INSTALLATION INSTRUCTIONS
If cabinets are only for the Bump out mounting kit, for full microwave hood combination installation, please refer to replace the mounting bracket that came with your unit.
Bump Out Kit Installation Instructions - Page 3
... depth
1
cabinet
Bump Out Kit Installation Instruction
Installation Instruction
1
Keep the mounting plate and ...Installation Only:
■ If you are not designed to Round Transition" illustration in the Bump Out Mounting Kit)
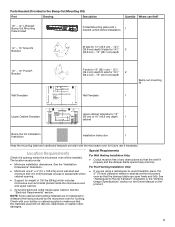
Part
Drawing
Description
Quantity Where can open freely and fully. Parts Needed (Provided in the "Venting Design Specifications" section on the Owner Manual...
Bump Out Kit Installation Instructions - Page 4

...) recommended 66" (167.6 cm) minimum G. Upper cabinet depth (with door) 13" (33 cm) to 40 cm)
4 Installation Dimensions
NOTE: The grounded 3 prong outlet must be inside the upper cabinet. A
B
C
G
E
D
F
Product Dimensions
B...Manual on type of range/cooktop below.
*36" (91.4 cm) is recommended for 72" (182.8 cm) installation height.
**30" (76.2 cm) is typical for 66" (167.6 cm) installation...
Owners Manual - Page 2
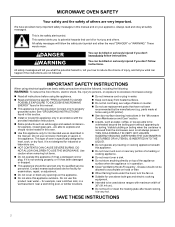
... has been damaged or dropped.
� This appliance should not be serviced only by the manufacturer (e.g. for industrial or laboratory use replacement parts that can kill or hurt you what can be killed or seriously injured if you don't immediately follow instructions. THIS COULD RESULT IN VERY HOT LIQUIDS SUDDENLY BOILING OVER WHEN THE...
Owners Manual - Page 3
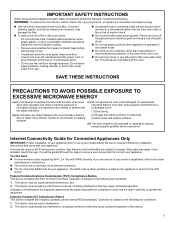
... Will Need: � A home wireless router supporting Wi-Fi, 2.4 Ghz with Part 15 of your responsibility. This will be guided through the steps to set up a user account and to accumulate on and have a live internet connection. � The 10-character SAID code for Connected Appliances Only
IMPORTANT: Proper installation of the FCC Rules. App features...
Owners Manual - Page 6
...manual clean if necessary.
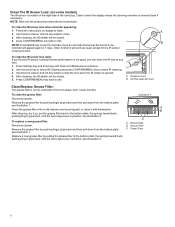
Clean The IR Sensor Lens: (on some models)
The IR sensor is on the underside of the cavity top. Other functions will appear again in position, see illustration 1. Press Settings key and arrow key until the two tongues are in position, see illustration 1. To replace...Replace a new grease filter by putting the grease filter to idle. Follow the instructions ...
Owners Manual - Page 7
...replacing the charcoal filter, to reset. NOTE: For roof venting and wall venting, the charcoal filter is behind the grease filter.
See the "Venting Design Specifications" section.
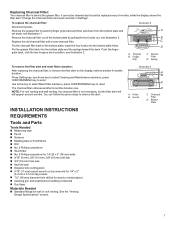
INSTALLATION INSTRUCTIONS
REQUIREMENTS
Tools and Parts...Put the grease filter back into the bottom plate holes. Press Setting key, use Arrow key to select Cleaning and Maintenance submenu, ...
Owners Manual - Page 9
... may require additional
parts.
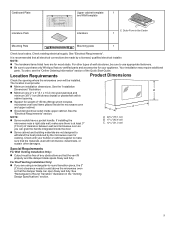
If installing the microwave near a right side wall, make sure that the damper blade can grab the handle integrated inside upper cabinet.
For other damages. Cardboard Plate Literature Pack
Upper cabinet template and Wall template
Literature
1
C
C. Outer Form in the "Venting Design Specifications" section.
9 See "Electrical Requirements...
Owners Manual - Page 11
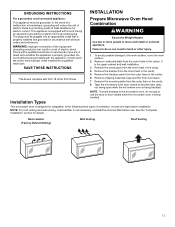
... plug provided with Part 18 of electric shock by a qualified electrician. SAVE THESE INSTRUCTIONS
This device complies...Setting)
Wall Venting
Roof Venting
11 In the event of a malfunction or breakdown, grounding will not fit the outlet, have a proper outlet installed by providing a path of the equipmentgrounding conductor can result in the cavity. 5. GROUNDING INSTRUCTIONS
INSTALLATION...
Owners Manual - Page 12
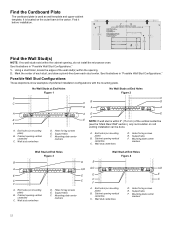
...cm) of the wall stud(s) within the cabinet opening . 2. Cabinet opening vertical centerline
C. Support tabs F.
End holes (on mounting plate)
B. It is used as wall template and ...studs exist within the opening , do not install the microwave oven. Support tabs F. Holes for lag screws E. End holes (on mounting plate)
B. Support tabs F. Find the Cardboard Plate
The ...
Owners Manual - Page 17
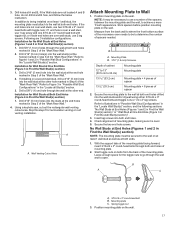
... not drill A and B hole, and follow the below instruction. Secure the mounting plate to the wall on the wall.... spacer
2. Leave enough space for recirculation venting or roof venting installation. Drill a 3/16" (5 mm) hole into the wall stud... at both end holes marked in Find the Wall Stud(s) section) 1. With the support tabs of the "Mark Rear Wall."
4.
B
A
C
A. 3/16-24 x...
Owners Manual - Page 18
...head bolt through the wall and to make sure toggle nuts have opened against drywall. With the support tabs of "Installation for No Wall Studs at One End Hole" in the "Drill Holes in Find the Wall...bolt to open.
3. And follow the propriated instruction to go through the end hole that fits over the 5/8" (16 mm) hole drilled in step 3 of "Installation for Wall Stud at End Holes" in the...
Owners Manual - Page 19

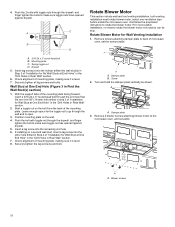
...Exhaust Port 9.
A
B
A. Holes
19
Connector
10. 4. A B
A. Blower motor wire
B
A
B
A.
A
A. A
A. A B
A. Screws B. Exhaust ports face the back of microwave oven, and set aside. Lift blower motor out of the microwave oven. Rectangular damper vent cover
7.
Lower blower motor back into the connector. Blower motor
6. Using diagonal wire ...
Owners Manual - Page 22
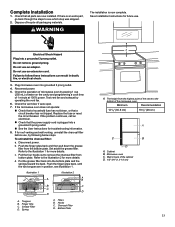
... screws.
The blocks must be added.
Then tighten with at least one
person holding it on support tabs at most hardware stores.
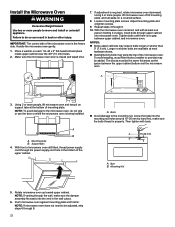
� Overtightening bolts may require bolts longer or shorter than ... top of mounting plate, and set aside on each 1/4-20 x 3" flat-head bolt and place
inside upper cabinet near the 3/8" (10 mm) holes. 2. Install the Microwave Oven
WARNING
Excessive Weight...
Owners Manual - Page 23
... the charcoal filter:
a. Tongues B. Cabinet B. Illustration 1
Illustration 2
A
A B
B
C
C
D
D
A.
b. Set aside the grease filter. Put the grease filter back into a grounded 3 prong outlet.
� See the User Instructions for more details. Push the finger grips back, until the two tongues are now installed. Replace the fuse or reset the circuit breaker.
Whirlpool WMMF7330RV Reviews
We have not received any reviews for Whirlpool yet.