Use and Care Guide
Page 2
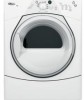
... many important safety messages in this manual and on your appliance. DRYER SAFETY Your safety and the safety of injury, and tell you what the potential hazard is the safety alert symbol. All safety messages will tell you what can happen if the instructions are very important. This symbol alerts...of others . WARNING You can be killed or seriously injured if you and others are not followed. 2 All safety messages will follow instructions. Always read and obey all safety messages. This is , tell you how to potential hazards that can kill or hurt you don't follow...
... many important safety messages in this manual and on your appliance. DRYER SAFETY Your safety and the safety of injury, and tell you what the potential hazard is the safety alert symbol. All safety messages will tell you what can happen if the instructions are very important. This symbol alerts...of others . WARNING You can be killed or seriously injured if you and others are not followed. 2 All safety messages will follow instructions. Always read and obey all safety messages. This is , tell you how to potential hazards that can kill or hurt you don't follow...

Use and Care Guide
Page 3
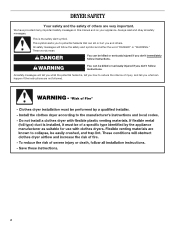
... TO DO IF YOU SMELL GAS: • Do not try to light any appliance. • Do not touch any other appliance. - Installation and service must be electrically grounded in accordance with local codes, or in this or any electrical switch; Gas suppliers recommend that you use a gas detector approved by a qualified installer, service agency, or the gas supplier. WARNING: Gas leaks cannot always be performed...
... TO DO IF YOU SMELL GAS: • Do not try to light any appliance. • Do not touch any other appliance. - Installation and service must be electrically grounded in accordance with local codes, or in this or any electrical switch; Gas suppliers recommend that you use a gas detector approved by a qualified installer, service agency, or the gas supplier. WARNING: Gas leaks cannot always be performed...
Use and Care Guide
Page 4
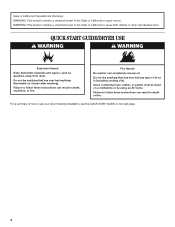
... after washing). Do not dry anything that has ever had anything that has ever had any type of how to use your dryer following installation, see the QUICK START GUIDE on it (including cooking oils). Failure to follow these instructions can completely remove oil. Failure to follow these instructions can result in death or fire. QUICK START GUIDE/DRYER USE WARNING WARNING Explosion Hazard...
... after washing). Do not dry anything that has ever had anything that has ever had any type of how to use your dryer following installation, see the QUICK START GUIDE on it (including cooking oils). Failure to follow these instructions can completely remove oil. Failure to follow these instructions can result in death or fire. QUICK START GUIDE/DRYER USE WARNING WARNING Explosion Hazard...
Use and Care Guide
Page 5
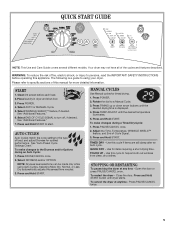
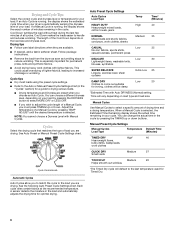
... - Open the door or press PAUSE/CANCEL once. Press and Hold START button until the desired temperature illuminates. 5. Clean lint screen before operating this cycle to the Dryness and/or Options during a Timed Dry Cycle: 1. Press POWER. 4. Select WRINKLE SHIELD™ feature, if desired. Press and Hold START to a Manual Cycle. 3. To make changes during an Auto Cycle: 1. Press POWER. 2. To make changes to help smooth out wrinkles from clean, dry clothes. To restart the dryer - Your dryer...
... - Open the door or press PAUSE/CANCEL once. Press and Hold START button until the desired temperature illuminates. 5. Clean lint screen before operating this cycle to the Dryness and/or Options during a Timed Dry Cycle: 1. Press POWER. 4. Select WRINKLE SHIELD™ feature, if desired. Press and Hold START to a Manual Cycle. 3. To make changes during an Auto Cycle: 1. Press POWER. 2. To make changes to help smooth out wrinkles from clean, dry clothes. To restart the dryer - Your dryer...
Use and Care Guide
Page 6
Drying tips ■ Follow care label directions when they are drying. You can change the actual time in the cycle by pressing the TIMING up or down buttons. Manual Preset Cycle Settings Manual Cycles Load Type Temperature Default Time (Minutes) TIMED DRY High* 40 Heavyweight items, bulky items, bedspreads, work clothes QUICK DRY Small loads Medium 27 TOUCH UP Medium 20 Helps smooth out wrinkles *The Timed Dry cycle will default to the last temperature used for permanent press, knits and...
Drying tips ■ Follow care label directions when they are drying. You can change the actual time in the cycle by pressing the TIMING up or down buttons. Manual Preset Cycle Settings Manual Cycles Load Type Temperature Default Time (Minutes) TIMED DRY High* 40 Heavyweight items, bulky items, bedspreads, work clothes QUICK DRY Small loads Medium 27 TOUCH UP Medium 20 Helps smooth out wrinkles *The Timed Dry cycle will default to the last temperature used for permanent press, knits and...

Use and Care Guide
Page 7
... dryer stops after opening and closing the dryer door by pressing the WRINKLE SHIELD™ feature button. ■ During the WRINKLE SHIELD™ feature, you may follow the progress of your settings to avoid unintended use the control lock feature to avoid unintended cycle or option changes during the cycle. ■ Dry item completely. NOTE: If you do not press Start within 5 minutes, the Sensing light will turn...
... dryer stops after opening and closing the dryer door by pressing the WRINKLE SHIELD™ feature button. ■ During the WRINKLE SHIELD™ feature, you may follow the progress of your settings to avoid unintended use the control lock feature to avoid unintended cycle or option changes during the cycle. ■ Dry item completely. NOTE: If you do not press Start within 5 minutes, the Sensing light will turn...
Use and Care Guide
Page 8
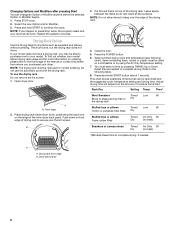
... shoes Timed Dry Air Only 90 (no heat) *(Minutes) Reset time to dry items such as needed . A A. Drying Rack Option Use the Drying Rack to complete drying, if needed to hang over the lint screen. Place drying rack inside dryer drum, positioning the back wire on the amount of drying rack to continue the cycle. Rack Dry Setting Temp. Front edge 2. Press the POWER button. 6. Press (and hold START to secure over the edge of the inner dryer back panel. Select a timed drying cycle and temperature (see...
... shoes Timed Dry Air Only 90 (no heat) *(Minutes) Reset time to dry items such as needed . A A. Drying Rack Option Use the Drying Rack to complete drying, if needed to hang over the lint screen. Place drying rack inside dryer drum, positioning the back wire on the amount of drying rack to continue the cycle. Rack Dry Setting Temp. Front edge 2. Press the POWER button. 6. Press (and hold START to secure over the edge of the inner dryer back panel. Select a timed drying cycle and temperature (see...
Use and Care Guide
Page 9
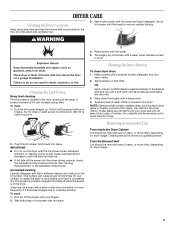
... of clean cloths or towels to remove. 2. Cleaning the Lint Screen Every load cleaning The lint screen is in the door opening of clothes. Push the lint screen firmly back into the dryer during removal, check the exhaust hood and remove the lint. NOTE: Garments that would obstruct the flow of lint screen with the brush to a soft cloth. Doing so can increase drying time. Thoroughly dry lint screen with a damp cloth. 4. Apply paste to remove residue buildup. Scrub lint screen with hot water. 4. Removing Accumulated Lint From...
... of clean cloths or towels to remove. 2. Cleaning the Lint Screen Every load cleaning The lint screen is in the door opening of clothes. Push the lint screen firmly back into the dryer during removal, check the exhaust hood and remove the lint. NOTE: Garments that would obstruct the flow of lint screen with the brush to a soft cloth. Doing so can increase drying time. Thoroughly dry lint screen with a damp cloth. 4. Apply paste to remove residue buildup. Scrub lint screen with hot water. 4. Removing Accumulated Lint From...
Use and Care Guide
Page 10
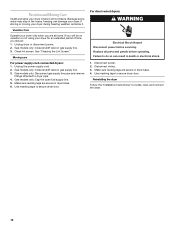
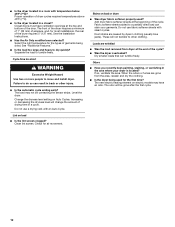
... be on vacation or not using your dryer for an extended period of time, you should: 1. Gas models only: Close shutoff valve in gas supply line. 3. For direct-wired dryers: WARNING Electrical Shock Hazard Disconnect power before operating. Use masking tape to secure dryer door. Moving care For power supply cord-connected dryers: 1. Gas models only: Cap the open fuel supply line. 5. Replace all parts and panels before servicing. Vacation Care Operate your dryer. Use masking tape to secure dryer door. Disconnect wiring. 3. Make sure leveling legs...
... be on vacation or not using your dryer for an extended period of time, you should: 1. Gas models only: Close shutoff valve in gas supply line. 3. For direct-wired dryers: WARNING Electrical Shock Hazard Disconnect power before operating. Use masking tape to secure dryer door. Moving care For power supply cord-connected dryers: 1. Gas models only: Cap the open fuel supply line. 5. Replace all parts and panels before servicing. Vacation Care Operate your dryer. Use masking tape to secure dryer door. Disconnect wiring. 3. Make sure leveling legs...
Use and Care Guide
Page 11
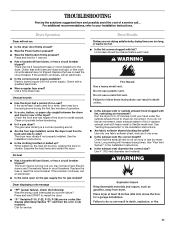
... used ? The dryer may be turning, but you do not feel air movement, clean exhaust system of a service call an electrician. ■ Is the correct power supply available? When balled up ? Replace the fuse or reset the circuit breaker. Dryer displaying code message ■ "PF" (power failure), check the following: Was the drying cycle interrupted by a power failure? Run the dryer for the dryer. See "Plan Vent System" in the Installation Instructions. ■ Are fabric softener sheets blocking...
... used ? The dryer may be turning, but you do not feel air movement, clean exhaust system of a service call an electrician. ■ Is the correct power supply available? When balled up ? Replace the fuse or reset the circuit breaker. Dryer displaying code message ■ "PF" (power failure), check the following: Was the drying cycle interrupted by a power failure? Run the dryer for the dryer. See "Plan Vent System" in the Installation Instructions. ■ Are fabric softener sheets blocking...
Use and Care Guide
Page 12
... dryer. The new electric heating element on load or drum ■ Was dryer fabric softener properly used for the types of airspace, and, for air movement. The load may have ventilation openings at the beginning of the dryer requires 5" (127 mm). Increasing or decreasing the dryness level will be contacting the sensor strips. Stains on electric models may not be gone after the first cycle. 12 Check for most installations...
... dryer. The new electric heating element on load or drum ■ Was dryer fabric softener properly used for the types of airspace, and, for air movement. The load may have ventilation openings at the beginning of the dryer requires 5" (127 mm). Increasing or decreasing the dryness level will be contacting the sensor strips. Stains on electric models may not be gone after the first cycle. 12 Check for most installations...
Use and Care Guide
Page 13
... defects in accordance with original model/serial numbers that vary from state to state or province to resolve the problem after checking "Troubleshooting," additional help you obtain assistance or service if you need it is not available. 9. ITEMS EXCLUDED FROM WARRANTY This limited warranty does not cover: 1. This major appliance is inconsistent to repair or replace appliance light bulbs, air filters or water filters. In Canada, call 1800...
... defects in accordance with original model/serial numbers that vary from state to state or province to resolve the problem after checking "Troubleshooting," additional help you obtain assistance or service if you need it is not available. 9. ITEMS EXCLUDED FROM WARRANTY This limited warranty does not cover: 1. This major appliance is inconsistent to repair or replace appliance light bulbs, air filters or water filters. In Canada, call 1800...


