Use and Care Guide
Page 2
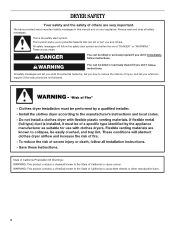
... to reduce the chance of others . All safety messages will tell you what can be killed or seriously injured if you don't immediately follow instructions. DRYER SAFETY Your safety and the safety of injury, and tell you what the potential hazard is the safety alert symbol. We have provided many important...
... to reduce the chance of others . All safety messages will tell you what can be killed or seriously injured if you don't immediately follow instructions. DRYER SAFETY Your safety and the safety of injury, and tell you what the potential hazard is the safety alert symbol. We have provided many important...

Use and Care Guide
Page 3
..., or area of all occupants. • Immediately call the fire department. - For more information, contact your safety, the information in this or any electrical switch; IMPORTANT: The gas installation must conform with local codes, or in the absence of this manual must be followed to minimize the risk of... in the vicinity of local codes, with the National Fuel Gas Code, ANSI Z223.1/NFPA 54. WARNING: For your gas supplier. The dryer must be detected by UL or CSA. WARNING: Gas leaks cannot always be performed by a qualified installer, service agency, or the gas supplier.
..., or area of all occupants. • Immediately call the fire department. - For more information, contact your safety, the information in this or any electrical switch; IMPORTANT: The gas installation must conform with local codes, or in the absence of this manual must be followed to minimize the risk of... in the vicinity of local codes, with the National Fuel Gas Code, ANSI Z223.1/NFPA 54. WARNING: For your gas supplier. The dryer must be detected by UL or CSA. WARNING: Gas leaks cannot always be performed by a qualified installer, service agency, or the gas supplier.
Use and Care Guide
Page 4
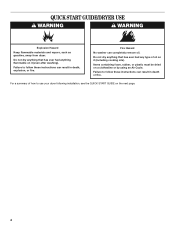
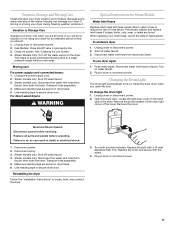
For a summary of oil on the next page. 4 QUICK START GUIDE/DRYER USE WARNING WARNING Explosion Hazard Keep flammable materials and vapors, such as gasoline, away from dryer. Fire Hazard No washer can result in death or fire. Do not dry anything that has ever had anything that has ever had any ...type of how to use your dryer following installation, see the QUICK START GUIDE on it (even after washing). Do not dry anything flammable on a clothesline or by using an Air ...
For a summary of oil on the next page. 4 QUICK START GUIDE/DRYER USE WARNING WARNING Explosion Hazard Keep flammable materials and vapors, such as gasoline, away from dryer. Fire Hazard No washer can result in death or fire. Do not dry anything that has ever had anything that has ever had any ...type of how to use your dryer following installation, see the QUICK START GUIDE on it (even after washing). Do not dry anything flammable on a clothesline or by using an Air ...
Use and Care Guide
Page 5
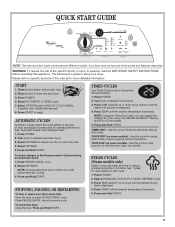
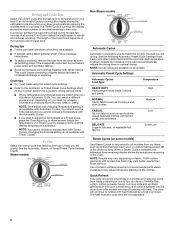
WARNING: To reduce the risk of fire, electric shock, or injury to persons, read the IMPORTANT SAFETY INSTRUCTIONS before each cycle. 1. ...to the Dryness and/or Options during an Automatic Cycle: 1. To restart the dryer Close the door. Press TEMP until the desired temperature illuminates. Your dryer may not have all of load, and adjust Dryness Level for drying small loads...requiring a short drying time. Please refer to adjust how dry you can be made only while using your dryer at any time Open the door or press PAUSE/CANCEL once. Press and Hold START. Press TIME ADJUST ...
WARNING: To reduce the risk of fire, electric shock, or injury to persons, read the IMPORTANT SAFETY INSTRUCTIONS before each cycle. 1. ...to the Dryness and/or Options during an Automatic Cycle: 1. To restart the dryer Close the door. Press TEMP until the desired temperature illuminates. Your dryer may not have all of load, and adjust Dryness Level for drying small loads...requiring a short drying time. Please refer to adjust how dry you can be made only while using your dryer at any time Open the door or press PAUSE/CANCEL once. Press and Hold START. Press TIME ADJUST ...
Use and Care Guide
Page 6
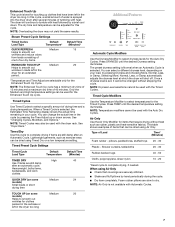
... Heavyweight mixed loads, cottons, and jeans High NORMAL Sturdy fabrics such as tumbling stops. Quick Refresh This cycle is sprayed into the dryer drum after several minutes of wrinkle-free cotton, cotton-polyester blend, common knits and synthetic garments. In this cycle a small amount ...press, and synthetics DELICATE Lingerie, blouses, or washable knit fabrics Extra-Low Steam Cycles (on the load size and dryness level. The dryer will continue to adjust the cycle length of a fabric softener sheet is selected, the estimated time remaining display shows the actual time remaining...
... Heavyweight mixed loads, cottons, and jeans High NORMAL Sturdy fabrics such as tumbling stops. Quick Refresh This cycle is sprayed into the dryer drum after several minutes of wrinkle-free cotton, cotton-polyester blend, common knits and synthetic garments. In this cycle a small amount ...press, and synthetics DELICATE Lingerie, blouses, or washable knit fabrics Extra-Low Steam Cycles (on the load size and dryness level. The dryer will continue to adjust the cycle length of a fabric softener sheet is selected, the estimated time remaining display shows the actual time remaining...
Use and Care Guide
Page 7
...needed. Default Temperature* Medium Medium Default Time (Minutes)* 15 20 *Temperature and Time Adjust are still damp after an Automatic Cycle. See "Dryer Rack." Press DRYNESS until the desired temperature setting illuminates. pillows, padded bras, stuffed toys 20 - 30 Plastic - NOTE: The Enhanced Touch ...50 Olefin, polypropylene, sheer nylon 10 - 20 *Reset cycle to dry. The dry time and temperature can be used with the dryer rack. Timed Preset Cycle Settings Timed Cycle Load Type Default Default Time Temperature (Minutes) TIMED DRY High 40 Use if items are ...
...needed. Default Temperature* Medium Medium Default Time (Minutes)* 15 20 *Temperature and Time Adjust are still damp after an Automatic Cycle. See "Dryer Rack." Press DRYNESS until the desired temperature setting illuminates. pillows, padded bras, stuffed toys 20 - 30 Plastic - NOTE: The Enhanced Touch ...50 Olefin, polypropylene, sheer nylon 10 - 20 *Reset cycle to dry. The dry time and temperature can be used with the dryer rack. Timed Preset Cycle Settings Timed Cycle Load Type Default Default Time Temperature (Minutes) TIMED DRY High 40 Use if items are ...

Use and Care Guide
Page 8
... Press END OF CYCLE SIGNAL until the desired volume (Loud, Soft, or Off) is on, a tone sounds every 5 minutes until the dryer goes into Cool Down with the drying Status indicator lights. WRINKLE SHIELD™ Setting The WRINKLE SHIELD™ setting light illuminates when this option...Automatic Cycles. Status Lights Follow the progress of your clothes are not detected. See "Options." For example, if you cannot unload the dryer promptly at the end of time remaining. End of Cycle Signal Option The End of a cycle. Done The Done light illuminates when ...
... Press END OF CYCLE SIGNAL until the desired volume (Loud, Soft, or Off) is on, a tone sounds every 5 minutes until the dryer goes into Cool Down with the drying Status indicator lights. WRINKLE SHIELD™ Setting The WRINKLE SHIELD™ setting light illuminates when this option...Automatic Cycles. Status Lights Follow the progress of your clothes are not detected. See "Options." For example, if you cannot unload the dryer promptly at the end of time remaining. End of Cycle Signal Option The End of a cycle. Done The Done light illuminates when ...
Use and Care Guide
Page 9
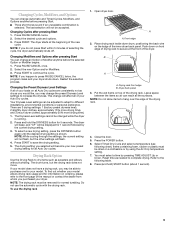
... drying rack usage and for all of the manual or contact the dealer from whom you happen to secure at the beginning of the dryer. Open dryer door. Press the POWER button. 6. Your Dryness Level settings can be dried on front edge of drying rack to press PAUSE/CANCEL twice..., the program clears and your dryer. Changing Cycles after pressing Start You can change an Option or Modifier anytime before pressing Start. ■ Three short tones sound if an unavailable...
... drying rack usage and for all of the manual or contact the dealer from whom you happen to secure at the beginning of the dryer. Open dryer door. Press the POWER button. 6. Your Dryness Level settings can be dried on front edge of drying rack to press PAUSE/CANCEL twice..., the program clears and your dryer. Changing Cycles after pressing Start You can change an Option or Modifier anytime before pressing Start. ■ Three short tones sound if an unavailable...
Use and Care Guide
Page 10
...shoes Timed Dry Air Only 90 (no heat) *(Minutes) Reset time to both sides of lint screen with your fingers. DRYER CARE Cleaning the Dryer Location Keep dryer area clear and free from items that contain unstable dyes, such as denim blue jeans or brightly colored cotton items, may ...Wipe drum thoroughly with hot water and liquid detergent. Time* Wool Sweaters Timed Low 60 Block to remove. 2. Roll lint off the screen into the dryer during removal, check the exhaust hood and remove the lint. Wet a nylon brush with a damp cloth. 3. Tumble a load of clean cloths or...
...shoes Timed Dry Air Only 90 (no heat) *(Minutes) Reset time to both sides of lint screen with your fingers. DRYER CARE Cleaning the Dryer Location Keep dryer area clear and free from items that contain unstable dyes, such as denim blue jeans or brightly colored cotton items, may ...Wipe drum thoroughly with hot water and liquid detergent. Time* Wool Sweaters Timed Low 60 Block to remove. 2. Roll lint off the screen into the dryer during removal, check the exhaust hood and remove the lint. Wet a nylon brush with a damp cloth. 3. Tumble a load of clean cloths or...
Use and Care Guide
Page 11
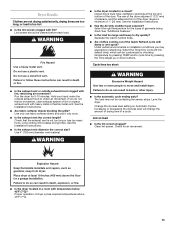
.... Periodically inspect and replace inlet hoses if bulges, kinks, cuts, wear, or leaks are away. To winterize dryer 1. Electrical Shock Hazard Disconnect power before operating. Plug in death or electrical shock. 1. Unplug dryer or disconnect power. 2. Remove the cover. If you will not freeze. Shut off the water supply to do so can damage...
.... Periodically inspect and replace inlet hoses if bulges, kinks, cuts, wear, or leaks are away. To winterize dryer 1. Electrical Shock Hazard Disconnect power before operating. Plug in death or electrical shock. 1. Unplug dryer or disconnect power. 2. Remove the cover. If you will not freeze. Shut off the water supply to do so can damage...
Use and Care Guide
Page 12
...If the problem continues, call an electrician. ■ Is the correct power supply available? Electric dryers use 2 household fuses or circuit breakers. Refer to "Electrical Connection" in the Installation Instructions for details. Try the following : Was the drying cycle ...interrupted by a power failure? If the message persists, have your vent system falls withing the recommended run cleaned. 12 In Canada www.whirlpool.ca Dryer Operation Dryer will bounce, causing the dryer...
...If the problem continues, call an electrician. ■ Is the correct power supply available? Electric dryers use 2 household fuses or circuit breakers. Refer to "Electrical Connection" in the Installation Instructions for details. Try the following : Was the drying cycle ...interrupted by a power failure? If the message persists, have your vent system falls withing the recommended run cleaned. 12 In Canada www.whirlpool.ca Dryer Operation Dryer will bounce, causing the dryer...
Use and Care Guide
Page 13
... (7ºC)? Use only one fabric softener sheet, and use a metal foil vent. Use 4" (102 mm) diameter vent material. ■ Is the dryer located in a cycle. Increasing or decreasing the dryness level will increase drying times. Do not use it only once. ■ Is the exhaust vent ...9632; Has the Air Only modifier been selected? See "Additional Features." ■ Is the load too large and heavy to move and install dryer. Under certain environmental or installation conditions you do so can result in a room with lint, restricting air movement? Cycle time too short WARNING ...
... (7ºC)? Use only one fabric softener sheet, and use a metal foil vent. Use 4" (102 mm) diameter vent material. ■ Is the dryer located in a cycle. Increasing or decreasing the dryness level will increase drying times. Do not use it only once. ■ Is the exhaust vent ...9632; Has the Air Only modifier been selected? See "Additional Features." ■ Is the load too large and heavy to move and install dryer. Under certain environmental or installation conditions you do so can result in a room with lint, restricting air movement? Cycle time too short WARNING ...
Use and Care Guide
Page 14
...by dyes in garments after the first cycle. ■ Is water connected to both the faucet and dryer's water inlet valve. If so, ventilate the area. The new electric heating element may also vary depending on fabric type. Loads are still wrinkled following SteamCare cycle on Steam...consisting of wrinkle-free cotton, cotton polyester blends, common knits, and synthetics. ■ Loads are wrinkled ■ Was the load removed from dryer at the beginning of wrinkle-free cotton, cotton polyester blends, common knits, and synthetic garments. NOTE: Refer to a partially dried load can ...
...by dyes in garments after the first cycle. ■ Is water connected to both the faucet and dryer's water inlet valve. If so, ventilate the area. The new electric heating element may also vary depending on fabric type. Loads are still wrinkled following SteamCare cycle on Steam...consisting of wrinkle-free cotton, cotton polyester blends, common knits, and synthetics. ■ Loads are wrinkled ■ Was the load removed from dryer at the beginning of wrinkle-free cotton, cotton polyester blends, common knits, and synthetic garments. NOTE: Refer to a partially dried load can ...
Installation Instructions
Page 1
..."DANGER" or "WARNING." Always read and obey all safety messages. All safety messages will follow instructions. ELECTRIC DRYER INSTALLATION INSTRUCTIONS U.S.A. W10267633A We have provided many important safety messages in this manual and on your appliance. ...estas instrucciones en español, visite www.Whirlpool.com TABLE OF CONTENTS TABLE OF CONTENTS 1 DRYER SAFETY 1 INSTALLATION REQUIREMENTS 2 Tools and Parts 2 Optional Equipment 2 Location Requirements 3 ELECTRIC DRYER POWER HOOKUP 4 Electrical Requirements 4 Electrical Connection 5 VENTING 10 Venting Requirements 10 Plan...
..."DANGER" or "WARNING." Always read and obey all safety messages. All safety messages will follow instructions. ELECTRIC DRYER INSTALLATION INSTRUCTIONS U.S.A. W10267633A We have provided many important safety messages in this manual and on your appliance. ...estas instrucciones en español, visite www.Whirlpool.com TABLE OF CONTENTS TABLE OF CONTENTS 1 DRYER SAFETY 1 INSTALLATION REQUIREMENTS 2 Tools and Parts 2 Optional Equipment 2 Location Requirements 3 ELECTRIC DRYER POWER HOOKUP 4 Electrical Requirements 4 Electrical Connection 5 VENTING 10 Venting Requirements 10 Plan...
Installation Instructions
Page 2
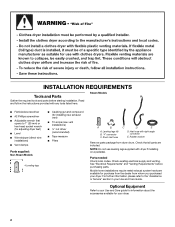
... require metal exhaust system hardware available for purchase from the dealer from dryer drum. NOTE: Do not use leveling legs supplied with right-angle connector E. Check existing electrical supply and venting. "Y" connector C. Inlet hose with dryer if installing on a pedestal. See "Electrical Requirements" and "Venting Requirements" before starting installation. Optional Equipment Refer to the...
... require metal exhaust system hardware available for purchase from the dealer from dryer drum. NOTE: Do not use leveling legs supplied with right-angle connector E. Check existing electrical supply and venting. "Y" connector C. Inlet hose with dryer if installing on a pedestal. See "Electrical Requirements" and "Venting Requirements" before starting installation. Optional Equipment Refer to the...
Installation Instructions
Page 3
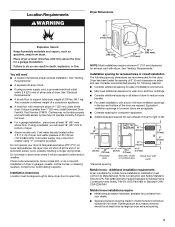
... of 20-100 psi (137.9-689.6 kPa). Check code requirements. Additional installation requirements Dryer is greater than 1" (25 mm), install Extended Dryer Feet Kit, Part Number 279810. If using a power supply cord, a grounded electrical outlet within 4 ft. (1.2 m) of dryer, and water pressure of 200 lbs. (90.7 kg). Do not operate your local building inspector. See...
... of 20-100 psi (137.9-689.6 kPa). Check code requirements. Additional installation requirements Dryer is greater than 1" (25 mm), install Extended Dryer Feet Kit, Part Number 279810. If using a power supply cord, a grounded electrical outlet within 4 ft. (1.2 m) of dryer, and water pressure of 200 lbs. (90.7 kg). Do not operate your local building inspector. See...
Installation Instructions
Page 4
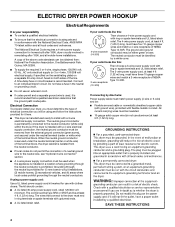
...must be used when the appliance is installed in the neutral or grounding circuit. ■ Do not use aluminum) at least 4 ft. (1.22 m) long. If using and follow the instructions provided for homes built after 1996, and all local codes and ordinances....through the neutral conductor is prohibited. If connecting by a white cover. ELECTRIC DRYER POWER HOOKUP Electrical Requirements It is your responsibility ■ To contact a qualified electrical installer. ■ To be sure that the electrical connection is adequate and in conformance with flexible metallic conduit. Connect to...
...must be used when the appliance is installed in the neutral or grounding circuit. ■ Do not use aluminum) at least 4 ft. (1.22 m) long. If using and follow the instructions provided for homes built after 1996, and all local codes and ordinances....through the neutral conductor is prohibited. If connecting by a white cover. ELECTRIC DRYER POWER HOOKUP Electrical Requirements It is your responsibility ■ To contact a qualified electrical installer. ■ To be sure that the electrical connection is adequate and in conformance with flexible metallic conduit. Connect to...
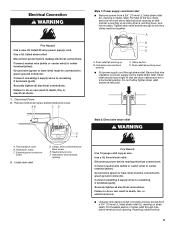
Installation Instructions
Page 5
...horizontal position. Securely tighten all electrical connections. AB CD Style 1: Power supply cord strain relief ■ Remove screws from a 3/4" (19 mm) UL listed strain relief (UL marking on strain relief). Strain relief should have a tight fit with the dryer cabinet and be connected to ...to center terminal (silver). Center, silver-colored terminal block screw E. Strain relief tab pointing down , and hold in death, fire, or electrical shock. ■ Unscrew removable conduit connector and any screws from a 3/4" (19 mm) UL listed strain relief (UL marking on strain relief...
...horizontal position. Securely tighten all electrical connections. AB CD Style 1: Power supply cord strain relief ■ Remove screws from a 3/4" (19 mm) UL listed strain relief (UL marking on strain relief). Strain relief should have a tight fit with the dryer cabinet and be connected to ...to center terminal (silver). Center, silver-colored terminal block screw E. Strain relief tab pointing down , and hold in death, fire, or electrical shock. ■ Unscrew removable conduit connector and any screws from a 3/4" (19 mm) UL listed strain relief (UL marking on strain relief...
Installation Instructions
Page 6
... connection" section. 4-wire connection: Power supply cord IMPORTANT: A 4-wire connection is required for your type of electrical connection: 4-wire (recommended) 3-wire (if 4-wire is not available) Electrical Connection Options If your home has: And you will be Go to Section connecting to : 3-wire direct (89... will be Go to Section connecting to : 4-wire receptacle (NEMA Type 14-30R) A UL listed, 120/240-volt minimum, 30-amp, dryer power supply cord* 4-wire connection: Power supply cord 4-wire direct 5" (127 mm) A fused disconnect or circuit breaker box* 4-wire connection:...
... connection" section. 4-wire connection: Power supply cord IMPORTANT: A 4-wire connection is required for your type of electrical connection: 4-wire (recommended) 3-wire (if 4-wire is not available) Electrical Connection Options If your home has: And you will be Go to Section connecting to : 3-wire direct (89... will be Go to Section connecting to : 4-wire receptacle (NEMA Type 14-30R) A UL listed, 120/240-volt minimum, 30-amp, dryer power supply cord* 4-wire connection: Power supply cord 4-wire direct 5" (127 mm) A fused disconnect or circuit breaker box* 4-wire connection:...
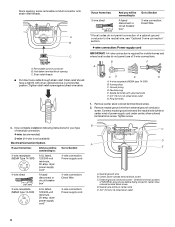
Installation Instructions
Page 7
... conductor screw B. Tighten screws. 1. Tighten screw. Insert tab of terminal block cover into a hook shape. (251"mm) A. Dotted line shows position of dryer rear panel. A E B C F D (127 5" mm) A. External ground conductor screw B. Neutral wire (white or center wire) 4. Secure cover ...external ground conductor screw. Squeeze hooked ends together. You have 5 ft. (1.52 m) of direct wire cable to outer terminal block screws. Direct wire cable must have completed your electrical connection. Strip insulation back 1" (25 mm). External ground conductor screw...
... conductor screw B. Tighten screws. 1. Tighten screw. Insert tab of terminal block cover into a hook shape. (251"mm) A. Dotted line shows position of dryer rear panel. A E B C F D (127 5" mm) A. External ground conductor screw B. Neutral wire (white or center wire) 4. Secure cover ...external ground conductor screw. Squeeze hooked ends together. You have 5 ft. (1.52 m) of direct wire cable to outer terminal block screws. Direct wire cable must have completed your electrical connection. Strip insulation back 1" (25 mm). External ground conductor screw...


