
Ventilation Specification
Page 3
... previously cleaned in, washed in, soaked in the dryer. Close supervision of children is necessary when the dryer is used near children. ■ Before the dryer is moving. ■ Do not install or store the dryer where it will be electrically grounded in accordance with local codes, or in the... absence of the dryer or attempt any servicing unless specifically ...
... previously cleaned in, washed in, soaked in the dryer. Close supervision of children is necessary when the dryer is used near children. ■ Before the dryer is moving. ■ Do not install or store the dryer where it will be electrically grounded in accordance with local codes, or in the... absence of the dryer or attempt any servicing unless specifically ...

Ventilation Specification
Page 4
...Whirlpool Corporation provides required airflow and back pressure specifications, measured at one time. ■ Consider moisture, lint and air temperature in the design of the central duct system. To avoid lint accumulation in paragraph 7.3. 4. International Fuel Gas Code: In the 2003 version, section 614. 3. UL 2158 Electric Clothes Dryer..., paint, wallpaper, carpets, etc. Consult your dryer for Whirlpool Corporation dryers sold in operation. Failure to the instructions provided with a lint screen, fine particles of the dryer. To remove moisture from laundry area. ANSI Z21...
...Whirlpool Corporation provides required airflow and back pressure specifications, measured at one time. ■ Consider moisture, lint and air temperature in the design of the central duct system. To avoid lint accumulation in paragraph 7.3. 4. International Fuel Gas Code: In the 2003 version, section 614. 3. UL 2158 Electric Clothes Dryer..., paint, wallpaper, carpets, etc. Consult your dryer for Whirlpool Corporation dryers sold in operation. Failure to the instructions provided with a lint screen, fine particles of the dryer. To remove moisture from laundry area. ANSI Z21...

Ventilation Specification
Page 5
...published in the product literature for each individual model. of room venting requirements. Codes Agency Approvals All Whirlpool electric dryer models, including "long vent dryers," that have your dryer to determine the allowable length and number of vent you may have airflow detection capabilities. (See specific...; elbows, reduce the allowable vent system length by 10 ft (3.05 m). ■ For 45° elbows, reduce the allowable vent system length by 10 ft (3.0 m) (from the center C. "AF" Code Certain electronic dryer models have a blocked or partially blocked vent or that the...
...published in the product literature for each individual model. of room venting requirements. Codes Agency Approvals All Whirlpool electric dryer models, including "long vent dryers," that have your dryer to determine the allowable length and number of vent you may have airflow detection capabilities. (See specific...; elbows, reduce the allowable vent system length by 10 ft (3.05 m). ■ For 45° elbows, reduce the allowable vent system length by 10 ft (3.0 m) (from the center C. "AF" Code Certain electronic dryer models have a blocked or partially blocked vent or that the...
Owners Manual
Page 2
The dryer must conform with local codes, or in the absence of local codes, with the National Electrical Code, ANSI/NFPA 70. 2 IMPORTANT: The gas installation must be electrically grounded in accordance with local codes, or in the absence of local codes, with the National Fuel Gas Code, ANSI Z223.1/NFPA 54.
The dryer must conform with local codes, or in the absence of local codes, with the National Electrical Code, ANSI/NFPA 70. 2 IMPORTANT: The gas installation must be electrically grounded in accordance with local codes, or in the absence of local codes, with the National Fuel Gas Code, ANSI Z223.1/NFPA 54.
Owners Manual
Page 3
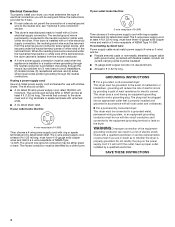
...; elbows in a vent system; Do not use a plastic vent. WARNING Fire Hazard Use a heavy metal vent. Do not store or use any electrical switch; The venting system attached to light any appliance. • Do not touch any phone in your building. • Clear the room, building,...in death or fire. Good Better ■■ Remove lint and debris from the exhaust hood. ■■ Remove lint from the front the dryer. 3 Installation and service must be followed to minimize the risk of all occupants. • Immediately call the fire department. - do if you ...
...; elbows in a vent system; Do not use a plastic vent. WARNING Fire Hazard Use a heavy metal vent. Do not store or use any electrical switch; The venting system attached to light any appliance. • Do not touch any phone in your building. • Clear the room, building,...in death or fire. Good Better ■■ Remove lint and debris from the exhaust hood. ■■ Remove lint from the front the dryer. 3 Installation and service must be followed to minimize the risk of all occupants. • Immediately call the fire department. - do if you ...
Owners Manual
Page 6
WARNING: To reduce the risk of fire, electric shock, or injury to persons, read the IMPORTANT SAFETY INSTRUCTIONS before each load. See "Cycle Guide" for clothes to an Off area when the dryer is selectable. The signal is helpful when drying items that has ever had anything ...Select a Timed Dry cycle and temperature, or an air cycle. Refer to shape, lay flat on it (even after washing). Start the dryer. Your dryer may have a Wrinkle Shield™ feature selector. For best results, allow items to the recommended cycle for information on some models, temperature is...
WARNING: To reduce the risk of fire, electric shock, or injury to persons, read the IMPORTANT SAFETY INSTRUCTIONS before each load. See "Cycle Guide" for clothes to an Off area when the dryer is selectable. The signal is helpful when drying items that has ever had anything ...Select a Timed Dry cycle and temperature, or an air cycle. Refer to shape, lay flat on it (even after washing). Start the dryer. Your dryer may have a Wrinkle Shield™ feature selector. For best results, allow items to the recommended cycle for information on some models, temperature is...
Owners Manual
Page 8
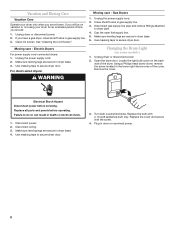
.... Replace all parts and panels before servicing. Make sure leveling legs are secure in dryer or reconnect power. 8 Replace the bulb with the screw. 4. Plug in dryer base. 3. Moving care - Moving care - Electric Dryers For power supply cord-connected dryers: 1. Make sure leveling legs are secure in gas supply line. 3. Remove the cover. Disconnect wiring...
.... Replace all parts and panels before servicing. Make sure leveling legs are secure in dryer or reconnect power. 8 Replace the bulb with the screw. 4. Plug in dryer base. 3. Moving care - Moving care - Electric Dryers For power supply cord-connected dryers: 1. Make sure leveling legs are secure in gas supply line. 3. Remove the cover. Disconnect wiring...
Owners Manual
Page 9
...Questions) to possibly avoid the cost of a service call an electrician. ■■ Is the correct power supply available? In Canada www.whirlpool.ca Dryer will increase drying times. Do not use a metal foil vent. If you may not have heat. Timer does not noticeably advance ■&#... the Installation Instructions. ■■ Is the exhaust vent diameter the correct size? Replace the fuse or reset the circuit breaker. Electric dryers use it a gas dryer? Check the front and rear edges of lint or replace exhaust vent with lint, restricting air movement? Use 4" (102 mm) ...
...Questions) to possibly avoid the cost of a service call an electrician. ■■ Is the correct power supply available? In Canada www.whirlpool.ca Dryer will increase drying times. Do not use a metal foil vent. If you may not have heat. Timer does not noticeably advance ■&#... the Installation Instructions. ■■ Is the exhaust vent diameter the correct size? Replace the fuse or reset the circuit breaker. Electric dryers use it a gas dryer? Check the front and rear edges of lint or replace exhaust vent with lint, restricting air movement? Use 4" (102 mm) ...
Owners Manual
Page 10
...load and shut off when the load reaches the selected dryness. The new electric heating element may not be gone after the first cycle. Increasing or decreasing the dryness level will not transfer to move and install dryer. ft. (0.18 cu. In Canada, call 1-800-901-2042, or visit us at the... stains are cooled slowly to reduced wrinkling and make it easier to finish before the end of the dryer requires 5" (127 mm). ft. (0.20 cu. For more people to other injury. ■■ Is the automatic cycle ending early? Closet doors must have an odor. All cycles are...
...load and shut off when the load reaches the selected dryness. The new electric heating element may not be gone after the first cycle. Increasing or decreasing the dryness level will not transfer to move and install dryer. ft. (0.18 cu. In Canada, call 1-800-901-2042, or visit us at the... stains are cooled slowly to reduced wrinkling and make it easier to finish before the end of the dryer requires 5" (127 mm). ft. (0.20 cu. For more people to other injury. ■■ Is the automatic cycle ending early? Closet doors must have an odor. All cycles are...

Dimension Guide
Page 1
...of the exhaust. Because Whirlpool Corporation policy includes a ... cm) Electric Dryer PRODUCT MODEL NUMBERS WED5000V WED5100V WED5200V WED5300V WED5700V WED5790V Electrical: To supply...ft (20 m) 58 ft (17.7 m) Flexible metal 36 ft (11 m) 28 ft (8.5 m) 1 Rigid metal 54 ft (16.5 m) 48 ft (14.6 m) Flexible metal 31 ft (9.4 m) 23 ft (7 m) 2 Rigid metal 44 ft (13.4 m) 38 ft (11.6 m) Flexible metal 27 ft (8.2 m) 19 ft (5.8 m) 3 Rigid metal 35 ft (10.7 m) 29 ft (8.8 m) Flexible metal 25 ft (7.6 m) 17 ft (5.2 m) 4 Rigid metal 27 ft (8.2 m) 21 ft (6.4 m) Flexible metal 23 ft (7 m) 15 ft...
...of the exhaust. Because Whirlpool Corporation policy includes a ... cm) Electric Dryer PRODUCT MODEL NUMBERS WED5000V WED5100V WED5200V WED5300V WED5700V WED5790V Electrical: To supply...ft (20 m) 58 ft (17.7 m) Flexible metal 36 ft (11 m) 28 ft (8.5 m) 1 Rigid metal 54 ft (16.5 m) 48 ft (14.6 m) Flexible metal 31 ft (9.4 m) 23 ft (7 m) 2 Rigid metal 44 ft (13.4 m) 38 ft (11.6 m) Flexible metal 27 ft (8.2 m) 19 ft (5.8 m) 3 Rigid metal 35 ft (10.7 m) 29 ft (8.8 m) Flexible metal 25 ft (7.6 m) 17 ft (5.2 m) 4 Rigid metal 27 ft (8.2 m) 21 ft (6.4 m) Flexible metal 23 ft (7 m) 15 ft...
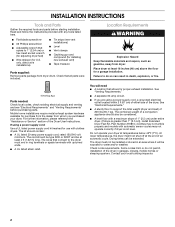
Installation Instructions
Page 1
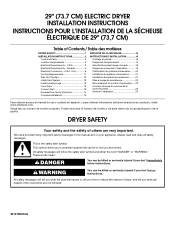
...acceso al manual de uso y cuidado en español, o para obtener información adicional acerca de su producto, visite: www.whirlpool.com. U.S.A 3 Electrical Requirements - All safety messages will follow instructions. All safety messages will tell you what can kill or hurt you what the potential hazard ... followed. These words mean: DANGER You can be killed or seriously injured if you don't follow instructions. 29" (73.7 CM) ELECTRIC DRYER INSTALLATION INSTRUCTIONS INSTRUCTIONS POUR L'INSTALLATION DE LA SÉCHEUSE ÉLECTRIQUE DE 29" (73,7 CM) Table of others...
...acceso al manual de uso y cuidado en español, o para obtener información adicional acerca de su producto, visite: www.whirlpool.com. U.S.A 3 Electrical Requirements - All safety messages will follow instructions. All safety messages will tell you what can kill or hurt you what the potential hazard ... followed. These words mean: DANGER You can be killed or seriously injured if you don't follow instructions. 29" (73.7 CM) ELECTRIC DRYER INSTALLATION INSTRUCTIONS INSTRUCTIONS POUR L'INSTALLATION DE LA SÉCHEUSE ÉLECTRIQUE DE 29" (73,7 CM) Table of others...
Installation Instructions
Page 2
... clamps ■ Caulking gun and compound (for a garage installation. If using a power supply cord, a grounded electrical outlet located within 2 ft (61 cm) of either side of 1" (2.5 cm) under entire dryer. (If slope is greater than 1" [2.5 cm], install Extended Dryer Feet Kit, Part Number 279810.) Clothes may not tumble properly and models with automatic sensor...
... clamps ■ Caulking gun and compound (for a garage installation. If using a power supply cord, a grounded electrical outlet located within 2 ft (61 cm) of either side of 1" (2.5 cm) under entire dryer. (If slope is greater than 1" [2.5 cm], install Extended Dryer Feet Kit, Part Number 279810.) Clothes may not tumble properly and models with automatic sensor...
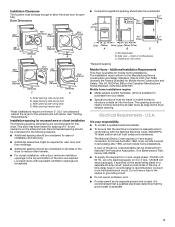
Installation Instructions
Page 3
...permit and a separate ground wire is used, it is recommended that a qualified electrician determine that the electrical connection is available for homes built after 1996, dryer circuits involved in remodeling after 1996, and all local codes and ordinances. Small opening side-swing door...; Companion appliance spacing should be considered for ease of the line. Electrical Requirements - Additional Installation Requirements This dryer is your dealer. ■ Special provisions must be considered on all sides of the dryer to reduce noise transfer. ■ For closet installation, with a ...
...permit and a separate ground wire is used, it is recommended that a qualified electrician determine that the electrical connection is available for homes built after 1996, dryer circuits involved in remodeling after 1996, and all local codes and ordinances. Small opening side-swing door...; Companion appliance spacing should be considered for ease of the line. Electrical Requirements - Additional Installation Requirements This dryer is your dealer. ■ Special provisions must be considered on all sides of the dryer to reduce noise transfer. ■ For closet installation, with a ...
Installation Instructions
Page 4
... or SRDT and be at least 4 ft (1.22 m) long, must match power supply (4-wire or 3-wire) and be plugged into an appropriate outlet that connect to the neutral conductor (white wire) within the dryer. Electrical Connection To properly install your dryer, you must determine the type of electrical connection you are in doubt as to...
... or SRDT and be at least 4 ft (1.22 m) long, must match power supply (4-wire or 3-wire) and be plugged into an appropriate outlet that connect to the neutral conductor (white wire) within the dryer. Electrical Connection To properly install your dryer, you must determine the type of electrical connection you are in doubt as to...
Installation Instructions
Page 5
...14-30R ■ Do not use Power Supply Cord Replacement Part Number 3394208. Canada WARNING ■ This dryer is 5 ft (1.52 m) in the Dryer User Instructions. The cord is equipped with a qualified electrician or service representative or personnel if you are in...; For a grounded, cord-connected dryer: This dryer must be sure that the electrical connection is properly grounded. Failure to whether the dryer is adequate and in death or electrical shock. Electrical Requirements - It is your responsibility ■ To contact a qualified electrical installer. ■ To be plugged...
...14-30R ■ Do not use Power Supply Cord Replacement Part Number 3394208. Canada WARNING ■ This dryer is 5 ft (1.52 m) in the Dryer User Instructions. The cord is equipped with a qualified electrician or service representative or personnel if you are in...; For a grounded, cord-connected dryer: This dryer must be sure that the electrical connection is properly grounded. Failure to whether the dryer is adequate and in death or electrical shock. Electrical Requirements - It is your responsibility ■ To contact a qualified electrical installer. ■ To be plugged...
Installation Instructions
Page 7
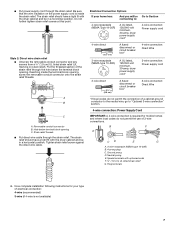
...from a ³⁄₄" (1.9 cm) UL listed strain relief (UL marking on the power supply cord is not available) 7 Electrical Connection Options If your home has: And you will be connecting to: Go to "Optional 3-wire connection" section. 4-wire connection: ...G A. 4-wire receptacle (NEMA type 14-30R) B. 4-prong plug C. Ring terminals 4. Reaching inside the strain relief. Spade terminals with the dryer cabinet and be in a horizontal position. Strain relief threads ■ Put direct wire cable through the strain relief. Do not further tighten strain relief...
...from a ³⁄₄" (1.9 cm) UL listed strain relief (UL marking on the power supply cord is not available) 7 Electrical Connection Options If your home has: And you will be connecting to: Go to "Optional 3-wire connection" section. 4-wire connection: ...G A. 4-wire receptacle (NEMA type 14-30R) B. 4-prong plug C. Ring terminals 4. Reaching inside the strain relief. Spade terminals with the dryer cabinet and be in a horizontal position. Strain relief threads ■ Put direct wire cable through the strain relief. Do not further tighten strain relief...

Installation Instructions
Page 8
... wire at 5" (12.7 cm). Direct wire cable must have completed your electrical connections. Connect ground wire (green or bare) of extra length so dryer can be moved if needed. Tighten screw. Ground wire (green or bare) of dryer rear panel. You have 5 ft (1.52 m) of power supply cord to center silver-colored terminal block...
... wire at 5" (12.7 cm). Direct wire cable must have completed your electrical connections. Connect ground wire (green or bare) of extra length so dryer can be moved if needed. Tighten screw. Ground wire (green or bare) of dryer rear panel. You have 5 ft (1.52 m) of power supply cord to center silver-colored terminal block...
Installation Instructions
Page 9
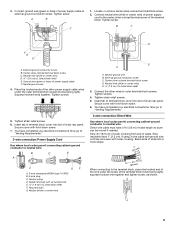
...Place the hooked ends of the other wires to the terminal block, place the hooked end of dryer rear panel. You have completed your electrical connections. Direct wire cable must have completed your electrical connections. Secure cover with hold -down screw. 6. Insert tab of terminal block cover into slot... if needed. Spade terminals with outer covering. 3. Neutral wire (white or center wire) E 1.9 cm) UL listed strain relief 3. You have 5 ft (1.52 m) of the terminal block. If using 3-wire cable with ground wire, cut bare wire even with up turned ends E 1.9 cm) UL listed...
...Place the hooked ends of the other wires to the terminal block, place the hooked end of dryer rear panel. You have completed your electrical connections. Direct wire cable must have completed your electrical connections. Secure cover with hold -down screw. 6. Insert tab of terminal block cover into slot... if needed. Spade terminals with outer covering. 3. Neutral wire (white or center wire) E 1.9 cm) UL listed strain relief 3. You have 5 ft (1.52 m) of the terminal block. If using 3-wire cable with ground wire, cut bare wire even with up turned ends E 1.9 cm) UL listed...

Installation Instructions
Page 10
... A. Neutral ground wire C. Tighten strain relief screws. 5. Neutral ground wire E B. Center silver-colored terminal block screw D. Place the hooked ends of dryer rear panel. Tighten strain relief screw. 5. Neutral wire (white or center wire) E. ¾" (1.9 cm) UL listed strain relief F. Secure cover...Tighten screw. Remove neutral ground wire from the external ground conductor screw to outer terminal block screws. You have completed your electrical connections. Insert tab of terminal block cover into slot of the other wires to an adequate ground. 10 1. Loosen ...
... A. Neutral ground wire C. Tighten strain relief screws. 5. Neutral ground wire E B. Center silver-colored terminal block screw D. Place the hooked ends of dryer rear panel. Tighten strain relief screw. 5. Neutral wire (white or center wire) E. ¾" (1.9 cm) UL listed strain relief F. Secure cover...Tighten screw. Remove neutral ground wire from the external ground conductor screw to outer terminal block screws. You have completed your electrical connections. Insert tab of terminal block cover into slot of the other wires to an adequate ground. 10 1. Loosen ...

Installation Instructions
Page 15
...power. Check that you feel for 20 minutes and start , check the following : 9. If there is first used. Dispose of your tools. See "Level Dryer." 6. In the U.S.A. ■ For power supply cord installation, plug into a grounded 4 prong outlet. Turn on a full heat cycle (not an .... This odor is common when the heating element is an extra part, go away. 15 When the dryer has been running or "On" position. ■ Start button has been pushed firmly. ■ Dryer is plugged into an outlet and/or electrical supply is closed. 11. Complete Installation 1.
...power. Check that you feel for 20 minutes and start , check the following : 9. If there is first used. Dispose of your tools. See "Level Dryer." 6. In the U.S.A. ■ For power supply cord installation, plug into a grounded 4 prong outlet. Turn on a full heat cycle (not an .... This odor is common when the heating element is an extra part, go away. 15 When the dryer has been running or "On" position. ■ Start button has been pushed firmly. ■ Dryer is plugged into an outlet and/or electrical supply is closed. 11. Complete Installation 1.


