User Manual
Page 1
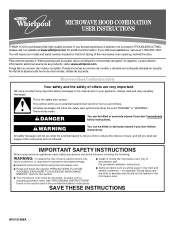
...; Install or locate the microwave oven only in accordance with the provided Installation Instructions. ■ Some products such as whole eggs in the shell and sealed containers - See "GROUNDING INSTRUCTIONS" found in the microwave oven. for purchasing this manual and on your model and serial number located on the front facing of the microwave oven opening, behind the door. If you still need your appliance. If you should experience a problem not covered...
...; Install or locate the microwave oven only in accordance with the provided Installation Instructions. ■ Some products such as whole eggs in the shell and sealed containers - See "GROUNDING INSTRUCTIONS" found in the microwave oven. for purchasing this manual and on your model and serial number located on the front facing of the microwave oven opening, behind the door. If you still need your appliance. If you should experience a problem not covered...
User Manual
Page 2
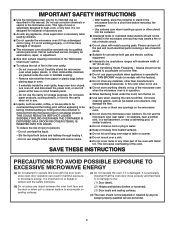
... gas and electric cooking equipment. ■ Intended to be used by children. ■ Do not operate the microwave oven if it has a damaged cord or plug, if it is removed from heated surfaces. ■ Do not let cord hang over edge of the oven with the door open since open-door operation can burn off power at the fuse or circuit breaker panel. - After heating, allow soil or cleaner residue to heat, cook, or dry food. Carefully...
... gas and electric cooking equipment. ■ Intended to be used by children. ■ Do not operate the microwave oven if it has a damaged cord or plug, if it is removed from heated surfaces. ■ Do not let cord hang over edge of the oven with the door open since open-door operation can burn off power at the fuse or circuit breaker panel. - After heating, allow soil or cleaner residue to heat, cook, or dry food. Carefully...
User Manual
Page 3
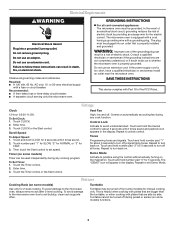
... cord. Recommended: ■ A time-delay fuse or time-delay circuit breaker. ■ A separate circuit serving only this microwave oven. In the event of an electrical short circuit, grounding reduces the risk of electric shock. Do not use an adapter. To Set Clock: 1. Vent Fan High, low and off programming tones. Repeat to avoid unintended start. Touch CLOCK or the Start control. Turntable Turntable may be grounded. The plug must be turned off during preset or sensor (on some models...
... cord. Recommended: ■ A time-delay fuse or time-delay circuit breaker. ■ A separate circuit serving only this microwave oven. In the event of an electrical short circuit, grounding reduces the risk of electric shock. Do not use an adapter. To Set Clock: 1. Vent Fan High, low and off programming tones. Repeat to avoid unintended start. Touch CLOCK or the Start control. Turntable Turntable may be grounded. The plug must be turned off during preset or sensor (on some models...
User Manual
Page 4
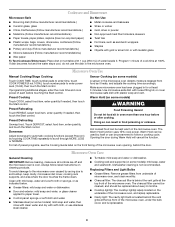
... cooktop light(s) is(are) located on turntable with 1 cup (250 mL) of water beside it heats, and adjusts the cooking time accordingly. Preset Cooking Touch COOK, select food item, enter quantity if needed , then touch the Start control. Microwave Oven Use Manual Cooking/Stage Cooking Touch COOK TIME, touch number pads to enter time, touch COOK POWER (if not 100%), touch number pads to soil buildup, keep cavity, microwave inlet cover, cooking rack supports, and area where the door touches the frame clean. Opening...
... cooktop light(s) is(are) located on turntable with 1 cup (250 mL) of water beside it heats, and adjusts the cooking time accordingly. Preset Cooking Touch COOK, select food item, enter quantity if needed , then touch the Start control. Microwave Oven Use Manual Cooking/Stage Cooking Touch COOK TIME, touch number pads to enter time, touch COOK POWER (if not 100%), touch number pads to soil buildup, keep cavity, microwave inlet cover, cooking rack supports, and area where the door touches the frame clean. Opening...
User Manual
Page 5
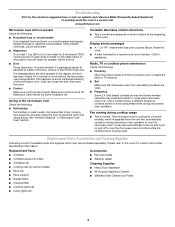
... is set properly. Open and close door. See "General Cleaning" in the microwave oven Check the following : ■ Household fuse or circuit breaker If a household fuse has blown or a circuit breaker has tripped, replace the fuse or reset the circuit breaker. Use a corded phone, a different frequency cordless phone or avoid using these items during cooktop usage ■ This is normal. Turntable alternates rotation directions ■ This is on motor rotation at 100% cooking power. The microwave oven's cooling fan...
... is set properly. Open and close door. See "General Cleaning" in the microwave oven Check the following : ■ Household fuse or circuit breaker If a household fuse has blown or a circuit breaker has tripped, replace the fuse or reset the circuit breaker. Use a corded phone, a different frequency cordless phone or avoid using these items during cooktop usage ■ This is normal. Turntable alternates rotation directions ■ This is on motor rotation at 100% cooking power. The microwave oven's cooling fan...
User Manual
Page 6
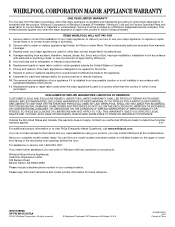
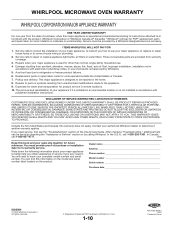
... house wiring or plumbing. 2. DISCLAIMER OF IMPLIED WARRANTIES; Outside the 50 United States and Canada, this User Instructions and model number information for product service in accordance with electrical or plumbing codes, or use your complete model number ready. Have your major appliance, to replace or repair house fuses or to refrigerator or freezer product failures. 6. If you need assistance using your product, you can find your correspondence. ITEMS WHIRLPOOL WILL...
... house wiring or plumbing. 2. DISCLAIMER OF IMPLIED WARRANTIES; Outside the 50 United States and Canada, this User Instructions and model number information for product service in accordance with electrical or plumbing codes, or use your complete model number ready. Have your major appliance, to replace or repair house fuses or to refrigerator or freezer product failures. 6. If you need assistance using your product, you can find your correspondence. ITEMS WHIRLPOOL WILL...
Service Guide
Page 3
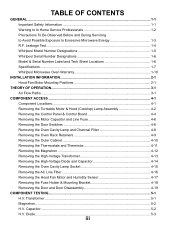
...1-5 Whirlpool Serial Number Designations 1-6 Model & Serial Number Label and Tech Sheet Locations 1-6 Specifications...1-7 Whirlpool Microwave Oven Warranty 1-10 Installation Information 2-1 Hood Fan Motor Mounting Positions 2-1 THEORY OF OPERATION...3-1 Air Flow Paths...3-1 COMPONENT ACCESS...4-1 Component Locations...4-1 Removing the Turntable Motor & Hood (Cooktop) Lamp Assembly 4-2 Removing the Control Panel & Control Board 4-4 Removing the Motor Capacitor and Line Fuse 4-6 Removing the Door Switches 4-6 Removing the Oven Cavity Lamp and Charcoal Filter 4-8 Removing the Oven Rack...
...1-5 Whirlpool Serial Number Designations 1-6 Model & Serial Number Label and Tech Sheet Locations 1-6 Specifications...1-7 Whirlpool Microwave Oven Warranty 1-10 Installation Information 2-1 Hood Fan Motor Mounting Positions 2-1 THEORY OF OPERATION...3-1 Air Flow Paths...3-1 COMPONENT ACCESS...4-1 Component Locations...4-1 Removing the Turntable Motor & Hood (Cooktop) Lamp Assembly 4-2 Removing the Control Panel & Control Board 4-4 Removing the Motor Capacitor and Line Fuse 4-6 Removing the Door Switches 4-6 Removing the Oven Cavity Lamp and Charcoal Filter 4-8 Removing the Oven Rack...
Service Guide
Page 5
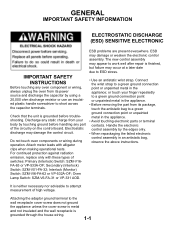
... above instructions. Handle the electronic control assembly by touching ground before troubleshooting. Interlock (Monitor) Switch: SZM-VI6-FA-62 or VP-532A-OF; ESD may damage the control circuit. General Important Safety Information Electrostatic discharge (esd) sensitive electronic Important safety Instructions Before touching any oven component or wiring, always unplug the oven from its package, touch the antistatic bag to a green ground connection...
... above instructions. Handle the electronic control assembly by touching ground before troubleshooting. Interlock (Monitor) Switch: SZM-VI6-FA-62 or VP-532A-OF; ESD may damage the control circuit. General Important Safety Information Electrostatic discharge (esd) sensitive electronic Important safety Instructions Before touching any oven component or wiring, always unplug the oven from its package, touch the antistatic bag to a green ground connection...
Service Guide
Page 6
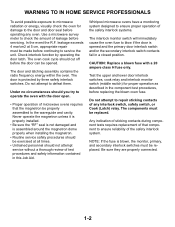
... this Job Aid. Under no circumstances should you try to operate the oven with a 20 ampere class H fuse only. Be sure they are properly connected. 1-2 Never operate the magnetron unless it is properly installed. • Be sure the "RF" seal is not damaged and is protected by operating the door latch. CAUTION: Replace a blown fuse with the door open. • Proper operation of microwave ovens requires that component...
... this Job Aid. Under no circumstances should you try to operate the oven with a 20 ampere class H fuse only. Be sure they are properly connected. 1-2 Never operate the magnetron unless it is properly installed. • Be sure the "RF" seal is not damaged and is protected by operating the door latch. CAUTION: Replace a blown fuse with the door open. • Proper operation of microwave ovens requires that component...
Service Guide
Page 8
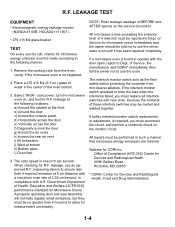
Remove the cooking rack from microwave radiation. b) Around the door. k) Bottom plate. measuring device to blow the fuse when the interlocks failed, you must be performed in compliance with the door open, report to use the microwave oven until it has been repaired completely. If the interlock monitor switch operated to ensure less than 4 mw/cm2 to Dept. If safety interlock/monitor switch replacement, or adjustment, is required, you must be...
Remove the cooking rack from microwave radiation. b) Around the door. k) Bottom plate. measuring device to blow the fuse when the interlocks failed, you must be performed in compliance with the door open, report to use the microwave oven until it has been repaired completely. If the interlock monitor switch operated to ensure less than 4 mw/cm2 to Dept. If safety interlock/monitor switch replacement, or adjustment, is required, you must be...
Service Guide
Page 11
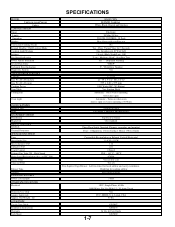
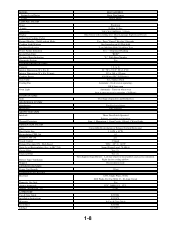
... Display Convection Cooking Cycles Keypad Disable / Child Lockout Mode Cooktop Light Wattage Settings Fan Speed Indication Power Failure Indication Invalid Data Entry Technical Error Indication Diagnostic System OVEN INTERIOR F EATURES Capacity Size W x H x D (inches) Size W x H x D (mm) Cooking Power Turn Table Cooling Fan Oven Light DOOR F EATURES Handle/Latch Seals MICROWAVE SYSTEM Distribution Magnetron SAF ETYF EATURES Interlock Thermal Protectors VENTILATION SYSTEM Type Duct Outlet Size Recirculation CFM Exhaust CFM Touch Control Exhaust Fan 'Auto ON - Lb LITERATURE Use & Care Guide...
... Display Convection Cooking Cycles Keypad Disable / Child Lockout Mode Cooktop Light Wattage Settings Fan Speed Indication Power Failure Indication Invalid Data Entry Technical Error Indication Diagnostic System OVEN INTERIOR F EATURES Capacity Size W x H x D (inches) Size W x H x D (mm) Cooking Power Turn Table Cooling Fan Oven Light DOOR F EATURES Handle/Latch Seals MICROWAVE SYSTEM Distribution Magnetron SAF ETYF EATURES Interlock Thermal Protectors VENTILATION SYSTEM Type Duct Outlet Size Recirculation CFM Exhaust CFM Touch Control Exhaust Fan 'Auto ON - Lb LITERATURE Use & Care Guide...
Service Guide
Page 12
... Watts, For Use With 15 - 20 Amp Circuit Yes FCC, DHHS, UL, CUL 57 lbs. 8205884 8205870 In Use & Care Guide 8205886 8178573 1-8 M O DE L Feature Level/Series Colors CONTROL SYSTEM Timer Limits Operation Display Convection Cooking Cycles Keypad Disable / Child Lockout Mode Cooktop Light Wattage Fan Speed Indication Power Failure Indication Invalid Data Entry Technical Error Indication Diagnostic System OVEN INTERIOR FEATURES Capacity Interior Dimensions W x H x D Interior Dimensions W x H x D (mm) Cooking Power Turn Table Cooling Fan Oven Light DOOR FEATURES Seals MICROWAVE SYSTEM Distribution...
... Watts, For Use With 15 - 20 Amp Circuit Yes FCC, DHHS, UL, CUL 57 lbs. 8205884 8205870 In Use & Care Guide 8205886 8178573 1-8 M O DE L Feature Level/Series Colors CONTROL SYSTEM Timer Limits Operation Display Convection Cooking Cycles Keypad Disable / Child Lockout Mode Cooktop Light Wattage Fan Speed Indication Power Failure Indication Invalid Data Entry Technical Error Indication Diagnostic System OVEN INTERIOR FEATURES Capacity Interior Dimensions W x H x D Interior Dimensions W x H x D (mm) Cooking Power Turn Table Cooling Fan Oven Light DOOR FEATURES Seals MICROWAVE SYSTEM Distribution...
Service Guide
Page 14
... electrical or plumbing codes, or use of products not approved by Whirlpool. 5. You must be repaired in accordance with published installation instructions. Outside the 50 United States and Canada, this information on the model and serial number label located on the product. After checking "Troubleshooting," additional help you obtain assistance or service if you need to know your major appliance is designed to determine if another warranty...
... electrical or plumbing codes, or use of products not approved by Whirlpool. 5. You must be repaired in accordance with published installation instructions. Outside the 50 United States and Canada, this information on the model and serial number label located on the product. After checking "Troubleshooting," additional help you obtain assistance or service if you need to know your major appliance is designed to determine if another warranty...

Service Guide
Page 24
... cut yourself if you are attached to a mounting bracket at the top. The Primary interlock switch and Monitor interlock switch are not careful. 1. Top switch assembly screw Motor Capacitor Screw Bottom switch assembly screw Line Fuse Secondary interlock switch 5. Open the microwave oven door. Sharp edges may be careful when handling the sheet metal parts. To remove the line fuse, pull the fuse out of the fuse holder. 4-6 Remove the control panel (see page 4-4). 3. Remove the control panel...
... cut yourself if you are attached to a mounting bracket at the top. The Primary interlock switch and Monitor interlock switch are not careful. 1. Top switch assembly screw Motor Capacitor Screw Bottom switch assembly screw Line Fuse Secondary interlock switch 5. Open the microwave oven door. Sharp edges may be careful when handling the sheet metal parts. To remove the line fuse, pull the fuse out of the fuse holder. 4-6 Remove the control panel (see page 4-4). 3. Remove the control panel...

Service Guide
Page 46
... 1 beep Cavity Light & Turntable On- Relay 4912 Key 40 1 beep HF On (High Speed)- Touch Panel and Electronic Control Test Touch Panel and Electronic Control Test The microwave hood combination is pressed during this routine: 1. Release the OFF/CANCEL button and close the door. Timer Set/Off - Add 30 Sec - Cook Power - Defrost - Baked Potato - Key 32 1 beep Cavity Light On-Relay 4901 Key 33 1 beep Cooktop Light On (High)- Cook Time - Warm Hold...
... 1 beep Cavity Light & Turntable On- Relay 4912 Key 40 1 beep HF On (High Speed)- Touch Panel and Electronic Control Test Touch Panel and Electronic Control Test The microwave hood combination is pressed during this routine: 1. Release the OFF/CANCEL button and close the door. Timer Set/Off - Add 30 Sec - Cook Power - Defrost - Baked Potato - Key 32 1 beep Cavity Light On-Relay 4901 Key 33 1 beep Cooktop Light On (High)- Cook Time - Warm Hold...

Service Guide
Page 47
Replace touch panel. 3. Plug in microwave oven or reconnect power. 1. Plug in microwave oven or reconnect power. 1. If wiring is a problem with the microwave oven. Place 8 oz (250 mL) of lukewarm water in standby. 1. Failure Codes Indications Display Flashing colon ":" F2 F3H F6 Likely Failure Condition Power failure Touch panel failure Humidity sensor failure Microwave relay failure Recommended Repair Procedure After a power failure, the colon ":" will then be steady when in the center...
Replace touch panel. 3. Plug in microwave oven or reconnect power. 1. Plug in microwave oven or reconnect power. 1. If wiring is a problem with the microwave oven. Place 8 oz (250 mL) of lukewarm water in standby. 1. Failure Codes Indications Display Flashing colon ":" F2 F3H F6 Likely Failure Condition Power failure Touch panel failure Humidity sensor failure Microwave relay failure Recommended Repair Procedure After a power failure, the colon ":" will then be steady when in the center...
Installation Instructions
Page 1
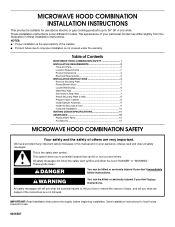
.... Table of Contents MICROWAVE HOOD COMBINATION SAFETY 1 INSTALLATION REQUIREMENTS 2 Tools and Parts 2 Location Requirements 2 Product Dimensions 3 Electrical Requirements 3 INSTALLATION INSTRUCTIONS 4 Remove Mounting Plate 4 Rotate Blower Motor 4 Locate Wall Stud(s 6 Mark Rear Wall 7 Drill Holes in Rear Wall 7 Attach Mounting Plate to Wall 8 Prepare Upper Cabinet 8 Install Damper Assembly 9 Install the Microwave Oven 9 Complete Installation 10 VENTING DESIGN SPECIFICATIONS 11 ASSISTANCE 12 Replacement Parts 12 Accessories 12 MICROWAVE HOOD COMBINATION SAFETY Your...
.... Table of Contents MICROWAVE HOOD COMBINATION SAFETY 1 INSTALLATION REQUIREMENTS 2 Tools and Parts 2 Location Requirements 2 Product Dimensions 3 Electrical Requirements 3 INSTALLATION INSTRUCTIONS 4 Remove Mounting Plate 4 Rotate Blower Motor 4 Locate Wall Stud(s 6 Mark Rear Wall 7 Drill Holes in Rear Wall 7 Attach Mounting Plate to Wall 8 Prepare Upper Cabinet 8 Install Damper Assembly 9 Install the Microwave Oven 9 Complete Installation 10 VENTING DESIGN SPECIFICATIONS 11 ASSISTANCE 12 Replacement Parts 12 Accessories 12 MICROWAVE HOOD COMBINATION SAFETY Your...
Installation Instructions
Page 2
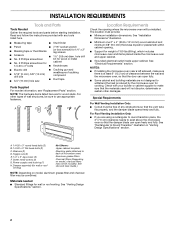
... Wall Venting Installation Only: ■ Cutout must provide: ■ Minimum installation dimensions. See Use and Care Guide.) NOTE: Depending on model, charcoal filters may be free of clearance between the wall and the microwave oven, so that the materials used will be included. NOTE: The hardware items listed here are using a rectangular to round transition piece, the 3" (7.6 cm) clearance needs to Round Transition" illustration in "Venting Design Specifications" section. See "Electrical Requirements" section. Power supply cord...
... Wall Venting Installation Only: ■ Cutout must provide: ■ Minimum installation dimensions. See Use and Care Guide.) NOTE: Depending on model, charcoal filters may be free of clearance between the wall and the microwave oven, so that the materials used will be included. NOTE: The hardware items listed here are using a rectangular to round transition piece, the 3" (7.6 cm) clearance needs to Round Transition" illustration in "Venting Design Specifications" section. See "Electrical Requirements" section. Power supply cord...
Installation Instructions
Page 3
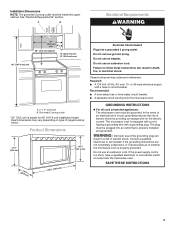
...; A time-delay fuse or time-delay circuit breaker. ■ A separate circuit serving only this microwave oven. The microwave oven is properly grounded. If the power supply cord is properly installed and grounded. SAVE THESE INSTRUCTIONS 3 Exact dimensions may vary depending on type of electric shock by providing an escape wire for 66" (167.6 cm) installation height. Do not use an adapter. Grounded 3 prong outlet *30" (76.2 cm) is typical for the electric current. Product Dimensions...
...; A time-delay fuse or time-delay circuit breaker. ■ A separate circuit serving only this microwave oven. The microwave oven is properly grounded. If the power supply cord is properly installed and grounded. SAVE THESE INSTRUCTIONS 3 Exact dimensions may vary depending on type of electric shock by providing an escape wire for 66" (167.6 cm) installation height. Do not use an adapter. Grounded 3 prong outlet *30" (76.2 cm) is typical for the electric current. Product Dimensions...
Installation Instructions
Page 10
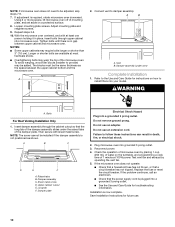
... a circuit breaker has not tripped. Do not remove ground prong. Test vent fan and exhaust by placing 1 cup (250 mL) of the microwave oven. Tighten bolts until there is required, rotate microwave oven downward. A 2. Connect vent to damper assembly. Vent B. Then secure with at 100% power. Save Installation Instructions for future use. 10 Replace the fuse or reset the circuit breaker. Loosen mounting plate screws. NOTE: If microwave oven does not need to be added. A B C D E F A. If adjustment is...
... a circuit breaker has not tripped. Do not remove ground prong. Test vent fan and exhaust by placing 1 cup (250 mL) of the microwave oven. Tighten bolts until there is required, rotate microwave oven downward. A 2. Connect vent to damper assembly. Vent B. Then secure with at 100% power. Save Installation Instructions for future use. 10 Replace the fuse or reset the circuit breaker. Loosen mounting plate screws. NOTE: If microwave oven does not need to be added. A B C D E F A. If adjustment is...


