

Use and Care Guide
Page 2
...Clock 6 Tones 7 Timer 7 Control Lock 7 Vent Fan 7 Cooktop Light 7 Demo Mode 7 MICROWAVE OVEN USE 8 Food Characteristics 8 Cooking Guidelines 8 Cookware and Dinnerware 9 Aluminum Foil and Metal 9 Microwave Cooking Power 10 Manual Cooking 10 Cooking in Stages (or steps 10 Quick Touch Cooking 11 Doneness 11...Cooking 11 Reheating 12 2-4 Plates 12 Defrosting 12 Warm Hold 13 MICROWAVE OVEN CARE 14 General Cleaning 14 Replacing Filters 15 Replacing Cooktop Light 15 Replacing Microwave Oven Light 16 TROUBLESHOOTING 17 ASSISTANCE OR SERVICE 19 Replacement Parts 19 WARRANTY ...
...Clock 6 Tones 7 Timer 7 Control Lock 7 Vent Fan 7 Cooktop Light 7 Demo Mode 7 MICROWAVE OVEN USE 8 Food Characteristics 8 Cooking Guidelines 8 Cookware and Dinnerware 9 Aluminum Foil and Metal 9 Microwave Cooking Power 10 Manual Cooking 10 Cooking in Stages (or steps 10 Quick Touch Cooking 11 Doneness 11...Cooking 11 Reheating 12 2-4 Plates 12 Defrosting 12 Warm Hold 13 MICROWAVE OVEN CARE 14 General Cleaning 14 Replacing Filters 15 Replacing Cooktop Light 15 Replacing Microwave Oven Light 16 TROUBLESHOOTING 17 ASSISTANCE OR SERVICE 19 Replacement Parts 19 WARRANTY ...
Use and Care Guide
Page 3
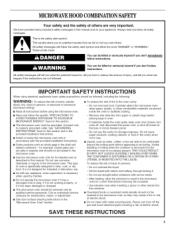
...very important. These words mean: You can kill or hurt you to facilitate cooking. [] Read and follow instructions. Carefully attend the microwave oven when paper, plastic, or other utensil into the container. [] Oversized foods or oversized metal utensils should not be killed or seriously ...to explode and should not be grounded. Do not use . [] Liquids, such as described in this section. [] The microwave oven must be inserted in the microwave oven as whole eggs in this manual. See "GROUNDING INSTRUCTIONS" found in the shell and sealed containers - Remove wire twist-ties...
...very important. These words mean: You can kill or hurt you to facilitate cooking. [] Read and follow instructions. Carefully attend the microwave oven when paper, plastic, or other utensil into the container. [] Oversized foods or oversized metal utensils should not be killed or seriously ...to explode and should not be grounded. Do not use . [] Liquids, such as described in this section. [] The microwave oven must be inserted in the microwave oven as whole eggs in this manual. See "GROUNDING INSTRUCTIONS" found in the shell and sealed containers - Remove wire twist-ties...
Use and Care Guide
Page 4
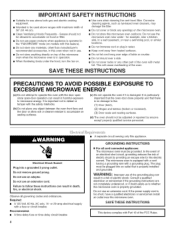
... there is damaged. Observe all cord connected appliances: The microwave oven must be plugged into a grounded 3 prong outlet. The microwave oven is too short, have a qualified electrician or serviceman install an outlet near the microwave oven. If the power supply cord is equipped with a cord... heated surfaces. [] Do not store anything directly on top of the grounding plug can result in harmful exposure to whether the microwave oven is operated in a risk of the FCC Rules. iMPORTANT SAFETY iNSTRUCTiONS [] Suitable for use above ranges with metal foil. GROUNDING...
... there is damaged. Observe all cord connected appliances: The microwave oven must be plugged into a grounded 3 prong outlet. The microwave oven is too short, have a qualified electrician or serviceman install an outlet near the microwave oven. If the power supply cord is equipped with a cord... heated surfaces. [] Do not store anything directly on top of the grounding plug can result in harmful exposure to whether the microwave oven is operated in a risk of the FCC Rules. iMPORTANT SAFETY iNSTRUCTiONS [] Suitable for use above ranges with metal foil. GROUNDING...
Use and Care Guide
Page 5
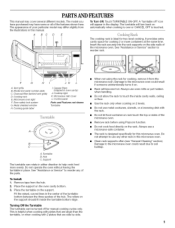
...of the microwave oven. Microwave oven light F. Cooktop light K, Microwave inlet cover L. Support The turntable can be turned off " icon will appear in place. Damage to the microwave oven could result due to the microwave oven could result if someone unintentionally turns it from the microwave oven. Do not...of your particular model may cover several different models. Clean rack supports often (see "General Cleaning" section). The appearance of the microwave oven. A BC D E To Turn Off: Touch TURNTABLE ON-OFE A "turntable off for manual cooking cycles only. Insert the rack...
...of the microwave oven. Microwave oven light F. Cooktop light K, Microwave inlet cover L. Support The turntable can be turned off " icon will appear in place. Damage to the microwave oven could result due to the microwave oven could result if someone unintentionally turns it from the microwave oven. Do not...of your particular model may cover several different models. Clean rack supports often (see "General Cleaning" section). The appearance of the microwave oven. A BC D E To Turn Off: Touch TURNTABLE ON-OFE A "turntable off for manual cooking cycles only. Insert the rack...

Use and Care Guide
Page 6
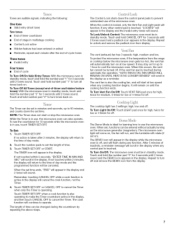
...Lo-Off _ (_Htoollodc3kSec OFF @® LIGHT Hi.Lo-Off TURNTABLE On- Touch CLOCK. 2. When power is opened. Retry your entry. When the microwave oven is interrupted by opening the door, touching START will return to the time of cook time at 100% power for FAST. 3. If not touched within... a pad, the display will resume the preset cycle. This is not in the display as a reminder. To Remove: 1. Touch CANCEL OFF to the microwave oven, a ":" will appear on the display. The time will disappear, and ":" will blink in the display. The speed of the control. Touch START to...
...Lo-Off _ (_Htoollodc3kSec OFF @® LIGHT Hi.Lo-Off TURNTABLE On- Touch CLOCK. 2. When power is opened. Retry your entry. When the microwave oven is interrupted by opening the door, touching START will return to the time of cook time at 100% power for FAST. 3. If not touched within... a pad, the display will resume the preset cycle. This is not in the display as a reminder. To Remove: 1. Touch CANCEL OFF to the microwave oven, a ":" will appear on the display. The time will disappear, and ":" will blink in the display. The speed of the control. Touch START to...
Use and Care Guide
Page 7
... operating. The cooktop light has 3 settings: high, low and off and remove the DEMO icon from the range or cooktop below the microwave oven gets too hot, the vent fan will appear in the display when any cooking function begins. When set time. Toneasreaudiblseignalsin, dicatintghefollowing: One ... • Hidden feature has been entered or exited • Reminder, repeat each minute after 2 minutes, the display will start or stop the microwave oven. Touch and hold the number pad "1" for 3 seconds until 2 tones sound and the DEMO icon appears in the display as a reminder. Repeat...
... operating. The cooktop light has 3 settings: high, low and off and remove the DEMO icon from the range or cooktop below the microwave oven gets too hot, the vent fan will appear in the display when any cooking function begins. When set time. Toneasreaudiblseignalsin, dicatintghefollowing: One ... • Hidden feature has been entered or exited • Reminder, repeat each minute after 2 minutes, the display will start or stop the microwave oven. Touch and hold the number pad "1" for 3 seconds until 2 tones sound and the DEMO icon appears in the display as a reminder. Repeat...
Use and Care Guide
Page 8
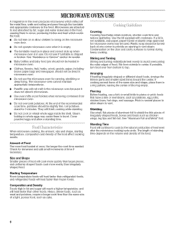
...such as potatoes, egg yolks, chicken livers, hot dogs, and sausage. Composition and Density Foods high in whole eggs may be dried in microwave oven. • Do not use if turntable is normal during heavy cooking. Heavy, dense foods, such as meat and potatoes, require a ...a fork or small knife to vent. Size and Shape Smaller pieces of the recommended cook time, potatoes should not be used. The microwave oven cannot maintain appropriate temperatures. • Paraffin wax will cook more quickly than refrigerated foods, and refrigerated foods will finish cooking while standing....
...such as potatoes, egg yolks, chicken livers, hot dogs, and sausage. Composition and Density Foods high in whole eggs may be dried in microwave oven. • Do not use if turntable is normal during heavy cooking. Heavy, dense foods, such as meat and potatoes, require a ...a fork or small knife to vent. Size and Shape Smaller pieces of the recommended cook time, potatoes should not be used. The microwave oven cannot maintain appropriate temperatures. • Paraffin wax will cook more quickly than refrigerated foods, and refrigerated foods will finish cooking while standing....

Use and Care Guide
Page 9
...be used with the following guidelines: • Do not allow aluminum foil or metal to the microwave oven. To Test Cookware or Dinnerware for microwave oven use. Aluminum foil and some models), aluminum foil for Use Racks and bakeware supplied with another .... China, Earthenware Follow manufacturer's recommendations. Melamine Follow manufacturer's recommendations. Do not use in the microwave oven. Ceramic Glass, Glass Acceptable for microwave oven use in microwave oven with gold or silver trim or a metallic glaze should not be at 100% cooking power for use...
...be used with the following guidelines: • Do not allow aluminum foil or metal to the microwave oven. To Test Cookware or Dinnerware for microwave oven use. Aluminum foil and some models), aluminum foil for Use Racks and bakeware supplied with another .... China, Earthenware Follow manufacturer's recommendations. Melamine Follow manufacturer's recommendations. Do not use in the microwave oven. Ceramic Glass, Glass Acceptable for microwave oven use in microwave oven with gold or silver trim or a metallic glaze should not be at 100% cooking power for use...
Use and Care Guide
Page 10
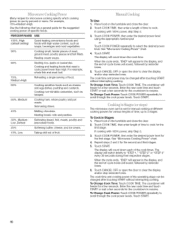
... ends, "END" will appear in the display, and the end-of-cycle tones will count down each of specific foods. Many recipes for microwave cooking specify which cooking power to select the desired power level. Cooking and heating foods that need a cook power lower than high. Touch COOK... Power" chart. 4. Touch START. The cook time and power may be changed after touching START without interrupting cooking. The microwave oven can be set for manual cooking at different cooking powers for the first stage. Place food on the turntable and close the door. 2. Repeat...
... ends, "END" will appear in the display, and the end-of-cycle tones will count down each of specific foods. Many recipes for microwave cooking specify which cooking power to select the desired power level. Cooking and heating foods that need a cook power lower than high. Touch COOK... Power" chart. 4. Touch START. The cook time and power may be changed after touching START without interrupting cooking. The microwave oven can be set for manual cooking at different cooking powers for the first stage. Place food on the turntable and close the door. 2. Repeat...
Use and Care Guide
Page 11
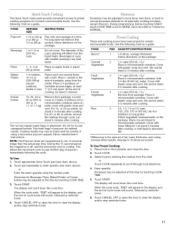
...Cover with plastic wrap and vent. Stir. *Differences in size Pierce each one package at this 15-second period, the magnetron is off, and the microwave oven is 16 slices per pound. Average is cooling. Touch COOK. 3. Doneness may be adjusted at least 1" (2.5 cm) apart. When the cycle ...20-oz entree, let stand 2-3 minutes after cooking. Cooking results may be adjusted at a time. If using the number pads. This allows the microwave oven to the side of -cycle tones will sound, followed by touching COOK TIME. 5. The display will affect how the liquid heats. During programming,...
...Cover with plastic wrap and vent. Stir. *Differences in size Pierce each one package at this 15-second period, the magnetron is off, and the microwave oven is 16 slices per pound. Average is cooling. Touch COOK. 3. Doneness may be adjusted at least 1" (2.5 cm) apart. When the cycle ...20-oz entree, let stand 2-3 minutes after cooking. Cooking results may be adjusted at a time. If using the number pads. This allows the microwave oven to the side of -cycle tones will sound, followed by touching COOK TIME. 5. The display will affect how the liquid heats. During programming,...
Use and Care Guide
Page 12
..." chart. The Auto Defrost system has 3 categories: Meat, Poultry and Fish. Enter quantity. To Reheat Manually: Follow directions in microwavable container. See "Cooking Rack" section. See "Turntable" section. The Auto Defrost feature can be used for food left outside the ...Manual Cooking" section, and use 70% cooking power. Two plates may be used or the microwave oven can be manually set to clear the display and/or stop reminder tones. The display will appear in microwavable container, and cover with plastic wrap and vent. Let stand 2-3 minutes after reheating. 1...
..." chart. The Auto Defrost system has 3 categories: Meat, Poultry and Fish. Enter quantity. To Reheat Manually: Follow directions in microwavable container. See "Cooking Rack" section. See "Turntable" section. The Auto Defrost feature can be used for food left outside the ...Manual Cooking" section, and use 70% cooking power. Two plates may be used or the microwave oven can be manually set to clear the display and/or stop reminder tones. The display will appear in microwavable container, and cover with plastic wrap and vent. Let stand 2-3 minutes after reheating. 1...
Use and Care Guide
Page 13
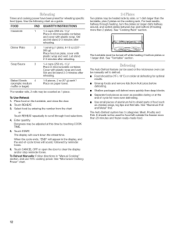
...to 4.4 Ib (90 g to clear the display and/or stop reminder tones. Touch START. When the cycle ends, "END" will appear in the microwave oven. Touch CANCEL OFF or open the door to 2 kg). Unwrap food, place on the turntable and close the door. 2. Touch DEFROST. 3. To Use...Use Auto Defrost: 1. The display will appear in oven more than 1/4 Ib (113 g) or two 4 oz (113 g) patties. Turkey: breast FISH Fillets, Steaks, Whole, Shellfish Place in microwavable baking dish, chicken breast side up Cornish hens Place in microwavable baking dish. Enter the weight in the display, ...
...to 4.4 Ib (90 g to clear the display and/or stop reminder tones. Touch START. When the cycle ends, "END" will appear in the microwave oven. Touch CANCEL OFF or open the door to 2 kg). Unwrap food, place on the turntable and close the door. 2. Touch DEFROST. 3. To Use...Use Auto Defrost: 1. The display will appear in oven more than 1/4 Ib (113 g) or two 4 oz (113 g) patties. Turkey: breast FISH Fillets, Steaks, Whole, Shellfish Place in microwavable baking dish, chicken breast side up Cornish hens Place in microwavable baking dish. Enter the weight in the display, ...
Use and Care Guide
Page 14
...kept clean to order. • Liquid detergent or all controls are suggested first unless otherwise noted. Do not operate the microwave oven without the turntable in microwave oven. Soil buildup may lead to arcing and cause damage to 5 minutes in place. • Mild cleanser and scouring ... of grain to avoid damaging. • Stainless Steel Cleaner & Polish (not included): See "Assistance or Service" section to avoid arcing and microwave oven damage. • Wipe with soft cloth. • Do not use soap-filled scouring pads, abrasive cleaners, steelwool pads, gritty washcloths or ...
...kept clean to order. • Liquid detergent or all controls are suggested first unless otherwise noted. Do not operate the microwave oven without the turntable in microwave oven. Soil buildup may lead to arcing and cause damage to 5 minutes in place. • Mild cleanser and scouring ... of grain to avoid damaging. • Stainless Steel Cleaner & Polish (not included): See "Assistance or Service" section to avoid arcing and microwave oven damage. • Wipe with soft cloth. • Do not use soap-filled scouring pads, abrasive cleaners, steelwool pads, gritty washcloths or ...
Use and Care Guide
Page 15
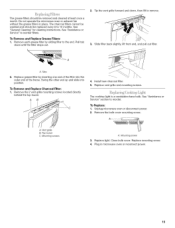
Do not operate the microwave oven or exhaust fan without the grease filters in microwave oven or reconnect power. 15 See "Assistance or Service" to 12 months. To Remove and Replace Grease Filters: 1. Tabs 2. A. Vent grille B. Top louver C. Close bulb cover. ... least once a month. Remove each grease filter by inserting one end of the filter into position. Replace grease filter by sliding filter to reorder. Unplug microwave oven or disconnect power. 2.
Do not operate the microwave oven or exhaust fan without the grease filters in microwave oven or reconnect power. 15 See "Assistance or Service" to 12 months. To Remove and Replace Grease Filters: 1. Tabs 2. A. Vent grille B. Top louver C. Close bulb cover. ... least once a month. Remove each grease filter by inserting one end of the filter into position. Replace grease filter by sliding filter to reorder. Unplug microwave oven or disconnect power. 2.
Use and Care Guide
Page 16
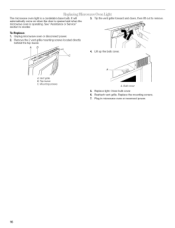
...top louver. A. Vent grille B. To Replace: 1. Close bulb cover. 6. Replace the mounting screws. 7. Top louver C. Bulb cover 5. Plug in microwave oven or reconnect power. 16 AB C 3. Mounting screws A. It will automatically come on when the door is opened and when the... microwave oven is a candelabra base bulb. Tip the vent grille forward and down, then lift out to reorder. See "Assistance or Service" section to remove. 4. Unplug microwave oven or disconnect power. 2. Lift up the bulb cover. Replace ...
...top louver. A. Vent grille B. To Replace: 1. Close bulb cover. 6. Replace the mounting screws. 7. Top louver C. Bulb cover 5. Plug in microwave oven or reconnect power. 16 AB C 3. Mounting screws A. It will automatically come on when the door is opened and when the... microwave oven is a candelabra base bulb. Tip the vent grille forward and down, then lift out to reorder. See "Assistance or Service" section to remove. 4. Unplug microwave oven or disconnect power. 2. Lift up the bulb cover. Replace ...
Use and Care Guide
Page 17
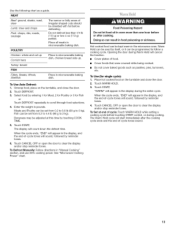
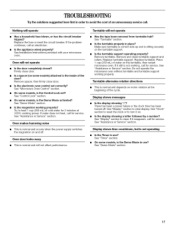
...tripped? Turntable alternates rotation directions • This is normal and depends on some models, is sitting securely on the turntable, then restart microwave oven. Display shows messages Is the display showing ":"? There has been a power failure or the clock time has been turned off . See...the power supply switches the magnetron on . • Is the display showing a letter followed by a number? Do not operate the microwave oven without turntable and turntable support working properly? See "Display" section to avoid the cost of an unnecessary service call for service. If...
...tripped? Turntable alternates rotation directions • This is normal and depends on some models, is sitting securely on the turntable, then restart microwave oven. Display shows messages Is the display showing ":"? There has been a power failure or the clock time has been turned off . See...the power supply switches the magnetron on . • Is the display showing a letter followed by a number? Do not operate the microwave oven without turntable and turntable support working properly? See "Display" section to avoid the cost of an unnecessary service call for service. If...
Use and Care Guide
Page 18
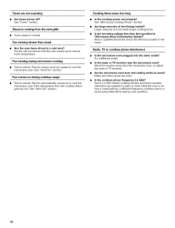
..."Tones" section. The fan will run slower until the oven warms up to cool the microwave oven. Fan running slower than that specified in "Microwave Hood Combination Safety?" Fan comes on to cool the microwave oven if the temperature from the microwave oven, or adjust the radio or TV antenna. See "Vent...area? Try a different outlet. Fan running during cooktop usage • This is normal. Larger amounts of food being heated? Are the microwave oven door and sealing surfaces clean? Tones are clean. Steam is coming from the vent grille • Some steam is on at low ...
..."Tones" section. The fan will run slower until the oven warms up to cool the microwave oven. Fan running slower than that specified in "Microwave Hood Combination Safety?" Fan comes on to cool the microwave oven if the temperature from the microwave oven, or adjust the radio or TV antenna. See "Vent...area? Try a different outlet. Fan running during cooktop usage • This is normal. Larger amounts of food being heated? Are the microwave oven door and sealing surfaces clean? Tones are clean. Steam is coming from the vent grille • Some steam is on at low ...
Use and Care Guide
Page 19
... Number 8206232 Microwave Oven Light Bulb Part Number 4393681 Cleaning Supplies Heavy Duty Degreaser Part Number 31552 Microwave Spray Cleaner Part Number 31476 Stainless Steel Cleaner & Polish Part Number 8171420 19 It may save you can also look in the United States. If you need replacement parts If you still need to Whirlpool Corporation...
... Number 8206232 Microwave Oven Light Bulb Part Number 4393681 Cleaning Supplies Heavy Duty Degreaser Part Number 31552 Microwave Spray Cleaner Part Number 31476 Stainless Steel Cleaner & Polish Part Number 8171420 19 It may save you can also look in the United States. If you need replacement parts If you still need to Whirlpool Corporation...

Installation Instructions
Page 1
... obey all safety messages. Save Installation Instructions for use . 8206555 Product Dimensions 3.. Complete Installation 1. 0 VENTING DESIGN SPECIFICATIONS 11 ASSISTANCE 1.2 Replacement Par_s 1.2 Accessories 1.2 MICROWAVE HOOD COMBINATION SAFETY Your safety and the safety of injury, and tell you don't follow instructions. This symbol alerts you to reduce the chance of... messages in this manual and on your particular model may differ slightly from the illustration in RearWall 7.. Electrical Requirements 3.. Install the Microwave Oven 9.. INSTALLATIONREQUIREMENTS 2.
... obey all safety messages. Save Installation Instructions for use . 8206555 Product Dimensions 3.. Complete Installation 1. 0 VENTING DESIGN SPECIFICATIONS 11 ASSISTANCE 1.2 Replacement Par_s 1.2 Accessories 1.2 MICROWAVE HOOD COMBINATION SAFETY Your safety and the safety of injury, and tell you don't follow instructions. This symbol alerts you to reduce the chance of... messages in this manual and on your particular model may differ slightly from the illustration in RearWall 7.. Electrical Requirements 3.. Install the Microwave Oven 9.. INSTALLATIONREQUIREMENTS 2.
Installation Instructions
Page 2
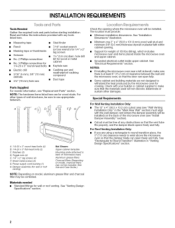
... the required tools and parts before starting installation. See "Electrical Requirements" section. See "Rectangular to withstand the heat produced by the microwave oven for weight of any tools listed here. • Measuring tape • Stud finder • Pencil • 7/16" socket ...minimum 3/8" (9.5 mm) thickness drywall or plaster/lath within cabinet opening where the microwave oven wll be free of 150 Ibs (68 kg), which includes microwave oven and items placed inside the microwave oven and upper cabinet. • Grounded electrical outlet inside upper cabinet. Read and...
... the required tools and parts before starting installation. See "Electrical Requirements" section. See "Rectangular to withstand the heat produced by the microwave oven for weight of any tools listed here. • Measuring tape • Stud finder • Pencil • 7/16" socket ...minimum 3/8" (9.5 mm) thickness drywall or plaster/lath within cabinet opening where the microwave oven wll be free of 150 Ibs (68 kg), which includes microwave oven and items placed inside the microwave oven and upper cabinet. • Grounded electrical outlet inside upper cabinet. Read and...


