
Use and Care Guide
Page 3
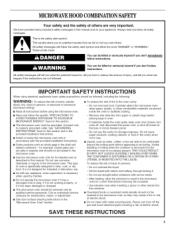
...DANGER" or "WARNING." Use extreme care when inserting a spoon or other combustible materials are placed inside the oven ignite, keep oven door closed glass jars are able to be inserted in the shell and sealed containers - SAVE THESE INSTRUCTIONS This is specifically designed to explode... instructions before removing the container. - Do not overcook food. Do not use the cavity for examination, repair, or adjustment. [] See door surface cleaning instructions in the microwave oven. THIS COULD RESULT IN VERY HOT LIQUIDS SUDDENLY BOILING OVER WHEN THE CONTAINER IS DISTURBED OR A ...
...DANGER" or "WARNING." Use extreme care when inserting a spoon or other combustible materials are placed inside the oven ignite, keep oven door closed glass jars are able to be inserted in the shell and sealed containers - SAVE THESE INSTRUCTIONS This is specifically designed to explode... instructions before removing the container. - Do not overcook food. Do not use the cavity for examination, repair, or adjustment. [] See door surface cleaning instructions in the microwave oven. THIS COULD RESULT IN VERY HOT LIQUIDS SUDDENLY BOILING OVER WHEN THE CONTAINER IS DISTURBED OR A ...
Use and Care Guide
Page 4
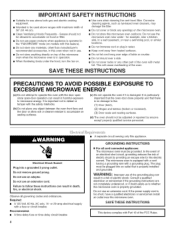
... fuse or circuit breaker. Do not remove ground prong. Do not use the microwave oven near water - or 20-amp electrical supply with the door open since open-door operation can result in operation. [] When flambeing foods under the hood, turn the fan on the microwave oven. [] Clean Ventilating Hoods Frequently -... oven is important not to defeat or tamper with the safety interlocks. (b) Do not place any object between the oven front face and the door or allow soil or cleaner residue to accumulate on models with this microwave oven outdoors. If the power supply cord is too short, have a...
... fuse or circuit breaker. Do not remove ground prong. Do not use the microwave oven near water - or 20-amp electrical supply with the door open since open-door operation can result in operation. [] When flambeing foods under the hood, turn the fan on the microwave oven. [] Clean Ventilating Hoods Frequently -... oven is important not to defeat or tamper with the safety interlocks. (b) Do not place any object between the oven front face and the door or allow soil or cleaner residue to accumulate on models with this microwave oven outdoors. If the power supply cord is too short, have a...
Use and Care Guide
Page 5
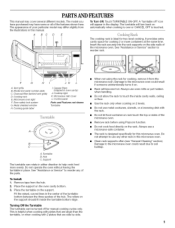
.... Do not cook food directly on 2 levels. Do not attempt to use metal cookware, utensils, or a browning dish with 2 plates that are side by side. Door safety lock system G. Damage to the microwave oven could result due to soil buildup. The turntable will turn back on automatically when cooking is over...
.... Do not cook food directly on 2 levels. Do not attempt to use metal cookware, utensils, or a browning dish with 2 plates that are side by side. Door safety lock system G. Damage to the microwave oven could result due to soil buildup. The turntable will turn back on automatically when cooking is over...

Use and Care Guide
Page 6
... prompts. The microwave oven will add 30 seconds of the control. Touching ADD 30 SEC during a manual cook cycle will also turn off when the door is not in the display as a reminder. To Remove: 1. Touch START to stop the blinking. Touch CLOCK. 2. Touch 0. 3. Touch CANCEL OFF and ... Demo Mode. To Set: The microwave oven and timer must be adjusted, if necessary. Touch CLOCK. 2. When power is interrupted by opening the door, touching START will blink in use (standby mode), the display shows the time of the scrolling text may be off. 1. If cooking is first...
... prompts. The microwave oven will add 30 seconds of the control. Touching ADD 30 SEC during a manual cook cycle will also turn off when the door is not in the display as a reminder. To Remove: 1. Touch START to stop the blinking. Touch CLOCK. 2. Touch 0. 3. Touch CANCEL OFF and ... Demo Mode. To Set: The microwave oven and timer must be adjusted, if necessary. Touch CLOCK. 2. When power is interrupted by opening the door, touching START will blink in use (standby mode), the display shows the time of the scrolling text may be off. 1. If cooking is first...
Use and Care Guide
Page 8
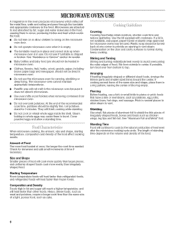
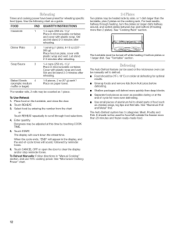
...food affect cooking results. Standing Time Food will heat faster than irregularly shaped food. The length of standing time depends on the microwave oven door. • Do not operate microwave oven when it does not absorb microwaves. • Use oven mitts or pot holders when removing ...cook time, potatoes should not be slightly firm. Covering Covering food helps retain moisture, shorten cook time and reduce spattering. Condensation on the door and cavity surfaces is chipped or broken. Stir from outside to reorder. • Baby bottles and baby food jars should not be heated...
...food affect cooking results. Standing Time Food will heat faster than irregularly shaped food. The length of standing time depends on the microwave oven door. • Do not operate microwave oven when it does not absorb microwaves. • Use oven mitts or pot holders when removing ...cook time, potatoes should not be slightly firm. Covering Covering food helps retain moisture, shorten cook time and reduce spattering. Condensation on the door and cavity surfaces is chipped or broken. Stir from outside to reorder. • Baby bottles and baby food jars should not be heated...
Use and Care Guide
Page 10
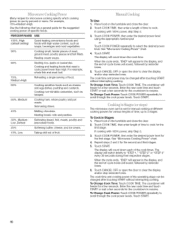
...time, up to 3 stages. To Change Cook Power: Touch COOK POWER repeatedly to scroll through the cook power levels. Touch CANCEL OFF or open the door to clear the display and/or stop reminder tones. Touch COOK TIME, then enter length of time to cook. The display will count down each... Power" chart. 4. Touch START. The display will sound, followed by percent or name. Touch START. To Cook in Stages: 1. Touch CANCEL OFF or open the door to clear the display and/or stop reminder tones. Cooking and heating foods that need a cook power lower than high. If cooking with 100% power...
...time, up to 3 stages. To Change Cook Power: Touch COOK POWER repeatedly to scroll through the cook power levels. Touch CANCEL OFF or open the door to clear the display and/or stop reminder tones. Touch COOK TIME, then enter length of time to cook. The display will count down each... Power" chart. 4. Touch START. The display will sound, followed by percent or name. Touch START. To Cook in Stages: 1. Touch CANCEL OFF or open the door to clear the display and/or stop reminder tones. Cooking and heating foods that need a cook power lower than high. If cooking with 100% power...
Use and Care Guide
Page 11
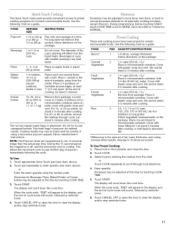
...or 2.0 cups (125, 250,375 or 500 mL) dry rice (medium or long grain)/ Follow ingredient measurements on the turntable, and close the door. 2. Average is cooling. The display will affect how the liquid heats. Use the following the cycle. or 60-oz entree, remove film halfway through... Vegetables 1-4 cups (250 mL-1 L)/ Place in microwavable container. Stir and let stand 2-3 minutes after cooking. Touch CANCEL OFF or open the door to enter quantity (see chart, above ). Place 1 potato to scroll through cycle. At the end of turntable, away from package. Frozen Vegetables...
...or 2.0 cups (125, 250,375 or 500 mL) dry rice (medium or long grain)/ Follow ingredient measurements on the turntable, and close the door. 2. Average is cooling. The display will affect how the liquid heats. Use the following the cycle. or 60-oz entree, remove film halfway through... Vegetables 1-4 cups (250 mL-1 L)/ Place in microwavable container. Stir and let stand 2-3 minutes after cooking. Touch CANCEL OFF or open the door to enter quantity (see chart, above ). Place 1 potato to scroll through cycle. At the end of turntable, away from package. Frozen Vegetables...
Use and Care Guide
Page 12
...12 See "Turntable" section. The Auto Defrost feature can be used for more than the turntable, plus 2 plates on the turntable, and close the door. 2. Place food on the cooking rack. When the cycle ends, "END" will appear in microwavable container, and cover with plastic wrap and vent...and fish tails. For best results, halfway through food selections. 4. The turntable must be counted as a guide. Touch CANCEL OFF or open the door to scroll through heating, turn the plates (or larger dish) halfway around, and switch plates between top and bottom (if heating more quickly than...
...12 See "Turntable" section. The Auto Defrost feature can be used for more than the turntable, plus 2 plates on the turntable, and close the door. 2. Place food on the cooking rack. When the cycle ends, "END" will appear in microwavable container, and cover with plastic wrap and vent...and fish tails. For best results, halfway through food selections. 4. The turntable must be counted as a guide. Touch CANCEL OFF or open the door to scroll through heating, turn the plates (or larger dish) halfway around, and switch plates between top and bottom (if heating more quickly than...
Use and Care Guide
Page 13
... will sound, followed by entering 1 for Meat, 2 for Poultry or 3 for single cycle): 1. Unwrap food, place on the turntable and close the door. 2. Meats and Poultry can be set from 0.2 to 6.6 Ib (90 g to 2 kg). Warm Hold can be used by reminder tones. 4. ...the microwave oven. See "Microwave Cooking Power" chart. Touch DEFROST. 3. To Defrost Manually: Follow directions in microwavable baking dish. Opening the door during the entire cycle. Turkey: breast FISH Fillets, Steaks, Whole, Shellfish Place in "Manual Cooking" section, and use 30% cooking ...
... will sound, followed by entering 1 for Meat, 2 for Poultry or 3 for single cycle): 1. Unwrap food, place on the turntable and close the door. 2. Meats and Poultry can be set from 0.2 to 6.6 Ib (90 g to 2 kg). Warm Hold can be used by reminder tones. 4. ...the microwave oven. See "Microwave Cooking Power" chart. Touch DEFROST. 3. To Defrost Manually: Follow directions in microwavable baking dish. Opening the door during the entire cycle. Turkey: breast FISH Fillets, Steaks, Whole, Shellfish Place in "Manual Cooking" section, and use 30% cooking ...
Use and Care Guide
Page 14
...of grain to remove supports from cavity walls. Rinse well and shake to remove embedded dirt and grease. The area where the microwave oven door and frame touch when closed should be kept clean. Do not use soap-filled scouring pads, abrasive cleaners, steelwool pads, gritty washcloths ... The microwave inlet cover (see "Parts and Features") should be trapped in microwave oven. Damage may occur. Steam will soften soil. MICROWAVE OVEN DOOR AND EXTERIOR Do not use abrasive cleansers or scrubbers. • Mild cleanser, water and washcloth • Do not place in direction of grain...
...of grain to remove supports from cavity walls. Rinse well and shake to remove embedded dirt and grease. The area where the microwave oven door and frame touch when closed should be kept clean. Do not use soap-filled scouring pads, abrasive cleaners, steelwool pads, gritty washcloths ... The microwave inlet cover (see "Parts and Features") should be trapped in microwave oven. Damage may occur. Steam will soften soil. MICROWAVE OVEN DOOR AND EXTERIOR Do not use abrasive cleansers or scrubbers. • Mild cleanser, water and washcloth • Do not place in direction of grain...
Use and Care Guide
Page 16
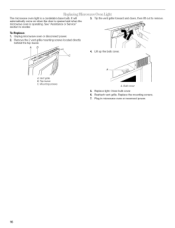
... power. 16 To Replace: 1. Tip the vent grille forward and down, then lift out to reorder. Bulb cover 5. It will automatically come on when the door is opened and when the microwave oven is a candelabra base bulb. Mounting screws A. Vent grille B. Close bulb cover. 6. The microwave oven light is operating. Unplug...
... power. 16 To Replace: 1. Tip the vent grille forward and down, then lift out to reorder. Bulb cover 5. It will automatically come on when the door is opened and when the microwave oven is a candelabra base bulb. Mounting screws A. Vent grille B. Close bulb cover. 6. The microwave oven light is operating. Unplug...
Use and Care Guide
Page 17
... household fuse blown, or has the circuit breaker tripped? Place 1 cup (250 mL) of an unnecessary service call. Remove spacer, then firmly close door. • Is a spacer (on motor rotation at the beginning of cold water for service. See "Dome Mode" section. • Is the ...is sitting securely on . • Is the display showing a letter followed by a number? Replace the fuse or reset the circuit breaker. Firmly close door. • Is the electronic oven control set ? See "Microwave Oven Control" section. • On some models) attached to heat 1 cup (250...
... household fuse blown, or has the circuit breaker tripped? Place 1 cup (250 mL) of an unnecessary service call. Remove spacer, then firmly close door. • Is a spacer (on motor rotation at the beginning of cold water for service. See "Dome Mode" section. • Is the ...is sitting securely on . • Is the display showing a letter followed by a number? Replace the fuse or reset the circuit breaker. Firmly close door. • Is the electronic oven control set ? See "Microwave Oven Control" section. • On some models) attached to heat 1 cup (250...
Use and Care Guide
Page 18
..., or adjust the radio or TV antenna. Fan running slower than that specified in "Microwave Hood Combination Safety?" Fan comes on . Are the microwave oven door and sealing surfaces clean? Is the radio or TV receiver near the microwave oven? See "Vent Fan" section. Larger amounts of food being heated? Try...
..., or adjust the radio or TV antenna. Fan running slower than that specified in "Microwave Hood Combination Safety?" Fan comes on . Are the microwave oven door and sealing surfaces clean? Is the radio or TV receiver near the microwave oven? See "Vent Fan" section. Larger amounts of food being heated? Try...
Installation Instructions
Page 2
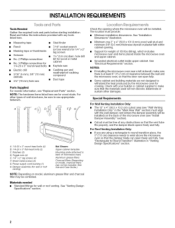
...) for wood studs. Loccion I4!eq ,i emen'Is Check the opening . • Support for cooking. The location must align with any obstructions so that the door can open fully. • Some cabinet and building materials are for 1/4" x 2" lag screws • Scissors 11/2'' (3.8 cm) diam. NOTES: • If installing the microwave oven...
...) for wood studs. Loccion I4!eq ,i emen'Is Check the opening . • Support for cooking. The location must align with any obstructions so that the door can open fully. • Some cabinet and building materials are for 1/4" x 2" lag screws • Scissors 11/2'' (3.8 cm) diam. NOTES: • If installing the microwave oven...

Installation Instructions
Page 4
...back of microwave oven exterior. I I I I I A. Back of the microwave oven, and set the mounting plate aside. Tape the microwave oven door closed so that attach it to the back of microwave oven C. Blower motor Keep the damper assembly in recessed holes) 4. A A. Lift blower ...recirculating) installation. Side damper plate toward the front of microwave oven. Tape (multiple locations) 3. NOTE: Do not grip or use the door or door handle while the microwave oven is set aside. 3. The microwave oven is being handled. Remove 2 screws attaching blower motor to the ...
...back of microwave oven exterior. I I I I I A. Back of the microwave oven, and set the mounting plate aside. Tape the microwave oven door closed so that attach it to the back of microwave oven C. Blower motor Keep the damper assembly in recessed holes) 4. A A. Lift blower ...recirculating) installation. Side damper plate toward the front of microwave oven. Tape (multiple locations) 3. NOTE: Do not grip or use the door or door handle while the microwave oven is set aside. 3. The microwave oven is being handled. Remove 2 screws attaching blower motor to the ...

Installation Instructions
Page 9
...microwave oven. ns xs the Mc Oven A. These are for the power supply cord. Handle the microwave oven gently. 1. Make sure the microwave oven door is the heavy side. Damper assembly C. ILA B A. Support tabs With front of the upper cabinet. 5. NOTE: If venting through the power ... away from the microwave oven. Sheet metal screws 3. Rotate microwave oven up toward upper cabinet. 5. NOTE: Do not grip or use the door or door handle during installation. Cut the 11/2"(3.8 cm) diameter hole at one corner of the shaded rectangular area "F" on the back of microwave oven...
...microwave oven. ns xs the Mc Oven A. These are for the power supply cord. Handle the microwave oven gently. 1. Make sure the microwave oven door is the heavy side. Damper assembly C. ILA B A. Support tabs With front of the upper cabinet. 5. NOTE: If venting through the power ... away from the microwave oven. Sheet metal screws 3. Rotate microwave oven up toward upper cabinet. 5. NOTE: Do not grip or use the door or door handle during installation. Cut the 11/2"(3.8 cm) diameter hole at one corner of the shaded rectangular area "F" on the back of microwave oven...

Installation Instructions
Page 12
...) Part Number 8206432 Filler Panel Kits are available from your dealer to keep the damper from sticking. Each panel is located behind the microwave oven door on the model and serial number plate, which is 3" (7.6 cm) wide. For best performance, use when installing this microwave oven in a 36" (91.4 cm) or...
...) Part Number 8206432 Filler Panel Kits are available from your dealer to keep the damper from sticking. Each panel is located behind the microwave oven door on the model and serial number plate, which is 3" (7.6 cm) wide. For best performance, use when installing this microwave oven in a 36" (91.4 cm) or...


