
M421NV User Manual
Page 3
... fit only into your HDTV. x When moving the cart/HDTV combination to constitute a risk of your HDTV. Use only a cart or stand recommended by manufacturer or sold with a third grounding pin). Do not install your HDTV in electric shock or fire. Do not place your ... to your HDTV. x The power cord must be sure these instructions in fire or electric shock. 2 www.VIZIO.com x Do not overload power strips and extension cords. VIZIO M421NV User Manual Important Safety Instructions Your HDTV is designed and manufactured to insure compatibility. When a cart is provided. ...
... fit only into your HDTV. x When moving the cart/HDTV combination to constitute a risk of your HDTV. Use only a cart or stand recommended by manufacturer or sold with a third grounding pin). Do not install your HDTV in electric shock or fire. Do not place your ... to your HDTV. x The power cord must be sure these instructions in fire or electric shock. 2 www.VIZIO.com x Do not overload power strips and extension cords. VIZIO M421NV User Manual Important Safety Instructions Your HDTV is designed and manufactured to insure compatibility. When a cart is provided. ...
M421NV User Manual
Page 7
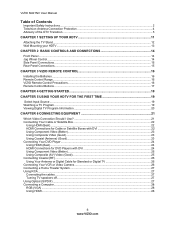
VIZIO M421NV User Manual Table of Contents Important Safety Instructions...2 Television Antenna Connection Protection 4 Advisory of the DTV Transition...5 CHAPTER 1 SETTING UP YOUR HDTV 11 Attaching the TV Stand...12 Wall Mounting your HDTV ...13 CHAPTER 2 BASIC CONTROLS AND CONNECTIONS 14 Front Panel ...14 Jag ...Wheel Control ...14 Side Panel Connections ...15 Rear Panel Connections...15 CHAPTER 3 VIZIO REMOTE CONTROL 16 Installing the Batteries ...16...
VIZIO M421NV User Manual Table of Contents Important Safety Instructions...2 Television Antenna Connection Protection 4 Advisory of the DTV Transition...5 CHAPTER 1 SETTING UP YOUR HDTV 11 Attaching the TV Stand...12 Wall Mounting your HDTV ...13 CHAPTER 2 BASIC CONTROLS AND CONNECTIONS 14 Front Panel ...14 Jag ...Wheel Control ...14 Side Panel Connections ...15 Rear Panel Connections...15 CHAPTER 3 VIZIO REMOTE CONTROL 16 Installing the Batteries ...16...

M421NV User Manual
Page 13
...: 1. Remove the two top foam end caps. 3. Remove the TV from packaging. 4. Align the stand base to the back of the TV. 2. Insert the four screws provided and tighten. 12 www.VIZIO.com Note: Make sure that two people perform the setup and assembly due to the weight and size of the... from the box and lay it face down on a clean, padded, flat surface. Attach the TV stand base: 1. VIZIO M421NV User Manual Attaching the TV Stand Note: We strongly recommend that the surface is free of debris to prevent the TV screen from getting scratched. Remove the remote control, batteries, and ...
...: 1. Remove the two top foam end caps. 3. Remove the TV from packaging. 4. Align the stand base to the back of the TV. 2. Insert the four screws provided and tighten. 12 www.VIZIO.com Note: Make sure that two people perform the setup and assembly due to the weight and size of the... from the box and lay it face down on a clean, padded, flat surface. Attach the TV stand base: 1. VIZIO M421NV User Manual Attaching the TV Stand Note: We strongly recommend that the surface is free of debris to prevent the TV screen from getting scratched. Remove the remote control, batteries, and ...

M421NV User Manual
Page 14
Remove the stand base and neck: a. VIZIO M421NV User Manual Wall Mounting your HDTV face down the serial number located on....0 mm Screw Pitch 1.0 mm Hole Pattern VESA standard 200 x 200 mm spacing Version 2/23/2010 13 www.VIZIO.com Disconnect the cables from the neck, unscrew thumbscrew on a soft, flat surface to prevent damage to call for... viewing. If you need to the screen. b. b. Remove the four (4) screws holding the stand neck, and then remove the neck and base. Write down on bottom. 3. Read the instructions that came with your ...
Remove the stand base and neck: a. VIZIO M421NV User Manual Wall Mounting your HDTV face down the serial number located on....0 mm Screw Pitch 1.0 mm Hole Pattern VESA standard 200 x 200 mm spacing Version 2/23/2010 13 www.VIZIO.com Disconnect the cables from the neck, unscrew thumbscrew on a soft, flat surface to prevent damage to call for... viewing. If you need to the screen. b. b. Remove the four (4) screws holding the stand neck, and then remove the neck and base. Write down on bottom. 3. Read the instructions that came with your ...

M421NV User Manual
Page 68
VIZIO M421NV User Manual Power Consumption 75W (Avg), 0.37W standby Environmental Conditions Operating Temperature: 5°C~35°C, Relative Humidity: 20~80%, Altitude: 0~14,000 ft Non-Operating Temperature: -20°C~50°C, Relative Humidity: 10~70%, Altitude: 0~40,000 ft Dimensions 43.89" W x 27.58" H x 9.41" D with stand; 43.89" W x 24.88" H x 1.99" D without...
VIZIO M421NV User Manual Power Consumption 75W (Avg), 0.37W standby Environmental Conditions Operating Temperature: 5°C~35°C, Relative Humidity: 20~80%, Altitude: 0~14,000 ft Non-Operating Temperature: -20°C~50°C, Relative Humidity: 10~70%, Altitude: 0~40,000 ft Dimensions 43.89" W x 27.58" H x 9.41" D with stand; 43.89" W x 24.88" H x 1.99" D without...
M421NV User Manual
Page 72
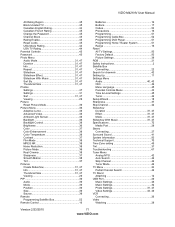
VIZIO M421NV User Manual Alt Rating Region 45 Block Unrated TV 45 Canadian English Rating 44 Canadian French Rating 45 Change the Password 45 Channel Block 43 ... 37 Troubleshooting 67 Tuner Menu Analog MTS 42 Auto Search 42 Skip Channel 42 Tuner Mode 42 TV Menu 34 Partial Channel Search 42 TV Stand Attaching 12 USB Port 29 Music Settings 48 Music Settings 32 Photo Settings 31, 47 Video Settings 33, 49 VCR Connecting 26 Video Watching 29...
VIZIO M421NV User Manual Alt Rating Region 45 Block Unrated TV 45 Canadian English Rating 44 Canadian French Rating 45 Change the Password 45 Channel Block 43 ... 37 Troubleshooting 67 Tuner Menu Analog MTS 42 Auto Search 42 Skip Channel 42 Tuner Mode 42 TV Menu 34 Partial Channel Search 42 TV Stand Attaching 12 USB Port 29 Music Settings 48 Music Settings 32 Photo Settings 31, 47 Video Settings 33, 49 VCR Connecting 26 Video Watching 29...


