

Download
Page 4
...the type of power source indicated on the label. To ensure reliable operation of your TV yourself. Doing so could short circuit parts causing a fire or electric shock. The manufacturer's warranty does not cover user abuse or improper installations. • The power cord must be replaced when using ...or electric shock. • The wall socket should be operated only from tip-over. • Unplug this apparatus during lightning. If you to qualified service personnel. • Use only with the cart, stand, tripod, bracket, or table specified by the manufacturer, or sold...
...the type of power source indicated on the label. To ensure reliable operation of your TV yourself. Doing so could short circuit parts causing a fire or electric shock. The manufacturer's warranty does not cover user abuse or improper installations. • The power cord must be replaced when using ...or electric shock. • The wall socket should be operated only from tip-over. • Unplug this apparatus during lightning. If you to qualified service personnel. • Use only with the cart, stand, tripod, bracket, or table specified by the manufacturer, or sold...

Download
Page 5
... TV, hold the AC/DC power adapter, not the cord. Operating your TV in environments with liquids, such as vases, shall be used as sunshine, fire or the like. • If any smoke or odor becomes apparent, unplug the power cord and contact your dealer for use by h qualified service personnel only. These servicing instructions are for repair. Incorrect polarities may function...
... TV, hold the AC/DC power adapter, not the cord. Operating your TV in environments with liquids, such as vases, shall be used as sunshine, fire or the like. • If any smoke or odor becomes apparent, unplug the power cord and contact your dealer for use by h qualified service personnel only. These servicing instructions are for repair. Incorrect polarities may function...

Download
Page 6
... screen of the coaxial cable is left unattended or unused for long periods of time, unplug the TV from the wall outlet and disconnect the antenna or cable system. TELEVISION ANTENNA CONNECTION PROTECTION If an outside antenna/satellite dish or cable system is to be connected to earth in wire to an antenna discharge unit, size of the grounding conductors, location of antenna discharge unit, connection...
... screen of the coaxial cable is left unattended or unused for long periods of time, unplug the TV from the wall outlet and disconnect the antenna or cable system. TELEVISION ANTENNA CONNECTION PROTECTION If an outside antenna/satellite dish or cable system is to be connected to earth in wire to an antenna discharge unit, size of the grounding conductors, location of antenna discharge unit, connection...

Download
Page 7
...Settings 23 Resetting the Picture Settings 24 Adjusting the Audio Settings 25 Resetting the Audio Settings 26 Activating the Sleep Timer 26 Setting the Auto Power Off Feature 27 Setting Up the Tuner 27 Selecting a Tuner Input 28 Scanning for Channels 28 Adding New Channels 28 Skipping Channels 29 Changing the Audio Language 30 Setting Up Closed Captioning 31 Changing the Appearance of Contents Installing the TV 3 Inspecting the Package Contents 3 Installing the TV 4 Installing the TV Stand 4 Installing the TV on a Wall 6 Controls and Connections 7 Rear Panel 7 Side Panel...
...Settings 23 Resetting the Picture Settings 24 Adjusting the Audio Settings 25 Resetting the Audio Settings 26 Activating the Sleep Timer 26 Setting the Auto Power Off Feature 27 Setting Up the Tuner 27 Selecting a Tuner Input 28 Scanning for Channels 28 Adding New Channels 28 Skipping Channels 29 Changing the Audio Language 30 Setting Up Closed Captioning 31 Changing the Appearance of Contents Installing the TV 3 Inspecting the Package Contents 3 Installing the TV 4 Installing the TV Stand 4 Installing the TV on a Wall 6 Controls and Connections 7 Rear Panel 7 Side Panel...

Download
Page 8
Restoring the TV to Factory Default Settings 40 Using the Guided Setup Menu 40 Using Guided Setup 40 Using the Info Window 41 Using the USB Media Player 42 Using the USB Media Player 42 Preparing Your USB Drive to Play USB Media 42 Playing USB Media 42 Removing the USB Drive from the TV 42 Troubleshooting & Technical Support 44 Specifications 47 Limited Warranty 49 Legal & Compliance 50 2
Restoring the TV to Factory Default Settings 40 Using the Guided Setup Menu 40 Using Guided Setup 40 Using the Info Window 41 Using the USB Media Player 42 Using the USB Media Player 42 Preparing Your USB Drive to Play USB Media 42 Playing USB Media 42 Removing the USB Drive from the TV 42 Troubleshooting & Technical Support 44 Specifications 47 Limited Warranty 49 Legal & Compliance 50 2

Download
Page 12
...-listed wall mount bracket rated for the weight of this TV. 6 1 WALL MOUNT SCREW LOCATION - Consult the information below to your TV model: Installing a TV on a wall requires lifting. To install your TV on a clean, flat, stable surface. Use only with your mount. E400-B2 WALL MOUNT SCREW LOCATION - Remove the base by loosening and removing the screws. 4. Attach your TV and wall mount to help you will need a wall mount. Specifications on page 47 for the weight/load of this TV. E480-B2 Installing the...
...-listed wall mount bracket rated for the weight of this TV. 6 1 WALL MOUNT SCREW LOCATION - Consult the information below to your TV model: Installing a TV on a wall requires lifting. To install your TV on a clean, flat, stable surface. Use only with your mount. E400-B2 WALL MOUNT SCREW LOCATION - Remove the base by loosening and removing the screws. 4. Attach your TV and wall mount to help you will need a wall mount. Specifications on page 47 for the weight/load of this TV. E480-B2 Installing the...

Download
Page 16
... -screen menu. WIDE Switch the display mode. 10 2 POWER Turn the TV on or off or on. GUIDE Display the info window. INFO Display the info window. CHANNEL UP/DOWN Change the channel. LAST Return to the previous on -screen menu. A/V CONTROLS Control USB media player. ARROW Navigate the on -screen menu. REMOTE CONTROL INPUT Change the currently-displayed input. CLOSED CAPTIONS Open the closed caption menu. MUTE Turn the audio off . VOLUME UP/DOWN Increase or decrease loudness of the audio. NUMBER PAD Manually enter a channel. MENU Display the on -screen menu. BACK...
... -screen menu. WIDE Switch the display mode. 10 2 POWER Turn the TV on or off or on. GUIDE Display the info window. INFO Display the info window. CHANNEL UP/DOWN Change the channel. LAST Return to the previous on -screen menu. A/V CONTROLS Control USB media player. ARROW Navigate the on -screen menu. REMOTE CONTROL INPUT Change the currently-displayed input. CLOSED CAPTIONS Open the closed caption menu. MUTE Turn the audio off . VOLUME UP/DOWN Increase or decrease loudness of the audio. NUMBER PAD Manually enter a channel. MENU Display the on -screen menu. BACK...

Download
Page 18
... TV 12 3 Cable/Satellite Box DVD/Blu-ray Player Game Console HDMI CABLE BEST • DIGITAL • HD VIDEO (1080p)* • HD AUDIO COMPONENT CABLE BETTER • ANALOG • HD VIDEO (1080i)* • STEREO AUDIO COAXIAL CABLE BETTER • ANALOG • HD VIDEO (1080i)* • STEREO AUDIO AV CABLE GOOD • ANALOG • VIDEO (480i)* • STEREO AUDIO * Maximum Resolution Connecting Your Devices CONNECTING A DEVICE Your TV can be used (HDMI-1, HDMI-2, etc.). Connect the appropriate cable (not included) to display output from most...
... TV 12 3 Cable/Satellite Box DVD/Blu-ray Player Game Console HDMI CABLE BEST • DIGITAL • HD VIDEO (1080p)* • HD AUDIO COMPONENT CABLE BETTER • ANALOG • HD VIDEO (1080i)* • STEREO AUDIO COAXIAL CABLE BETTER • ANALOG • HD VIDEO (1080i)* • STEREO AUDIO AV CABLE GOOD • ANALOG • VIDEO (480i)* • STEREO AUDIO * Maximum Resolution Connecting Your Devices CONNECTING A DEVICE Your TV can be used (HDMI-1, HDMI-2, etc.). Connect the appropriate cable (not included) to display output from most...

Download
Page 26
5 CHANGING THE INPUT SOURCE CHANGING THE SCREEN ASPECT RATIO External devices such as DVD players, Blu-ray Players, and video game consoles can display images in the on-screen menu. Press the INPUT button on the remote to highlight the input you wish to view and press OK. TV COMP HDMI-1 HDMI-2 Note: Inputs may vary by Input source. • Stretch expands the display image to the left and right of the display image. • Zoom expands...
5 CHANGING THE INPUT SOURCE CHANGING THE SCREEN ASPECT RATIO External devices such as DVD players, Blu-ray Players, and video game consoles can display images in the on-screen menu. Press the INPUT button on the remote to highlight the input you wish to view and press OK. TV COMP HDMI-1 HDMI-2 Note: Inputs may vary by Input source. • Stretch expands the display image to the left and right of the display image. • Zoom expands...

Download
Page 27
...on -screen menu is too high, the picture may appear dark. Adjusts the intensity of picture elements. This setting is displayed. 3. Adjusts the edge sharpness of the picture colors. Use the Arrow buttons on the remote. 21 Tint - When this setting is displayed. 2. Adjusts the white level of the picture. When you have finished adjusting the picture settings, press the EXIT button on the remote to change the picture mode: VIZIO PICTURE Picture Mode Auto Brightness Control Backlight - To adjust the picture settings: 1. The PICTURE menu is useful...
...on -screen menu is too high, the picture may appear dark. Adjusts the intensity of picture elements. This setting is displayed. 3. Adjusts the edge sharpness of the picture colors. Use the Arrow buttons on the remote. 21 Tint - When this setting is displayed. 2. Adjusts the white level of the picture. When you have finished adjusting the picture settings, press the EXIT button on the remote to change the picture mode: VIZIO PICTURE Picture Mode Auto Brightness Control Backlight - To adjust the picture settings: 1. The PICTURE menu is useful...

Download
Page 31
...TV's volume controls, or select Fixed to On, DTS signals cannot be passed through digital audio outputs. • Surround Sound - Adjusts the synchronization between program content, AV formats and input sources. Select PCM or Bitstream. • Analog Audio Out - Network Settings Help 25 DTS Studio Sound™ is displayed. 3. Select Variable to control the external speakers' volume from your home theater system controls. • Equalizer SAeBCttings - VIZIO AUDIO TV Speakers Surround Sound Volume Leveling Balance - Press the MENU button on the remote. Adjusts...
...TV's volume controls, or select Fixed to On, DTS signals cannot be passed through digital audio outputs. • Surround Sound - Adjusts the synchronization between program content, AV formats and input sources. Select PCM or Bitstream. • Analog Audio Out - Network Settings Help 25 DTS Studio Sound™ is displayed. 3. Select Variable to control the external speakers' volume from your home theater system controls. • Equalizer SAeBCttings - VIZIO AUDIO TV Speakers Surround Sound Volume Leveling Balance - Press the MENU button on the remote. Adjusts...
Download
Page 32
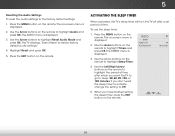
... the MENU button on the remote. The TIMERS menu is displayed. 2. VIZIO TIMERS Sleep Timer Auto Power Off Off 10 minutes 3. Use the Arrow buttons on the remote to highlight Audio and press OK. ACTIVATING THE SLEEP TIMER When activated, the TV's sleep timer will turn the TV off after a set period of time after which you want the sleep timer to activate, change the setting to highlight Reset Audio Mode and press OK. Use the Arrow buttons on the remote to highlight Sleep Timer. 4. Use...
... the MENU button on the remote. The TIMERS menu is displayed. 2. VIZIO TIMERS Sleep Timer Auto Power Off Off 10 minutes 3. Use the Arrow buttons on the remote to highlight Audio and press OK. ACTIVATING THE SLEEP TIMER When activated, the TV's sleep timer will turn the TV off after a set period of time after which you want the sleep timer to activate, change the setting to highlight Reset Audio Mode and press OK. Use the Arrow buttons on the remote to highlight Sleep Timer. 4. Use...

Download
Page 44
.... 4. The SYSTEM menu is connected and supports CEC. 5. To turn the Power Indicator Light on the remote. Use the Up/Down Arrow buttons to adjust each setting: • CEC Function - Use the Arrow and OK buttons to select On or Off, then press OK. 38 Use the Arrow buttons on the remote to determine if your device's user manual for details. Use this setting if you to control HDMI-connected devices with the...
.... 4. The SYSTEM menu is connected and supports CEC. 5. To turn the Power Indicator Light on the remote. Use the Up/Down Arrow buttons to adjust each setting: • CEC Function - Use the Arrow and OK buttons to select On or Off, then press OK. 38 Use the Arrow buttons on the remote to determine if your device's user manual for details. Use this setting if you to control HDMI-connected devices with the...

Download
Page 46
... OK. Enter your parental control passcode. If you want to factory defaults.". 6. The on the remote. If you restore the TV to the factory default settings, all TV settings to use guided setup: 1. Use the Arrow buttons on the remote. 40 Highlight Guided Setup and press OK. The RESET & ADMIN menu is displayed. 4. When finished, press the EXIT button on the remote to turn back on the remote. Press the MENU button on -screen menu is displayed. 2. Wait for...
... OK. Enter your parental control passcode. If you want to factory defaults.". 6. The on the remote. If you restore the TV to the factory default settings, all TV settings to use guided setup: 1. Use the Arrow buttons on the remote. 40 Highlight Guided Setup and press OK. The RESET & ADMIN menu is displayed. 4. When finished, press the EXIT button on the remote to turn back on the remote. Press the MENU button on -screen menu is displayed. 2. Wait for...

Download
Page 51
... Channels on the TV don't look right. • Adjust the Color and Tint settings in the Picture menu. There is no power. • Ensure the TV is plugged into a working electrical outlet. • Ensure the power cable is connected securely to the TV and move the antenna around the room or close to a window for the best signal. A The TV displays "No Signal." • Press the INPUT button on the remote control...
... Channels on the TV don't look right. • Adjust the Color and Tint settings in the Picture menu. There is no power. • Ensure the TV is plugged into a working electrical outlet. • Ensure the power cable is connected securely to the TV and move the antenna around the room or close to a window for the best signal. A The TV displays "No Signal." • Press the INPUT button on the remote control...

Download
Page 52
... close to a window for the best signal. When I change input source, the display image changes size. • The TV remembers the viewing mode on each input source. If the viewing mode on the new input source differs from the one on the input source you switch from, the difference may be noticeable. • See Changing the Screen Aspect Ratio on the remote aren't working. • Ensure you are inherent to adjust the volume. Ensure your antenna is connected...
... close to a window for the best signal. When I change input source, the display image changes size. • The TV remembers the viewing mode on each input source. If the viewing mode on the new input source differs from the one on the input source you switch from, the difference may be noticeable. • See Changing the Screen Aspect Ratio on the remote aren't working. • Ensure you are inherent to adjust the volume. Ensure your antenna is connected...

Download
Page 55
... purchaser of customer misuse, modifications or adjustments, as well as installation and set-up issues or any repairs attempted by anyone other information, ALL CONTENTS AND INFORMATION WILL BE DELETED IN THE COURSE OF SOME IN-HOME AND ALL SHIP-IN WARRANTY SERVICE. VIZIO is capable of the model's product information page (www.VIZIO.com) or look for packing and...
... purchaser of customer misuse, modifications or adjustments, as well as installation and set-up issues or any repairs attempted by anyone other information, ALL CONTENTS AND INFORMATION WILL BE DELETED IN THE COURSE OF SOME IN-HOME AND ALL SHIP-IN WARRANTY SERVICE. VIZIO is capable of the model's product information page (www.VIZIO.com) or look for packing and...

Download
Page 2
... the risk of electric shock or component damage, switch off the power before connecting other cables are qualified to high voltages, electric shock, and other voltage than that may be used , use of time. A grounding type plug has two blades and a third grounding prong. If you to do not perform any servicing other . Opening or removing the back cover may expose you...
... the risk of electric shock or component damage, switch off the power before connecting other cables are qualified to high voltages, electric shock, and other voltage than that may be used , use of time. A grounding type plug has two blades and a third grounding prong. If you to do not perform any servicing other . Opening or removing the back cover may expose you...

Download
Page 14
... no power. • Be sure the power cord is off. • Press MENU, then select Audio. Press the WIDE button on the remote to which your device is 0000). HELP TOPICS How do not work, try plugging the power cord into a different outlet. The TV displays "No Signal." • Be sure your settings will be lost. Select Reset. Press MENU > Guided Setup. Enter the Parental Control Passcode (the default code is connected (TV, HDMI-1, COMP...
... no power. • Be sure the power cord is off. • Press MENU, then select Audio. Press the WIDE button on the remote to which your device is 0000). HELP TOPICS How do not work, try plugging the power cord into a different outlet. The TV displays "No Signal." • Be sure your settings will be lost. Select Reset. Press MENU > Guided Setup. Enter the Parental Control Passcode (the default code is connected (TV, HDMI-1, COMP...

Download
Page 15
...-AUTHORIZATION IS REQUIRED BEFORE SENDING ANY PRODUCT TO A VIZIO SERVICE CENTER FOR WARRANTY SERVICE. Shielded interface cables and AC power cord, if any interference received, including interference that affords an equal degree of the model's product information page (www.VIZIO.com) or look for the "zero bright pixel" guarantee on the box. FCC Warning Changes or modifications not expressly approved by a non...
...-AUTHORIZATION IS REQUIRED BEFORE SENDING ANY PRODUCT TO A VIZIO SERVICE CENTER FOR WARRANTY SERVICE. Shielded interface cables and AC power cord, if any interference received, including interference that affords an equal degree of the model's product information page (www.VIZIO.com) or look for the "zero bright pixel" guarantee on the box. FCC Warning Changes or modifications not expressly approved by a non...


