v2 Camera Manual
Page 1
All other trademarks are registered trademarks of their respective companies. Windows and the Windows logo are the property of Microsoft Corporation. All rights reserved. DVR 426HDv2 Digital Camcorder with camera User Manual © 2009-2012 Sakar International, Inc.
All other trademarks are registered trademarks of their respective companies. Windows and the Windows logo are the property of Microsoft Corporation. All rights reserved. DVR 426HDv2 Digital Camcorder with camera User Manual © 2009-2012 Sakar International, Inc.
v2 Camera Manual
Page 2
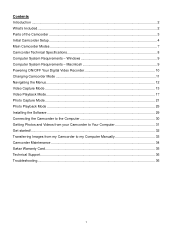
... the Computer 30 Getting Photos and Videos from your Camcorder to Your Computer 31 Get started!...32 Transferring Images from my Camcorder to my Computer Manually 33 Camcorder Maintenance ...34 Sakar Warranty Card...35 Technical Support...36 Troubleshooting...36 1 Windows 9 Computer System Requirements -
... the Computer 30 Getting Photos and Videos from your Camcorder to Your Computer 31 Get started!...32 Transferring Images from my Camcorder to my Computer Manually 33 Camcorder Maintenance ...34 Sakar Warranty Card...35 Technical Support...36 Troubleshooting...36 1 Windows 9 Computer System Requirements -
v2 Camera Manual
Page 3
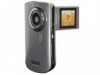
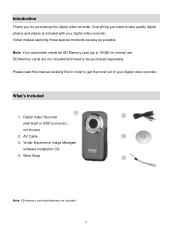
... card (up to get the most out of your digital video recorder. Digital Video Recorder (with your digital video recorder. Vivitar makes capturing those special moments as easy as possible. AV Cable 3. Vivitar Experience Image Manager software Installation CD 4. Everything you for normal use. Please read this digital video recorder. Introduction Thank... Memory cards are not included and need to take quality digital photos and videos is included with Built-in order to 16GB) for purchasing this manual carefully first in USB Connector, not shown) 2.
... card (up to get the most out of your digital video recorder. Digital Video Recorder (with your digital video recorder. Vivitar makes capturing those special moments as easy as possible. AV Cable 3. Vivitar Experience Image Manager software Installation CD 4. Everything you for normal use. Please read this digital video recorder. Introduction Thank... Memory cards are not included and need to take quality digital photos and videos is included with Built-in order to 16GB) for purchasing this manual carefully first in USB Connector, not shown) 2.
v2 Camera Manual
Page 16
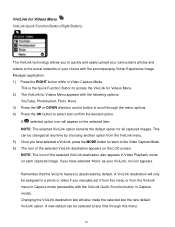
...new default ViviLink option. This is deactivated by choosing another option from the ViviLink menu in Capture mode (accessible with the accompanying Vivitar Experience Image Manager application. 1) Press the RIGHT button while in Capture mode). ViviLink for Videos Menu ViviLink Quick Function Button (...Right Button): The ViviLink technology allows you manually set it from this menu. 15 A ViviLink destination will only be selected at any time through the menu options. 4) Press the...
...new default ViviLink option. This is deactivated by choosing another option from the ViviLink menu in Capture mode (accessible with the accompanying Vivitar Experience Image Manager application. 1) Press the RIGHT button while in Capture mode). ViviLink for Videos Menu ViviLink Quick Function Button (...Right Button): The ViviLink technology allows you manually set it from this menu. 15 A ViviLink destination will only be selected at any time through the menu options. 4) Press the...
v2 Camera Manual
Page 17
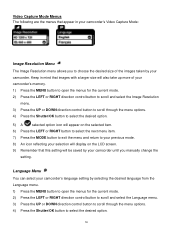
... can select your camcorder's language setting by your camcorder. Keep in your camcorder's Video Capture Mode: Image Resolution Menu The Image Resolution menu allows you manually change the setting. Video Capture Mode Menus The following are the menus that appear in mind that images with a larger size will also take up...
... can select your camcorder's language setting by your camcorder. Keep in your camcorder's Video Capture Mode: Image Resolution Menu The Image Resolution menu allows you manually change the setting. Video Capture Mode Menus The following are the menus that appear in mind that images with a larger size will also take up...
v2 Camera Manual
Page 18
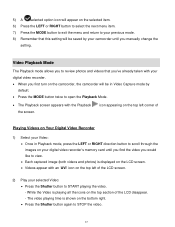
... with an 'AVI' icon on the top section of the LCD screen. 2) Play your digital video recorder's memory card until you find the video you manually change the setting.
... with an 'AVI' icon on the top section of the LCD screen. 2) Play your digital video recorder's memory card until you find the video you manually change the setting.
v2 Camera Manual
Page 24
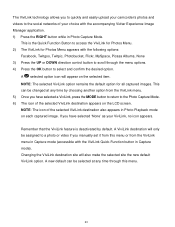
This can be assigned to a photo or video if you manually set it from this menu. 23 A ViviLink destination will only be selected at any time through the menu options. 4) Press the OK button to select ... DOWN direction control button to scroll through this menu or from the ViviLink menu. 5) Once you have selected 'None' as your choice with the accompanying Vivitar Experience Image Manager application. 1) Press the RIGHT button while in Capture mode). Changing the ViviLink destination site will appear on each captured image.
This can be assigned to a photo or video if you manually set it from this menu. 23 A ViviLink destination will only be selected at any time through the menu options. 4) Press the OK button to select ... DOWN direction control button to scroll through this menu or from the ViviLink menu. 5) Once you have selected 'None' as your choice with the accompanying Vivitar Experience Image Manager application. 1) Press the RIGHT button while in Capture mode). Changing the ViviLink destination site will appear on each captured image.
v2 Camera Manual
Page 25
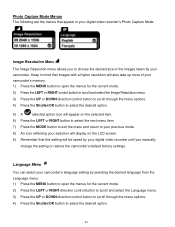
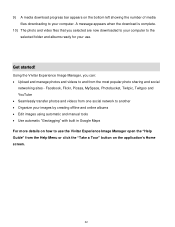
Keep in your digital video recorder's Photo Capture Mode: Image Resolution Menu The Image Resolution menu allows you manually change the setting or restore the camcorder's default factory settings. Language Menu You can select your camcorder's language setting by selecting the desired language from ...
Keep in your digital video recorder's Photo Capture Mode: Image Resolution Menu The Image Resolution menu allows you manually change the setting or restore the camcorder's default factory settings. Language Menu You can select your camcorder's language setting by selecting the desired language from ...
v2 Camera Manual
Page 33
... and videos from one social network to another Organize your images by creating offline and online albums Edit images using automatic and manual tools Use automatic "Geotagging" with built in Google Maps For more details on the application's Home screen. 32 Get started! 9) A...progress bar appears on the bottom left showing the number of media files downloading to use . Using the Vivitar Experience Image Manager, you selected are now downloaded to your use the Vivitar Experience Image Manager open the "Help Guide" from the Help Menu or click the "Take a Tour...
... and videos from one social network to another Organize your images by creating offline and online albums Edit images using automatic and manual tools Use automatic "Geotagging" with built in Google Maps For more details on the application's Home screen. 32 Get started! 9) A...progress bar appears on the bottom left showing the number of media files downloading to use . Using the Vivitar Experience Image Manager, you selected are now downloaded to your use the Vivitar Experience Image Manager open the "Help Guide" from the Help Menu or click the "Take a Tour...
v2 Camera Manual
Page 34
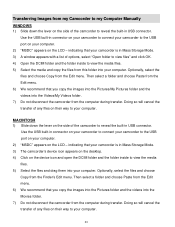
... folder and the folder inside to the USB port on your computer. 2) "MSDC" appears on the LCD - Transferring Images from my Camcorder to my Computer Manually WINDOWS 1) Slide down the lever on the side of the camcorder to reveal the built-in USB connector. indicating that your camcorder is in connector...
... folder and the folder inside to the USB port on your computer. 2) "MSDC" appears on the LCD - Transferring Images from my Camcorder to my Computer Manually WINDOWS 1) Slide down the lever on the side of the camcorder to reveal the built-in USB connector. indicating that your camcorder is in connector...
v2 Camera Manual
Page 37
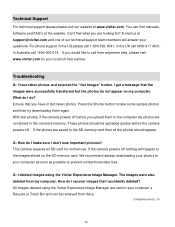
... I get a message that I recover images that the images were successfully transferred but the photos do I make sure I deleted images using the Vivitar Experience Image Manager are not stored in the camera's memory. This camera requires an SD card for ? If the photos are looking for normal use... try downloading them to the computer the photos are sent to your computer as soon as possible to call 1800-006-614. Can't find manuals, software and FAQ's at the website. Troubleshooting Q: I do I have in Australia call from my computer. We recommend always downloading your ...
... I get a message that I recover images that the images were successfully transferred but the photos do I make sure I deleted images using the Vivitar Experience Image Manager are not stored in the camera's memory. This camera requires an SD card for ? If the photos are looking for normal use... try downloading them to the computer the photos are sent to your computer as soon as possible to call 1800-006-614. Can't find manuals, software and FAQ's at the website. Troubleshooting Q: I do I have in Australia call from my computer. We recommend always downloading your ...


