v2 Camera Manual
Page 1
All other trademarks are registered trademarks of their respective companies. All rights reserved. Windows and the Windows logo are the property of Microsoft Corporation. DVR 426HDv2 Digital Camcorder with camera User Manual © 2009-2012 Sakar International, Inc.
All other trademarks are registered trademarks of their respective companies. All rights reserved. Windows and the Windows logo are the property of Microsoft Corporation. DVR 426HDv2 Digital Camcorder with camera User Manual © 2009-2012 Sakar International, Inc.
v2 Camera Manual
Page 2
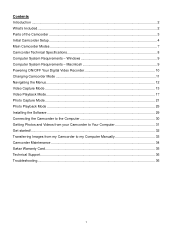
... Capture Mode ...21 Photo Playback Mode ...25 Installing the Software ...29 Connecting the Camcorder to the Computer 30 Getting Photos and Videos from your Camcorder to Your Computer 31 Get started!...32 Transferring Images from my Camcorder to my Computer Manually 33 Camcorder Maintenance ...34 Sakar Warranty Card...35 Technical Support...36 Troubleshooting...36 1 Contents...
... Capture Mode ...21 Photo Playback Mode ...25 Installing the Software ...29 Connecting the Camcorder to the Computer 30 Getting Photos and Videos from your Camcorder to Your Computer 31 Get started!...32 Transferring Images from my Camcorder to my Computer Manually 33 Camcorder Maintenance ...34 Sakar Warranty Card...35 Technical Support...36 Troubleshooting...36 1 Contents...
v2 Camera Manual
Page 3
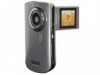
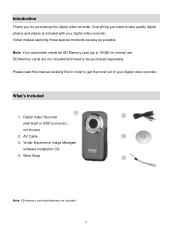
...not included and need to 16GB) for purchasing this manual carefully first in USB Connector, not shown) 2. Digital Video Recorder (with your digital video recorder. Wrist Strap Note: SD memory card and batteries not included. 2 Vivitar makes capturing those special moments as easy as possible.... Please read this digital video recorder. Vivitar Experience Image Manager software Installation CD 4. Introduction Thank you need to get the most out of your digital video recorder. Note: Your camcorder needs an SD Memory card (up to take quality digital ...
...not included and need to 16GB) for purchasing this manual carefully first in USB Connector, not shown) 2. Digital Video Recorder (with your digital video recorder. Wrist Strap Note: SD memory card and batteries not included. 2 Vivitar makes capturing those special moments as easy as possible.... Please read this digital video recorder. Vivitar Experience Image Manager software Installation CD 4. Introduction Thank you need to get the most out of your digital video recorder. Note: Your camcorder needs an SD Memory card (up to take quality digital ...
v2 Camera Manual
Page 16
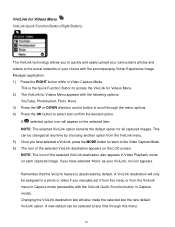
...destination site will only be assigned to a photo or video if you manually set it from this menu. 15 This can be changed at any time by default. If you to quickly and easily upload your camcorder's photos and videos to the social networks of your ViviLink, no icon...site the new default ViviLink option. This is deactivated by choosing another option from the ViviLink menu in Capture mode (accessible with the accompanying Vivitar Experience Image Manager application. 1) Press the RIGHT button while in Video Playback mode on the selected item. ViviLink for Videos Menu ViviLink ...
...destination site will only be assigned to a photo or video if you manually set it from this menu. 15 This can be changed at any time by default. If you to quickly and easily upload your camcorder's photos and videos to the social networks of your ViviLink, no icon...site the new default ViviLink option. This is deactivated by choosing another option from the ViviLink menu in Capture mode (accessible with the accompanying Vivitar Experience Image Manager application. 1) Press the RIGHT button while in Video Playback mode on the selected item. ViviLink for Videos Menu ViviLink ...
v2 Camera Manual
Page 17
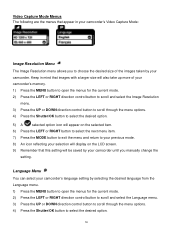
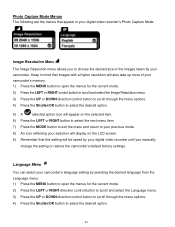
.... 4) Press the Shutter/OK button to select the desired option. 5) A selected option icon will be saved by your camcorder until you to choose the desired size of your camcorder's memory. 1) Press the MENU button to open the menus for the current mode. 2) Press the LEFT or RIGHT direction... 7) Press the MODE button to exit the menu and return to select the desired option. 16 Language Menu You can select your camcorder's language setting by your camcorder's Video Capture Mode: Image Resolution Menu The Image Resolution menu allows you manually change the setting. Keep in your...
.... 4) Press the Shutter/OK button to select the desired option. 5) A selected option icon will be saved by your camcorder until you to choose the desired size of your camcorder's memory. 1) Press the MENU button to open the menus for the current mode. 2) Press the LEFT or RIGHT direction... 7) Press the MODE button to exit the menu and return to select the desired option. 16 Language Menu You can select your camcorder's language setting by your camcorder's Video Capture Mode: Image Resolution Menu The Image Resolution menu allows you manually change the setting. Keep in your...
v2 Camera Manual
Page 18
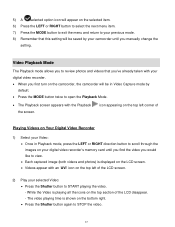
... on the bottom right. Press the Shutter button again to START playing the video. - While the Video is playing all the icons on the camcorder, the camcorder will be in Playback mode, press the LEFT or RIGHT direction button to scroll through the images on your...
... on the bottom right. Press the Shutter button again to START playing the video. - While the Video is playing all the icons on the camcorder, the camcorder will be in Playback mode, press the LEFT or RIGHT direction button to scroll through the images on your...
v2 Camera Manual
Page 24
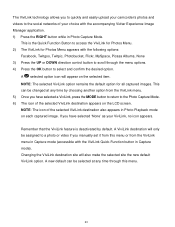
...The selected ViviLink option remains the default option for Photos Menu appears with the accompanying Vivitar Experience Image Manager application. 1) Press the RIGHT button while in Capture mode). ...in Photo Playback mode on the LCD screen. A new default can be assigned to a photo or video if you manually set it from the ViviLink menu. 5) Once you have selected 'None' as your choice with the following options: ... The ViviLink technology allows you to quickly and easily upload your camcorder's photos and videos to the social networks of your ViviLink, no icon appears.
...The selected ViviLink option remains the default option for Photos Menu appears with the accompanying Vivitar Experience Image Manager application. 1) Press the RIGHT button while in Capture mode). ...in Photo Playback mode on the LCD screen. A new default can be assigned to a photo or video if you manually set it from the ViviLink menu. 5) Once you have selected 'None' as your choice with the following options: ... The ViviLink technology allows you to quickly and easily upload your camcorder's photos and videos to the social networks of your ViviLink, no icon appears.
v2 Camera Manual
Page 25
... your previous mode. 8) An icon reflecting your selection will display on the LCD screen. 9) Remember that images with a higher resolution will be saved by your camcorder's memory. 1) Press the MENU button to open the menus for the current mode. 2) Press the LEFT or RIGHT control button to scroll and select the... return to select the desired option. 24 Keep in your digital video recorder's Photo Capture Mode: Image Resolution Menu The Image Resolution menu allows you manually change the setting or restore the camcorder's default factory settings.
... your previous mode. 8) An icon reflecting your selection will display on the LCD screen. 9) Remember that images with a higher resolution will be saved by your camcorder's memory. 1) Press the MENU button to open the menus for the current mode. 2) Press the LEFT or RIGHT control button to scroll and select the... return to select the desired option. 24 Keep in your digital video recorder's Photo Capture Mode: Image Resolution Menu The Image Resolution menu allows you manually change the setting or restore the camcorder's default factory settings.
v2 Camera Manual
Page 34
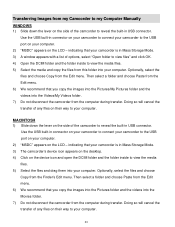
... the DCIM folder and the folder inside to view the media files. 5) Select the files and drag them into your computer. Transferring Images from my Camcorder to my Computer Manually WINDOWS 1) Slide down the lever on their way to your computer. 33 Use the USB built-in connector on your...
... the DCIM folder and the folder inside to view the media files. 5) Select the files and drag them into your computer. Transferring Images from my Camcorder to my Computer Manually WINDOWS 1) Slide down the lever on their way to your computer. 33 Use the USB built-in connector on your...


