

User Guide
Page 19
Contents Introduction 26 This guide 28 Safety icons 29 Other icons used 29 Your computer's features and specifications ....30 Other documentation 30 Service options 30 Chapter 1: Getting Started 31 Selecting a place to work 31 Setting up a work environment 31 Keeping yourself comfortable 32 Computer user comfort recommendations .......32 Good Working Posture 32 Using the notebook with an external keyboard, mouse or monitor 33 Typing style 34 Taking breaks and varying tasks 34 Mobile computing tips 35 Transporting the notebook 35 Seeking additional help 35 19
Contents Introduction 26 This guide 28 Safety icons 29 Other icons used 29 Your computer's features and specifications ....30 Other documentation 30 Service options 30 Chapter 1: Getting Started 31 Selecting a place to work 31 Setting up a work environment 31 Keeping yourself comfortable 32 Computer user comfort recommendations .......32 Good Working Posture 32 Using the notebook with an external keyboard, mouse or monitor 33 Typing style 34 Taking breaks and varying tasks 34 Mobile computing tips 35 Transporting the notebook 35 Seeking additional help 35 19

User Guide
Page 21
... your computer 77 Cleaning the computer 77 Moving the computer 77 Using a computer lock 78 Chapter 2: Learning the Basics 79 Computing tips 79 Using the keyboard 80 Character keys 81 Ctrl, Fn, and Alt keys 81 Function keys 81 Special Windows® keys 82 Starting a program 82 Starting a program using the... optical disc 87 Playing optical media 87 Recording optical media 88 Removing a disc with the computer on 89 Removing a disc with the computer off 89 Toshiba's online resources 89
... your computer 77 Cleaning the computer 77 Moving the computer 77 Using a computer lock 78 Chapter 2: Learning the Basics 79 Computing tips 79 Using the keyboard 80 Character keys 81 Ctrl, Fn, and Alt keys 81 Function keys 81 Special Windows® keys 82 Starting a program 82 Starting a program using the... optical disc 87 Playing optical media 87 Recording optical media 88 Removing a disc with the computer on 89 Removing a disc with the computer off 89 Toshiba's online resources 89

User Guide
Page 24
24 Contents Fingerprint reader limitations 146 TOSHIBA eco Utility 147 TOSHIBA Service Station 148 TOSHIBA PC Health Monitor 148 ConfigFree 149 Getting Started 149 ConfigFree® Utilities 150 Chapter 6: If Something Goes Wrong 153 Problems that are easy... system can help you 158 Fixing a problem with Device Manager 159 Checking device properties 159 Memory problems 160 Power and the batteries 160 Keyboard problems 162 Display problems 162 Disk or storage drive problems 164 Error-checking 164 Optical disc drive problems 165 Sound system problems 166 ExpressCard®...
24 Contents Fingerprint reader limitations 146 TOSHIBA eco Utility 147 TOSHIBA Service Station 148 TOSHIBA PC Health Monitor 148 ConfigFree 149 Getting Started 149 ConfigFree® Utilities 150 Chapter 6: If Something Goes Wrong 153 Problems that are easy... system can help you 158 Fixing a problem with Device Manager 159 Checking device properties 159 Memory problems 160 Power and the batteries 160 Keyboard problems 162 Display problems 162 Disk or storage drive problems 164 Error-checking 164 Optical disc drive problems 165 Sound system problems 166 ExpressCard®...
User Guide
Page 25
Contents 25 Other Toshiba Internet Web sites 179 Toshiba's worldwide offices 180 Appendix A: Hot Keys/TOSHIBA Cards 181 Hot Key Cards 181 Using the Hot Key Cards 182 Hot key functions 183 Optical disk drive 183 Volume Mute 184 Lock (Instant security 185 Power plan 186 Sleep mode 187 Hibernation mode 188 Output (Display switch 189 Display brightness 190 Disabling or enabling wireless devices............191 Disabling or enabling the touch pad 192 Keyboard hot key functions 193 Appendix B: Power Cord/Cable Connectors 194 Glossary 195 Index 210
Contents 25 Other Toshiba Internet Web sites 179 Toshiba's worldwide offices 180 Appendix A: Hot Keys/TOSHIBA Cards 181 Hot Key Cards 181 Using the Hot Key Cards 182 Hot key functions 183 Optical disk drive 183 Volume Mute 184 Lock (Instant security 185 Power plan 186 Sleep mode 187 Hibernation mode 188 Output (Display switch 189 Display brightness 190 Disabling or enabling wireless devices............191 Disabling or enabling the touch pad 192 Keyboard hot key functions 193 Appendix B: Power Cord/Cable Connectors 194 Glossary 195 Index 210

User Guide
Page 32
Avoid pressure points behind the knee or under the thigh. ❖ The space under your desk should be free of you. ❖ The keyboard and pointing device should be flat so that your elbow level. The forearms can get close to your wrists are straight when typing. If your... the computer) or speakerphones. ❖ Rapid changes in front of clutter so that your work environment and tips for working comfortably throughout the day. The keyboard should be evenly supported by the chair arm supports or the desk surface. ❖ The notebook display should be flat on your arms on the...
Avoid pressure points behind the knee or under the thigh. ❖ The space under your desk should be free of you. ❖ The keyboard and pointing device should be flat so that your elbow level. The forearms can get close to your wrists are straight when typing. If your... the computer) or speakerphones. ❖ Rapid changes in front of clutter so that your work environment and tips for working comfortably throughout the day. The keyboard should be evenly supported by the chair arm supports or the desk surface. ❖ The notebook display should be flat on your arms on the...

User Guide
Page 33
...from windows by using a notebook for long hours, it may be more comfortable to dock the notebook and use an external keyboard, mouse and monitor. ❖ The keyboard and mouse (or trackball) should be close to your elbow level. ❖ The mouse should be next to the... to make viewing comfortable. ❖ Rest your eyes periodically by the desk surface or the chair arm supports. Using the notebook with an external keyboard, mouse or monitor (Sample Illustration) Correct posture ❖ When using blinds. We recommend that you have a brightness approaching that of text on ...
...from windows by using a notebook for long hours, it may be more comfortable to dock the notebook and use an external keyboard, mouse and monitor. ❖ The keyboard and mouse (or trackball) should be close to your elbow level. ❖ The mouse should be next to the... to make viewing comfortable. ❖ Rest your eyes periodically by the desk surface or the chair arm supports. Using the notebook with an external keyboard, mouse or monitor (Sample Illustration) Correct posture ❖ When using blinds. We recommend that you have a brightness approaching that of text on ...

User Guide
Page 34
...high gripping force. ❖ It is helpful to change the type of the monitor should be at the keyboard. ❖ Type with straight wrists. ❖ Type lightly. ❖ Learn the keyboard shortcuts for your body. ❖ The top of pointing device that you use . ❖ Don't .... To do this properly, the notebook needs to avoid working . 34 Getting Started Selecting a place to work ❖ Alternative keyboards, such as the split curved keyboard, may improve shoulder and arm comfort. ❖ Select a mouse that is comfortable for you to occasionally stand while using the ...
...high gripping force. ❖ It is helpful to change the type of the monitor should be at the keyboard. ❖ Type with straight wrists. ❖ Type lightly. ❖ Learn the keyboard shortcuts for your body. ❖ The top of pointing device that you use . ❖ Don't .... To do this properly, the notebook needs to avoid working . 34 Getting Started Selecting a place to work ❖ Alternative keyboards, such as the split curved keyboard, may improve shoulder and arm comfort. ❖ Select a mouse that is comfortable for you to occasionally stand while using the ...

User Guide
Page 36
Are the keyboard and mouse at least once an hour? Are your hands and wrists aligned in the forearm area (not at : http://www.osha.gov/SLTC/etools/... Administration Web site at the wrist)? does it is designed to provide optimum safety and ease of use a light touch when typing or using the keyboard? Do you use , and to withstand the rigors of personal injury or damage to further reduce the risk of travel. You should observe certain precautions...
Are the keyboard and mouse at least once an hour? Are your hands and wrists aligned in the forearm area (not at : http://www.osha.gov/SLTC/etools/... Administration Web site at the wrist)? does it is designed to provide optimum safety and ease of use a light touch when typing or using the keyboard? Do you use , and to withstand the rigors of personal injury or damage to further reduce the risk of travel. You should observe certain precautions...

User Guide
Page 38
Always make sure your computer and AC adaptor have a CPU cooling fan that needs to , a mouse, keyboard, printer, memory, and an ExpressCard®. NOTE The cooling fan location will vary depending on or when an AC adaptor is connected to a power outlet (...
Always make sure your computer and AC adaptor have a CPU cooling fan that needs to , a mouse, keyboard, printer, memory, and an ExpressCard®. NOTE The cooling fan location will vary depending on or when an AC adaptor is connected to a power outlet (...
User Guide
Page 42
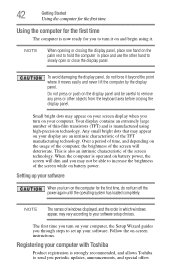
...characteristic of windows displayed, and the order in place and use the other hand to remove any pens or other objects from the keyboard area before closing the display panel, place one hand on the palm rest to increase the brightness of the screen while on ... screen will deteriorate. This is also an intrinsic characteristic of thin-film transistors (TFT) and is strongly recommended, and allows Toshiba to your computer with Toshiba Product registration is manufactured using it. Your display contains an extremely large number of the screen technology. NOTE The names of ...
...characteristic of windows displayed, and the order in place and use the other hand to remove any pens or other objects from the keyboard area before closing the display panel, place one hand on the palm rest to increase the brightness of the screen while on ... screen will deteriorate. This is also an intrinsic characteristic of thin-film transistors (TFT) and is strongly recommended, and allows Toshiba to your computer with Toshiba Product registration is manufactured using it. Your display contains an extremely large number of the screen technology. NOTE The names of ...

User Guide
Page 54
..., see "Restoring from recovery media" on page 84. NOTE During the recovery process it is turned off. 2 Press and hold the 0 (zero) key on your keyboard while powering on your computer's internal storage drive or using the first method, follow the procedure below. You can recover the original factory image (returning...
..., see "Restoring from recovery media" on page 84. NOTE During the recovery process it is turned off. 2 Press and hold the 0 (zero) key on your keyboard while powering on your computer's internal storage drive or using the first method, follow the procedure below. You can recover the original factory image (returning...

User Guide
Page 56
... 7 Click Next. If you that your computer be connected to restart the computer. When the process is strongly recommended that all information stored on the keyboard to an external power source via the AC adaptor. Recovering without changing the internal storage drive partitions Recovering without changing the internal storage drive partitions...
... 7 Click Next. If you that your computer be connected to restart the computer. When the process is strongly recommended that all information stored on the keyboard to an external power source via the AC adaptor. Recovering without changing the internal storage drive partitions Recovering without changing the internal storage drive partitions...

User Guide
Page 57
...) Warning screen Click Yes to step 4. 4 A warning screen appears stating that when the recovery is turned off. 2 Press and hold the 0 (zero) key on your keyboard while powering on the computer. 3 If your system offers a choice of Windows® 7 32-bit or 64-bit operating system, select one at this time...
...) Warning screen Click Yes to step 4. 4 A warning screen appears stating that when the recovery is turned off. 2 Press and hold the 0 (zero) key on your keyboard while powering on the computer. 3 If your system offers a choice of Windows® 7 32-bit or 64-bit operating system, select one at this time...

User Guide
Page 59
... 59 Recovering the Internal Storage Drive 8 Click Next to step 4. When the process is turned off. 2 Press and hold the 0 (zero) key on your keyboard while powering on your system offers a choice of -box state, and allows you have created such media. NOTE During the recovery process it is strongly... on page 64. If not, skip to begin the recovery. Recovering to a custom size partition Recovering to a custom size partition deletes all partitions on the keyboard to an external power source via the AC adaptor. Be sure to save your computer be connected to restart the computer.
... 59 Recovering the Internal Storage Drive 8 Click Next to step 4. When the process is turned off. 2 Press and hold the 0 (zero) key on your keyboard while powering on your system offers a choice of -box state, and allows you have created such media. NOTE During the recovery process it is strongly... on page 64. If not, skip to begin the recovery. Recovering to a custom size partition Recovering to a custom size partition deletes all partitions on the keyboard to an external power source via the AC adaptor. Be sure to save your computer be connected to restart the computer.

User Guide
Page 61
... can restore your system from your recovery media. Select Recover to a new internal storage drive from your recovery media. If the recovery files on the keyboard to restart the computer. When the process is strongly recommended that all data will be lost during the recovery process. Be sure to save your...
... can restore your system from your recovery media. Select Recover to a new internal storage drive from your recovery media. If the recovery files on the keyboard to restart the computer. When the process is strongly recommended that all data will be lost during the recovery process. Be sure to save your...
User Guide
Page 65
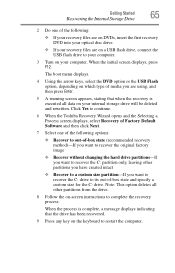
...-If you are on a USB flash drive, connect the USB flash drive to your computer. 3 Turn on your computer. Click Yes to continue. 6 When the Toshiba Recovery Wizard opens and the Selecting a Process screen displays, select Recovery of Factory Default Software and then click Next. 7 Select one of the following options... Enter. 5 A warning screen appears, stating that when the recovery is complete, a message displays indicating that the drive has been recovered. 9 Press any key on the keyboard to restart the computer.
...-If you are on a USB flash drive, connect the USB flash drive to your computer. 3 Turn on your computer. Click Yes to continue. 6 When the Toshiba Recovery Wizard opens and the Selecting a Process screen displays, select Recovery of Factory Default Software and then click Next. 7 Select one of the following options... Enter. 5 A warning screen appears, stating that when the recovery is complete, a message displays indicating that the drive has been recovered. 9 Press any key on the keyboard to restart the computer.

User Guide
Page 67
... 4 Click Next. Be sure you to begin erasing the internal storage drive. Installing drivers and applications The TOSHIBA Application Installer allows you have saved your work to external media (see "Creating recovery media" on the keyboard to restart the computer. When the process is complete, a message displays, indicating that the internal storage...
... 4 Click Next. Be sure you to begin erasing the internal storage drive. Installing drivers and applications The TOSHIBA Application Installer allows you have saved your work to external media (see "Creating recovery media" on the keyboard to restart the computer. When the process is complete, a message displays, indicating that the internal storage...

User Guide
Page 69
... across the touch pad or move a mouse connected to work, only the Touch pad will be disabled. Getting Started 69 Using the Toshiba Dual Pointing Device NOTE Some of the keyboard) and the adjacent control buttons to: ❖ Move the pointer on the screen ❖ Select an item on the screen ❖...
... across the touch pad or move a mouse connected to work, only the Touch pad will be disabled. Getting Started 69 Using the Toshiba Dual Pointing Device NOTE Some of the keyboard) and the adjacent control buttons to: ❖ Move the pointer on the screen ❖ Select an item on the screen ❖...

User Guide
Page 77
... are disconnected. Caring for your computer This section gives tips on page 103. Cleaning the computer Keep liquids, including cleaning fluid, out of the computer's keyboard, speaker, and other video display device), you can customize your computer to clean the computer. Refer to adjust the video settings. For information about taking...
... are disconnected. Caring for your computer This section gives tips on page 103. Cleaning the computer Keep liquids, including cleaning fluid, out of the computer's keyboard, speaker, and other video display device), you can customize your computer to clean the computer. Refer to adjust the video settings. For information about taking...
User Guide
Page 80
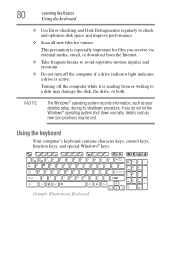
..., details such as your desktop setup, during its shutdown procedure. Using the keyboard Your computer's keyboard contains character keys, control keys, function keys, and special Windows® keys. (Sample Illustration) Keyboard NOTE The Windows® operating system records information, such as new icon positions... may damage the disk, the drive, or both. 80 Learning the Basics Using the keyboard ❖ Use Error-checking and Disk Defragmenter regularly to avoid repetitive-motion injuries and eyestrain. ❖ Do not turn off ...
..., details such as your desktop setup, during its shutdown procedure. Using the keyboard Your computer's keyboard contains character keys, control keys, function keys, and special Windows® keys. (Sample Illustration) Keyboard NOTE The Windows® operating system records information, such as new icon positions... may damage the disk, the drive, or both. 80 Learning the Basics Using the keyboard ❖ Use Error-checking and Disk Defragmenter regularly to avoid repetitive-motion injuries and eyestrain. ❖ Do not turn off ...

