

User Guide
Page 2
..., please make periodic back-up and usage instructions in the applicable user guides and/or manuals enclosed or provided electronically. If you fail to cause birth defects or other reproductive harm. Model: Satellite Pro® U400 Series Recordable and/or ReWritable Drive(s) and Associated Software Warranty The computer system you purchased may lose data or suffer other damage. YOU AGREE THAT TOSHIBA, ITS...
..., please make periodic back-up and usage instructions in the applicable user guides and/or manuals enclosed or provided electronically. If you fail to cause birth defects or other reproductive harm. Model: Satellite Pro® U400 Series Recordable and/or ReWritable Drive(s) and Associated Software Warranty The computer system you purchased may lose data or suffer other damage. YOU AGREE THAT TOSHIBA, ITS...
User Guide
Page 5
...The telephone number provided may occasionally be advised of your right to maintain uninterrupted service. If the equipment is causing harm to permanently disconnect your fax transmission, refer to the fax software instructions installed on this ...network, the telephone company may be a 900 number or any other electronic device, including Fax machines, to send any person to use a computer or other number for them know of the telephone company is to make any changes necessary to file a complaint with this change. Contact the state public utility commission, public service...
...The telephone number provided may occasionally be advised of your right to maintain uninterrupted service. If the equipment is causing harm to permanently disconnect your fax transmission, refer to the fax software instructions installed on this ...network, the telephone company may be a 900 number or any other electronic device, including Fax machines, to send any person to use a computer or other number for them know of the telephone company is to make any changes necessary to file a complaint with this change. Contact the state public utility commission, public service...
User Guide
Page 29
... 49 Opening the display panel 49 Your computer's features and specifications ....50 Turning on the power 50 Adding memory (optional 51 Installing a memory module 52 Removing a memory module 57 Checking total memory 59 Hard Drive Recovery Utilities 60 Creating Recovery DVDs 60 Hard Disk Drive Recovery options 61 Hard Disk Drive Recovery using the Recovery media 67 Checking the HDD operating status 69 Installing drivers and applications 69 Using the TouchPad 70 Scrolling with the TouchPad 70 Control buttons 70 Disabling or enabling the TouchPad 71 Using external display devices...
... 49 Opening the display panel 49 Your computer's features and specifications ....50 Turning on the power 50 Adding memory (optional 51 Installing a memory module 52 Removing a memory module 57 Checking total memory 59 Hard Drive Recovery Utilities 60 Creating Recovery DVDs 60 Hard Disk Drive Recovery options 61 Hard Disk Drive Recovery using the Recovery media 67 Checking the HDD operating status 69 Installing drivers and applications 69 Using the TouchPad 70 Scrolling with the TouchPad 70 Control buttons 70 Disabling or enabling the TouchPad 71 Using external display devices...

User Guide
Page 52
.... Avoid touching the cover, the module, and the surrounding area before replacing it must be installed in Slot A. You can be installed in the memory module slots on may damage the computer, the module, or both. You will be lost. The computer has two memory slots-Slot A and Slot B. Installing a memory module with the computer's power on the base of the computer. If you install or remove a memory module, turn off the computer using the Start menu...
.... Avoid touching the cover, the module, and the surrounding area before replacing it must be installed in Slot A. You can be installed in the memory module slots on may damage the computer, the module, or both. You will be lost. The computer has two memory slots-Slot A and Slot B. Installing a memory module with the computer's power on the base of the computer. If you install or remove a memory module, turn off the computer using the Start menu...

User Guide
Page 57
... computer and the memory module. Removing a memory module If you turn it correctly as described in memory will not be lost. In either of the above cases, the Sleep configuration will be saved. For more information on inserting the main battery, see "Inserting a charged battery" on page 59. If you are adding extra memory after setting up the next time you need to work. You can...
... computer and the memory module. Removing a memory module If you turn it correctly as described in memory will not be lost. In either of the above cases, the Sleep configuration will be saved. For more information on inserting the main battery, see "Inserting a charged battery" on page 59. If you are adding extra memory after setting up the next time you need to work. You can...

User Guide
Page 59
... with the socket latches. Getting Started Adding memory (optional) 59 4 Replace the memory module slot cover and secure it using the screws. 5 Re-insert the main battery. To do this: 1 Click Start, Control Panel, System and Maintenance, and then System. otherwise, click Cancel. This is displayed below the System heading under Memory (RAM). TECHNICAL NOTE: You must have at least one memory module installed for the computer to perform the...
... with the socket latches. Getting Started Adding memory (optional) 59 4 Replace the memory module slot cover and secure it using the screws. 5 Re-insert the main battery. To do this: 1 Click Start, Control Panel, System and Maintenance, and then System. otherwise, click Cancel. This is displayed below the System heading under Memory (RAM). TECHNICAL NOTE: You must have at least one memory module installed for the computer to perform the...

User Guide
Page 62
... Recovery Menu screen 4 When the Toshiba Recovery Wizard screen displays, select one at this time. To recover your hard disk drive using the utilities stored on your computer's HDD: 1 Make sure the computer is strongly recommended that your system offers a choice of Windows Vista® 32-bit or 64bit operating system, select one of Factory Default Software The options are: ❖ Recovery of the options and then click Next. If not skip to an external power...
... Recovery Menu screen 4 When the Toshiba Recovery Wizard screen displays, select one at this time. To recover your hard disk drive using the utilities stored on your computer's HDD: 1 Make sure the computer is strongly recommended that your system offers a choice of Windows Vista® 32-bit or 64bit operating system, select one of Factory Default Software The options are: ❖ Recovery of the options and then click Next. If not skip to an external power...

User Guide
Page 71
... can change the enable/disable TouchPad setting, press Fn + F9. This hot key enables/disables the TouchPad. Using external display devices Your computer comes with a built-in display, but you need to install new software. 2 Connect the monitor's video cable to the RGB (monitor) port on the side of the secondary (right-hand) button depends on the external device. To do this: 1 Read the directions that came with display options. 5 Select the settings you can also connect an external display device to an available video port via...
... can change the enable/disable TouchPad setting, press Fn + F9. This hot key enables/disables the TouchPad. Using external display devices Your computer comes with a built-in display, but you need to install new software. 2 Connect the monitor's video cable to the RGB (monitor) port on the side of the secondary (right-hand) button depends on the external device. To do this: 1 Read the directions that came with display options. 5 Select the settings you can also connect an external display device to an available video port via...

User Guide
Page 154
... compatible ports even when the power of the external devices thoroughly before use. ❖ Using the "USB Sleep and Charge function" to charge external devices will take longer than charging the devices with their own chargers. Changing the setting to Enabled enables the use , set the setting to Mode-1. As for the specifications of the external devices, please contact the device manufacturer or check the specifications of the computer is turned OFF. ❖ USB bus power (DC 5V) is Disabled. However, some external devices...
... compatible ports even when the power of the external devices thoroughly before use. ❖ Using the "USB Sleep and Charge function" to charge external devices will take longer than charging the devices with their own chargers. Changing the setting to Enabled enables the use , set the setting to Mode-1. As for the specifications of the external devices, please contact the device manufacturer or check the specifications of the computer is turned OFF. ❖ USB bus power (DC 5V) is Disabled. However, some external devices...

User Guide
Page 155
...USB ports have a non-Sleep and Charge USB port available. The "USB Wakeup function" will be displayed on the external devices connected to Mode-2. Setting item: Enabled (Mode-1) -- Disables the function USB Wakeup function-This function restores the computer from Sleep Mode depending on the Device Manager and even though you have the USB Sleep and Charge function-compatible icon ( ), change the "USB Sleep and Charge function" setting to allow the Wakeup) check box will not work. By changing any of the options that appear in TOSHIBA Hardware Setup, the "USB Wakeup function...
...USB ports have a non-Sleep and Charge USB port available. The "USB Wakeup function" will be displayed on the external devices connected to Mode-2. Setting item: Enabled (Mode-1) -- Disables the function USB Wakeup function-This function restores the computer from Sleep Mode depending on the Device Manager and even though you have the USB Sleep and Charge function-compatible icon ( ), change the "USB Sleep and Charge function" setting to allow the Wakeup) check box will not work. By changing any of the options that appear in TOSHIBA Hardware Setup, the "USB Wakeup function...
User Guide
Page 170
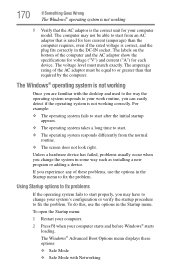
If you change your system's configuration or verify the startup procedure to fix the problem. The Windows® Advanced Boot Options menu displays these problems, use the options in some way such as installing a new program or adding a device. Unless a hardware device has failed, problems usually occur when you experience any of these options: ❖ Safe Mode ❖ Safe Mode with the desktop and used to the way the operating system responds to your work routine, you may...
If you change your system's configuration or verify the startup procedure to fix the problem. The Windows® Advanced Boot Options menu displays these problems, use the options in some way such as installing a new program or adding a device. Unless a hardware device has failed, problems usually occur when you experience any of these options: ❖ Safe Mode ❖ Safe Mode with the desktop and used to the way the operating system responds to your work routine, you may...

User Guide
Page 174
... to the Lock button in "Installing a memory module" on page 52, and making sure the module is worthwhile checking for the error again. 174 If Something Goes Wrong Resolving a hardware conflict ❖ The Resources tab, which displays the drivers being used by the memory module. The Shut Down menu appears. 2 Click Shut Down. For more information about Device Manager, refer to the monitor, optional external optical drive, optional external diskette drive, and other power-using functions. This...
... to the Lock button in "Installing a memory module" on page 52, and making sure the module is worthwhile checking for the error again. 174 If Something Goes Wrong Resolving a hardware conflict ❖ The Resources tab, which displays the drivers being used by the memory module. The Shut Down menu appears. 2 Click Shut Down. For more information about Device Manager, refer to the monitor, optional external optical drive, optional external diskette drive, and other power-using functions. This...
User Guide
Page 177
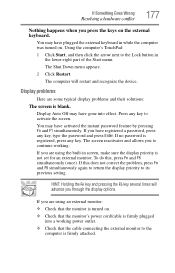
... Start menu. The screen reactivates and allows you through the display options. HINT: Holding the Fn key and pressing the F5 key several times will restart and recognize the device. Display Auto Off may have registered a password, press any key to the computer is firmly attached. If you are using an external monitor: ❖ Check that the monitor's power cord/cable is not set for an external monitor. Press any key, type...
... Start menu. The screen reactivates and allows you through the display options. HINT: Holding the Fn key and pressing the F5 key several times will restart and recognize the device. Display Auto Off may have registered a password, press any key to the computer is firmly attached. If you are using an external monitor: ❖ Check that the monitor's power cord/cable is not set for an external monitor. Press any key, type...
User Guide
Page 185
... test file using Notepad. For example, you see your original file. Make sure the cable from the way they print it. The other system may be busy or off the printer. Turn the printer back on . If a Notepad file prints correctly, the problem may be set up to the computer's modem port and the telephone line jack. For...
... test file using Notepad. For example, you see your original file. Make sure the cable from the way they print it. The other system may be busy or off the printer. Turn the printer back on . If a Notepad file prints correctly, the problem may be set up to the computer's modem port and the telephone line jack. For...
User Guide
Page 194
...; Make sure that you have a non-Sleep and Charge USB port available or disable the "USB Sleep and Charge function" in the TOSHIBA Hardware Setup, the "USB Wakeup function" does not work . ❖ When "USB Sleep and Charge function" is Enabled in TOSHIBA Hardware Setup. 194 If Something Goes Wrong Develop good computing habits 3 Install one or more of the following methods. ❖ Change the Enabled mode setting. ❖ Turn OFF the computer while external devices are still functioning. 6 For each additional hardware or software...
...; Make sure that you have a non-Sleep and Charge USB port available or disable the "USB Sleep and Charge function" in the TOSHIBA Hardware Setup, the "USB Wakeup function" does not work . ❖ When "USB Sleep and Charge function" is Enabled in TOSHIBA Hardware Setup. 194 If Something Goes Wrong Develop good computing habits 3 Install one or more of the following methods. ❖ Change the Enabled mode setting. ❖ Turn OFF the computer while external devices are still functioning. 6 For each additional hardware or software...

User Guide
Page 222
... Web. See also cache, CPU cache, L2 cache. It is refreshed. LAN (local area network) - A 3.5-inch diskette that you turn the computer off . I icon - The decentralized, world-wide network of your work , including all open files and programs, when you turn on the motherboard to interact with the Fn key can set system options or control system parameters, such as a mouse. A group of computers...
... Web. See also cache, CPU cache, L2 cache. It is refreshed. LAN (local area network) - A 3.5-inch diskette that you turn the computer off . I icon - The decentralized, world-wide network of your work , including all open files and programs, when you turn on the motherboard to interact with the Fn key can set system options or control system parameters, such as a mouse. A group of computers...
User Guide
Page 228
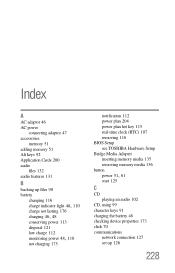
... 90 battery changing 116 charge indicator light 48, 110 charge not lasting 176 charging 46, 48 conserving power 113 disposal 121 low charge 112 monitoring power 48, 110 not charging 175 notification 112 power plan 204 power plan hot key 115 real-time clock (RTC) 107 removing 116 BIOS Setup see TOSHIBA Hardware Setup Bridge Media Adapter inserting memory media 135 removing memory media 136 button power 51, 61 start 125 C CD playing an audio 102 CD, using 99 character keys 91 charging the battery 48 checking device...
... 90 battery changing 116 charge indicator light 48, 110 charge not lasting 176 charging 46, 48 conserving power 113 disposal 121 low charge 112 monitoring power 48, 110 not charging 175 notification 112 power plan 204 power plan hot key 115 real-time clock (RTC) 107 removing 116 BIOS Setup see TOSHIBA Hardware Setup Bridge Media Adapter inserting memory media 135 removing memory media 136 button power 51, 61 start 125 C CD playing an audio 102 CD, using 99 character keys 91 charging the battery 48 checking device...

User Guide
Page 229
... connecting to a power source 46 connection set up 127 control buttons 70 Ctrl keys 92 D desktop creating new icon 124 major features 124 desktop exploration 123 desktop icons 124 Device Manager 173 checking properties 173 devices keyboard 73 mouse 73 Disk Defragmenter 180 disk drive corrupted/damaged data files 180 missing files/trouble accessing a disk 179 running slow 180 diskette drive cannot insert a diskette 180 cannot read a diskette 180 connecting 75 external, connecting 75 display...
... connecting to a power source 46 connection set up 127 control buttons 70 Ctrl keys 92 D desktop creating new icon 124 major features 124 desktop exploration 123 desktop icons 124 Device Manager 173 checking properties 173 devices keyboard 73 mouse 73 Disk Defragmenter 180 disk drive corrupted/damaged data files 180 missing files/trouble accessing a disk 179 running slow 180 diskette drive cannot insert a diskette 180 cannot read a diskette 180 connecting 75 external, connecting 75 display...

User Guide
Page 230
... Authentication Utility using 159 Fn keys 92 function keys 92 H hardware conflicts 172 resolving 173 headphones using 132 Help and Support Windows® operating system 172 Hibernation mode 76 configuring 80 starting again from 82 hot key display brightness 208 Hibernation mode 206 keyboard overlays 212 Lock (Instant security) 203 Output (Display switch) 207 power plan 204 Sleep mode 205 volume mute 202 Zoom (Display resolution) 211 zooming 212 Hot Key Cards 198 Hot key functions 202 hot key power plan 115 http 129 I i.LINK® port...
... Authentication Utility using 159 Fn keys 92 function keys 92 H hardware conflicts 172 resolving 173 headphones using 132 Help and Support Windows® operating system 172 Hibernation mode 76 configuring 80 starting again from 82 hot key display brightness 208 Hibernation mode 206 keyboard overlays 212 Lock (Instant security) 203 Output (Display switch) 207 power plan 204 Sleep mode 205 volume mute 202 Zoom (Display resolution) 211 zooming 212 Hot Key Cards 198 Hot key functions 202 hot key power plan 115 http 129 I i.LINK® port...
User Guide
Page 231
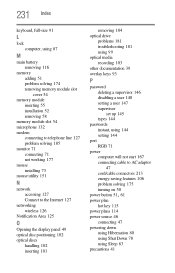
... memory module slot 54 microphone 132 modem connecting to telephone line 127 problem solving 185 monitor 71 connecting 71 not working 177 mouse installing 73 mouse utility 151 N network accessing 127 Connect to the Internet 127 networking wireless 126 Notification Area 125 O Opening the display panel 49 optical disc positioning 102 optical discs handling 102 inserting 101 removing 104 optical drive problems 181 troubleshooting 181 using 99 optical media recording 103 other documentation 39 overlay keys 93 P password deleting a supervisor 146 disabling a user 148 setting a user...
... memory module slot 54 microphone 132 modem connecting to telephone line 127 problem solving 185 monitor 71 connecting 71 not working 177 mouse installing 73 mouse utility 151 N network accessing 127 Connect to the Internet 127 networking wireless 126 Notification Area 125 O Opening the display panel 49 optical disc positioning 102 optical discs handling 102 inserting 101 removing 104 optical drive problems 181 troubleshooting 181 using 99 optical media recording 103 other documentation 39 overlay keys 93 P password deleting a supervisor 146 disabling a user 148 setting a user...


