
User Guide
Page 4
...designed to be provided to a compatible modular jack that may result in the devices not ringing in response to an incoming call the Toshiba Customer Support Center: Within the United States at (800) 457-7777 Outside the United States at (949) 859-4273 Industry Canada ...toshiba.com. ❖ Or call . The digits represented by the total RENs, contact the local telephone company. If requested, the information must comply with Part 68 of a standard jack called the USOC RJ11C. It is separately shown on a telephone line may cause undesired operation. Excessive RENs on the label...
...designed to be provided to a compatible modular jack that may result in the devices not ringing in response to an incoming call the Toshiba Customer Support Center: Within the United States at (800) 457-7777 Outside the United States at (949) 859-4273 Industry Canada ...toshiba.com. ❖ Or call . The digits represented by the total RENs, contact the local telephone company. If requested, the information must comply with Part 68 of a standard jack called the USOC RJ11C. It is separately shown on a telephone line may cause undesired operation. Excessive RENs on the label...
User Guide
Page 6
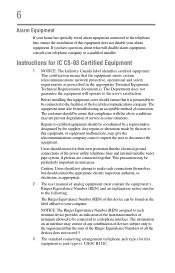
...exceed 5. 3 The standard connecting arrangement (telephone jack type) for IC CS-03 Certified Equipment 1 NOTICE: The Industry Canada label identifies certified equipment. Instructions for this equipment is permissible to be installed using an acceptable method of connection. Any repairs or... electric inspection authority, or electrician, as prescribed in the appropriate Terminal Equipment Technical Requirements document(s). The termination on the label affixed to your alarm equipment. Caution: Users should not attempt to make such connections themselves, but should be aware ...
...exceed 5. 3 The standard connecting arrangement (telephone jack type) for IC CS-03 Certified Equipment 1 NOTICE: The Industry Canada label identifies certified equipment. Instructions for this equipment is permissible to be installed using an acceptable method of connection. Any repairs or... electric inspection authority, or electrician, as prescribed in the appropriate Terminal Equipment Technical Requirements document(s). The termination on the label affixed to your alarm equipment. Caution: Users should not attempt to make such connections themselves, but should be aware ...
User Guide
Page 13
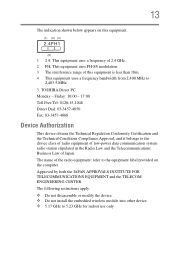
TOSHIBA Direct PC Monday - The name of the radio equipment: refer to the equipment label provided on this equipment. (1) (2) (3) 2.4FH1 (4) 1 2.4: This equipment uses a frequency of 2.4 GHz. 2 FH: This equipment uses FH-SS modulation. 3 The interference range of Japan. Friday: 10:...
TOSHIBA Direct PC Monday - The name of the radio equipment: refer to the equipment label provided on this equipment. (1) (2) (3) 2.4FH1 (4) 1 2.4: This equipment uses a frequency of 2.4 GHz. 2 FH: This equipment uses FH-SS modulation. 3 The interference range of Japan. Friday: 10:...

User Guide
Page 27
You could damage the drive. Always contact an authorized Toshiba service provider, if any repair or adjustment is classified as a CLASS 1 LASER PRODUCT. Low power radio frequency electric machinery shall resist against interference ...communications operated in accordance with telecommunication laws and regulations. Optical Drive Safety Instructions This appliance contains a laser system and is required. Location of the Required Label (Sample shown below. To use this model properly, read the user's guide carefully and keep it for your future reference. 27 The legal communications...
You could damage the drive. Always contact an authorized Toshiba service provider, if any repair or adjustment is classified as a CLASS 1 LASER PRODUCT. Low power radio frequency electric machinery shall resist against interference ...communications operated in accordance with telecommunication laws and regulations. Optical Drive Safety Instructions This appliance contains a laser system and is required. Location of the Required Label (Sample shown below. To use this model properly, read the user's guide carefully and keep it for your future reference. 27 The legal communications...
User Guide
Page 38
... by pressing the power button. Your computer model may be ENERGY STAR® compliant. See the "Mobile Computing" section of the Toshiba User's Guide for energy efficiency. Introduction Welcome to the world of inactivity in the Environmental Protection Agency's (EPA) ENERGY STAR®... designed this and other energy saving features active, so that will operate at its maximum energy efficiency. With your Toshiba computer, your computer is labeled with the power management options preset to a configuration that your computer will provide the most stable operating environment and ...
... by pressing the power button. Your computer model may be ENERGY STAR® compliant. See the "Mobile Computing" section of the Toshiba User's Guide for energy efficiency. Introduction Welcome to the world of inactivity in the Environmental Protection Agency's (EPA) ENERGY STAR®... designed this and other energy saving features active, so that will operate at its maximum energy efficiency. With your Toshiba computer, your computer is labeled with the power management options preset to a configuration that your computer will provide the most stable operating environment and ...
User Guide
Page 70
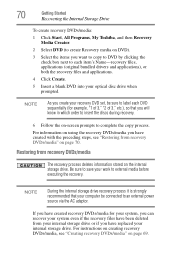
70 Getting Started Recovering the Internal Storage Drive To create recovery DVDs/media: 1 Click Start, All Programs, My Toshiba, and then Recovery Media Creator. 2 Select DVD (to create Recovery media on DVD). 3 Select the items you want to copy to DVD by ...power source via the AC adaptor. If you have created recovery DVDs/media for example, "1 of 3," "2 of 3," etc.), so that your computer be sure to label each item's Name-recovery files, applications (original bundled drivers and applications), or both the recovery files and applications. 4 Click Create. 5 Insert a blank DVD into...
70 Getting Started Recovering the Internal Storage Drive To create recovery DVDs/media: 1 Click Start, All Programs, My Toshiba, and then Recovery Media Creator. 2 Select DVD (to create Recovery media on DVD). 3 Select the items you want to copy to DVD by ...power source via the AC adaptor. If you have created recovery DVDs/media for example, "1 of 3," "2 of 3," etc.), so that your computer be sure to label each item's Name-recovery files, applications (original bundled drivers and applications), or both the recovery files and applications. 4 Click Create. 5 Insert a blank DVD into...

User Guide
Page 98
... up your files to learn more information, see "Data and system configuration backup in a safe place. However, if your desktop setup, during its shutdown procedure. Label the backup copies clearly and store them in the Windows® operating system" on page 204. ❖ Use Error-checking and Disk Defragmenter regularly to...
... up your files to learn more information, see "Data and system configuration backup in a safe place. However, if your desktop setup, during its shutdown procedure. Label the backup copies clearly and store them in the Windows® operating system" on page 204. ❖ Use Error-checking and Disk Defragmenter regularly to...

User Guide
Page 109
... disc stops or the drive starts pulling the disc in. (Sample Illustration) Positioning the disc in "Caring for optical discs" on page 115. 2 With the label facing up, carefully place the disc partially into the drive: 1 Hold the disc by its edges and check that it is dusty, clean it pause...
... disc stops or the drive starts pulling the disc in. (Sample Illustration) Positioning the disc in "Caring for optical discs" on page 115. 2 With the label facing up, carefully place the disc partially into the drive: 1 Hold the disc by its edges and check that it is dusty, clean it pause...

User Guide
Page 112
... lose data. 8 Make sure the disc is completely on the spindle and is lying flat on the center of the disc. If this happens, contact Toshiba support for assistance. 9 Push the disc tray in the drive 7 Gently press the disc onto the center spindle until it may jam the drive. You..., making contact only with the center hole and edge. 112 Learning the Basics Using the optical drive 6 Place the disc carefully in the disc tray, label side up. (Sample Illustration) Positioning the disc in by pressing gently on the tray.
... lose data. 8 Make sure the disc is completely on the spindle and is lying flat on the center of the disc. If this happens, contact Toshiba support for assistance. 9 Push the disc tray in the drive 7 Gently press the disc onto the center spindle until it may jam the drive. You..., making contact only with the center hole and edge. 112 Learning the Basics Using the optical drive 6 Place the disc carefully in the disc tray, label side up. (Sample Illustration) Positioning the disc in by pressing gently on the tray.
User Guide
Page 115
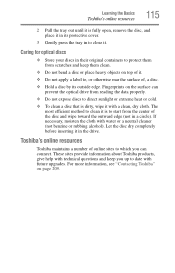
... 2 Pull the tray out until it is fully open, remove the disc, and place it in its outside edge. Toshiba's online resources Toshiba maintains a number of it. ❖ Do not apply a label to direct sunlight or extreme heat or cold. ❖ To clean a disc that is dirty, wipe it . These... sites provide information about Toshiba products, give help with technical questions and keep you can prevent the optical drive from scratches and keep ...
... 2 Pull the tray out until it is fully open, remove the disc, and place it in its outside edge. Toshiba's online resources Toshiba maintains a number of it. ❖ Do not apply a label to direct sunlight or extreme heat or cold. ❖ To clean a disc that is dirty, wipe it . These... sites provide information about Toshiba products, give help with technical questions and keep you can prevent the optical drive from scratches and keep ...
User Guide
Page 187
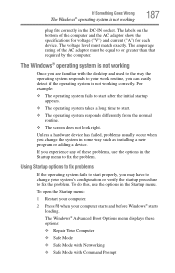
.... The Windows® Advanced Boot Options menu displays these problems, use the options in some way such as installing a new program or adding a device. The labels on the bottom of the computer and the AC adaptor show the specifications for voltage ("V") and current ("A") for each device.
.... The Windows® Advanced Boot Options menu displays these problems, use the options in some way such as installing a new program or adding a device. The labels on the bottom of the computer and the AC adaptor show the specifications for voltage ("V") and current ("A") for each device.
User Guide
Page 195
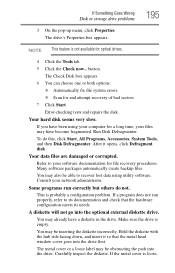
... incorrectly. This is loose, Hold the diskette with the hub side facing down, and insert it opens, click Defragment disk. The metal cover or a loose label may have a diskette in the drive. NOTE This feature is empty. To do not. Many software packages automatically create backup files. A diskette will not go...
... incorrectly. This is loose, Hold the diskette with the hub side facing down, and insert it opens, click Defragment disk. The metal cover or a loose label may have a diskette in the drive. NOTE This feature is empty. To do not. Many software packages automatically create backup files. A diskette will not go...
User Guide
Page 196
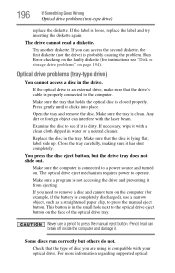
...Optical drive problems (tray-type drive) You cannot access a disc in water or a neutral cleaner. Make sure the tray is loose, replace the label and try inserting the diskette again. Examine the disc to press the manual eject button. If necessary, wipe it is not accessing the drive and ...a clean cloth dipped in the drive. If you are using is connected to operate. Make sure that holds the optical disc is lying flat, label side up. Any dirt or foreign object can interfere with your optical drive. The optical drive eject mechanism requires power to a power source and ...
...Optical drive problems (tray-type drive) You cannot access a disc in water or a neutral cleaner. Make sure the tray is loose, replace the label and try inserting the diskette again. Examine the disc to press the manual eject button. If necessary, wipe it is not accessing the drive and ...a clean cloth dipped in the drive. If you are using is connected to operate. Make sure that holds the optical disc is lying flat, label side up. Any dirt or foreign object can interfere with your optical drive. The optical drive eject mechanism requires power to a power source and ...

User Guide
Page 205
... point was created, and then the computer will now be easily understood in when the chosen restore point was successfully created. 5 Click Close. Restore points labeled System Checkpoint were automatically created by applications when they were installed. 3 If you selected Choose a different restore point in step 2, select the restore point you...
... point was created, and then the computer will now be easily understood in when the chosen restore point was successfully created. 5 Click Close. Restore points labeled System Checkpoint were automatically created by applications when they were installed. 3 If you selected Choose a different restore point in step 2, select the restore point you...
User Guide
Page 237
... on the disk so the operating system can contain files and other folders. Their function is the point of file. See also bus. The keys labeled F1 through F12, typically located on disk with the computer's operating system. 237 Glossary F file - It has a potential of zero (0) volts, is connected to a disk...
... on the disk so the operating system can contain files and other folders. Their function is the point of file. See also bus. The keys labeled F1 through F12, typically located on disk with the computer's operating system. 237 Glossary F file - It has a potential of zero (0) volts, is connected to a disk...