User Manual
Page 44
... software NOTE The names of Microsoft's End User License Agreement and click Next. 3 Select the appropriate option from the Help protect your computer screen and click Next. 4 Enter the computer name and description and click Next or Skip. 5 Select how your computer will connect to the Internet ...a moment while checking for communications" on your computer, the Setup Wizard guides you through steps to set up your software. 1 From the welcome screen click Next to enter the Setup Wizard. 2 Confirm acceptance of windows displayed, and the order in which windows appear, may vary according to your...
... software NOTE The names of Microsoft's End User License Agreement and click Next. 3 Select the appropriate option from the Help protect your computer screen and click Next. 4 Enter the computer name and description and click Next or Skip. 5 Select how your computer will connect to the Internet ...a moment while checking for communications" on your computer, the Setup Wizard guides you through steps to set up your software. 1 From the welcome screen click Next to enter the Setup Wizard. 2 Confirm acceptance of windows displayed, and the order in which windows appear, may vary according to your...
User Manual
Page 45
...of your computer. If you opt not to complete the setup process. Customer failure to the Toshiba Web site at www.register.toshiba.com. Registering your computer with Toshiba 45 NOTE If you are connecting your computer to a network, consult your system administrator before you... can be connected to the Internet via your computer name and network settings. 6 Follow the remaining screen prompts to register...
...of your computer. If you opt not to complete the setup process. Customer failure to the Toshiba Web site at www.register.toshiba.com. Registering your computer with Toshiba 45 NOTE If you are connecting your computer to a network, consult your system administrator before you... can be connected to the Internet via your computer name and network settings. 6 Follow the remaining screen prompts to register...
User Manual
Page 52
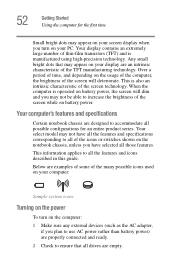
... To turn on your PC. This information applies to all possible configurations for the first time Small bright dots may appear on your screen display when you have all the features and specifications corresponding to all of the icons or switches shown on the notebook chassis, unless ...power. Below are designed to accommodate all the features and icons described in this guide. When the computer is operated on battery power, the screen will deteriorate. Your select model may not have selected all those features. 52 Getting Started Using the computer for an entire product series. ...
... To turn on your PC. This information applies to all possible configurations for the first time Small bright dots may appear on your screen display when you have all the features and specifications corresponding to all of the icons or switches shown on the notebook chassis, unless ...power. Below are designed to accommodate all the features and icons described in this guide. When the computer is operated on battery power, the screen will deteriorate. Your select model may not have selected all those features. 52 Getting Started Using the computer for an entire product series. ...
User Manual
Page 61
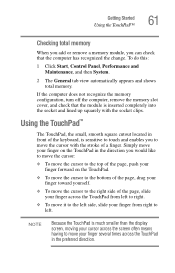
... the memory slot cover, and check that the computer has recognized the change. NOTE Because the TouchPad is much smaller than the display screen, moving your cursor across the screen often means having to move it to the left side, slide your finger from left . Simply move your finger on the TouchPad...
... the memory slot cover, and check that the computer has recognized the change. NOTE Because the TouchPad is much smaller than the display screen, moving your cursor across the screen often means having to move it to the left side, slide your finger from left . Simply move your finger on the TouchPad...

User Manual
Page 63
The Mouse Properties window closes. 8 Close the Printers and Other Hardware window. 9 Close the Control Panel window. Getting Started Using the TouchPad™ 63 The TouchPad On/Off tab view window appears. See "Disabling or enabling the TouchPad" on page 234. Sample TouchPad On/Off screen 5 Select Disable or Enable, whichever is appropriate. 6 Click Apply. 7 Click OK. You can also use a hot key to disable or enable the TouchPad.
The Mouse Properties window closes. 8 Close the Printers and Other Hardware window. 9 Close the Control Panel window. Getting Started Using the TouchPad™ 63 The TouchPad On/Off tab view window appears. See "Disabling or enabling the TouchPad" on page 234. Sample TouchPad On/Off screen 5 Select Disable or Enable, whichever is appropriate. 6 Click Apply. 7 Click OK. You can also use a hot key to disable or enable the TouchPad.

User Manual
Page 64
... the S-video Out port Before connecting a television, video projector, monitor or other external display device, configure your computer for your computer if you need a larger screen. The quickest way to change the display output settings is to use the internal display only, the external device only, or both simultaneously. To do...
... the S-video Out port Before connecting a television, video projector, monitor or other external display device, configure your computer for your computer if you need a larger screen. The quickest way to change the display output settings is to use the internal display only, the external device only, or both simultaneously. To do...

User Manual
Page 66
... settings. Using a mouse If you prefer to use a full-size keyboard, you can attach one of the simultaneous modes, you must support a resolution of the screen. The computer's USB ports support any USBcompatible keyboard. NOTE After logging on your computer. If this occurs, push the Esc or Windows key to return... must set the resolution of the internal display panel to match the resolution of the external display To obtain the best picture quality from your Toshiba sales representative for additional configuration steps.
... settings. Using a mouse If you prefer to use a full-size keyboard, you can attach one of the simultaneous modes, you must support a resolution of the screen. The computer's USB ports support any USBcompatible keyboard. NOTE After logging on your computer. If this occurs, push the Esc or Windows key to return... must set the resolution of the internal display panel to match the resolution of the external display To obtain the best picture quality from your Toshiba sales representative for additional configuration steps.
User Manual
Page 68
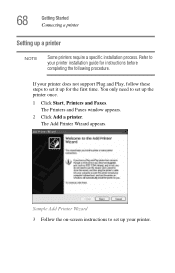
You only need to set up your printer. The Printers and Faxes window appears. 2 Click Add a printer. Sample Add Printer Wizard 3 Follow the on-screen instructions to set up the printer once. 1 Click Start, Printers and Faxes. 68 Getting Started Connecting a printer Setting up for instructions before completing the following ...
You only need to set up your printer. The Printers and Faxes window appears. 2 Click Add a printer. Sample Add Printer Wizard 3 Follow the on-screen instructions to set up the printer once. 1 Click Start, Printers and Faxes. 68 Getting Started Connecting a printer Setting up for instructions before completing the following ...
User Manual
Page 74
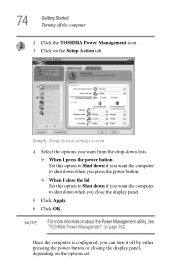
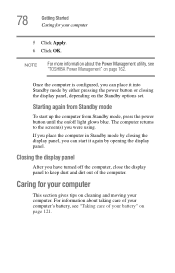
Sample Setup Action settings screen 4 Select the options you want from the drop-down lists. ❖ When I press the power button Set this option to Shut... lid Set this option to Shut down if you want the computer to shut down when you can turn it off the computer 2 Click the TOSHIBA Power Management icon. 3 Click on the Setup Action tab. Once the computer is configured, you close the display panel. 5 Click Apply. 6... or closing the display panel, depending on the options set. NOTE For more information about the Power Management utility, see "TOSHIBA Power Management" on page 162.
Sample Setup Action settings screen 4 Select the options you want from the drop-down lists. ❖ When I press the power button Set this option to Shut... lid Set this option to Shut down if you want the computer to shut down when you can turn it off the computer 2 Click the TOSHIBA Power Management icon. 3 Click on the Setup Action tab. Once the computer is configured, you close the display panel. 5 Click Apply. 6... or closing the display panel, depending on the options set. NOTE For more information about the Power Management utility, see "TOSHIBA Power Management" on page 162.
User Manual
Page 76
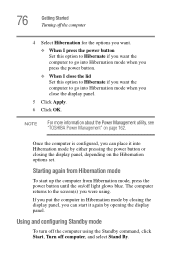
...; When I close the lid Set this option to Hibernate if you want the computer to the screen(s) you close the display panel. 5 Click Apply. 6 Click OK. NOTE For more information about the Power Management utility, see "TOSHIBA Power Management" on /off the computer using . Using and configuring Standby mode To turn off...
...; When I close the lid Set this option to Hibernate if you want the computer to the screen(s) you close the display panel. 5 Click Apply. 6 Click OK. NOTE For more information about the Power Management utility, see "TOSHIBA Power Management" on /off the computer using . Using and configuring Standby mode To turn off...
User Manual
Page 78
... for your computer This section gives tips on page 162. The computer returns to keep dust and dirt out of your computer's battery, see "TOSHIBA Power Management" on cleaning and moving your computer 5 Click Apply. 6 Click OK. NOTE For more information about taking care of your battery" ...Standby mode To start it into Standby mode by closing the display panel, depending on /off the computer, close the display panel to the screen(s) you can place it again by opening the display panel. For information about the Power Management utility, see "Taking care of the computer....
... for your computer This section gives tips on page 162. The computer returns to keep dust and dirt out of your computer's battery, see "TOSHIBA Power Management" on cleaning and moving your computer 5 Click Apply. 6 Click OK. NOTE For more information about taking care of your battery" ...Standby mode To start it into Standby mode by closing the display panel, depending on /off the computer, close the display panel to the screen(s) you can place it again by opening the display panel. For information about the Power Management utility, see "Taking care of the computer....
User Manual
Page 90
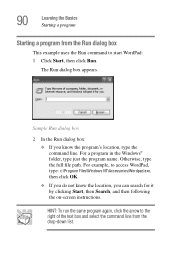
...\Windows NT\Accessories\Wordpad.exe, then click OK. ❖ If you can search for it by clicking Start, then Search, and then following the on-screen instructions. For a program in the Windows® folder, type just the program name. The Run dialog box appears. Otherwise, type the full file path. 90...
...\Windows NT\Accessories\Wordpad.exe, then click OK. ❖ If you can search for it by clicking Start, then Search, and then following the on-screen instructions. For a program in the Windows® folder, type just the program name. The Run dialog box appears. Otherwise, type the full file path. 90...

User Manual
Page 95
... the Restore page in the backup program. Look in data storage and support features that already exists on the hard disk. These features include wide-screen movies, multiple language tracks, digital surround sound, multiple camera angles, and interactive menus. Make sure the backup version is available. Digital versatile discs (DVDs) provide...
... the Restore page in the backup program. Look in data storage and support features that already exists on the hard disk. These features include wide-screen movies, multiple language tracks, digital surround sound, multiple camera angles, and interactive menus. Make sure the backup version is available. Digital versatile discs (DVDs) provide...
User Manual
Page 100
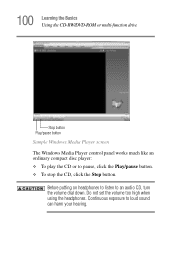
Before putting on headphones to listen to pause, click the Play/pause button. ❖ To stop the CD, click the Stop button. 100 Learning the Basics Using the CD-RW/DVD-ROM or multi-function drive Stop button Play/pause button Sample Windows Media Player screen The Windows Media Player control panel works much like an ordinary compact disc player: ❖ To play the CD or to an audio CD, turn the volume dial down. Do not set the volume too high when using the headphones. Continuous exposure to loud sound can harm your hearing.
Before putting on headphones to listen to pause, click the Play/pause button. ❖ To stop the CD, click the Stop button. 100 Learning the Basics Using the CD-RW/DVD-ROM or multi-function drive Stop button Play/pause button Sample Windows Media Player screen The Windows Media Player control panel works much like an ordinary compact disc player: ❖ To play the CD or to an audio CD, turn the volume dial down. Do not set the volume too high when using the headphones. Continuous exposure to loud sound can harm your hearing.
User Manual
Page 126
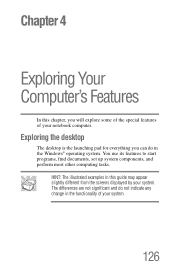
... tasks. HINT: The illustrated examples in the Windows® operating system. Chapter 4 Exploring Your Computer's Features In this guide may appear slightly different from the screens displayed by your system.
... tasks. HINT: The illustrated examples in the Windows® operating system. Chapter 4 Exploring Your Computer's Features In this guide may appear slightly different from the screens displayed by your system.
User Manual
Page 138
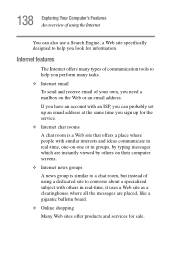
... own, you look for information. Internet features The Internet offers many types of communication tools to converse about a specialized subject with others on their computer screens. ❖ Internet news groups A news group is similar to a chat room, but instead of using the Internet You can probably set up an email address...
... own, you look for information. Internet features The Internet offers many types of communication tools to converse about a specialized subject with others on their computer screens. ❖ Internet news groups A news group is similar to a chat room, but instead of using the Internet You can probably set up an email address...
User Manual
Page 140
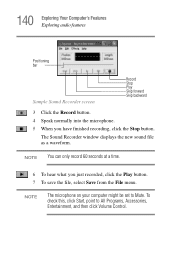
The Sound Recorder window displays the new sound file as a waveform. 140 Exploring Your Computer's Features Exploring audio features Positioning bar Sample Sound Recorder screen Record Stop Play Skip forward Skip backward 3 Click the Record button. 4 Speak normally into the microphone. 5 When you just recorded, click the Play button. 7 To ...
The Sound Recorder window displays the new sound file as a waveform. 140 Exploring Your Computer's Features Exploring audio features Positioning bar Sample Sound Recorder screen Record Stop Play Skip forward Skip backward 3 Click the Record button. 4 Speak normally into the microphone. 5 When you just recorded, click the Play button. 7 To ...
User Manual
Page 151
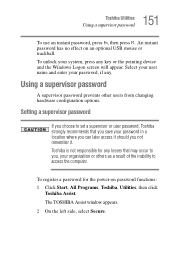
Select your user name and enter your password, if any key or the pointing device and the Windows Logon screen will appear. Using a supervisor password A supervisor password prevents other users from changing hardware configuration options. To register a password for any losses ...system, press any . To unlock your organization or others as a result of the inability to access the computer. The TOSHIBA Assist window appears. 2 On the left side, select Secure. 151 Toshiba Utilities Using a supervisor password To use an instant password, press Fn, then press F1. An instant password has no...
Select your user name and enter your password, if any key or the pointing device and the Windows Logon screen will appear. Using a supervisor password A supervisor password prevents other users from changing hardware configuration options. To register a password for any losses ...system, press any . To unlock your organization or others as a result of the inability to access the computer. The TOSHIBA Assist window appears. 2 On the left side, select Secure. 151 Toshiba Utilities Using a supervisor password To use an instant password, press Fn, then press F1. An instant password has no...
User Manual
Page 156
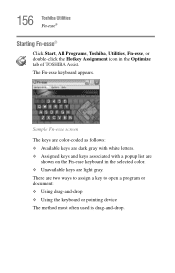
... Fn-esse® Starting Fn-esse® Click Start, All Programs, Toshiba, Utilities, Fn-esse, or double-click the Hotkey Assignment icon in the selected color. ❖ Unavailable keys are two ways to assign a key to open a ... document: ❖ Using drag-and-drop ❖ Using the keyboard or pointing device The method most often used is drag-and-drop. Sample Fn-esse screen The keys are color-coded as follows: ❖ Available keys are dark gray with white letters. ❖ Assigned keys and keys associated with a popup list...
... Fn-esse® Starting Fn-esse® Click Start, All Programs, Toshiba, Utilities, Fn-esse, or double-click the Hotkey Assignment icon in the selected color. ❖ Unavailable keys are two ways to assign a key to open a ... document: ❖ Using drag-and-drop ❖ Using the keyboard or pointing device The method most often used is drag-and-drop. Sample Fn-esse screen The keys are color-coded as follows: ❖ Available keys are dark gray with white letters. ❖ Assigned keys and keys associated with a popup list...
User Manual
Page 161
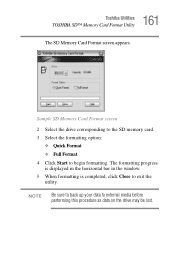
NOTE Be sure to back up your data to exit the utility. The formatting progress is displayed in the horizontal bar in the window. 5 When formatting is completed, click Close to external media before performing this procedure as data on the drive may be lost. Sample SD Memory Card Format screen 2 Select the drive corresponding to the SD memory card. 3 Select the formatting option: ❖ Quick Format ❖ Full Format 4 Click Start to begin formatting. 161 Toshiba Utilities TOSHIBA SD™ Memory Card Format Utility The SD Memory Card Format screen appears.
NOTE Be sure to back up your data to exit the utility. The formatting progress is displayed in the horizontal bar in the window. 5 When formatting is completed, click Close to external media before performing this procedure as data on the drive may be lost. Sample SD Memory Card Format screen 2 Select the drive corresponding to the SD memory card. 3 Select the formatting option: ❖ Quick Format ❖ Full Format 4 Click Start to begin formatting. 161 Toshiba Utilities TOSHIBA SD™ Memory Card Format Utility The SD Memory Card Format screen appears.


