User Guide
Page 29
Contents 29 Setting up your software 47 Registering your computer with Toshiba 48 Adding optional external devices 48 Adding memory (optional 48 Installing a memory module 49 Removing a memory module 54 Checking total memory 57 Recovering the Internal ...; settings 76 Using external display devices 76 Connecting an external monitor or projector ....77 Adjusting the quality of the external display......77 Using an external keyboard 77 Using a mouse 77 Connecting a printer 78 Setting up a printer 79 Turning off the computer 79 Options for turning off the computer 80 Using the...
Contents 29 Setting up your software 47 Registering your computer with Toshiba 48 Adding optional external devices 48 Adding memory (optional 48 Installing a memory module 49 Removing a memory module 54 Checking total memory 57 Recovering the Internal ...; settings 76 Using external display devices 76 Connecting an external monitor or projector ....77 Adjusting the quality of the external display......77 Using an external keyboard 77 Using a mouse 77 Connecting a printer 78 Setting up a printer 79 Turning off the computer 79 Options for turning off the computer 80 Using the...
User Guide
Page 30
30 Contents Moving the computer 91 Using a computer lock 91 Chapter 2: Learning the Basics 92 Computing tips 92 Using the keyboard 93 Character keys 94 Ctrl, Fn, and Alt keys 94 Function keys 94 Special Windows® keys 95 Starting a program 95 ... a disc with the computer on...........105 Removing a disc with the computer off ..........105 Caring for optical discs 106 Toshiba's online resources 106 Chapter 3: Mobile Computing 107 Toshiba's energy-saver design 107 Running the computer on battery power 107 Battery Notice 108 Power management 109 Using additional batteries ...
30 Contents Moving the computer 91 Using a computer lock 91 Chapter 2: Learning the Basics 92 Computing tips 92 Using the keyboard 93 Character keys 94 Ctrl, Fn, and Alt keys 94 Function keys 94 Special Windows® keys 95 Starting a program 95 ... a disc with the computer on...........105 Removing a disc with the computer off ..........105 Caring for optical discs 106 Toshiba's online resources 106 Chapter 3: Mobile Computing 107 Toshiba's energy-saver design 107 Running the computer on battery power 107 Battery Notice 108 Power management 109 Using additional batteries ...
User Guide
Page 32
...supervisor password 140 Using a user password 142 Deleting a user password 142 TOSHIBA Face Recognition Utility 143 TOSHIBA PC Diagnostic Tool Utility 144 TOSHIBA HDD Protection Utility 145 Mouse Utility 146 TOSHIBA Hardware Setup 147 TOSHIBA Accessibility 149 TOSHIBA eco Utility 150 TOSHIBA Service Station 151 TOSHIBA PC Health Monitor 151 Chapter 6: If Something Goes Wrong 153 Problems ... system can help you 158 Fixing a problem with Device Manager 159 Checking device properties 159 Memory problems 160 Power and the batteries 160 Keyboard problems 162 Display problems 162
...supervisor password 140 Using a user password 142 Deleting a user password 142 TOSHIBA Face Recognition Utility 143 TOSHIBA PC Diagnostic Tool Utility 144 TOSHIBA HDD Protection Utility 145 Mouse Utility 146 TOSHIBA Hardware Setup 147 TOSHIBA Accessibility 149 TOSHIBA eco Utility 150 TOSHIBA Service Station 151 TOSHIBA PC Health Monitor 151 Chapter 6: If Something Goes Wrong 153 Problems ... system can help you 158 Fixing a problem with Device Manager 159 Checking device properties 159 Memory problems 160 Power and the batteries 160 Keyboard problems 162 Display problems 162
User Guide
Page 42
... must complete all setup steps up to and including "Setting up your computer Important information on or when an AC adaptor is connected to , a mouse, keyboard, printer, and memory. Always make sure your computer and AC adaptor have adequate ventilation and are not limited to a power outlet (even if your computer...
... must complete all setup steps up to and including "Setting up your computer Important information on or when an AC adaptor is connected to , a mouse, keyboard, printer, and memory. Always make sure your computer and AC adaptor have adequate ventilation and are not limited to a power outlet (even if your computer...
User Guide
Page 46
... while on the palm rest to hold the computer in place and use the other hand to remove any pens or other objects from the keyboard area before closing the display panel, place one hand on battery power. Any small bright dots that may not be able to turn on the...
... while on the palm rest to hold the computer in place and use the other hand to remove any pens or other objects from the keyboard area before closing the display panel, place one hand on battery power. Any small bright dots that may not be able to turn on the...
User Guide
Page 48
...) ❖ Connect a mouse (see "Using a mouse" on page 77) ❖ Connect an external keyboard (see "Using an external keyboard" on page 77) ❖ Connect an external monitor (see "Connecting an external monitor or projector" on ...page 77) ❖ Connect a local printer (see the accessories information packaged with Toshiba Product registration is strongly recommended, and allows Toshiba to complete Product Registration will not diminish Customer rights under the Toshiba...
...) ❖ Connect a mouse (see "Using a mouse" on page 77) ❖ Connect an external keyboard (see "Using an external keyboard" on page 77) ❖ Connect an external monitor (see "Connecting an external monitor or projector" on ...page 77) ❖ Connect a local printer (see the accessories information packaged with Toshiba Product registration is strongly recommended, and allows Toshiba to complete Product Registration will not diminish Customer rights under the Toshiba...
User Guide
Page 59
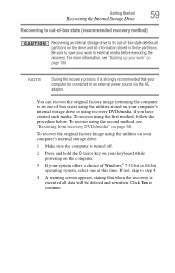
... time. NOTE During the recovery process it is strongly recommended that when the recovery is turned off. 2 Press and hold the 0 (zero) key on your keyboard while powering on the computer. 3 If your system offers a choice of -box state) using the utilities stored on page 100. If not, skip to an...
... time. NOTE During the recovery process it is strongly recommended that when the recovery is turned off. 2 Press and hold the 0 (zero) key on your keyboard while powering on the computer. 3 If your system offers a choice of -box state) using the utilities stored on page 100. If not, skip to an...
User Guide
Page 61
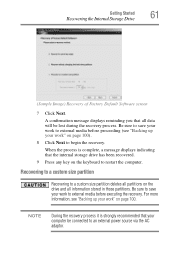
... sure to an external power source via the AC adaptor. Recovering to a custom size partition Recovering to a custom size partition deletes all partitions on the keyboard to begin the recovery. For more information, see "Backing up your work " on page 100). 8 Click Next to restart the computer. Be sure to save...
... sure to an external power source via the AC adaptor. Recovering to a custom size partition Recovering to a custom size partition deletes all partitions on the keyboard to begin the recovery. For more information, see "Backing up your work " on page 100). 8 Click Next to restart the computer. Be sure to save...
User Guide
Page 62
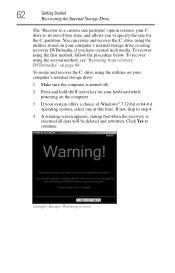
... and rewritten. Click Yes to step 4. 4 A warning screen appears, stating that when the recovery is turned off. 2 Press and hold the 0 (zero) key on your keyboard while powering on the computer. 3 If your C: drive to its out-of Windows® 7 32-bit or 64-bit operating system, select one at this...
... and rewritten. Click Yes to step 4. 4 A warning screen appears, stating that when the recovery is turned off. 2 Press and hold the 0 (zero) key on your keyboard while powering on the computer. 3 If your C: drive to its out-of Windows® 7 32-bit or 64-bit operating system, select one at this...
User Guide
Page 64
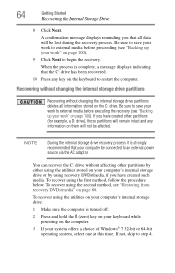
Be sure to save your work " on the keyboard to external media before executing the recovery (see "Restoring from recovery DVDs/media" on the C: drive. If you that all information stored on page 68. ... recover using the utilities on your computer's internal storage drive: 1 Make sure the computer is turned off. 2 Press and hold the 0 (zero) key on your keyboard while powering on the computer. 3 If your computer's internal storage drive or by either using the first method, follow the procedure below.
Be sure to save your work " on the keyboard to external media before executing the recovery (see "Restoring from recovery DVDs/media" on the C: drive. If you that all information stored on page 68. ... recover using the utilities on your computer's internal storage drive: 1 Make sure the computer is turned off. 2 Press and hold the 0 (zero) key on your keyboard while powering on the computer. 3 If your computer's internal storage drive or by either using the first method, follow the procedure below.
User Guide
Page 66
... the process is strongly recommended that the C: drive has been recovered. 9 Press any key on your recovery DVDs/media. If the recovery files on the keyboard to a new internal storage drive from your internal storage drive become corrupted or are deleted, you create recovery DVDs/media. Creating recovery DVDs/media It...
... the process is strongly recommended that the C: drive has been recovered. 9 Press any key on your recovery DVDs/media. If the recovery files on the keyboard to a new internal storage drive from your internal storage drive become corrupted or are deleted, you create recovery DVDs/media. Creating recovery DVDs/media It...
User Guide
Page 70
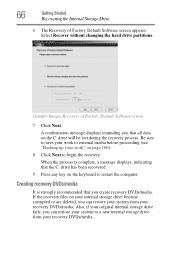
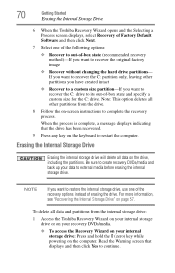
... to its out-of erasing the drive. Erasing the Internal Storage Drive Erasing the internal storage drive will delete all data on the keyboard to restart the computer. To delete all other partitions you have created intact ❖ Recover to a custom size partition-If you ... the Internal Storage Drive" on -screen instructions to complete the recovery process. 70 Getting Started Erasing the Internal Storage Drive 6 When the Toshiba Recovery Wizard opens and the Selecting a Process screen displays, select Recovery of Factory Default Software and then click Next. 7 Select one of...
... to its out-of erasing the drive. Erasing the Internal Storage Drive Erasing the internal storage drive will delete all data on the keyboard to restart the computer. To delete all other partitions you have created intact ❖ Recover to a custom size partition-If you ... the Internal Storage Drive" on -screen instructions to complete the recovery process. 70 Getting Started Erasing the Internal Storage Drive 6 When the Toshiba Recovery Wizard opens and the Selecting a Process screen displays, select Recovery of Factory Default Software and then click Next. 7 Select one of...
User Guide
Page 72
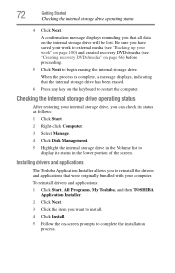
...you want to display its status in the lower portion of the screen. To reinstall drivers and applications: 1 Click Start, All Programs, My Toshiba, and then TOSHIBA Application Installer. 2 Click Next. 3 Click the item you can check its status as follows: 1 Click Start. 2 Right-click Computer....on page 100) and created recovery DVDs/media (see "Creating recovery DVDs/media" on the keyboard to begin erasing the internal storage drive. Installing drivers and applications The Toshiba Application Installer allows you to reinstall the drivers and applications that the internal storage drive has ...
...you want to display its status in the lower portion of the screen. To reinstall drivers and applications: 1 Click Start, All Programs, My Toshiba, and then TOSHIBA Application Installer. 2 Click Next. 3 Click the item you can check its status as follows: 1 Click Start. 2 Right-click Computer....on page 100) and created recovery DVDs/media (see "Creating recovery DVDs/media" on the keyboard to begin erasing the internal storage drive. Installing drivers and applications The Toshiba Application Installer allows you to reinstall the drivers and applications that the internal storage drive has ...

User Guide
Page 73
... icon (usually an arrow) that moves on performing each operation. Using the TouchPad™ Getting Started 73 Using the TouchPad™ NOTE Some of the keyboard) and the adjacent control buttons to: ❖ Move the pointer on the screen ❖ Select an item on the screen ❖ Open or activate an...
... icon (usually an arrow) that moves on performing each operation. Using the TouchPad™ Getting Started 73 Using the TouchPad™ NOTE Some of the keyboard) and the adjacent control buttons to: ❖ Move the pointer on the screen ❖ Select an item on the screen ❖ Open or activate an...
User Guide
Page 77
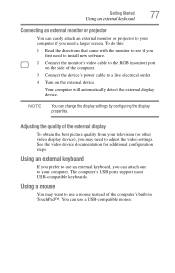
...Using a mouse You may need to the RGB (monitor) port on the external device. The computer's USB ports support most USB-compatible keyboards. NOTE You can use an external keyboard, you can attach one to your computer if you first need a larger screen. Getting Started 77 Using an external... You can easily attach an external monitor or projector to your computer. Your computer will automatically detect the external display device. Using an external keyboard If you prefer to use a USB-compatible mouse. To do this: 1 Read the directions that came with the monitor to see if ...
...Using a mouse You may need to the RGB (monitor) port on the external device. The computer's USB ports support most USB-compatible keyboards. NOTE You can use an external keyboard, you can attach one to your computer if you first need a larger screen. Getting Started 77 Using an external... You can easily attach an external monitor or projector to your computer. Your computer will automatically detect the external display device. Using an external keyboard If you prefer to use a USB-compatible mouse. To do this: 1 Read the directions that came with the monitor to see if ...
User Guide
Page 90
... dirt out of your computer's battery, see "Power Plans" on page 120. For more information, see "Taking care of the computer's keyboard, speaker, and other openings. Never spray cleaner directly onto the computer and/or display. NOTE Please handle your computer carefully to your operating ...the display panel After you have turned off the computer, close the display panel to keep your computer clean, gently wipe the display panel, keyboard, and exterior case with a lightly dampened cloth. Refer to avoid scratching or damaging the surface. See "Utilities" on cleaning and moving ...
... dirt out of your computer's battery, see "Power Plans" on page 120. For more information, see "Taking care of the computer's keyboard, speaker, and other openings. Never spray cleaner directly onto the computer and/or display. NOTE Please handle your computer carefully to your operating ...the display panel After you have turned off the computer, close the display panel to keep your computer clean, gently wipe the display panel, keyboard, and exterior case with a lightly dampened cloth. Refer to avoid scratching or damaging the surface. See "Utilities" on cleaning and moving ...
User Guide
Page 93
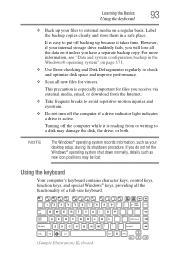
...such as your internal storage drive suddenly fails, you will lose all the functionality of a full-size keyboard. (Sample Illustration) Keyboard Turning off the computer while it is especially important for viruses. Using the keyboard Your computer's keyboard contains character keys, control keys, function keys, and special Windows® keys, providing all the data... desktop setup, during its shutdown procedure. For more information, see "Data and system configuration backup in a safe place. Learning the Basics 93 Using the keyboard ❖ Back up because it takes time.
...such as your internal storage drive suddenly fails, you will lose all the functionality of a full-size keyboard. (Sample Illustration) Keyboard Turning off the computer while it is especially important for viruses. Using the keyboard Your computer's keyboard contains character keys, control keys, function keys, and special Windows® keys, providing all the data... desktop setup, during its shutdown procedure. For more information, see "Data and system configuration backup in a safe place. Learning the Basics 93 Using the keyboard ❖ Back up because it takes time.
User Guide
Page 94
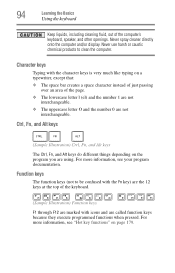
... be confused with the Fn key) are the 12 keys at the top of the computer's keyboard, speaker, and other openings. 94 Learning the Basics Using the keyboard Keep liquids, including cleaning fluid, out of the keyboard. (Sample Illustration) Function keys F1 through F12 are marked with the character keys is very much...
... be confused with the Fn key) are the 12 keys at the top of the computer's keyboard, speaker, and other openings. 94 Learning the Basics Using the keyboard Keep liquids, including cleaning fluid, out of the keyboard. (Sample Illustration) Function keys F1 through F12 are marked with the character keys is very much...
User Guide
Page 95
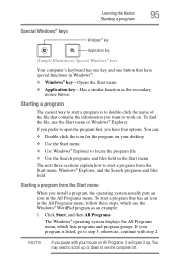
... program on . Learning the Basics 95 Starting a program Special Windows® keys Windows® key Application key (Sample Illustration) Special Windows® keys Your computer's keyboard has one key and one button that has an icon in the All Programs menu. If you prefer to open it will open the program...
... program on . Learning the Basics 95 Starting a program Special Windows® keys Windows® key Application key (Sample Illustration) Special Windows® keys Your computer's keyboard has one key and one button that has an icon in the All Programs menu. If you prefer to open it will open the program...
User Guide
Page 98
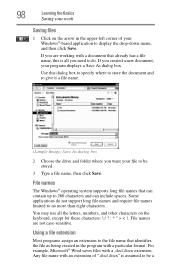
... folder where you created a new document, your program displays a Save As dialog box. 98 Learning the Basics Saving your work Saving files 1 Click on the keyboard, except for these characters File names are working with a document that can contain up to no more than eight characters. File names The Windows®...
... folder where you created a new document, your program displays a Save As dialog box. 98 Learning the Basics Saving your work Saving files 1 Click on the keyboard, except for these characters File names are working with a document that can contain up to no more than eight characters. File names The Windows®...

