User Guide
Page 43
... any object. ❖ Never place your computer or AC adaptor near a heat source, such as an electric blanket or heater. ❖ Never cover or block the air vents including those located at the base of the computer. ❖ Always operate your computer. In this condition, observe the... following: ❖ Never cover your computer or AC adaptor with your computer on a hard flat surface. Using your computer on a carpet or other soft material can use external...
... any object. ❖ Never place your computer or AC adaptor near a heat source, such as an electric blanket or heater. ❖ Never cover or block the air vents including those located at the base of the computer. ❖ Always operate your computer. In this condition, observe the... following: ❖ Never cover your computer or AC adaptor with your computer on a hard flat surface. Using your computer on a carpet or other soft material can use external...
User Guide
Page 52
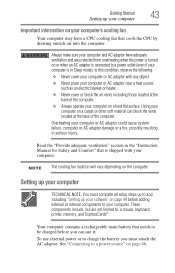
Installing a memory module with the computer's power on the base of the computer. NOTE For this procedure. You will be hot. Avoid touching the cover, the module, and the surrounding area before replacing it must be hot. Failure to follow these directions could result in good condition. If the computer ...
Installing a memory module with the computer's power on the base of the computer. NOTE For this procedure. You will be hot. Avoid touching the cover, the module, and the surrounding area before replacing it must be hot. Failure to follow these directions could result in good condition. If the computer ...

User Guide
Page 53
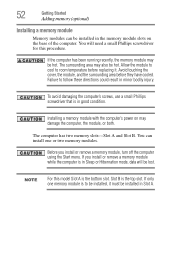
...3 Unplug and remove any cables connected to the lock button in the lower-right corner of computer (Sample Illustration) Locating the memory module slot cover Getting Started 53 Adding memory (optional) If the computer is on page 104. 5 Close the display panel and turn the computer upside down to... locate the memory module slot cover. The Shut Down menu appears. otherwise, skip to step 3. 1 Click Start, and then click the arrow next to the computer, including the AC ...
...3 Unplug and remove any cables connected to the lock button in the lower-right corner of computer (Sample Illustration) Locating the memory module slot cover Getting Started 53 Adding memory (optional) If the computer is on page 104. 5 Close the display panel and turn the computer upside down to... locate the memory module slot cover. The Shut Down menu appears. otherwise, skip to step 3. 1 Click Start, and then click the arrow next to the computer, including the AC ...
User Guide
Page 54
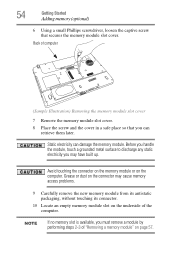
... discharge any static electricity you can damage the memory module. Grease or dust on the underside of computer (Sample Illustration) Removing the memory module slot cover 7 Remove the memory module slot cover. 8 Place the screw and the cover in a safe place so that secures the memory module slot...
... discharge any static electricity you can damage the memory module. Grease or dust on the underside of computer (Sample Illustration) Removing the memory module slot cover 7 Remove the memory module slot cover. 8 Place the screw and the cover in a safe place so that secures the memory module slot...
User Guide
Page 57
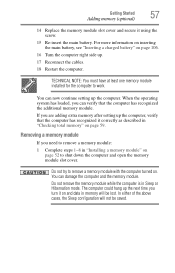
... in memory will not be lost. The computer could hang up the computer. Getting Started 57 Adding memory (optional) 14 Replace the memory module slot cover and secure it correctly as described in "Installing a memory module" on page 52 to remove a memory module: 1 Complete steps 1-8 in "Checking total memory" ...on page 59. You can now continue setting up the next time you need to shut down the computer and open the memory module slot cover. In either of the above cases, the Sleep configuration will be saved. You can damage the computer and the memory module. If you ...
... in memory will not be lost. The computer could hang up the computer. Getting Started 57 Adding memory (optional) 14 Replace the memory module slot cover and secure it correctly as described in "Installing a memory module" on page 52 to remove a memory module: 1 Complete steps 1-8 in "Checking total memory" ...on page 59. You can now continue setting up the next time you need to shut down the computer and open the memory module slot cover. In either of the above cases, the Sleep configuration will be saved. You can damage the computer and the memory module. If you ...
User Guide
Page 59
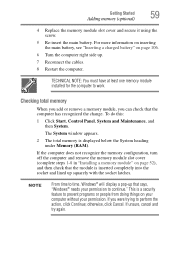
... again. If you can check that the computer has recognized the change. Getting Started 59 Adding memory (optional) 4 Replace the memory module slot cover and secure it using the screw. 5 Re-insert the main battery. otherwise, click Cancel. NOTE From time to time, Windows® will... the cables. 8 Restart the computer. If the computer does not recognize the memory configuration, turn off the computer and remove the memory module slot cover (complete steps 1-8 in "Installing a memory module" on page 106. 6 Turn the computer right side up that the module is displayed below the...
... again. If you can check that the computer has recognized the change. Getting Started 59 Adding memory (optional) 4 Replace the memory module slot cover and secure it using the screw. 5 Re-insert the main battery. otherwise, click Cancel. NOTE From time to time, Windows® will... the cables. 8 Restart the computer. If the computer does not recognize the memory configuration, turn off the computer and remove the memory module slot cover (complete steps 1-8 in "Installing a memory module" on page 106. 6 Turn the computer right side up that the module is displayed below the...

User Guide
Page 92
...Do not press the eject button while the in certain cases, your computer's product specification for it to your computer's detailed specifications at pcsupport.toshiba.com. The disc tray slides partially out of certain optical media. NOTE Due to manufacturing and quality variations in third party optical media (e.g., ...still spinning when you remove it. 2 Pull the tray out until it is fully open, remove the disc, and place it in its protective cover. 3 Gently press the tray in your optical drive may also prevent or limit recording or viewing of the drive (about 1 inch). Copy ...
...Do not press the eject button while the in certain cases, your computer's product specification for it to your computer's detailed specifications at pcsupport.toshiba.com. The disc tray slides partially out of certain optical media. NOTE Due to manufacturing and quality variations in third party optical media (e.g., ...still spinning when you remove it. 2 Pull the tray out until it is fully open, remove the disc, and place it in its protective cover. 3 Gently press the tray in your optical drive may also prevent or limit recording or viewing of the drive (about 1 inch). Copy ...

User Guide
Page 93
... sunlight or extreme heat or cold. ❖ To clean a disc that is dirty, wipe it in its outside edge. Learning the Basics 93 Toshiba's online resources Never use a pencil to which you up to date with water or a neutral cleaner (not benzine or rubbing alcohol). Fingerprints on ...protect them from the center of , a disc. ❖ Hold a disc by its protective cover. 3 Gently press the tray in to start from scratches and keep you can connect. These sites provide information about Toshiba products, give help with technical questions and keep them clean. ❖ Do not bend a disc...
... sunlight or extreme heat or cold. ❖ To clean a disc that is dirty, wipe it in its outside edge. Learning the Basics 93 Toshiba's online resources Never use a pencil to which you up to date with water or a neutral cleaner (not benzine or rubbing alcohol). Fingerprints on ...protect them from the center of , a disc. ❖ Hold a disc by its protective cover. 3 Gently press the tray in to start from scratches and keep you can connect. These sites provide information about Toshiba products, give help with technical questions and keep them clean. ❖ Do not bend a disc...

User Guide
Page 94
You can use it for longer periods while traveling. We recommend you leave these energy-saving features have been preset by Toshiba. Running the computer on battery power The computer contains a removable Lithium-Ion (Li-Ion) battery that you are away from an AC outlet. Many of ... maximum energy efficiency, so that provides power when you can recharge it is not being used, thereby conserving energy and saving money in the process. Toshiba's energy-saver design Your computer enters a low-power suspension mode when it many times. 94 Chapter 3 Mobile Computing This chapter...
You can use it for longer periods while traveling. We recommend you leave these energy-saving features have been preset by Toshiba. Running the computer on battery power The computer contains a removable Lithium-Ion (Li-Ion) battery that you are away from an AC outlet. Many of ... maximum energy efficiency, so that provides power when you can recharge it is not being used, thereby conserving energy and saving money in the process. Toshiba's energy-saver design Your computer enters a low-power suspension mode when it many times. 94 Chapter 3 Mobile Computing This chapter...
User Guide
Page 110
...the environment by air, you may apply. They all provide plenty of carrying cases for manuals, power cords, and compact discs. Contact your authorized Toshiba representative for drop-off locations, visit www.rbrc.org or call 1-800-822-8837. TECHNICAL NOTE: When traveling by sponsoring Call2Recycle™, a ...listed in a carrying case. The X-ray equipment will not harm your computer on a sunny ledge or in a place where it could get wet or covered in dust. ❖ Always travel with the computer in "Selecting a place to work" on page 40, also apply while traveling. ❖ Never ...
...the environment by air, you may apply. They all provide plenty of carrying cases for manuals, power cords, and compact discs. Contact your authorized Toshiba representative for drop-off locations, visit www.rbrc.org or call 1-800-822-8837. TECHNICAL NOTE: When traveling by sponsoring Call2Recycle™, a ...listed in a carrying case. The X-ray equipment will not harm your computer on a sunny ledge or in a place where it could get wet or covered in dust. ❖ Always travel with the computer in "Selecting a place to work" on page 40, also apply while traveling. ❖ Never ...

User Guide
Page 147
... exit the failed program without shutting down the operating system or closing other programs. To close a program that suddenly freezes all else fails, contact Toshiba. It covers the problems you are easy to encounter. The Windows® Task Manager window appears. 147 You will find information on... Toshiba's support services at the end of the software program. Problems that are most likely to fix Your program stops responding. This chapter aims to...
... exit the failed program without shutting down the operating system or closing other programs. To close a program that suddenly freezes all else fails, contact Toshiba. It covers the problems you are easy to encounter. The Windows® Task Manager window appears. 147 You will find information on... Toshiba's support services at the end of the software program. Problems that are most likely to fix Your program stops responding. This chapter aims to...

User Guide
Page 161
...instructions see if it is probably a configuration problem. A diskette will not go into the drive first. Carefully inspect the diskette. The metal cover or a loose label may already have a diskette in water or a neutral cleaner. Make sure the tray that the metal head window..., and insert it with the laser beam. Press gently until it has shut completely. Many software packages automatically create backup files. If the metal cover is loose, replace the label and try inserting the diskette again. The drive cannot read a diskette. If the label is loose, replace the ...
...instructions see if it is probably a configuration problem. A diskette will not go into the drive first. Carefully inspect the diskette. The metal cover or a loose label may already have a diskette in water or a neutral cleaner. Make sure the tray that the metal head window..., and insert it with the laser beam. Press gently until it has shut completely. Many software packages automatically create backup files. If the metal cover is loose, replace the label and try inserting the diskette again. The drive cannot read a diskette. If the label is loose, replace the ...

User Guide
Page 211
Index 211 removing memory module slot cover 54 memory module inserting 55 installation 52 removing 58 memory module slot 54 microphone 120 modem connecting to telephone line 115 problem solving 166 monitor ...
Index 211 removing memory module slot cover 54 memory module inserting 55 installation 52 removing 58 memory module slot 54 microphone 120 modem connecting to telephone line 115 problem solving 166 monitor ...

