User Guide
Page 3
... DO NOT WARRANT THAT OPERATION OF THE PRODUCT WILL BE UNINTERRUPTED OR ERROR FREE. IF YOUR DATA IS ALTERED OR LOST DUE TO ANY TROUBLE, FAILURE OR MALFUNCTION OF THE HARD DISK DRIVE OR OTHER STORAGE DEVICES AND THE DATA CANNOT BE RECOVERED, TOSHIBA SHALL NOT BE LIABLE FOR...PROFITS, PROGRAMS, DATA, NETWORK SYSTEMS OR REMOVABLE STORAGE MEDIA ARISING OUT OF OR RESULTING FROM THE USE OF THE PRODUCT, EVEN IF ADVISED OF THE POSSIBILITY THEREOF. Wash hands after handling. Model: Satellite® L300 Series Recordable and/or ReWritable Drive(s) and Associated Software Warranty The computer system ...
... DO NOT WARRANT THAT OPERATION OF THE PRODUCT WILL BE UNINTERRUPTED OR ERROR FREE. IF YOUR DATA IS ALTERED OR LOST DUE TO ANY TROUBLE, FAILURE OR MALFUNCTION OF THE HARD DISK DRIVE OR OTHER STORAGE DEVICES AND THE DATA CANNOT BE RECOVERED, TOSHIBA SHALL NOT BE LIABLE FOR...PROFITS, PROGRAMS, DATA, NETWORK SYSTEMS OR REMOVABLE STORAGE MEDIA ARISING OUT OF OR RESULTING FROM THE USE OF THE PRODUCT, EVEN IF ADVISED OF THE POSSIBILITY THEREOF. Wash hands after handling. Model: Satellite® L300 Series Recordable and/or ReWritable Drive(s) and Associated Software Warranty The computer system ...
User Guide
Page 11
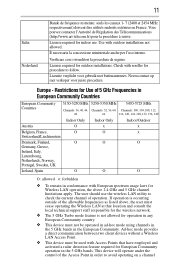
... voor juiste procedure. The user should use . This device will operate under the control of operation. License required for outdoor installations. Europe - Check with reseller for operation in any European Community country. ❖ This device must not be used with Access Points that location and consult the local technical support staff responsible for the wireless network. ❖ The 5 GHz Turbo mode feature is occurring outside of...
... voor juiste procedure. The user should use . This device will operate under the control of operation. License required for outdoor installations. Europe - Check with reseller for operation in any European Community country. ❖ This device must not be used with Access Points that location and consult the local technical support staff responsible for the wireless network. ❖ The 5 GHz Turbo mode feature is occurring outside of...

User Guide
Page 23
..., your computer will operate at its retail version (if available), and may not include user manuals or all U.S. That is set to enter the low-power Sleep mode which shuts down the system and display within 15 minutes of inactivity in energy costs over the lifetime of ENERGY STAR®, saved about $14 billion dollars on using power management settings to meet the...
..., your computer will operate at its retail version (if available), and may not include user manuals or all U.S. That is set to enter the low-power Sleep mode which shuts down the system and display within 15 minutes of inactivity in energy costs over the lifetime of ENERGY STAR®, saved about $14 billion dollars on using power management settings to meet the...
User Guide
Page 30
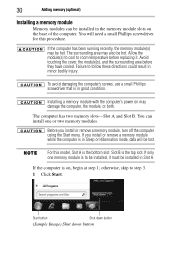
... has two memory slots-Slot A and Slot B. If you install or remove a memory module, turn off the computer using the Start menu. If the computer is in the memory module slots on may be hot. Start button Shut down button (Sample Image) Shut down button Allow the module(s) to cool to step 3. 1 Click Start. Installing a memory module with the computer's power on the base of the computer. For this procedure. 30 Adding memory (optional) Installing a memory module Memory modules can install one memory module is the...
... has two memory slots-Slot A and Slot B. If you install or remove a memory module, turn off the computer using the Start menu. If the computer is in the memory module slots on may be hot. Start button Shut down button (Sample Image) Shut down button Allow the module(s) to cool to step 3. 1 Click Start. Installing a memory module with the computer's power on the base of the computer. For this procedure. 30 Adding memory (optional) Installing a memory module Memory modules can install one memory module is the...
User Guide
Page 31
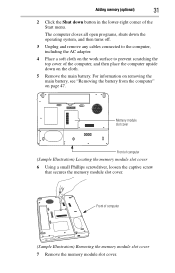
... down button in the lower-right corner of the computer, and then place the computer upside down the operating system, and then turns off. 3 Unplug and remove any cables connected to prevent scratching the top cover of the Start menu. The computer closes all open programs, shuts down on the cloth. 5 Remove the main battery. Front of computer (Sample Illustration) Locating the memory module slot cover 6 Using a small...
... down button in the lower-right corner of the computer, and then place the computer upside down the operating system, and then turns off. 3 Unplug and remove any cables connected to prevent scratching the top cover of the Start menu. The computer closes all open programs, shuts down on the cloth. 5 Remove the main battery. Front of computer (Sample Illustration) Locating the memory module slot cover 6 Using a small...
User Guide
Page 32
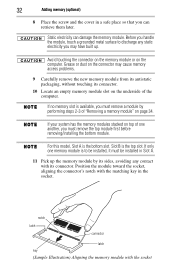
... with its connector. 10 Locate an empty memory module slot on the underside of "Removing a memory module" on the computer. If only one another, you must be installed in Slot A. 11 Pick up . For this model, Slot A is to discharge any static electricity you may cause memory access problems. 9 Carefully remove the new memory module from its antistatic packaging, without touching its connector. Position the module toward the socket, aligning...
... with its connector. 10 Locate an empty memory module slot on the underside of "Removing a memory module" on the computer. If only one another, you must be installed in Slot A. 11 Pick up . For this model, Slot A is to discharge any static electricity you may cause memory access problems. 9 Carefully remove the new memory module from its antistatic packaging, without touching its connector. Position the module toward the socket, aligning...
User Guide
Page 34
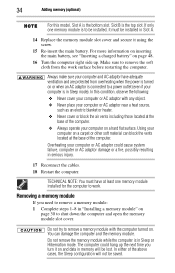
... located at least one memory module is in Sleep or Hibernation mode. Overheating your computer and AC adaptor have at the base of the above cases, the Sleep configuration will be installed, it on and data in Slot A. 14 Replace the memory module slot cover and secure it using the screw. 15 Re-insert the main battery. Slot B is in Sleep mode). If only one memory module installed for the computer to remove a memory module...
... located at least one memory module is in Sleep or Hibernation mode. Overheating your computer and AC adaptor have at the base of the above cases, the Sleep configuration will be installed, it on and data in Slot A. 14 Replace the memory module slot cover and secure it using the screw. 15 Re-insert the main battery. Slot B is in Sleep mode). If only one memory module installed for the computer to remove a memory module...
User Guide
Page 35
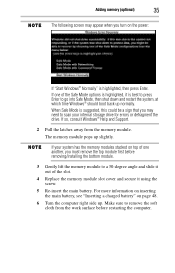
... the Safe Mode options is highlighted, it using the screw. 5 Re-insert the main battery. Adding memory (optional) 35 The following screen may appear when you turn on the power: If "Start Windows® Normally" is suggested, this could be a sign that you must remove the top module first before restarting the computer. The memory module pops up . If your internal storage drive for errors or defragment the drive. When Safe Mode...
... the Safe Mode options is highlighted, it using the screw. 5 Re-insert the main battery. Adding memory (optional) 35 The following screen may appear when you turn on the power: If "Start Windows® Normally" is suggested, this could be a sign that you must remove the top module first before restarting the computer. The memory module pops up . If your internal storage drive for errors or defragment the drive. When Safe Mode...

User Guide
Page 37
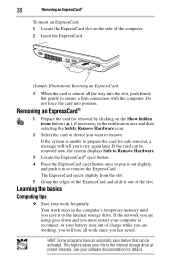
... disable the PC Card prior to removing it out of the PC Card and slide it . Removing a PC Card 37 You may be removed now, the system displays Safe To Remove Hardware. 3 Locate the PC Card eject button. 4 Press the PC Card eject button once to pop it out slightly, and then push it in the notification area and then selecting the Safely Remove Hardware icon. 2 Select the card or device...
... disable the PC Card prior to removing it out of the PC Card and slide it . Removing a PC Card 37 You may be removed now, the system displays Safe To Remove Hardware. 3 Locate the PC Card eject button. 4 Press the PC Card eject button once to pop it out slightly, and then push it in the notification area and then selecting the Safely Remove Hardware icon. 2 Select the card or device...
User Guide
Page 38
... memory until you will tell you want to the internal storage drive. Do not force the card into the slot, push firmly but gently to pop it out slightly, and push it out of charge while you are working, you save feature that can be activated. Your work frequently. See your battery runs out of the slot. If the network you are using...
... memory until you will tell you want to the internal storage drive. Do not force the card into the slot, push firmly but gently to pop it out slightly, and push it out of charge while you are working, you save feature that can be activated. Your work frequently. See your battery runs out of the slot. If the network you are using...
User Guide
Page 39
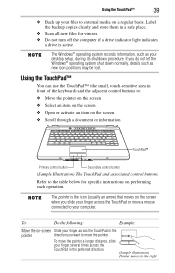
... TouchPad in a safe place. ❖ Scan all new files for viruses. ❖ Do not turn off the computer if a drive indicator light indicates a drive is the icon (usually an arrow) that moves on the screen when you do not let the Windows® operating system shut down normally, details such as your finger across the TouchPad in front of the keyboard) and the adjacent control buttons...
... TouchPad in a safe place. ❖ Scan all new files for viruses. ❖ Do not turn off the computer if a drive indicator light indicates a drive is the icon (usually an arrow) that moves on the screen when you do not let the Windows® operating system shut down normally, details such as your finger across the TouchPad in front of the keyboard) and the adjacent control buttons...
User Guide
Page 41
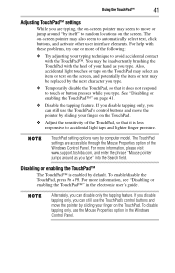
Using the TouchPad™ 41 Adjusting TouchPad™ settings While you are accessible through the Mouse Properties option of your typing technique to accidental light taps and lighter finger pressure. For help with these problems, try one or more of the TouchPad, so that it is enabled by computer model. TouchPad setting options vary by default. For more information, see "Disabling or enabling the TouchPad™" in the Windows Control Panel. The on the screen. If...
Using the TouchPad™ 41 Adjusting TouchPad™ settings While you are accessible through the Mouse Properties option of your typing technique to accidental light taps and lighter finger pressure. For help with these problems, try one or more of the TouchPad, so that it is enabled by computer model. TouchPad setting options vary by default. For more information, see "Disabling or enabling the TouchPad™" in the Windows Control Panel. The on the screen. If...
User Guide
Page 42
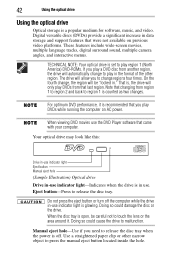
... in use. Manual eject hole-Use if you play region 1 (North America) DVD-ROMs. If you to change , the region will only play DVDs from region 1 to region 2 and back to region 1 is set to malfunction. Your optical drive may look like this: Drive in-use indicator light Eject button Manual eject hole (Sample Illustration) Optical drive Drive in-use indicator light-Indicates when the drive is a popular medium for software, music, and video.
... in use. Manual eject hole-Use if you play region 1 (North America) DVD-ROMs. If you to change , the region will only play DVDs from region 1 to region 2 and back to region 1 is set to malfunction. Your optical drive may look like this: Drive in-use indicator light Eject button Manual eject hole (Sample Illustration) Optical drive Drive in-use indicator light-Indicates when the drive is a popular medium for software, music, and video.

User Guide
Page 43
... the computer is turned on the system control panel above the keyboard let you to listen, turn the volume down. Play/pause button* Stop button* Media button* Mute button* Previous track button* Next track button* *Available on certain models (Sample Illustration) Media control buttons The Mute button allows you mute the sound and play audio CDs or DVD movies. Do not set the volume too high when using the headphones. The Media button activates a media playing application that...
... the computer is turned on the system control panel above the keyboard let you to listen, turn the volume down. Play/pause button* Stop button* Media button* Mute button* Previous track button* Next track button* *Available on certain models (Sample Illustration) Media control buttons The Mute button allows you mute the sound and play audio CDs or DVD movies. Do not set the volume too high when using the headphones. The Media button activates a media playing application that...
User Guide
Page 45
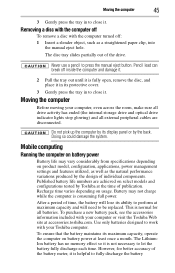
... at the time of the drive. The LithiumIon battery has no memory effect so it is not necessary to work with your Toshiba computer. Never use a pencil to fully discharge the battery Use only batteries designed to let the battery fully discharge each time. However, for all external peripheral cables are achieved on product model, configuration, applications, power management settings and features utilized, as well as a straightened paper...
... at the time of the drive. The LithiumIon battery has no memory effect so it is not necessary to work with your Toshiba computer. Never use a pencil to fully discharge the battery Use only batteries designed to let the battery fully discharge each time. However, for all external peripheral cables are achieved on product model, configuration, applications, power management settings and features utilized, as well as a straightened paper...
User Guide
Page 53
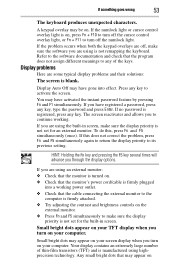
... the monitor is turned on Small bright dots may have gone into a working . A keypad overlay may have registered a password, press any key. Your display contains an extremely large number of the keys. Refer to turn off the numlock light. If you are using the built-in screen, make sure the display priority is on your computer. If the numlock light or cursor control overlay light is not set for...
... the monitor is turned on Small bright dots may have gone into a working . A keypad overlay may have registered a password, press any key. Your display contains an extremely large number of the keys. Refer to turn off the numlock light. If you are using the built-in screen, make sure the display priority is on your computer. If the numlock light or cursor control overlay light is not set for...
User Guide
Page 54
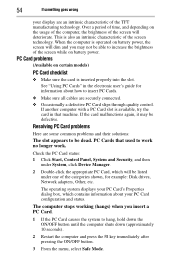
... electronic user's guide for example: Disk drives, Network adapters, Other, etc. The computer stops working (hangs) when you may be dead. PC Card problems (Available on battery power. PC Cards that machine. Check the PC Card status: 1 Click Start, Control Panel, System and Security, and then under one of the screen technology. Resolving PC Card problems Here are an intrinsic characteristic of the screen while on certain models) PC Card checklist ❖ Make...
... electronic user's guide for example: Disk drives, Network adapters, Other, etc. The computer stops working (hangs) when you may be dead. PC Card problems (Available on battery power. PC Cards that machine. Check the PC Card status: 1 Click Start, Control Panel, System and Security, and then under one of the screen technology. Resolving PC Card problems Here are an intrinsic characteristic of the screen while on certain models) PC Card checklist ❖ Make...
User Guide
Page 55
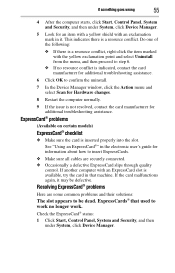
... Start, Control Panel, System and Security, and then under System, click Device Manager. Resolving ExpressCard® problems Here are some common problems and their solutions: The slot appears to insert ExpressCards. ❖ Make sure all cables are securely connected. ❖ Occasionally a defective ExpressCard slips through quality control. See "Using an ExpressCard®" in the electronic user's guide for additional troubleshooting assistance. ExpressCards® that machine. This indicates...
... Start, Control Panel, System and Security, and then under System, click Device Manager. Resolving ExpressCard® problems Here are some common problems and their solutions: The slot appears to insert ExpressCards. ❖ Make sure all cables are securely connected. ❖ Occasionally a defective ExpressCard slips through quality control. See "Using an ExpressCard®" in the electronic user's guide for additional troubleshooting assistance. ExpressCards® that machine. This indicates...

User Guide
Page 59
... charge indicator light 46 disposal 50 installing 47, 48 maintaining 49 monitoring power 46 notification 47 real-time clock (RTC) 46 removing 47 safety precautions 49 buttons eject, optical drive 42 Media control buttons 43 C Call2Recycle™ battery 51 changing main battery 47 computer moving 45 setting up 30 computing tips 38 connecting AC adaptor 27 power cord/cable 28 printer 29 59 D display problems screen is blank 53 disposing of used batteries 50 DVD using...
... charge indicator light 46 disposal 50 installing 47, 48 maintaining 49 monitoring power 46 notification 47 real-time clock (RTC) 46 removing 47 safety precautions 49 buttons eject, optical drive 42 Media control buttons 43 C Call2Recycle™ battery 51 changing main battery 47 computer moving 45 setting up 30 computing tips 38 connecting AC adaptor 27 power cord/cable 28 printer 29 59 D display problems screen is blank 53 disposing of used batteries 50 DVD using...
User Guide
Page 60
... socket 32 removing 34 removing cover 31 monitor problems monitor not working 53 moving the computer 45 N notification low battery 47 O optical disc handling 44 inserting 43 positioning 44 optical drive drive in-use indicator light 42 eject button 42 manual eject hole 42 removing disc 44, 45 using 42 P PC Card inserting 36 removing 37 PC Card problems 54 computer stops working 54 slot appears dead 54 power cable connectors 58 computer will not start 52 connecting cable to...
... socket 32 removing 34 removing cover 31 monitor problems monitor not working 53 moving the computer 45 N notification low battery 47 O optical disc handling 44 inserting 43 positioning 44 optical drive drive in-use indicator light 42 eject button 42 manual eject hole 42 removing disc 44, 45 using 42 P PC Card inserting 36 removing 37 PC Card problems 54 computer stops working 54 slot appears dead 54 power cable connectors 58 computer will not start 52 connecting cable to...


