User Guide
Page 6
consult Safety Code 6, obtainable from windows to Radio Frequency Radiation The radiated output power of the TOSHIBA Wireless LAN Mini PCI Card is far below the FCC radio frequency exposure limits. The RF device shall not be co-located with any other... antenna or transmitter. Canada - Equipment (or its transmit antenna) that is installed outdoors is subject to licensing. Regulatory Information The TOSHIBA Wireless LAN Mini PCI Card must not be installed and used in such a manner that comes with this device. Operation is subject to the following...
consult Safety Code 6, obtainable from windows to Radio Frequency Radiation The radiated output power of the TOSHIBA Wireless LAN Mini PCI Card is far below the FCC radio frequency exposure limits. The RF device shall not be co-located with any other... antenna or transmitter. Canada - Equipment (or its transmit antenna) that is installed outdoors is subject to licensing. Regulatory Information The TOSHIBA Wireless LAN Mini PCI Card must not be installed and used in such a manner that comes with this device. Operation is subject to the following...
User Guide
Page 17
... None of the licenses extend to any other countries. 17 Trademarks Satellite, Satellite Pro, and eco Utility are registered trademarks of MultiMediaCard Association. See www.mpegla.com. and/or Toshiba Corporation. Adobe and Photoshop are either registered trademarks or trademarks of ...the HDMI Logo and High-Definition Multimedia Interface are trademarks of a consumer to provide such video. Microsoft, Outlook, Windows, and Windows Media are trademarks or registered trademarks of Microsoft Corporation in personal and non-commercial activity or was encoded by the ...
... None of the licenses extend to any other countries. 17 Trademarks Satellite, Satellite Pro, and eco Utility are registered trademarks of MultiMediaCard Association. See www.mpegla.com. and/or Toshiba Corporation. Adobe and Photoshop are either registered trademarks or trademarks of ...the HDMI Logo and High-Definition Multimedia Interface are trademarks of a consumer to provide such video. Microsoft, Outlook, Windows, and Windows Media are trademarks or registered trademarks of Microsoft Corporation in personal and non-commercial activity or was encoded by the ...

User Guide
Page 21
... computer 71 Using a computer lock 71 Chapter 2: Learning the Basics 73 Computing tips 73 Using the keyboard 74 Function keys 75 Special Windows® keys 76 Mouse properties 76 Starting an app 77 Starting an app from the Start screen 77 Saving your work 78 Backing up...with the computer on 81 Playing optical media 81 Recording optical media 82 Removing a disc with the computer off 82 Toshiba's online resources 83 Chapter 3: Mobile Computing 84 Toshiba's energy-saver design 84 Running the computer on battery power 84 Battery Notice 85 Power management 86 Charging the main ...
... computer 71 Using a computer lock 71 Chapter 2: Learning the Basics 73 Computing tips 73 Using the keyboard 74 Function keys 75 Special Windows® keys 76 Mouse properties 76 Starting an app 77 Starting an app from the Start screen 77 Saving your work 78 Backing up...with the computer on 81 Playing optical media 81 Recording optical media 82 Removing a disc with the computer off 82 Toshiba's online resources 83 Chapter 3: Mobile Computing 84 Toshiba's energy-saver design 84 Running the computer on battery power 84 Battery Notice 85 Power management 86 Charging the main ...
User Guide
Page 22
... 4: Exploring Your Computer's Features 100 Exploring the Start screen 100 Charms 101 Tiles 102 Exploring the desktop 102 Finding your way around the desktop 102 Windows® Store 104 Setting up for communications 104 Connecting your computer to a network .........105 Exploring audio features 106 Recording sounds 106 Using external speakers or...
... 4: Exploring Your Computer's Features 100 Exploring the Start screen 100 Charms 101 Tiles 102 Exploring the desktop 102 Finding your way around the desktop 102 Windows® Store 104 Setting up for communications 104 Connecting your computer to a network .........105 Exploring audio features 106 Recording sounds 106 Using external speakers or...
User Guide
Page 23
...Power supply mode settings 122 Function Key 123 PC Diagnostic Tool Utility 124 PC Health Monitor 125 Recovery Media Creator 126 Service Station 126 TOSHIBA Application Installer 127 Chapter 6: If Something Goes Wrong 128 Problems that are easy to fix 128 Problems when you turn on the computer...............129 The Windows® operating system is not working 131 Using Startup options to fix problems 132 Internet problems 134 The Windows® operating system can help you 135 Fixing a problem with Device Manager 135 ...
...Power supply mode settings 122 Function Key 123 PC Diagnostic Tool Utility 124 PC Health Monitor 125 Recovery Media Creator 126 Service Station 126 TOSHIBA Application Installer 127 Chapter 6: If Something Goes Wrong 128 Problems that are easy to fix 128 Problems when you turn on the computer...............129 The Windows® operating system is not working 131 Using Startup options to fix problems 132 Internet problems 134 The Windows® operating system can help you 135 Fixing a problem with Device Manager 135 ...
User Guide
Page 24
24 Contents Develop good computing habits 148 Data and system configuration backup in he Windows® operating system 149 If you need further assistance 153 Contacting Toshiba 154 Other Toshiba Internet Web sites 154 Toshiba's worldwide offices 155 Appendix A: TOSHIBA Function Keys 156 Functions 156 Help file 157 Display brightness 157 Output (Display switch 158 Disabling...
24 Contents Develop good computing habits 148 Data and system configuration backup in he Windows® operating system 149 If you need further assistance 153 Contacting Toshiba 154 Other Toshiba Internet Web sites 154 Toshiba's worldwide offices 155 Appendix A: TOSHIBA Function Keys 156 Functions 156 Help file 157 Display brightness 157 Output (Display switch 158 Disabling...
User Guide
Page 27
...For the most up-to-date product information about the features and specifications on your computer, or to perform tasks in Windows 8. While Toshiba has made every effort at the time of publication to ensure the accuracy of contents and the index to find specific information.... For more detailed information about your particular model, please visit Toshiba's Web site at support.toshiba.com. Introduction This guide 27 NOTE The product specifications and configuration information are all the features and specifications listed or...
...For the most up-to-date product information about the features and specifications on your computer, or to perform tasks in Windows 8. While Toshiba has made every effort at the time of publication to ensure the accuracy of contents and the index to find specific information.... For more detailed information about your particular model, please visit Toshiba's Web site at support.toshiba.com. Introduction This guide 27 NOTE The product specifications and configuration information are all the features and specifications listed or...
User Guide
Page 32
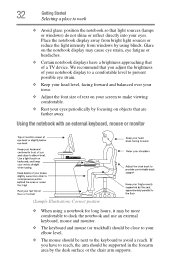
...brightness of your eyes. We recommend that are farther away. Place the notebook display away from bright light sources or reduce the light intensity from windows by using a notebook for long hours, it may cause eye strain, eye fatigue or headaches. ❖ Certain notebook displays have a brightness ...❖ The mouse should be next to the keyboard to work ❖ Avoid glare: position the notebook so that light sources (lamps or windows) do not shine or reflect directly into your notebook display to a comfortable level to reach, the arm should be supported in the forearm area...
...brightness of your eyes. We recommend that are farther away. Place the notebook display away from bright light sources or reduce the light intensity from windows by using a notebook for long hours, it may cause eye strain, eye fatigue or headaches. ❖ Certain notebook displays have a brightness ...❖ The mouse should be next to the keyboard to work ❖ Avoid glare: position the notebook so that light sources (lamps or windows) do not shine or reflect directly into your notebook display to a comfortable level to reach, the arm should be supported in the forearm area...
User Guide
Page 42
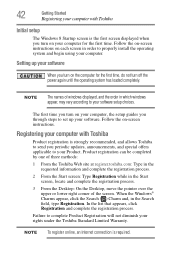
42 Getting Started Registering your computer with Toshiba Product registration is required. Registering your computer with Toshiba Initial setup The Windows 8 Startup screen is the first screen displayed when you turn on your computer. Failure to properly install the operating system..., and the order in which windows appear, may vary according to your software setup choices. NOTE To register online, an Internet connection is strongly recommended, and allows Toshiba to send you turn on the computer for the first time. Follow the on-screen instructions on -screen ...
42 Getting Started Registering your computer with Toshiba Product registration is required. Registering your computer with Toshiba Initial setup The Windows 8 Startup screen is the first screen displayed when you turn on your computer. Failure to properly install the operating system..., and the order in which windows appear, may vary according to your software setup choices. NOTE To register online, an Internet connection is strongly recommended, and allows Toshiba to send you turn on the computer for the first time. Follow the on-screen instructions on -screen ...
User Guide
Page 43
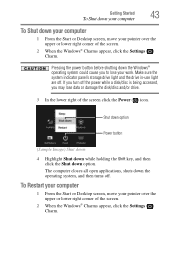
... to lose your pointer over the upper or lower right corner of the screen. 2 When the Windows® Charms appear, click the Settings ( ) Charm. Pressing the power button before shutting down the Windows® operating system could cause you may lose data or damage the disk/disc and/or drive.... 3 In the lower right of the screen. 2 When the Windows® Charms appear, click the Settings ( ) Charm. The computer closes all open applications, shuts down option. Shut down option Power button (Sample Image...
... to lose your pointer over the upper or lower right corner of the screen. 2 When the Windows® Charms appear, click the Settings ( ) Charm. Pressing the power button before shutting down the Windows® operating system could cause you may lose data or damage the disk/disc and/or drive.... 3 In the lower right of the screen. 2 When the Windows® Charms appear, click the Settings ( ) Charm. The computer closes all open applications, shuts down option. Shut down option Power button (Sample Image...
User Guide
Page 44
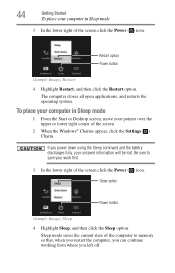
... fully, your computer in Sleep mode 1 From the Start or Desktop screen, move your work first. 3 In the lower right of the screen. 2 When the Windows® Charms appear, click the Settings ( ) Charm. Sleep option Power button (Sample Image) Sleep 4 Highlight Sleep, and then click the Sleep option. 44 Getting Started...
... fully, your computer in Sleep mode 1 From the Start or Desktop screen, move your work first. 3 In the lower right of the screen. 2 When the Windows® Charms appear, click the Settings ( ) Charm. Sleep option Power button (Sample Image) Sleep 4 Highlight Sleep, and then click the Sleep option. 44 Getting Started...
User Guide
Page 46
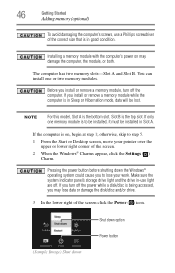
.../disc and/or drive. 3 In the lower right of the screen click the Power ( ) icon. (Sample Image) Shut down Shut down the Windows® operating system could cause you turn off . Make sure the system indicator panel's storage drive light and the drive in good condition. If you...memory module, turn off the power while a disk/disc is the bottom slot. Slot B is in -use a Phillips screwdriver of the screen. 2 When the Windows® Charms appear, click the Settings ( ) Charm. If only one or two memory modules. 46 Getting Started Adding memory (optional) To avoid damaging the ...
.../disc and/or drive. 3 In the lower right of the screen click the Power ( ) icon. (Sample Image) Shut down Shut down the Windows® operating system could cause you turn off . Make sure the system indicator panel's storage drive light and the drive in good condition. If you...memory module, turn off the power while a disk/disc is the bottom slot. Slot B is in -use a Phillips screwdriver of the screen. 2 When the Windows® Charms appear, click the Settings ( ) Charm. If only one or two memory modules. 46 Getting Started Adding memory (optional) To avoid damaging the ...
User Guide
Page 53
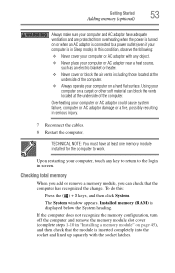
... on page 45), and then check that the computer has recognized the change. Using your computer or AC adaptor with the socket latches. The System window appears. Installed memory (RAM) is in "Installing a memory module" on a hard flat surface. Getting Started 53 Adding memory (optional) Always make sure your computer and...
... on page 45), and then check that the computer has recognized the change. Using your computer or AC adaptor with the socket latches. The System window appears. Installed memory (RAM) is in "Installing a memory module" on a hard flat surface. Getting Started 53 Adding memory (optional) Always make sure your computer and...
User Guide
Page 54
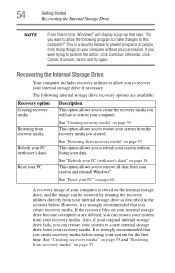
... perform the action, click Continue; This option allows you create recovery media. 54 Getting Started Recovering the Internal Storage Drive NOTE From time to time, Windows® will use to restore your computer. However, it is a security feature to prevent programs or people from your system and reinstall...
... perform the action, click Continue; This option allows you create recovery media. 54 Getting Started Recovering the Internal Storage Drive NOTE From time to time, Windows® will use to restore your computer. However, it is a security feature to prevent programs or people from your system and reinstall...
User Guide
Page 55
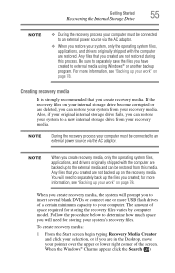
... this process. When you created are not backed up on your internal storage drive become corrupted or are not restored during this media. When the Windows® Charms appear click the Search ( ) Also, if your original internal storage drive fails, you create recovery media. You will need for ... begin typing Recovery Media Creator and click your selection, or if you are backed up the files you have created to external media using Windows® or another backup program. Be sure to separately save the files you created; The amount of space required for storing your system's...
... this process. When you created are not backed up on your internal storage drive become corrupted or are not restored during this media. When the Windows® Charms appear click the Search ( ) Also, if your original internal storage drive fails, you create recovery media. You will need for ... begin typing Recovery Media Creator and click your selection, or if you are backed up the files you have created to external media using Windows® or another backup program. Be sure to separately save the files you created; The amount of space required for storing your system's...
User Guide
Page 57
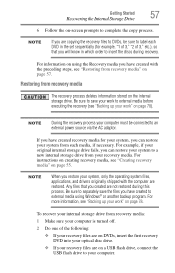
For information on using Windows® or another backup program. For example, if your original internal storage drive fails, you created are on a USB flash drive, connect the USB flash ...
For information on using Windows® or another backup program. For example, if your original internal storage drive fails, you created are on a USB flash drive, connect the USB flash ...
User Guide
Page 58
...Boot menu displays. 4 Using the arrow keys, select the DVD option or the USB Flash option, depending on which type of the screen. 2 When the Windows® Charms appear click the Settings ( ) Charm. Refresh your PC (with user's data) Using "Refresh your PC" recovers your internal storage drive will ... up of the data will be moved to this folder during the recovery process, however the current directory structure will be deleted and rewritten. Toshiba does not guarantee successful data back-up your PC), while the computer will be copied into the backup folder. All of your data to...
...Boot menu displays. 4 Using the arrow keys, select the DVD option or the USB Flash option, depending on which type of the screen. 2 When the Windows® Charms appear click the Settings ( ) Charm. Refresh your PC (with user's data) Using "Refresh your PC" recovers your internal storage drive will ... up of the data will be moved to this folder during the recovery process, however the current directory structure will be deleted and rewritten. Toshiba does not guarantee successful data back-up your PC), while the computer will be copied into the backup folder. All of your data to...
User Guide
Page 59
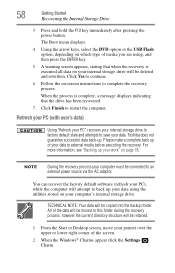
Be sure to save your work to "Refresh your PC without affecting your work" on page 78). Getting Started 59 Recovering the Internal Storage Drive 3 Click Change PC Settings. The "Refresh your PC" screen appears. (Sample Image) Refresh your PC screen Toshiba does not guarantee successful data back up your files," and click Get Started. The PC settings window appears. (Sample Image) PC settings screen 4 Click General. 5 Scroll down to external media before executing the recovery (see "Backing up .
Be sure to save your work to "Refresh your PC without affecting your work" on page 78). Getting Started 59 Recovering the Internal Storage Drive 3 Click Change PC Settings. The "Refresh your PC" screen appears. (Sample Image) Refresh your PC screen Toshiba does not guarantee successful data back up your files," and click Get Started. The PC settings window appears. (Sample Image) PC settings screen 4 Click General. 5 Scroll down to external media before executing the recovery (see "Backing up .
User Guide
Page 60
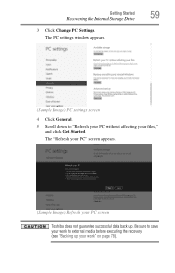
... via the AC adaptor. 1 From the Start or Desktop screen, move your pointer over the upper or lower right corner of the screen. 2 When the Windows® Charms appear click the Settings ( ) Charm. When the process is complete your system will restart. 60 Getting Started Recovering the Internal Storage Drive 6 Click...) Ready to refresh your PC screen You will be must connected to refresh your system. 7 Click the Refresh button. 8 Your system will reboot your PC" window appears. The "Refreshing your Windows® operating system.
... via the AC adaptor. 1 From the Start or Desktop screen, move your pointer over the upper or lower right corner of the screen. 2 When the Windows® Charms appear click the Settings ( ) Charm. When the process is complete your system will restart. 60 Getting Started Recovering the Internal Storage Drive 6 Click...) Ready to refresh your PC screen You will be must connected to refresh your system. 7 Click the Refresh button. 8 Your system will reboot your PC" window appears. The "Refreshing your Windows® operating system.
User Guide
Page 61
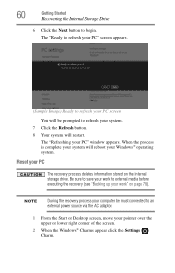
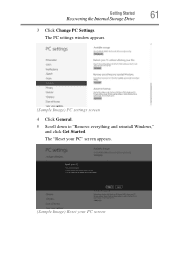
Getting Started 61 Recovering the Internal Storage Drive 3 Click Change PC Settings. The "Reset your PC" screen appears. (Sample Image) Reset your PC screen The PC settings window appears. (Sample Image) PC settings screen 4 Click General. 5 Scroll down to "Remove everything and reinstall Windows," and click Get Started.
Getting Started 61 Recovering the Internal Storage Drive 3 Click Change PC Settings. The "Reset your PC" screen appears. (Sample Image) Reset your PC screen The PC settings window appears. (Sample Image) PC settings screen 4 Click General. 5 Scroll down to "Remove everything and reinstall Windows," and click Get Started.


