User Guide
Page 2
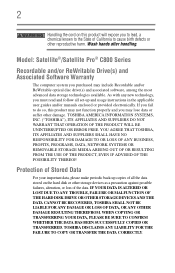
Model: Satellite®/Satellite Pro® C800 Series Recordable and/or ReWritable Drive(s) and ...important data, please make periodic back-up and usage instructions in the applicable user guides and/or manuals enclosed or provided electronically. WHEN COPYING OR TRANSFERRING YOUR DATA, PLEASE BE SURE TO CONFIRM WHETHER THE DATA... HAS BEEN SUCCESSFULLY COPIED OR TRANSFERRED. TOSHIBA AMERICA INFORMATION SYSTEMS, INC. ("TOSHIBA"), ITS AFFILIATES AND SUPPLIERS DO NOT WARRANT THAT OPERATION OF THE PRODUCT WILL BE UNINTERRUPTED OR ERROR...
Model: Satellite®/Satellite Pro® C800 Series Recordable and/or ReWritable Drive(s) and ...important data, please make periodic back-up and usage instructions in the applicable user guides and/or manuals enclosed or provided electronically. WHEN COPYING OR TRANSFERRING YOUR DATA, PLEASE BE SURE TO CONFIRM WHETHER THE DATA... HAS BEEN SUCCESSFULLY COPIED OR TRANSFERRED. TOSHIBA AMERICA INFORMATION SYSTEMS, INC. ("TOSHIBA"), ITS AFFILIATES AND SUPPLIERS DO NOT WARRANT THAT OPERATION OF THE PRODUCT WILL BE UNINTERRUPTED OR ERROR...
User Guide
Page 6
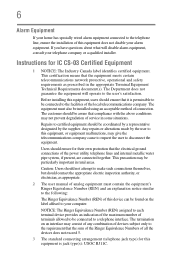
... Equivalence Number (REN) of this device can be aware that the equipment meets certain telecommunications network protective, operational and safety requirements as appropriate. 2 The user manual of analog equipment must also be particularly important in rural areas. Users should ensure that the sum of the Ringer Equivalence Numbers of all the...
... Equivalence Number (REN) of this device can be aware that the equipment meets certain telecommunications network protective, operational and safety requirements as appropriate. 2 The user manual of analog equipment must also be particularly important in rural areas. Users should ensure that the sum of the Ringer Equivalence Numbers of all the...
User Guide
Page 18
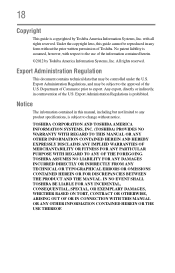
... OR OMISSIONS CONTAINED HEREIN OR FOR DISCREPANCIES BETWEEN THE PRODUCT AND THE MANUAL. Department of the U.S. TOSHIBA CORPORATION AND TOSHIBA AMERICA INFORMATION SYSTEMS, INC. (TOSHIBA) PROVIDES NO WARRANTY WITH REGARD TO THIS MANUAL OR ANY OTHER INFORMATION CONTAINED HEREIN AND HEREBY EXPRESSLY DISCLAIMS ANY IMPLIED ..., with all rights reserved. 18 Copyright This guide is subject to change without the prior written permission of Toshiba. Under the copyright laws, this manual, including but not limited to any form without notice. Any export, directly or indirectly, in this guide ...
... OR OMISSIONS CONTAINED HEREIN OR FOR DISCREPANCIES BETWEEN THE PRODUCT AND THE MANUAL. Department of the U.S. TOSHIBA CORPORATION AND TOSHIBA AMERICA INFORMATION SYSTEMS, INC. (TOSHIBA) PROVIDES NO WARRANTY WITH REGARD TO THIS MANUAL OR ANY OTHER INFORMATION CONTAINED HEREIN AND HEREBY EXPRESSLY DISCLAIMS ANY IMPLIED ..., with all rights reserved. 18 Copyright This guide is subject to change without the prior written permission of Toshiba. Under the copyright laws, this manual, including but not limited to any form without notice. Any export, directly or indirectly, in this guide ...
User Guide
Page 28
Toshiba requires its computer component suppliers to meet RoHS requirements and verifies its retail version (if available), and may not include user manuals or all your home office, purchase products that have earned the ENERGY STAR® for all program functionality. Product activation procedures and Microsoft's privacy policy ...
Toshiba requires its computer component suppliers to meet RoHS requirements and verifies its retail version (if available), and may not include user manuals or all your home office, purchase products that have earned the ENERGY STAR® for all program functionality. Product activation procedures and Microsoft's privacy policy ...
User Guide
Page 30
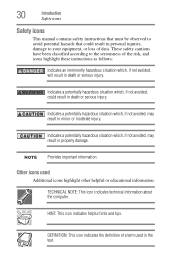
... as follows: Indicates an imminently hazardous situation which, if not avoided, will result in death or serious injury. 30 Introduction Safety icons Safety icons This manual contains safety instructions that must be observed to avoid potential hazards that could result in death or serious injury. DEFINITION: This icon indicates the definition...
... as follows: Indicates an imminently hazardous situation which, if not avoided, will result in death or serious injury. 30 Introduction Safety icons Safety icons This manual contains safety instructions that must be observed to avoid potential hazards that could result in death or serious injury. DEFINITION: This icon indicates the definition...
User Guide
Page 77
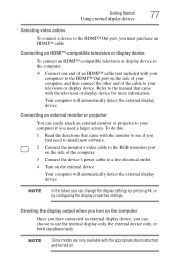
...™ Out port, you must purchase an HDMI™ cable. Getting Started 77 Using external display devices Selecting video cables To connect a device to the manual that came with the television or display device for more information.
...™ Out port, you must purchase an HDMI™ cable. Getting Started 77 Using external display devices Selecting video cables To connect a device to the manual that came with the television or display device for more information.
User Guide
Page 87
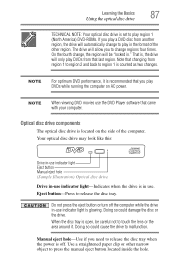
...DVDs from region 1 to region 2 and back to malfunction. That is, the drive will be careful not to press the manual eject button located inside the hole. Manual eject hole-Use if you play in -use . Note that you need to play DVDs while running the computer on the...so could cause the drive to region 1 is glowing. Your optical disc drive may look like this: Drive in-use indicator light Eject button Manual eject hole (Sample Illustration) Optical disc drive Drive in-use the DVD Player software that last region. NOTE When viewing DVD movies use indicator ...
...DVDs from region 1 to region 2 and back to malfunction. That is, the drive will be careful not to press the manual eject button located inside the hole. Manual eject hole-Use if you play in -use . Note that you need to play DVDs while running the computer on the...so could cause the drive to region 1 is glowing. Your optical disc drive may look like this: Drive in-use indicator light Eject button Manual eject hole (Sample Illustration) Optical disc drive Drive in-use the DVD Player software that last region. NOTE When viewing DVD movies use indicator ...
User Guide
Page 88
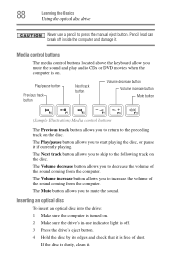
... Next track button Volume decrease button Volume increase button Mute button (Sample Illustration) Media control buttons The Previous track button allows you to press the manual eject button. The Play/pause button allows you to return to mute the sound. The Next track button allows you to the preceding track on...
... Next track button Volume decrease button Volume increase button Mute button (Sample Illustration) Media control buttons The Previous track button allows you to press the manual eject button. The Play/pause button allows you to return to mute the sound. The Next track button allows you to the preceding track on...
User Guide
Page 89
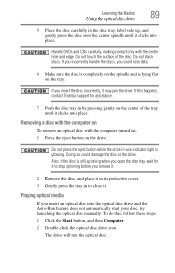
... insert an optical disc into the optical disc drive and the Auto-Run feature does not automatically start your disc, try launching the optical disc manually. If you remove it. 2 Remove the disc, and place it in its protective cover. 3 Gently press the tray in to stop spinning before you insert... surface of the tray until it clicks into place. Removing a disc with the computer on the center of the disc. To do this happens, contact Toshiba support for it to close it may jam the drive. If this , follow these steps: 1 Click the Start button, and then Computer. 2 Double-click the...
... insert an optical disc into the optical disc drive and the Auto-Run feature does not automatically start your disc, try launching the optical disc manually. If you remove it. 2 Remove the disc, and place it in its protective cover. 3 Gently press the tray in to stop spinning before you insert... surface of the tray until it clicks into place. Removing a disc with the computer on the center of the disc. To do this happens, contact Toshiba support for it to close it may jam the drive. If this , follow these steps: 1 Click the Start button, and then Computer. 2 Double-click the...
User Guide
Page 91
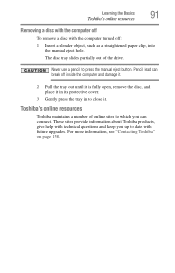
... break off : 1 Insert a slender object, such as a straightened paper clip, into the manual eject hole. Never use a pencil to date with future upgrades. For more information, see "Contacting Toshiba" on page 158. Pencil lead can connect. Learning the Basics 91 Toshiba's online resources Removing a disc with the computer off To remove a disc with...
... break off : 1 Insert a slender object, such as a straightened paper clip, into the manual eject hole. Never use a pencil to date with future upgrades. For more information, see "Contacting Toshiba" on page 158. Pencil lead can connect. Learning the Basics 91 Toshiba's online resources Removing a disc with the computer off To remove a disc with...
User Guide
Page 106
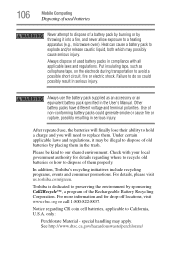
... replace them. Use of the Rechargeable Battery Recycling Corporation. Please be illegal to dispose of old batteries by placing them properly. Toshiba is dedicated to preserving the environment by sponsoring Call2Recycle™, a program of non-conforming battery packs could possibly result in serious ... to avoid a possible short circuit, fire or electric shock. 106 Mobile Computing Disposing of used battery packs in the User's Manual. Put insulating tape, such as an accessory or an equivalent battery pack specified in compliance with your local government authority for drop...
... replace them. Use of the Rechargeable Battery Recycling Corporation. Please be illegal to dispose of old batteries by placing them properly. Toshiba is dedicated to preserving the environment by sponsoring Call2Recycle™, a program of non-conforming battery packs could possibly result in serious ... to avoid a possible short circuit, fire or electric shock. 106 Mobile Computing Disposing of used battery packs in the User's Manual. Put insulating tape, such as an accessory or an equivalent battery pack specified in compliance with your local government authority for drop...
User Guide
Page 107
... on page 160. NOTE Before using your computer aboard an aircraft, make sure the Wireless antenna is OFF if your computer. Contact your authorized Toshiba representative for manuals, power cords, and compact discs. NOTE To enable or disable wireless communication, use the Hot Key F12. The X-ray equipment will not harm your...
... on page 160. NOTE Before using your computer aboard an aircraft, make sure the Wireless antenna is OFF if your computer. Contact your authorized Toshiba representative for manuals, power cords, and compact discs. NOTE To enable or disable wireless communication, use the Hot Key F12. The X-ray equipment will not harm your...
User Guide
Page 147
... cannot access a disc in the tray. Any dirt or foreign object can interfere with a clean cloth dipped in the small hole next to press the manual eject button. If necessary, wipe it has shut completely. Make sure that came with your network administrator. Close the tray carefully, making sure it with...
... cannot access a disc in the tray. Any dirt or foreign object can interfere with a clean cloth dipped in the small hole next to press the manual eject button. If necessary, wipe it has shut completely. Make sure that came with your network administrator. Close the tray carefully, making sure it with...
User Guide
Page 148
... control. The disc will not come out of paper. 148 If Something Goes Wrong Sound system problems Never use a pencil to your computer at support.toshiba.com. The computer emits a loud, high-pitched noise. Some discs run correctly but the drive tray does not slide out." Check that the printer has...
... control. The disc will not come out of paper. 148 If Something Goes Wrong Sound system problems Never use a pencil to your computer at support.toshiba.com. The computer emits a loud, high-pitched noise. Some discs run correctly but the drive tray does not slide out." Check that the printer has...
User Guide
Page 153
...safeguard your valuable data from much easier and more difficult and time-consuming restoration procedures, and to solve problems will improve as the manuals that come with your mind. and saves them for backing up your Windows® settings and your Windows® operating system ...configuration - Follow these features to supplement the information in the manuals. Get familiar with all the user's guides provided with the programs and devices you can easily select a previously established Control Point to...
...safeguard your valuable data from much easier and more difficult and time-consuming restoration procedures, and to solve problems will improve as the manuals that come with your mind. and saves them for backing up your Windows® settings and your Windows® operating system ...configuration - Follow these features to supplement the information in the manuals. Get familiar with all the user's guides provided with the programs and devices you can easily select a previously established Control Point to...
User Guide
Page 186
... desktop 109 moving to desktop 109 recycle bin 109 safety 30 installation memory module 45 installing a charged battery 103 battery 101 memory modules 45 Instruction Manual for Safety and Comfort 33 internal storage drive recovery 53 K keyboard character keys 83 function keys 83 hot keys 165 special Windows® keys 83...
... desktop 109 moving to desktop 109 recycle bin 109 safety 30 installation memory module 45 installing a charged battery 103 battery 101 memory modules 45 Instruction Manual for Safety and Comfort 33 internal storage drive recovery 53 K keyboard character keys 83 function keys 83 hot keys 165 special Windows® keys 83...
User Guide
Page 187
... computer 79 N network accessing 112 connecting your computer 112 networking wireless 111 notification area 111 O ON/OFF indicator light 97 online resources Toshiba 91 optical disc Auto-Run feature 89 handling 89 inserting 88 playing optical media 89 positioning 89 recording optical media 90 removing with computer ... optical disc drive components 87 drive in-use indicator light 87 eject button 87 handling an optical disc 89 inserting an optical disc 88 manual eject hole 87 playing optical media 89 recording optical media 90 removing a disc 89, 91 troubleshooting 147 using 86, 87 optical discs ...
... computer 79 N network accessing 112 connecting your computer 112 networking wireless 111 notification area 111 O ON/OFF indicator light 97 online resources Toshiba 91 optical disc Auto-Run feature 89 handling 89 inserting 88 playing optical media 89 positioning 89 recording optical media 90 removing with computer ... optical disc drive components 87 drive in-use indicator light 87 eject button 87 handling an optical disc 89 inserting an optical disc 88 manual eject hole 87 playing optical media 89 recording optical media 90 removing a disc 89, 91 troubleshooting 147 using 86, 87 optical discs ...


