
User Guide
Page 2
...function properly and you purchased may lose data or suffer other damage. Model: Satellite®/Satellite Pro® C800/L800/S800 Series Recordable and/or ReWritable Drive(s) and Associated ...make periodic back-up and usage instructions in the applicable user guides and/or manuals enclosed or provided electronically. WHEN COPYING OR TRANSFERRING YOUR DATA, PLEASE BE SURE ...devices as a precaution against possible failures, alteration, or loss of the data. TOSHIBA AMERICA INFORMATION SYSTEMS, INC. ("TOSHIBA"), ITS AFFILIATES AND SUPPLIERS DO NOT WARRANT THAT OPERATION OF THE PRODUCT WILL ...
...function properly and you purchased may lose data or suffer other damage. Model: Satellite®/Satellite Pro® C800/L800/S800 Series Recordable and/or ReWritable Drive(s) and Associated ...make periodic back-up and usage instructions in the applicable user guides and/or manuals enclosed or provided electronically. WHEN COPYING OR TRANSFERRING YOUR DATA, PLEASE BE SURE ...devices as a precaution against possible failures, alteration, or loss of the data. TOSHIBA AMERICA INFORMATION SYSTEMS, INC. ("TOSHIBA"), ITS AFFILIATES AND SUPPLIERS DO NOT WARRANT THAT OPERATION OF THE PRODUCT WILL ...
User Guide
Page 16
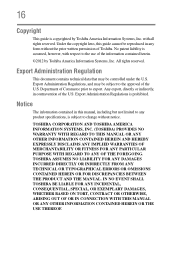
... rights reserved. Notice The information contained in any product specifications, is assumed, however, with all rights reserved. TOSHIBA CORPORATION AND TOSHIBA AMERICA INFORMATION SYSTEMS, INC. (TOSHIBA) PROVIDES NO WARRANTY WITH REGARD TO THIS MANUAL OR ANY OTHER INFORMATION CONTAINED HEREIN AND HEREBY EXPRESSLY DISCLAIMS ANY IMPLIED WARRANTIES OF MERCHANTABILITY OR FITNESS FOR ANY PARTICULAR...
... rights reserved. Notice The information contained in any product specifications, is assumed, however, with all rights reserved. TOSHIBA CORPORATION AND TOSHIBA AMERICA INFORMATION SYSTEMS, INC. (TOSHIBA) PROVIDES NO WARRANTY WITH REGARD TO THIS MANUAL OR ANY OTHER INFORMATION CONTAINED HEREIN AND HEREBY EXPRESSLY DISCLAIMS ANY IMPLIED WARRANTIES OF MERCHANTABILITY OR FITNESS FOR ANY PARTICULAR...
User Guide
Page 26
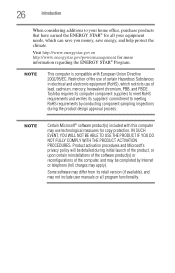
... computer is compatible with this computer may use of the computer, and may not include user manuals or all your home office, purchase products that have earned the ENERGY STAR® for all program functionality. Toshiba requires its computer component suppliers to meet RoHS requirements and verifies its retail version (if available...
... computer is compatible with this computer may use of the computer, and may not include user manuals or all your home office, purchase products that have earned the ENERGY STAR® for all program functionality. Toshiba requires its computer component suppliers to meet RoHS requirements and verifies its retail version (if available...
User Guide
Page 28
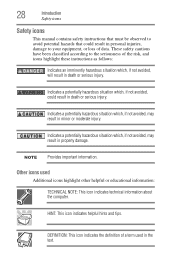
... data. Indicates a potentially hazardous situation which , if not avoided, may result in the text. NOTE Provides important information. 28 Introduction Safety icons Safety icons This manual contains safety instructions that must be observed to avoid potential hazards that could result in death or serious injury.
... data. Indicates a potentially hazardous situation which , if not avoided, may result in the text. NOTE Provides important information. 28 Introduction Safety icons Safety icons This manual contains safety instructions that must be observed to avoid potential hazards that could result in death or serious injury.

User Guide
Page 68
... or display device To connect an HDMI™-compatible television or display device to the computer: ❖ Connect one end of the cable to the manual that came with the television or display device for more information. NOTE You can easily attach an external monitor or projector to your computer if...
... or display device To connect an HDMI™-compatible television or display device to the computer: ❖ Connect one end of the cable to the manual that came with the television or display device for more information. NOTE You can easily attach an external monitor or projector to your computer if...
User Guide
Page 79
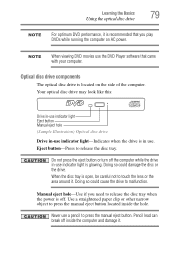
...Drive in-use indicator light-Indicates when the drive is in -use . Doing so could cause the drive to press the manual eject button located inside the computer and damage it. Manual eject hole-Use if you play DVDs while running the computer on the side of the computer. Use a straightened paper...use indicator light is glowing. When the disc tray is located on AC power. Pencil lead can break off . Eject button-Press to press the manual eject button. Never use the DVD Player software that you need to touch the lens or the area around it. Optical disc drive components The...
...Drive in-use indicator light-Indicates when the drive is in -use . Doing so could cause the drive to press the manual eject button located inside the computer and damage it. Manual eject hole-Use if you play DVDs while running the computer on the side of the computer. Use a straightened paper...use indicator light is glowing. When the disc tray is located on AC power. Pencil lead can break off . Eject button-Press to press the manual eject button. Never use the DVD Player software that you need to touch the lens or the area around it. Optical disc drive components The...
User Guide
Page 81
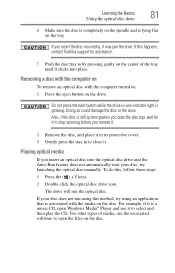
... optical media If you insert the disc incorrectly, it may jam the drive. If your disc, try using this method, try launching the optical disc manually. Removing a disc with the computer on To remove an optical disc with the media on the drive. For example, if it to select and then... the optical disc drive 6 Make sure the disc is completely on the spindle and is lying flat on the disc. To do this happens, contact Toshiba support for it to stop spinning before you remove it. 2 Remove the disc, and place it in its protective cover. 3 Gently press the tray in...
... optical media If you insert the disc incorrectly, it may jam the drive. If your disc, try using this method, try launching the optical disc manually. Removing a disc with the computer on To remove an optical disc with the media on the drive. For example, if it to select and then... the optical disc drive 6 Make sure the disc is completely on the spindle and is lying flat on the disc. To do this happens, contact Toshiba support for it to stop spinning before you remove it. 2 Remove the disc, and place it in its protective cover. 3 Gently press the tray in...
User Guide
Page 82
...media that allows you to: ❖ Play pre-recorded and recorded optical media. ❖ Read/write data and multi-media files to your Toshiba computer or optical disc drive. Copy protection technology may come with the computer turned off: 1 Insert a slender object, such as a straightened ...paper clip, into the manual eject hole. The disc tray slides partially out of certain optical media. NOTE Due to manufacturing and quality variations in third party optical media ...
...media that allows you to: ❖ Play pre-recorded and recorded optical media. ❖ Read/write data and multi-media files to your Toshiba computer or optical disc drive. Copy protection technology may come with the computer turned off: 1 Insert a slender object, such as a straightened ...paper clip, into the manual eject hole. The disc tray slides partially out of certain optical media. NOTE Due to manufacturing and quality variations in third party optical media ...
User Guide
Page 83
... resources Never use a pencil to date with future upgrades. These sites provide information about Toshiba products, give help with technical questions and keep you can break off inside the computer and damage it. 2 Pull the tray out until it is ...fully open, remove the disc, and place it in its protective cover. 3 Gently press the tray in to close it. Toshiba's online resources Toshiba maintains a number of online sites to which you up to press the...
... resources Never use a pencil to date with future upgrades. These sites provide information about Toshiba products, give help with technical questions and keep you can break off inside the computer and damage it. 2 Pull the tray out until it is ...fully open, remove the disc, and place it in its protective cover. 3 Gently press the tray in to close it. Toshiba's online resources Toshiba maintains a number of online sites to which you up to press the...
User Guide
Page 98
... may be using the system for an extended period, more than one month, remove the battery pack. ❖ Store spare battery packs in the User's Manual. Heat can cause a battery pack to avoid a possible short circuit, fire or electric shock. Under certain applicable laws and regulations, it may possibly cause serious...
... may be using the system for an extended period, more than one month, remove the battery pack. ❖ Store spare battery packs in the User's Manual. Heat can cause a battery pack to avoid a possible short circuit, fire or electric shock. Under certain applicable laws and regulations, it may possibly cause serious...
User Guide
Page 99
...wireless LAN capability. Mobile Computing 99 Traveling tips Please be required to pass your computer on page 156. For details, please visit us.toshiba.com/green. NOTE Before using your computer aboard an aircraft, make sure the Wireless antenna is OFF (Airplane mode is dedicated to preserving.../perchlorate/ Traveling tips The environmental precautions listed in dust. ❖ Always travel with your computer. For more information and for manuals, power cords, and compact discs. The X-ray equipment will not harm your local government authority for the computer.
...wireless LAN capability. Mobile Computing 99 Traveling tips Please be required to pass your computer on page 156. For details, please visit us.toshiba.com/green. NOTE Before using your computer aboard an aircraft, make sure the Wireless antenna is OFF (Airplane mode is dedicated to preserving.../perchlorate/ Traveling tips The environmental precautions listed in dust. ❖ Always travel with your computer. For more information and for manuals, power cords, and compact discs. The X-ray equipment will not harm your local government authority for the computer.

User Guide
Page 132
... lower right corner of your screen. 3 Click the Restart option from the menu. 4 Click Troubleshoot from depending on page 58. To enter the Boot menu manually: 1 Press Ctrl, Alt, and Del simultaneously (once). 2 Press the Power button in some way such as installing a new application or adding a device. Reset your computer...
... lower right corner of your screen. 3 Click the Restart option from the menu. 4 Click Troubleshoot from depending on page 58. To enter the Boot menu manually: 1 Press Ctrl, Alt, and Del simultaneously (once). 2 Press the Power button in some way such as installing a new application or adding a device. Reset your computer...
User Guide
Page 133
... point to return the computer to reset your current video driver at which it was performing properly. Command Prompt The command prompt is installed ❖ Manually by the user System Image Recovery Windows® will automatically look for advanced users.
... point to return the computer to reset your current video driver at which it was performing properly. Command Prompt The command prompt is installed ❖ Manually by the user System Image Recovery Windows® will automatically look for advanced users.

User Guide
Page 143
... the computer and refer to a power source and turned on. Some applications run properly, refer to see if it from ejecting. Refer to press the manual eject button. Examine the disc to its documentation and check that came with your network administrator. If you need to remove a disc and cannot turn...
... the computer and refer to a power source and turned on. Some applications run properly, refer to see if it from ejecting. Refer to press the manual eject button. Examine the disc to its documentation and check that came with your network administrator. If you need to remove a disc and cannot turn...
User Guide
Page 144
If the problem is with your computer at support.toshiba.com. Adjust the volume control. on the optical disc drive itself. Check that the hardware configuration meets the application's needs. Check that they are using ... control. This is too loud. It occurs in the tray. Check that the printer is compatible with an optical data disc, refer to press the manual eject button.
If the problem is with your computer at support.toshiba.com. Adjust the volume control. on the optical disc drive itself. Check that the hardware configuration meets the application's needs. Check that they are using ... control. This is too loud. It occurs in the tray. Check that the printer is compatible with an optical data disc, refer to press the manual eject button.
User Guide
Page 149
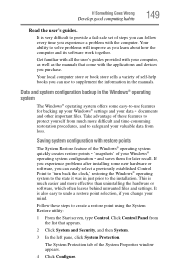
If you experience problems after installing some easy-to-use to supplement the information in the manuals. It is much more effective than uninstalling the hardware or software, which often leaves behind unwanted files and settings. Your local computer store ...window appears. 4 Click Configure. Your ability to the installation. Data and system configuration backup in just prior to solve problems will improve as the manuals that appears. 2 Click System and Security, and then System. 3 In the left pane, click System Protection. Saving system configuration with the computer.
If you experience problems after installing some easy-to-use to supplement the information in the manuals. It is much more effective than uninstalling the hardware or software, which often leaves behind unwanted files and settings. Your local computer store ...window appears. 4 Click Configure. Your ability to the installation. Data and system configuration backup in just prior to solve problems will improve as the manuals that appears. 2 Click System and Security, and then System. 3 In the left pane, click System Protection. Saving system configuration with the computer.
User Guide
Page 180
...N network accessing 105 connecting your computer 105 networking wireless 105 notification area 103 notifications 104 O ON/OFF indicator light 89 online resources Toshiba 83 optical disc Auto-Run feature 81 handling 80 inserting 80 playing optical media 81 positioning 80 recording optical media 82 removing with computer...optical disc drive components 79 drive in-use indicator light 79 eject button 79 handling an optical disc 80 inserting an optical disc 80 manual eject hole 79 playing optical media 81 recording optical media 82 removing a disc 81, 82 troubleshooting 143 using 78, 79 optical ...
...N network accessing 105 connecting your computer 105 networking wireless 105 notification area 103 notifications 104 O ON/OFF indicator light 89 online resources Toshiba 83 optical disc Auto-Run feature 81 handling 80 inserting 80 playing optical media 81 positioning 80 recording optical media 82 removing with computer...optical disc drive components 79 drive in-use indicator light 79 eject button 79 handling an optical disc 80 inserting an optical disc 80 manual eject hole 79 playing optical media 81 recording optical media 82 removing a disc 81, 82 troubleshooting 143 using 78, 79 optical ...


