
Users Manual Canada; English
Page 3
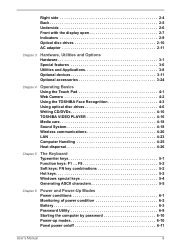
...6-9 Starting the computer by password 6-10 Power-up modes 6-10 Panel power on/off 6-11 User's Manual iii Right side 2-4 Back 2-5 Underside 2-6 Front with the display open 2-7 Indicators 2-9 Optical disc drives 2-10 AC adaptor 2-11 Chapter 3 Hardware, Utilities and Options Hardware 3-1 Special features 3-6 Utilities and Applications 3-8 Optional devices 3-11 Optional accessories 3-24 Chapter 4 Operating Basics Using the Touch Pad 4-1 Web Camera 4-2 Using the TOSHIBA Face Recognition 4-3 Using optical disc drives 4-6 Writing CD/DVDs 4-10 TOSHIBA VIDEO PLAYER 4-16 Media...
...6-9 Starting the computer by password 6-10 Power-up modes 6-10 Panel power on/off 6-11 User's Manual iii Right side 2-4 Back 2-5 Underside 2-6 Front with the display open 2-7 Indicators 2-9 Optical disc drives 2-10 AC adaptor 2-11 Chapter 3 Hardware, Utilities and Options Hardware 3-1 Special features 3-6 Utilities and Applications 3-8 Optional devices 3-11 Optional accessories 3-24 Chapter 4 Operating Basics Using the Touch Pad 4-1 Web Camera 4-2 Using the TOSHIBA Face Recognition 4-3 Using optical disc drives 4-6 Writing CD/DVDs 4-10 TOSHIBA VIDEO PLAYER 4-16 Media...
Users Manual Canada; English
Page 4
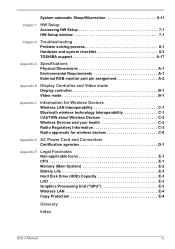
... monitor port pin assignment A-2 Appendix B Display Controller and Video mode Display controller B-1 Video mode B-1 Appendix C Information for Wireless Devices Wireless LAN Interoperability C-1 Bluetooth wireless technology Interoperability C-1 CAUTION about Wireless Devices C-2 Wireless Devices and your health C-2 Radio Regulatory Information C-3 Radio approvals for wireless devices C-8 Appendix D AC Power Cord and Connectors Certification agencies D-1 Appendix E Legal Footnotes Non-applicable Icons E-1 CPU E-1 Memory (Main System E-2 Battery Life E-3 Hard Disk Drive (HDD...
... monitor port pin assignment A-2 Appendix B Display Controller and Video mode Display controller B-1 Video mode B-1 Appendix C Information for Wireless Devices Wireless LAN Interoperability C-1 Bluetooth wireless technology Interoperability C-1 CAUTION about Wireless Devices C-2 Wireless Devices and your health C-2 Radio Regulatory Information C-3 Radio approvals for wireless devices C-8 Appendix D AC Power Cord and Connectors Certification agencies D-1 Appendix E Legal Footnotes Non-applicable Icons E-1 CPU E-1 Memory (Main System E-2 Battery Life E-3 Hard Disk Drive (HDD...

Users Manual Canada; English
Page 13
... example: Read Only Memory (ROM). Read Chapter 3, Hardware, Utilities and Options if connecting optional products or external devices. Conventions This manual uses the following their definition. Acronyms are enclosed in Chapter 3, Hardware, Utilities and Options to describe, identify, and highlight terms and operating procedures. Preface Congratulations on your purchase of this manual by -step instructions on . This powerful notebook computer provides excellent expansion capability, includes multimedia functionality, and is organized...
... example: Read Only Memory (ROM). Read Chapter 3, Hardware, Utilities and Options if connecting optional products or external devices. Conventions This manual uses the following their definition. Acronyms are enclosed in Chapter 3, Hardware, Utilities and Options to describe, identify, and highlight terms and operating procedures. Preface Congratulations on your purchase of this manual by -step instructions on . This powerful notebook computer provides excellent expansion capability, includes multimedia functionality, and is organized...
Users Manual Canada; English
Page 19
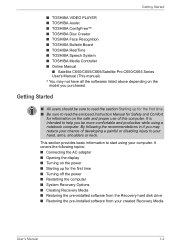
... enclosed Instruction Manual for Safety and Comfort for the first time ■ Turning off the power ■ Restarting the computer ■ System Recovery Options ■ Creating Recovery Media ■ Restoring the pre-installed software from the Recovery hard disk drive ■ Restoring the pre-installed software from your created Recovery Media User's Manual 1-2 Getting Started ■ All users should be more comfortable and productive while using your computer. This section provides basic information to start using a notebook computer. Getting Started ■ TOSHIBA VIDEO...
... enclosed Instruction Manual for Safety and Comfort for the first time ■ Turning off the power ■ Restarting the computer ■ System Recovery Options ■ Creating Recovery Media ■ Restoring the pre-installed software from the Recovery hard disk drive ■ Restoring the pre-installed software from your created Recovery Media User's Manual 1-2 Getting Started ■ All users should be more comfortable and productive while using your computer. This section provides basic information to start using a notebook computer. Getting Started ■ TOSHIBA VIDEO...
Users Manual Canada; English
Page 25
... avoid any wireless communication functionalities, and cancelling settings that when you turn off the power while a disk (disc) is off the power, disconnect an external storage device or remove storage media during data read/write. Make sure all disk/disc activity has stopped before removing the CD/DVD. ■ Make sure the Optical Disc Drive indicator is being accessed, you left off the power without exiting from your data. ■ Do not install or remove a memory module while...
... avoid any wireless communication functionalities, and cancelling settings that when you turn off the power while a disk (disc) is off the power, disconnect an external storage device or remove storage media during data read/write. Make sure all disk/disc activity has stopped before removing the CD/DVD. ■ Make sure the Optical Disc Drive indicator is being accessed, you left off the power without exiting from your data. ■ Do not install or remove a memory module while...
Users Manual Canada; English
Page 27
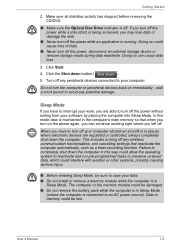
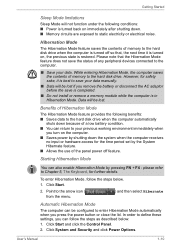
... can also enable Hibernation Mode by the System Hibernate feature. ■ Allows the use of any peripheral devices connected to the computer. ■ Save your data. Click System and Security and click Power Options. To enter Hibernation Mode, follow the steps as described below . 1. Click Start and click the Control Panel. 2. In order to your data manually. ■ Data will be lost . User's Manual 1-10 please...
... can also enable Hibernation Mode by the System Hibernate feature. ■ Allows the use of any peripheral devices connected to the computer. ■ Save your data. Click System and Security and click Power Options. To enter Hibernation Mode, follow the steps as described below . 1. Click Start and click the Control Panel. 2. In order to your data manually. ■ Data will be lost . User's Manual 1-10 please...
Users Manual Canada; English
Page 29
... Windows® manual for more information about Startup Repair. Getting Started See the Windows Help and Support content for it to finish, then disable virus detection programs including any software that checks files automatically in the background. ■ Do not use utilities, including those intended to enhance hard disk drive access speed. The Advanced Boot Options menu will be run manually to repair problems. The procedure is running. User's Manual 1-12 Turn off or Sleep...
... Windows® manual for more information about Startup Repair. Getting Started See the Windows Help and Support content for it to finish, then disable virus detection programs including any software that checks files automatically in the background. ■ Do not use utilities, including those intended to enhance hard disk drive access speed. The Advanced Boot Options menu will be run manually to repair problems. The procedure is running. User's Manual 1-12 Turn off or Sleep...
Users Manual Canada; English
Page 66
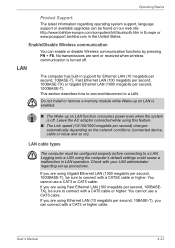
... install or remove a memory module while Wake-up on LAN is enabled. ■ The Wake-up procedures. Operating Basics Product Support: The latest information regarding set-up on LAN function consumes power even when the system is turned off . Logging onto a LAN using Gigabit Ethernet LAN (1000 megabits per second, 1000BASE-T). If you are sent or received when wireless communication is off . Enable/Disable Wireless communication You can connect with a CAT5 cable...
... install or remove a memory module while Wake-up on LAN is enabled. ■ The Wake-up procedures. Operating Basics Product Support: The latest information regarding set-up on LAN function consumes power even when the system is turned off . Logging onto a LAN using Gigabit Ethernet LAN (1000 megabits per second, 1000BASE-T). If you are sent or received when wireless communication is off . Enable/Disable Wireless communication You can connect with a CAT5 cable...
Users Manual Canada; English
Page 71
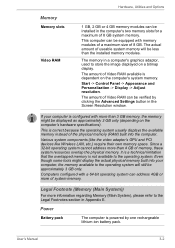
... memory. Hardware, Utilities and Options Memory Memory slots Video RAM 1 GB, 2 GB or 4 GB memory modules can be installed in the Screen Resolution window. The amount of Video RAM available is powered by clicking the Advanced Settings button in the computer's two memory slots for a maximum of 8 GB system memory. Legal Footnote (Memory (Main System)) For more than 3 GB memory, the memory might display the actual physical memory built into the computer. User's Manual 3-2 The actual amount of 8 GB. Start -> Control Panel...
... memory. Hardware, Utilities and Options Memory Memory slots Video RAM 1 GB, 2 GB or 4 GB memory modules can be installed in the Screen Resolution window. The amount of Video RAM available is powered by clicking the Advanced Settings button in the computer's two memory slots for a maximum of 8 GB system memory. Legal Footnote (Memory (Main System)) For more than 3 GB memory, the memory might display the actual physical memory built into the computer. User's Manual 3-2 The actual amount of 8 GB. Start -> Control Panel...
Users Manual Canada; English
Page 85
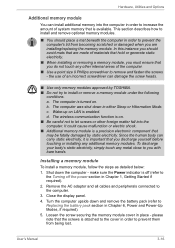
... in order to the cover in Chapter 1, Getting Started if required). 2. Wake-up on . Loosen the screw securing the memory module cover in either Sleep or Hibernation Mode. The computer is turned on LAN is attached to prevent the computer's lid from being lost. Turn the computer upside down in place - Hardware, Utilities and Options Additional memory module You can install additional memory into the computer. The wireless communication function...
... in order to the cover in Chapter 1, Getting Started if required). 2. Wake-up on . Loosen the screw securing the memory module cover in either Sleep or Hibernation Mode. The computer is turned on LAN is attached to prevent the computer's lid from being lost. Turn the computer upside down in place - Hardware, Utilities and Options Additional memory module You can install additional memory into the computer. The wireless communication function...
Users Manual Canada; English
Page 88
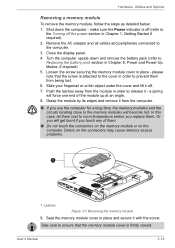
... all cables and peripherals connected to Replacing the battery pack section in Chapter 1, Getting Started if required). 2. a spring will get burnt if you replace them from being lost. 6. Latches Figure 3-7 Removing the memory module 9. User's Manual 3-19 Turn the computer upside down the computer - Loosen the screw securing the memory module cover in place and secure it off the power section in Chapter 6, Power and Power-Up Modes, if...
... all cables and peripherals connected to Replacing the battery pack section in Chapter 1, Getting Started if required). 2. a spring will get burnt if you replace them from being lost. 6. Latches Figure 3-7 Removing the memory module 9. User's Manual 3-19 Turn the computer upside down the computer - Loosen the screw securing the memory module cover in place and secure it off the power section in Chapter 6, Power and Power-Up Modes, if...
Users Manual Canada; English
Page 95
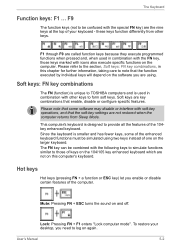
... the soft-key settings are key combinations that some of one on the computer. Lock: Pressing FN + F1 enters ''Lock computer mode''. The Keyboard Function keys: F1 ... Soft keys: FN key combinations The FN (function) is unique to TOSHIBA computers and is designed to those keys marked with the special FN key) are not on again. Mute: Pressing FN + ESC turns the sound on the software you enable or disable certain...
... the soft-key settings are key combinations that some of one on the computer. Lock: Pressing FN + F1 enters ''Lock computer mode''. The Keyboard Function keys: F1 ... Soft keys: FN key combinations The FN (function) is unique to TOSHIBA computers and is designed to those keys marked with the special FN key) are not on again. Mute: Pressing FN + ESC turns the sound on the software you enable or disable certain...
Users Manual Canada; English
Page 102
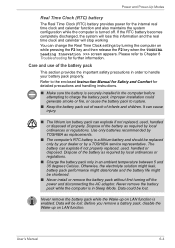
... battery pack to Chapter 8 Troubleshooting for further information. Data will stop working You can change the Real Time Clock settings by turning the computer on LAN function. Before you remove a battery pack, disable the Wake-up on LAN function is enabled. Use only batteries recommended by a TOSHIBA service representative. It can cause injury. ■ The lithium ion battery pack can explode if not properly replaced, used , handled or disposed of the battery...
... battery pack to Chapter 8 Troubleshooting for further information. Data will stop working You can change the Real Time Clock settings by turning the computer on LAN function. Before you remove a battery pack, disable the Wake-up on LAN function is enabled. Use only batteries recommended by a TOSHIBA service representative. It can cause injury. ■ The lithium ion battery pack can explode if not properly replaced, used , handled or disposed of the battery...
Users Manual Canada; English
Page 110
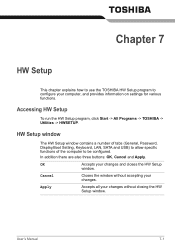
... Setup window The HW Setup window contains a number of tabs (General, Password, Display,Boot Setting, Keyboard, LAN, SATA and USB) to allow specific functions of the computer to configure your computer, and provides information on settings for various functions. Cancel Closes the window without closing the HW Setup window. Apply Accepts all your changes without accepting your changes and closes the HW Setup window. In addition there are also three buttons: OK, Cancel and Apply. Accessing...
... Setup window The HW Setup window contains a number of tabs (General, Password, Display,Boot Setting, Keyboard, LAN, SATA and USB) to allow specific functions of the computer to configure your computer, and provides information on settings for various functions. Cancel Closes the window without closing the HW Setup window. Apply Accepts all your changes without accepting your changes and closes the HW Setup window. In addition there are also three buttons: OK, Cancel and Apply. Accessing...
Users Manual Canada; English
Page 113
... boot process. Enabled Enables the Wake-up speed. User's Manual 7-4 Power On function. (Default) Keyboard Wake-up on the system by pressing any key. Power On This feature allows you open the display panel while your computer is connected via a network. Enabled Enables the Panel Open - Fast Normal Reduces system boot-up packet (Magic packet) from shutdown when it receives a wake-up time. Power On setting. System can turn on LAN from the built-in Sleep Mode...
... boot process. Enabled Enables the Wake-up speed. User's Manual 7-4 Power On function. (Default) Keyboard Wake-up on the system by pressing any key. Power On This feature allows you open the display panel while your computer is connected via a network. Enabled Enables the Panel Open - Fast Normal Reduces system boot-up packet (Magic packet) from shutdown when it receives a wake-up time. Power On setting. System can turn on LAN from the built-in Sleep Mode...
Users Manual Canada; English
Page 116
...; What appears on the display? User's Manual 8-2 loose cables can cause signal errors. ■ Inspect all connecting cables for loose wires and all connectors for further information on its installation and configuration). ■ Check all required driver software has been loaded (please refer to the documentation included with the computer, software or operating system. ■ Check that its configuration is set . Make a screenshot of the current...
...; What appears on the display? User's Manual 8-2 loose cables can cause signal errors. ■ Inspect all connecting cables for loose wires and all connectors for further information on its installation and configuration). ■ Check all required driver software has been loaded (please refer to the documentation included with the computer, software or operating system. ■ Check that its configuration is set . Make a screenshot of the current...
Users Manual Canada; English
Page 129
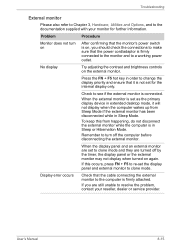
... make sure that the power cord/adaptor is not set as the primary display device in extended desktop mode, it will not display when the computer wakes up from happening, do not disconnect the external monitor while the computer is in order to change the display priority and ensure that the cable connecting the external monitor to a working power outlet. Problem Procedure Monitor does not turn off by the timer, the display panel...
... make sure that the power cord/adaptor is not set as the primary display device in extended desktop mode, it will not display when the computer wakes up from happening, do not disconnect the external monitor while the computer is in order to change the display priority and ensure that the cable connecting the external monitor to a working power outlet. Problem Procedure Monitor does not turn off by the timer, the display panel...
Users Manual Canada; English
Page 151
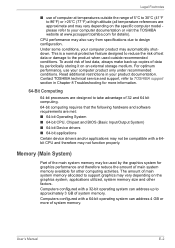
... hardware and software requirements are approximate and may be used outside the range of 5°C to 30°C (41°F to 86°F) or >25°C (77°F) at www.pcsupport.toshiba.com for details). Memory (Main System) Part of the main system memory may vary depending on the graphics system, applications utilized, system memory size and other computing activities. User's Manual...
... hardware and software requirements are approximate and may be used outside the range of 5°C to 30°C (41°F to 86°F) or >25°C (77°F) at www.pcsupport.toshiba.com for details). Memory (Main System) Part of the main system memory may vary depending on the graphics system, applications utilized, system memory size and other computing activities. User's Manual...
Users Manual Canada; English
Page 157
... Windows special keys 5-4 L LAN 3-5, 4-23 cable types 4-23 connecting 4-24 disconnecting 4-24 jack 2-3 User's Manual problems 8-16 M Media care 4-18 Card care 3-13 Memory card care 3-14 Memory 3-2 additional 3-24 installing 3-16 problems 8-14 removing 3-19 Memory media inserting 3-14 removing 3-15 Memory media slot 2-2, 3-12 using 3-12 Moving the computer 4-25 P Panel Open - automatic power off 1-7 turning on 1-7 Problems AC power 8-5 Additional memory module 8-14 Analyzing the problem 8-2 Battery 8-5 Bluetooth 8-16 DVD Super Multi drive 8-9 External monitor 8-15 Hard disk drive 8-8 Hardware...
... Windows special keys 5-4 L LAN 3-5, 4-23 cable types 4-23 connecting 4-24 disconnecting 4-24 jack 2-3 User's Manual problems 8-16 M Media care 4-18 Card care 3-13 Memory card care 3-14 Memory 3-2 additional 3-24 installing 3-16 problems 8-14 removing 3-19 Memory media inserting 3-14 removing 3-15 Memory media slot 2-2, 3-12 using 3-12 Moving the computer 4-25 P Panel Open - automatic power off 1-7 turning on 1-7 Problems AC power 8-5 Additional memory module 8-14 Analyzing the problem 8-2 Battery 8-5 Bluetooth 8-16 DVD Super Multi drive 8-9 External monitor 8-15 Hard disk drive 8-8 Hardware...
Detailed Specs for Satellite C650 PSC2EC-07J001 English
Page 1
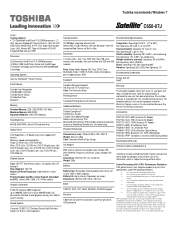
... Layer, (6x), DVD+RW (8x), DVD-RAM (5x) Display System Type: 16:9 TFT Active Matrix colour LCD display with Intel® HyperThreading Technology and Enhanced Intel® SpeedStep® Technology Operating System Genuine Windows® 7 Home Premium Key Features Toshiba Face Recognition Toshiba Media Controller Toshiba Bulletin Board Toshiba Reel Time Bluetooth Memory Standard Memory: 2GB +2GB DDR3 (1333 MHz) Maximum Memory: 8GB DDR3 Expansion Modules: 4GB DDR3 Modules Hard Disk Drive 640GB (5400 RPM); Slot 2 has 2GB...
... Layer, (6x), DVD+RW (8x), DVD-RAM (5x) Display System Type: 16:9 TFT Active Matrix colour LCD display with Intel® HyperThreading Technology and Enhanced Intel® SpeedStep® Technology Operating System Genuine Windows® 7 Home Premium Key Features Toshiba Face Recognition Toshiba Media Controller Toshiba Bulletin Board Toshiba Reel Time Bluetooth Memory Standard Memory: 2GB +2GB DDR3 (1333 MHz) Maximum Memory: 8GB DDR3 Expansion Modules: 4GB DDR3 Modules Hard Disk Drive 640GB (5400 RPM); Slot 2 has 2GB...

