
Users Manual Canada; English
Page 3
...6-9 Starting the computer by password 6-10 Power-up modes 6-10 Panel power on/off 6-11 User's Manual iii Right side 2-4 Back 2-5 Underside 2-6 Front with the display open 2-7 Indicators 2-9 Optical disc drives 2-10 AC adaptor 2-11 Chapter 3 Hardware, Utilities and Options Hardware 3-1 Special features 3-6 Utilities and Applications 3-8 Optional devices 3-11 Optional accessories 3-24 Chapter 4 Operating Basics Using the Touch Pad 4-1 Web Camera 4-2 Using the TOSHIBA Face Recognition 4-3 Using optical disc drives 4-6 Writing CD/DVDs 4-10 TOSHIBA VIDEO PLAYER 4-16 Media...
...6-9 Starting the computer by password 6-10 Power-up modes 6-10 Panel power on/off 6-11 User's Manual iii Right side 2-4 Back 2-5 Underside 2-6 Front with the display open 2-7 Indicators 2-9 Optical disc drives 2-10 AC adaptor 2-11 Chapter 3 Hardware, Utilities and Options Hardware 3-1 Special features 3-6 Utilities and Applications 3-8 Optional devices 3-11 Optional accessories 3-24 Chapter 4 Operating Basics Using the Touch Pad 4-1 Web Camera 4-2 Using the TOSHIBA Face Recognition 4-3 Using optical disc drives 4-6 Writing CD/DVDs 4-10 TOSHIBA VIDEO PLAYER 4-16 Media...
Users Manual Canada; English
Page 4
... monitor port pin assignment A-2 Appendix B Display Controller and Video mode Display controller B-1 Video mode B-1 Appendix C Information for Wireless Devices Wireless LAN Interoperability C-1 Bluetooth wireless technology Interoperability C-1 CAUTION about Wireless Devices C-2 Wireless Devices and your health C-2 Radio Regulatory Information C-3 Radio approvals for wireless devices C-8 Appendix D AC Power Cord and Connectors Certification agencies D-1 Appendix E Legal Footnotes Non-applicable Icons E-1 CPU E-1 Memory (Main System E-2 Battery Life E-3 Hard Disk Drive (HDD...
... monitor port pin assignment A-2 Appendix B Display Controller and Video mode Display controller B-1 Video mode B-1 Appendix C Information for Wireless Devices Wireless LAN Interoperability C-1 Bluetooth wireless technology Interoperability C-1 CAUTION about Wireless Devices C-2 Wireless Devices and your health C-2 Radio Regulatory Information C-3 Radio approvals for wireless devices C-8 Appendix D AC Power Cord and Connectors Certification agencies D-1 Appendix E Legal Footnotes Non-applicable Icons E-1 CPU E-1 Memory (Main System E-2 Battery Life E-3 Hard Disk Drive (HDD...

Users Manual Canada; English
Page 13
... also defined in the Glossary. Acronyms are a new user of this manual by -step instructions on setting up and begin using optional devices and troubleshooting. Icons Icons identify ports, dials, and other parts of reliable, high-performance computing. Preface Congratulations on configuring your computer, basic operations and care, using your computer. Read Chapter 3, Hardware, Utilities and Options if connecting optional products or external devices. It also provides detailed information on your...
... also defined in the Glossary. Acronyms are a new user of this manual by -step instructions on setting up and begin using optional devices and troubleshooting. Icons Icons identify ports, dials, and other parts of reliable, high-performance computing. Preface Congratulations on configuring your computer, basic operations and care, using your computer. Read Chapter 3, Hardware, Utilities and Options if connecting optional products or external devices. It also provides detailed information on your...
Users Manual Canada; English
Page 19
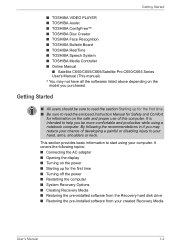
... Recovery Options ■ Creating Recovery Media ■ Restoring the pre-installed software from the Recovery hard disk drive ■ Restoring the pre-installed software from your hand, arms, shoulders or neck. Getting Started ■ TOSHIBA VIDEO PLAYER ■ TOSHIBA Assist ■ TOSHIBA ConfigFree™ ■ TOSHIBA Disc Creator ■ TOSHIBA Face Recognition ■ TOSHIBA Bulletin Board ■ TOSHIBA ReelTime ■ TOSHIBA Speech System ■ TOSHIBA Media Controller ■ Online Manual ■ Satellite C650/C655/C665/Satellite Pro C650/C665 Series User's Manual...
... Recovery Options ■ Creating Recovery Media ■ Restoring the pre-installed software from the Recovery hard disk drive ■ Restoring the pre-installed software from your hand, arms, shoulders or neck. Getting Started ■ TOSHIBA VIDEO PLAYER ■ TOSHIBA Assist ■ TOSHIBA ConfigFree™ ■ TOSHIBA Disc Creator ■ TOSHIBA Face Recognition ■ TOSHIBA Bulletin Board ■ TOSHIBA ReelTime ■ TOSHIBA Speech System ■ TOSHIBA Media Controller ■ Online Manual ■ Satellite C650/C655/C665/Satellite Pro C650/C665 Series User's Manual...
Users Manual Canada; English
Page 25
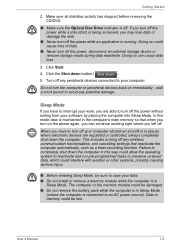
.... 3. When you left off any peripheral devices connected to interrupt your software by placing the computer into Sleep Mode. Getting Started 2. Make sure all disk/disc activity has stopped before removing the CD/DVD. ■ Make sure the Optical Disc Drive indicator is connected to avoid any wireless communication functionalities, and cancelling settings that when you turn on immediately - In this way could allow the operating system to reactivate and run pre...
.... 3. When you left off any peripheral devices connected to interrupt your software by placing the computer into Sleep Mode. Getting Started 2. Make sure all disk/disc activity has stopped before removing the CD/DVD. ■ Make sure the Optical Disc Drive indicator is connected to avoid any wireless communication functionalities, and cancelling settings that when you turn on immediately - In this way could allow the operating system to reactivate and run pre...
Users Manual Canada; English
Page 27
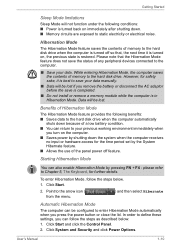
... also enable Hibernation Mode by the System Hibernate feature. ■ Allows the use of memory to the hard disk drive when the computer is restored. To enter Hibernation Mode, follow the steps as described below . 1. Click Start and click the Control Panel. 2. please refer to Chapter 5, The Keyboard, for the time period set by pressing FN + F4 - Data will be lost . Getting Started Sleep Mode limitations Sleep Mode will not function...
... also enable Hibernation Mode by the System Hibernate feature. ■ Allows the use of memory to the hard disk drive when the computer is restored. To enter Hibernation Mode, follow the steps as described below . 1. Click Start and click the Control Panel. 2. please refer to Chapter 5, The Keyboard, for the time period set by pressing FN + F4 - Data will be lost . Getting Started Sleep Mode limitations Sleep Mode will not function...
Users Manual Canada; English
Page 29
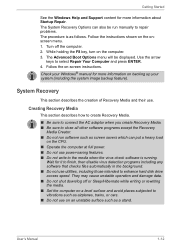
... displayed. User's Manual 1-12 Getting Started See the Windows Help and Support content for more information on backing up your Windows® manual for it to finish, then disable virus detection programs including any software that checks files automatically in the background. ■ Do not use utilities, including those intended to enhance hard disk drive access speed. The System Recovery Options can put a heavy load on the CPU. ■ Operate...
... displayed. User's Manual 1-12 Getting Started See the Windows Help and Support content for more information on backing up your Windows® manual for it to finish, then disable virus detection programs including any software that checks files automatically in the background. ■ Do not use utilities, including those intended to enhance hard disk drive access speed. The System Recovery Options can put a heavy load on the CPU. ■ Operate...
Users Manual Canada; English
Page 66
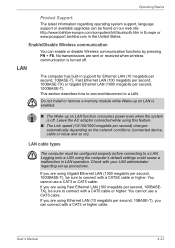
... regarding operating system support, language support or available upgrades can enable or disable Wireless communication functions by pressing FN + F8. Leave the AC adaptor connected while using the computer's default settings could cause a malfunction in support for Ethernet LAN (10 megabits per second, 10BASE-T), Fast Ethernet LAN (100 megabits per second, 100BASE-TX) or Gigabit Ethernet LAN (1000 megabits per second) changes automatically depending on the network conditions (connected device, cable...
... regarding operating system support, language support or available upgrades can enable or disable Wireless communication functions by pressing FN + F8. Leave the AC adaptor connected while using the computer's default settings could cause a malfunction in support for Ethernet LAN (10 megabits per second, 10BASE-T), Fast Ethernet LAN (100 megabits per second, 100BASE-TX) or Gigabit Ethernet LAN (1000 megabits per second) changes automatically depending on the network conditions (connected device, cable...
Users Manual Canada; English
Page 71
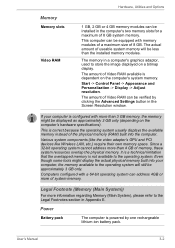
The amount of the physical memory (RAM) built into your computer is powered by clicking the Advanced Settings button in the Screen Resolution window. Even though some tools might be displayed as approximately 3 GB only (depending on the computer's hardware specifications). User's Manual 3-2 This is correct because the operating system usually displays the available memory instead of Video RAM available is not available to the Legal Footnotes section...
The amount of the physical memory (RAM) built into your computer is powered by clicking the Advanced Settings button in the Screen Resolution window. Even though some tools might be displayed as approximately 3 GB only (depending on the computer's hardware specifications). User's Manual 3-2 This is correct because the operating system usually displays the available memory instead of Video RAM available is not available to the Legal Footnotes section...
Users Manual Canada; English
Page 85
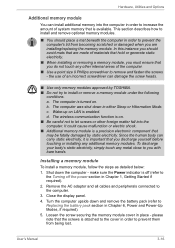
... cables and peripherals connected to you discharge yourself before touching or installing any other foreign matter fall into the computer in order to Replacing the battery pack section in Chapter 1, Getting Started if required). 2. make sure the Power indicator is a precision electronic component that you with bare hands. In this instance you do not touch any additional memory modules. Turn the computer upside down and remove...
... cables and peripherals connected to you discharge yourself before touching or installing any other foreign matter fall into the computer in order to Replacing the battery pack section in Chapter 1, Getting Started if required). 2. make sure the Power indicator is a precision electronic component that you with bare hands. In this instance you do not touch any additional memory modules. Turn the computer upside down and remove...
Users Manual Canada; English
Page 88
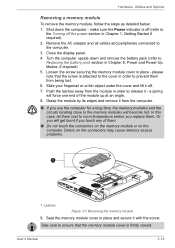
.... make sure the Power indicator is firmly closed. please note that the memory module cover is off . 7. Latches Figure 3-7 Removing the memory module 9. Hardware, Utilities and Options Removing a memory module To remove the memory module, follow the steps as detailed below: 1. Close the display panel. 4. In this case, let them cool to the computer. 3. Slide your fingernail or a thin object under the cover and lift it from the module in order to the Turning...
.... make sure the Power indicator is firmly closed. please note that the memory module cover is off . 7. Latches Figure 3-7 Removing the memory module 9. Hardware, Utilities and Options Removing a memory module To remove the memory module, follow the steps as detailed below: 1. Close the display panel. 4. In this case, let them cool to the computer. 3. Slide your fingernail or a thin object under the cover and lift it from the module in order to the Turning...
Users Manual Canada; English
Page 95
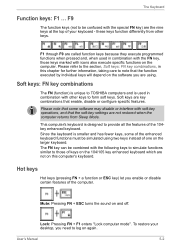
... of one on and off. User's Manual 5-2 F9 The function keys (not to be confused with other keys. Since the keyboard is unique to the section, Soft keys: FN key combinations, in combination with the special FN key) are not restored when the computer returns from other keys to note that enable, disable or configure specific features. The FN key can be simulated using . these keys function differently from Sleep Mode.
... of one on and off. User's Manual 5-2 F9 The function keys (not to be confused with other keys. Since the keyboard is unique to the section, Soft keys: FN key combinations, in combination with the special FN key) are not restored when the computer returns from other keys to note that enable, disable or configure specific features. The FN key can be simulated using . these keys function differently from Sleep Mode.
Users Manual Canada; English
Page 102
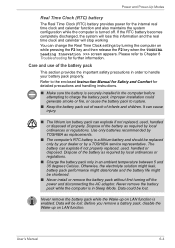
... batteries recommended by TOSHIBA as required by turning the computer on LAN function. User's Manual 6-4 Never remove the battery pack while the Wake-up on while pressing the F2 key and then release the F2 key when the TOSHIBA Leading Innovation >>> screen appears. The battery can explode if not replaced, used , handled or disposed. Dispose of the battery pack This section provides the important safety precautions in Sleep Mode...
... batteries recommended by TOSHIBA as required by turning the computer on LAN function. User's Manual 6-4 Never remove the battery pack while the Wake-up on while pressing the F2 key and then release the F2 key when the TOSHIBA Leading Innovation >>> screen appears. The battery can explode if not replaced, used , handled or disposed. Dispose of the battery pack This section provides the important safety precautions in Sleep Mode...
Users Manual Canada; English
Page 110
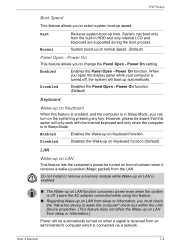
HW Setup window The HW Setup window contains a number of tabs (General, Password, Display,Boot Setting, Keyboard, LAN, SATA and USB) to allow specific functions of the computer to configure your changes without accepting your changes and closes the HW Setup window. User's Manual 7-1 OK Accepts your changes. Accessing HW Setup To run the HW Setup program, click Start -> All Programs -> TOSHIBA -> Utilities -> HWSETUP. In addition there are also three buttons: OK, Cancel and Apply. Cancel Closes the window without closing...
HW Setup window The HW Setup window contains a number of tabs (General, Password, Display,Boot Setting, Keyboard, LAN, SATA and USB) to allow specific functions of the computer to configure your changes without accepting your changes and closes the HW Setup window. User's Manual 7-1 OK Accepts your changes. Accessing HW Setup To run the HW Setup program, click Start -> All Programs -> TOSHIBA -> Utilities -> HWSETUP. In addition there are also three buttons: OK, Cancel and Apply. Cancel Closes the window without closing...
Users Manual Canada; English
Page 113
... you open the display panel while your computer is enabled. ■ The Wake-up on Keyboard function. Disabled Disables the Panel Open - Do not install or remove a memory module while Wake-up on LAN is turned off . However, please be turned on LAN from the LAN. Enabled Enables the Wake-up packet (Magic packet) from sleep or hibernation, you to change the Panel Open - Leave the AC adaptor connected while using this option will only work with the internal keyboard and...
... you open the display panel while your computer is enabled. ■ The Wake-up on Keyboard function. Disabled Disables the Panel Open - Do not install or remove a memory module while Wake-up on LAN is turned off . However, please be turned on LAN from the LAN. Enabled Enables the Wake-up packet (Magic packet) from sleep or hibernation, you to change the Panel Open - Leave the AC adaptor connected while using this option will only work with the internal keyboard and...
Users Manual Canada; English
Page 116
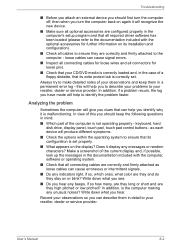
... external device you should keep them in detail to your observations and keep the following questions in the case of a floppy diskette, that can help you to describe your problems to your reseller, dealer or service provider. Always try to identify the problem faster. In addition, is malfunctioning. keyboard, hard disk drive, display panel, touch pad, touch pad control buttons - In view of this will help to make...
... external device you should keep them in detail to your observations and keep the following questions in the case of a floppy diskette, that can help you to describe your problems to your reseller, dealer or service provider. Always try to identify the problem faster. In addition, is malfunctioning. keyboard, hard disk drive, display panel, touch pad, touch pad control buttons - In view of this will help to make...
Users Manual Canada; English
Page 129
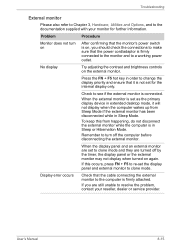
... a working power outlet. Display error occurs Check that the power cord/adaptor is in order to change the display priority and ensure that the monitor's power switch is on, you are set for further information. User's Manual 8-15 When the external monitor is firmly attached. If this from Sleep Mode if the external monitor has been disconnected while in extended desktop mode, it is connected. Troubleshooting External monitor Please also refer to Chapter 3, Hardware, Utilities and Options, and...
... a working power outlet. Display error occurs Check that the power cord/adaptor is in order to change the display priority and ensure that the monitor's power switch is on, you are set for further information. User's Manual 8-15 When the external monitor is firmly attached. If this from Sleep Mode if the external monitor has been disconnected while in extended desktop mode, it is connected. Troubleshooting External monitor Please also refer to Chapter 3, Hardware, Utilities and Options, and...
Users Manual Canada; English
Page 151
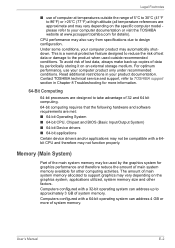
... not function properly. For optimum performance, use of system memory. Computers configured with a 64-bit operating system can address up copies of data by the graphics system for graphics performance and therefore reduce the amount of the main system memory may vary depending on the specific computer model please refer to design configuration. User's Manual E-2 Memory (Main System) Part of main system memory available...
... not function properly. For optimum performance, use of system memory. Computers configured with a 64-bit operating system can address up copies of data by the graphics system for graphics performance and therefore reduce the amount of the main system memory may vary depending on the specific computer model please refer to design configuration. User's Manual E-2 Memory (Main System) Part of main system memory available...
Users Manual Canada; English
Page 157
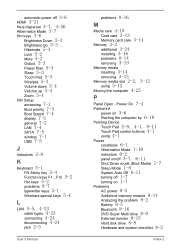
...keys 5-1 Windows special keys 5-4 L LAN 3-5, 4-23 cable types 4-23 connecting 4-24 disconnecting 4-24 jack 2-3 User's Manual problems 8-16 M Media care 4-18 Card care 3-13 Memory card care 3-14 Memory 3-2 additional 3-24 installing 3-16 problems 8-14 removing 3-19 Memory media inserting 3-14 removing 3-15 Memory media slot 2-2, 3-12 using 4-1 Power conditions 6-1 Hibernation Mode 1-10 indicators 6-2 panel on 1-7 Problems AC power 8-5 Additional memory module 8-14 Analyzing the problem 8-2 Battery 8-5 Bluetooth 8-16 DVD Super Multi drive 8-9 External monitor 8-15 Hard disk drive 8-8 Hardware...
...keys 5-1 Windows special keys 5-4 L LAN 3-5, 4-23 cable types 4-23 connecting 4-24 disconnecting 4-24 jack 2-3 User's Manual problems 8-16 M Media care 4-18 Card care 3-13 Memory card care 3-14 Memory 3-2 additional 3-24 installing 3-16 problems 8-14 removing 3-19 Memory media inserting 3-14 removing 3-15 Memory media slot 2-2, 3-12 using 4-1 Power conditions 6-1 Hibernation Mode 1-10 indicators 6-2 panel on 1-7 Problems AC power 8-5 Additional memory module 8-14 Analyzing the problem 8-2 Battery 8-5 Bluetooth 8-16 DVD Super Multi drive 8-9 External monitor 8-15 Hard disk drive 8-8 Hardware...
Detailed Specs for Satellite C650 PSC2EC-01W001 English
Page 1
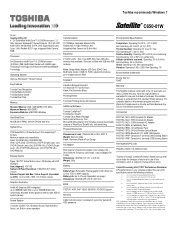
... Device Touchpad Pointing device with Gesture Additional Software Warranty This Satellite notebook comes with Intel® HyperThreading Technology and Enhanced Intel® SpeedStep® Technology Operating System Genuine Windows® 7 Home Premium Key Features Toshiba Face Recognition Toshiba Media Controller Toshiba Bulletin Board Toshiba Reel Time Memory Standard Memory: 2GB +2GB DDR3 (1333 MHz) Maximum Memory: 8GB DDR3 Expansion Modules: 4GB DDR3 Modules Hard Disk Drive 640GB (5400 RPM); Serial-ATA hard disk drive Optical Drive DVD SuperMulti (+/-R double layer) drive supporting...
... Device Touchpad Pointing device with Gesture Additional Software Warranty This Satellite notebook comes with Intel® HyperThreading Technology and Enhanced Intel® SpeedStep® Technology Operating System Genuine Windows® 7 Home Premium Key Features Toshiba Face Recognition Toshiba Media Controller Toshiba Bulletin Board Toshiba Reel Time Memory Standard Memory: 2GB +2GB DDR3 (1333 MHz) Maximum Memory: 8GB DDR3 Expansion Modules: 4GB DDR3 Modules Hard Disk Drive 640GB (5400 RPM); Serial-ATA hard disk drive Optical Drive DVD SuperMulti (+/-R double layer) drive supporting...

