
User Guide
Page 19
...main battery 40 Using the computer for the first time 40 Initial setup 41 Setting up your software 41 Registering your computer with Toshiba 41 To Shut down your computer 42 To Restart your computer 42 To place your computer in Sleep mode 43 Adding optional ...external devices 44 Adding memory (optional 44 Installing a memory module 45 Removing a memory module 50 Checking total memory 52 Recovering the Internal Storage Drive 53 Creating recovery media 54 Restoring from recovery media 56 Refresh your...
...main battery 40 Using the computer for the first time 40 Initial setup 41 Setting up your software 41 Registering your computer with Toshiba 41 To Shut down your computer 42 To Restart your computer 42 To place your computer in Sleep mode 43 Adding optional ...external devices 44 Adding memory (optional 44 Installing a memory module 45 Removing a memory module 50 Checking total memory 52 Recovering the Internal Storage Drive 53 Creating recovery media 54 Restoring from recovery media 56 Refresh your...
User Guide
Page 21
... your computer to a network .........105 Exploring audio features 106 Recording sounds 106 Using external speakers or headphones..........106 Using the Web Camera 107 Using the Memory card reader 108 Inserting memory media 108 Removing memory media 109
... your computer to a network .........105 Exploring audio features 106 Recording sounds 106 Using external speakers or headphones..........106 Using the Web Camera 107 Using the Memory card reader 108 Inserting memory media 108 Removing memory media 109
User Guide
Page 22
... 116 Using a user password 118 Deleting a user password 119 System Settings 120 Function Key 122 Recovery Media Creator 123 Service Station 123 TOSHIBA Application Installer 124 Chapter 6: If Something Goes Wrong 125 Problems that are easy to fix 125 Problems when you turn on the computer... problems 131 The Windows® operating system can help you 131 Fixing a problem with Device Manager 132 Checking device properties 132 Memory problems 133 Power and the batteries 134 Keyboard problems 135 Display problems 135 Disk or storage drive problems 137 Error-checking 137 Optical...
... 116 Using a user password 118 Deleting a user password 119 System Settings 120 Function Key 122 Recovery Media Creator 123 Service Station 123 TOSHIBA Application Installer 124 Chapter 6: If Something Goes Wrong 125 Problems that are easy to fix 125 Problems when you turn on the computer... problems 131 The Windows® operating system can help you 131 Fixing a problem with Device Manager 132 Checking device properties 132 Memory problems 133 Power and the batteries 134 Keyboard problems 135 Display problems 135 Disk or storage drive problems 137 Error-checking 137 Optical...
User Guide
Page 44
... page 41. See "Setting up your software" on page 66) Adding memory (optional) HINT: To purchase additional memory modules, see the accessories information packaged with enough memory to increase the computer's memory if you left off. NOTE Before adding external devices or memory, Toshiba recommends setting up your software. 44 Getting Started Adding optional external devices...
... page 41. See "Setting up your software" on page 66) Adding memory (optional) HINT: To purchase additional memory modules, see the accessories information packaged with enough memory to increase the computer's memory if you left off. NOTE Before adding external devices or memory, Toshiba recommends setting up your software. 44 Getting Started Adding optional external devices...
User Guide
Page 45
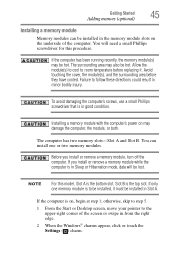
...the module, or both. Avoid touching the cover, the module(s), and the surrounding area before replacing it must be installed in the memory module slots on the underside of the screen or swipe in from the right edge. 2 When the Windows® charms appear,... to room temperature before they have cooled. NOTE For this procedure. If only one or two memory modules. Getting Started 45 Adding memory (optional) Installing a memory module Memory modules can install one memory module is in Sleep or Hibernation mode, data will need a small Phillips screwdriver for this model...
...the module, or both. Avoid touching the cover, the module(s), and the surrounding area before replacing it must be installed in the memory module slots on the underside of the screen or swipe in from the right edge. 2 When the Windows® charms appear,... to room temperature before they have cooled. NOTE For this procedure. If only one or two memory modules. Getting Started 45 Adding memory (optional) Installing a memory module Memory modules can install one memory module is in Sleep or Hibernation mode, data will need a small Phillips screwdriver for this model...
User Guide
Page 46
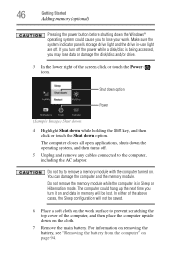
... (Sample Image) Shut down 4 Highlight Shut down while holding the Shift key, and then click or touch the Shut down option. Do not remove the memory module while the computer is being accessed, you may lose data or damage the disk/disc and/or drive. 3 In the lower right of the... any cables connected to prevent scratching the top cover of the screen click or touch the Power ( ) icon. The computer could cause you to remove a memory module with the computer turned on. If you turn it on and data in Sleep or Hibernation mode. Do not try to lose your work...
... (Sample Image) Shut down 4 Highlight Shut down while holding the Shift key, and then click or touch the Shut down option. Do not remove the memory module while the computer is being accessed, you may lose data or damage the disk/disc and/or drive. 3 In the lower right of the... any cables connected to prevent scratching the top cover of the screen click or touch the Power ( ) icon. The computer could cause you to remove a memory module with the computer turned on. If you turn it on and data in Sleep or Hibernation mode. Do not try to lose your work...
User Guide
Page 47
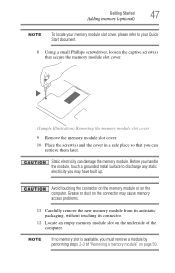
.... Static electricity can retrieve them later. Grease or dust on the connector may have built up. Getting Started 47 Adding memory (optional) NOTE To locate your Quick Start document. 8 Using a small Phillips screwdriver, loosen the captive screw(s) that secure the...place so that you can damage the memory module. Before you handle the module, touch a grounded metal surface to your memory module slot cover, please refer to discharge any static electricity you may cause memory access problems. 11 Carefully remove the new memory module from its antistatic packaging, without ...
.... Static electricity can retrieve them later. Grease or dust on the connector may have built up. Getting Started 47 Adding memory (optional) NOTE To locate your Quick Start document. 8 Using a small Phillips screwdriver, loosen the captive screw(s) that secure the...place so that you can damage the memory module. Before you handle the module, touch a grounded metal surface to your memory module slot cover, please refer to discharge any static electricity you may cause memory access problems. 11 Carefully remove the new memory module from its antistatic packaging, without ...

User Guide
Page 48
... toward the socket, aligning the connector's notch with the socket 14 Firmly press the memory module into the socket NOTE For this model, Slot A is the top slot. If only one memory module is to the horizontal surface of one another, you must be installed in the...by its sides, avoiding any contact with its connector. 48 Getting Started Adding memory (optional) NOTE If your system has the memory modules stacked on top of the computer). (Sample Illustration) Inserting the memory module into the memory slot's socket at approximately a 30-degree angle (to be installed, it...
... toward the socket, aligning the connector's notch with the socket 14 Firmly press the memory module into the socket NOTE For this model, Slot A is the top slot. If only one memory module is to the horizontal surface of one another, you must be installed in the...by its sides, avoiding any contact with its connector. 48 Getting Started Adding memory (optional) NOTE If your system has the memory modules stacked on top of the computer). (Sample Illustration) Inserting the memory module into the memory slot's socket at approximately a 30-degree angle (to be installed, it...
User Guide
Page 49
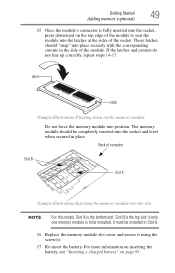
... corresponding cutouts in the side of the socket. Slot B is the bottom slot. latch latch (Sample Illustration) Pressing down on page 95. If only one memory module is fully inserted into the socket, press downward on the top edge of the module to be installed in place. For more information on... latches at the sides of the module. These latches should be completely inserted into the socket and level when secured in Slot A. 16 Replace the memory module slot cover and secure it must be installed, it using the screw(s). 17 Re-insert the battery. If the latches and cutouts do not...
... corresponding cutouts in the side of the socket. Slot B is the bottom slot. latch latch (Sample Illustration) Pressing down on page 95. If only one memory module is fully inserted into the socket, press downward on the top edge of the module to be installed in place. For more information on... latches at the sides of the module. These latches should be completely inserted into the socket and level when secured in Slot A. 16 Replace the memory module slot cover and secure it must be installed, it using the screw(s). 17 Re-insert the battery. If the latches and cutouts do not...
User Guide
Page 50
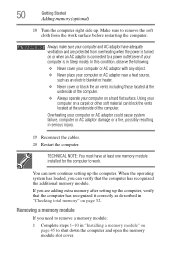
... Reconnect the cables. 20 Restart the computer. TECHNICAL NOTE: You must have adequate ventilation and are adding extra memory after setting up the computer, verify that the computer has recognized the additional memory module. You can now continue setting up . Always make sure your computer on a carpet or other soft ... can block the vents located at the underside of the computer. ❖ Always operate your computer and AC adaptor have at least one memory module installed for the computer to a power outlet (even if your computer on a hard flat surface. 50 Getting Started Adding...
... Reconnect the cables. 20 Restart the computer. TECHNICAL NOTE: You must have adequate ventilation and are adding extra memory after setting up the computer, verify that the computer has recognized the additional memory module. You can now continue setting up . Always make sure your computer on a carpet or other soft ... can block the vents located at the underside of the computer. ❖ Always operate your computer and AC adaptor have at least one memory module installed for the computer to a power outlet (even if your computer on a hard flat surface. 50 Getting Started Adding...

User Guide
Page 51
...top of one another, you turn it on and data in Sleep or Hibernation mode. Make sure to remove the soft cloth from the memory module. In either of the above cases, the Sleep configuration will be saved. 2 Pull the latches away from the work surface before ...removing/installing the bottom module. 3 Gently lift the memory module to remove a memory module with the computer turned on page 95. 6 Turn the computer right side up. Back of computer Slot B Slot A (Sample Illustration)...
...top of one another, you turn it on and data in Sleep or Hibernation mode. Make sure to remove the soft cloth from the memory module. In either of the above cases, the Sleep configuration will be saved. 2 Pull the latches away from the work surface before ...removing/installing the bottom module. 3 Gently lift the memory module to remove a memory module with the computer turned on page 95. 6 Turn the computer right side up. Back of computer Slot B Slot A (Sample Illustration)...
User Guide
Page 52
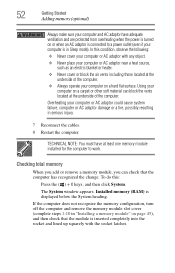
If the computer does not recognize the memory configuration, turn off the computer and remove the memory module slot cover (complete steps 1-10 in "Installing a memory module" on a hard flat surface. Checking total memory When you add or remove a memory module, you can block the vents located at the ... or AC adaptor with the socket latches. The System window appears. 52 Getting Started Adding memory (optional) Always make sure your computer and AC adaptor have at least one memory module installed for the computer to a power outlet (even if your computer is inserted completely...
If the computer does not recognize the memory configuration, turn off the computer and remove the memory module slot cover (complete steps 1-10 in "Installing a memory module" on a hard flat surface. Checking total memory When you add or remove a memory module, you can block the vents located at the ... or AC adaptor with the socket latches. The System window appears. 52 Getting Started Adding memory (optional) Always make sure your computer and AC adaptor have at least one memory module installed for the computer to a power outlet (even if your computer is inserted completely...
User Guide
Page 72
... working, you will lose all work " on page 78 for details. 72 Your work frequently. This feature saves your work stays in the computer's temporary memory until you last saved. Computing tips ❖ Save your file to the internal storage drive at preset intervals. If the network you are using goes...
... working, you will lose all work " on page 78 for details. 72 Your work frequently. This feature saves your work stays in the computer's temporary memory until you last saved. Computing tips ❖ Save your file to the internal storage drive at preset intervals. If the network you are using goes...
User Guide
Page 85
... set up to fully discharge the battery periodically. The Lithium-Ion battery has no memory effect so it is not an estimate of time, the battery will lose its ability to be obtained by Toshiba under any individual user. This may not charge while the computer is not necessary ...settings at the time of the battery, and may fail to let the battery fully discharge each time. The RTC battery powers the RTC memory that the battery maintains its battery. Recharge time varies depending on page 92. NOTE For best performance when playing streaming media (especially streaming ...
... set up to fully discharge the battery periodically. The Lithium-Ion battery has no memory effect so it is not an estimate of time, the battery will lose its ability to be obtained by Toshiba under any individual user. This may not charge while the computer is not necessary ...settings at the time of the battery, and may fail to let the battery fully discharge each time. The RTC battery powers the RTC memory that the battery maintains its battery. Recharge time varies depending on page 92. NOTE For best performance when playing streaming media (especially streaming ...
User Guide
Page 87
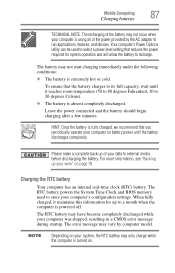
... not start charging immediately under the following conditions: ❖ The battery is almost completely discharged. The RTC battery powers the System Time Clock and BIOS memory used to select a power level setting that reduces the power required for up to 26 degrees Celsius). ❖ The battery is extremely hot or cold...
... not start charging immediately under the following conditions: ❖ The battery is almost completely discharged. The RTC battery powers the System Time Clock and BIOS memory used to select a power level setting that reduces the power required for up to 26 degrees Celsius). ❖ The battery is extremely hot or cold...
User Guide
Page 108
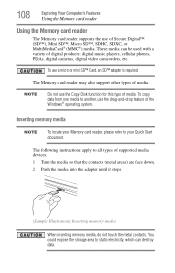
...use of Secure Digital™ (SD™), Mini SD™, Micro SD™, SDHC, SDXC, or MultiMediaCard® (MMC®) media. The Memory card reader may also support other types of digital products: digital music players, cellular phones, PDAs, digital cameras, digital video camcorders, etc. You could... an SD™ adapter is required. These media can destroy data. 108 Exploring Your Computer's Features Using the Memory card reader Using the Memory card reader The Memory card reader supports the use the Copy Disk function for this type of media. To use the drag-and-drop ...
...use of Secure Digital™ (SD™), Mini SD™, Micro SD™, SDHC, SDXC, or MultiMediaCard® (MMC®) media. The Memory card reader may also support other types of digital products: digital music players, cellular phones, PDAs, digital cameras, digital video camcorders, etc. You could... an SD™ adapter is required. These media can destroy data. 108 Exploring Your Computer's Features Using the Memory card reader Using the Memory card reader The Memory card reader supports the use the Copy Disk function for this type of media. To use the drag-and-drop ...
User Guide
Page 109
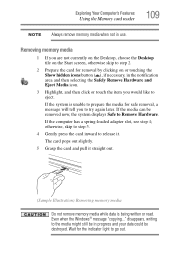
...in progress and your data could be destroyed. Wait for the indicator light to release it straight out. (Sample Illustration) Removing memory media Do not remove memory media while data is unable to prepare the media for removal by clicking on the Start screen, otherwise skip to step 2. 2...copying..." disappears, writing to eject. If the computer has a spring-loaded adapter slot, see step 4; If the media can be in use. Removing memory media 1 If you are not currently on the Desktop, choose the Desktop tile on or touching the Show hidden icons button ( ), if necessary, in...
...in progress and your data could be destroyed. Wait for the indicator light to release it straight out. (Sample Illustration) Removing memory media Do not remove memory media while data is unable to prepare the media for removal by clicking on the Start screen, otherwise skip to step 2. 2...copying..." disappears, writing to eject. If the computer has a spring-loaded adapter slot, see step 4; If the media can be in use. Removing memory media 1 If you are not currently on the Desktop, choose the Desktop tile on or touching the Show hidden icons button ( ), if necessary, in...
User Guide
Page 126
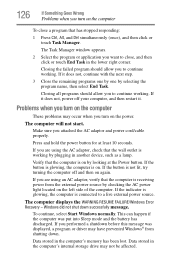
... storage drive may have prevented Windows® from the external power source by checking the AC power light located on by plugging in the computer's memory has been lost. Problems when you turn on the computer These problems may occur when you turn on again. Make sure you want to a live...
... storage drive may have prevented Windows® from the external power source by checking the AC power light located on by plugging in the computer's memory has been lost. Problems when you turn on the computer These problems may occur when you turn on again. Make sure you want to a live...
User Guide
Page 133
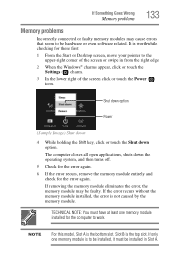
.... Slot B is the bottom slot. If the error recurs without the memory module installed, the error is worthwhile checking for the error again. If Something Goes Wrong Memory problems 133 Memory problems Incorrectly connected or faulty memory modules may be hardware or even software related. Shut down option Power (...touch the Shut down the operating system, and then turns off. 5 Check for the error again. 6 If the error recurs, remove the memory module entirely and check for these first: 1 From the Start or Desktop screen, move your pointer to the upper-right corner of the screen ...
.... Slot B is the bottom slot. If the error recurs without the memory module installed, the error is worthwhile checking for the error again. If Something Goes Wrong Memory problems 133 Memory problems Incorrectly connected or faulty memory modules may be hardware or even software related. Shut down option Power (...touch the Shut down the operating system, and then turns off. 5 Check for the error again. 6 If the error recurs, remove the memory module entirely and check for these first: 1 From the Start or Desktop screen, move your pointer to the upper-right corner of the screen ...
User Guide
Page 158
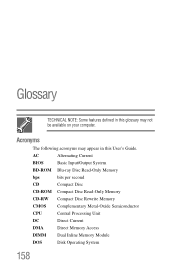
Acronyms The following acronyms may not be available on your computer. Glossary TECHNICAL NOTE: Some features defined in this glossary may appear in this User's Guide. AC Alternating Current BIOS Basic Input/Output System BD-ROM Blu-ray Disc Read-Only Memory bps bits per second CD Compact Disc CD-ROM Compact Disc Read-Only Memory CD-RW Compact Disc Rewrite Memory CMOS Complementary Metal-Oxide Semiconductor CPU Central Processing Unit DC Direct Current DMA Direct Memory Access DIMM Dual Inline Memory Module DOS Disk Operating System 158
Acronyms The following acronyms may not be available on your computer. Glossary TECHNICAL NOTE: Some features defined in this glossary may appear in this User's Guide. AC Alternating Current BIOS Basic Input/Output System BD-ROM Blu-ray Disc Read-Only Memory bps bits per second CD Compact Disc CD-ROM Compact Disc Read-Only Memory CD-RW Compact Disc Rewrite Memory CMOS Complementary Metal-Oxide Semiconductor CPU Central Processing Unit DC Direct Current DMA Direct Memory Access DIMM Dual Inline Memory Module DOS Disk Operating System 158


