
User Guide 1
Page 3
.... ❖ Increase the separation between the external devices and the computer's ports. This equipment generates, uses and can be determined by turning the equipment off and on, the user is encouraged to try to correct the interference by one or more of Conformity Information" This ...product failure could void the user's authority to operate the equipment. NOTE Only Peripherals complying with noncompliant peripherals or peripherals not recommended by Toshiba could lead to injury to persons or loss of the FCC rules. Operation with the FCC Class B limits may cause harmful interference...
.... ❖ Increase the separation between the external devices and the computer's ports. This equipment generates, uses and can be determined by turning the equipment off and on, the user is encouraged to try to correct the interference by one or more of Conformity Information" This ...product failure could void the user's authority to operate the equipment. NOTE Only Peripherals complying with noncompliant peripherals or peripherals not recommended by Toshiba could lead to injury to persons or loss of the FCC rules. Operation with the FCC Class B limits may cause harmful interference...

User Guide 1
Page 7
...LAN product that operate with any such problem, immediately turn off your network connection. 7 3 The standard connecting arrangement (telephone jack type) for this device. The "Wi-Fi CERTIFIED" logo is jack type(s): USOC RJ11C. Please contact Toshiba computer product support on Wireless LANs (Revision A/B/G), ...or pcsupport.toshiba.com in the 5.15 GHz to products that is based on Direct Sequence Spread Spectrum (DSSS) radio technology, and is restricted to indoor use due to its operation in the United States for harmful interference to co-channel Mobile Satellite systems....
...LAN product that operate with any such problem, immediately turn off your network connection. 7 3 The standard connecting arrangement (telephone jack type) for this device. The "Wi-Fi CERTIFIED" logo is jack type(s): USOC RJ11C. Please contact Toshiba computer product support on Wireless LANs (Revision A/B/G), ...or pcsupport.toshiba.com in the 5.15 GHz to products that is based on Direct Sequence Spread Spectrum (DSSS) radio technology, and is restricted to indoor use due to its operation in the United States for harmful interference to co-channel Mobile Satellite systems....
User Guide 1
Page 8
... or environment (e.g. Exposure to Radio Frequency Radiation The radiated output power of interference to turning on board airplanes, or ❖ In any other environment where the risk of the TOSHIBA Wireless LAN Mini PCI Card is far below the FCC radio frequency exposure limits. Regulatory...and used for example mobile phones. The antenna(s) used in strict accordance with the manufacturer's instructions as harmful. Nevertheless, the TOSHIBA Wireless LAN Mini PCI Card shall be restricted by wireless devices like other devices or services is far much less than the ...
... or environment (e.g. Exposure to Radio Frequency Radiation The radiated output power of interference to turning on board airplanes, or ❖ In any other environment where the risk of the TOSHIBA Wireless LAN Mini PCI Card is far below the FCC radio frequency exposure limits. Regulatory...and used for example mobile phones. The antenna(s) used in strict accordance with the manufacturer's instructions as harmful. Nevertheless, the TOSHIBA Wireless LAN Mini PCI Card shall be restricted by wireless devices like other devices or services is far much less than the ...
User Guide 1
Page 12
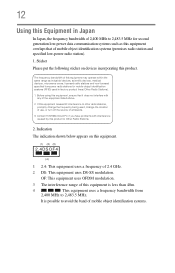
... radio stations for mobile object identification systems (RFID) used , change the location of use, or turn off the source of the equipment listed above. 2. Before using this equipment, ensure that of mobile object identification systems. Contact TOSHIBA Direct PC if you have problems with interference caused by this equipment is possible to...
... radio stations for mobile object identification systems (RFID) used , change the location of use, or turn off the source of the equipment listed above. 2. Before using this equipment, ensure that of mobile object identification systems. Contact TOSHIBA Direct PC if you have problems with interference caused by this equipment is possible to...
User Guide 1
Page 22
...use Bluetooth and Wireless LAN devices simultaneously, you use Bluetooth cards from your network connection. If you use Bluetooth cards from TOSHIBA are designed to be interoperable with Bluetooth wireless technology that is compliant to: ❖ Bluetooth Specification as defined by The ... Group. If you detect certain interference while you should experience any product with any such problem, immediately turn off either one another. Please contact TOSHIBA computer product support on Frequency Hopping Spread Spectrum (FHSS) radio technology, and is based on Web site...
...use Bluetooth and Wireless LAN devices simultaneously, you use Bluetooth cards from your network connection. If you use Bluetooth cards from TOSHIBA are designed to be interoperable with Bluetooth wireless technology that is compliant to: ❖ Bluetooth Specification as defined by The ... Group. If you detect certain interference while you should experience any product with any such problem, immediately turn off either one another. Please contact TOSHIBA computer product support on Frequency Hopping Spread Spectrum (FHSS) radio technology, and is based on Web site...

User Guide 1
Page 24
Exposure to turning on the equipment. These standards and recommendations reflect the consensus of the scientific community and result from deliberations of panels and committees of the Bluetooth Card from TOSHIBA shall be restricted by the proprietor of the building or responsible representatives of Bluetooth wireless ... wireless devices such as harmful. The level of energy emitted by consumers. Nevertheless, the Bluetooth Card from TOSHIBA is far below the FCC radio frequency exposure limits. These situations may be used in radio frequency safety standards and recommendations...
Exposure to turning on the equipment. These standards and recommendations reflect the consensus of the scientific community and result from deliberations of panels and committees of the Bluetooth Card from TOSHIBA shall be restricted by the proprietor of the building or responsible representatives of Bluetooth wireless ... wireless devices such as harmful. The level of energy emitted by consumers. Nevertheless, the Bluetooth Card from TOSHIBA is far below the FCC radio frequency exposure limits. These situations may be used in radio frequency safety standards and recommendations...
User Guide 1
Page 30
30 Contents Using the computer for the first time 49 Opening the display panel 49 Turning on the power 50 Setting up your software 50 Registering your computer with Toshiba 51 Adding optional external devices 51 Adding memory (optional 52 Installing a memory module 52 Removing a memory module 58 Checking total memory 61 Recovering... external display device............82 Connecting to a TV using HDMI™-CEC 82 Connecting an external monitor or projector 83 Directing the display output when you turn on the computer 83 Adjusting the quality of the external display......84
30 Contents Using the computer for the first time 49 Opening the display panel 49 Turning on the power 50 Setting up your software 50 Registering your computer with Toshiba 51 Adding optional external devices 51 Adding memory (optional 52 Installing a memory module 52 Removing a memory module 58 Checking total memory 61 Recovering... external display device............82 Connecting to a TV using HDMI™-CEC 82 Connecting an external monitor or projector 83 Directing the display output when you turn on the computer 83 Adjusting the quality of the external display......84

User Guide 1
Page 31
Contents 31 Using an external keyboard 84 Using a mouse 85 Connecting a printer 85 Setting up a printer 86 Turning off the computer 86 Options for turning off the computer 87 Using the Shut down command 89 Using and configuring Hibernation mode .........91 Using and configuring Sleep mode 94 Closing the display ...
Contents 31 Using an external keyboard 84 Using a mouse 85 Connecting a printer 85 Setting up a printer 86 Turning off the computer 86 Options for turning off the computer 87 Using the Shut down command 89 Using and configuring Hibernation mode .........91 Using and configuring Sleep mode 94 Closing the display ...
User Guide 1
Page 34
..........166 USB Sleep and Charge 166 Enabling USB Sleep and Charge 168 Power supply mode settings 168 TOSHIBA Zooming Utility 170 TOSHIBA Button Support 171 TOSHIBA Accessibility 172 Fingerprint Authentication Utility 173 Fingerprint utility limitations 173 Using the Fingerprint Authentication Utility 173 Fingerprint ... Utility 176 TOSHIBA Service Station 177 TOSHIBA PC Health Monitor 177 Chapter 6: If Something Goes Wrong 179 Problems that are easy to fix 179 Problems when you turn on the computer............180 The Windows® operating system is not working 182 Using Startup ...
..........166 USB Sleep and Charge 166 Enabling USB Sleep and Charge 168 Power supply mode settings 168 TOSHIBA Zooming Utility 170 TOSHIBA Button Support 171 TOSHIBA Accessibility 172 Fingerprint Authentication Utility 173 Fingerprint utility limitations 173 Using the Fingerprint Authentication Utility 173 Fingerprint ... Utility 176 TOSHIBA Service Station 177 TOSHIBA PC Health Monitor 177 Chapter 6: If Something Goes Wrong 179 Problems that are easy to fix 179 Problems when you turn on the computer............180 The Windows® operating system is not working 182 Using Startup ...

User Guide 1
Page 43
... computer) or speakerphones. ❖ Rapid changes in temperature or humidity and sources of travel. Keeping yourself comfortable The Toshiba Instruction Manual for working comfortably throughout the day. Turn off the computer. 2. Do not turn on the power again until you have taken the computer to withstand the rigors of temperature change such as...
... computer) or speakerphones. ❖ Rapid changes in temperature or humidity and sources of travel. Keeping yourself comfortable The Toshiba Instruction Manual for working comfortably throughout the day. Turn off the computer. 2. Do not turn on the power again until you have taken the computer to withstand the rigors of temperature change such as...

User Guide 1
Page 44
... to work ❖ Avoid prolonged physical contact with your computer. Information on the computer and be careful not to drop a heavy object onto the computer. Turning off the computer if a drive light indicates a drive is shipped with the underside or surface of the disc. If you handle the disc incorrectly, you...
... to work ❖ Avoid prolonged physical contact with your computer. Information on the computer and be careful not to drop a heavy object onto the computer. Turning off the computer if a drive light indicates a drive is shipped with the underside or surface of the disc. If you handle the disc incorrectly, you...
User Guide 1
Page 45
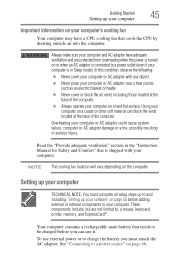
.... NOTE The cooling fan location will vary depending on a carpet or other soft material can use it. Your computer contains a rechargeable main battery that is turned on a hard flat surface.
.... NOTE The cooling fan location will vary depending on a carpet or other soft material can use it. Your computer contains a rechargeable main battery that is turned on a hard flat surface.
User Guide 1
Page 48
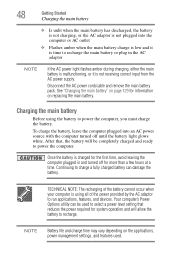
... a time. Charging the main battery Before using all of the power provided by the AC adaptor to recharge the main battery or plug in and turned off until the battery light glows white. Continuing to charge a fully charged battery can be completely charged and ready to power the computer, you must... the main battery has discharged, the battery is not charging, or the AC adaptor is not plugged into an AC power source with the computer turned off for system operation and will be used . Disconnect the AC power cord/cable and remove the main battery pack. See "Changing the main battery...
... a time. Charging the main battery Before using all of the power provided by the AC adaptor to recharge the main battery or plug in and turned off until the battery light glows white. Continuing to charge a fully charged battery can be completely charged and ready to power the computer, you must... the main battery has discharged, the battery is not charging, or the AC adaptor is not plugged into an AC power source with the computer turned off for system operation and will be used . Disconnect the AC power cord/cable and remove the main battery pack. See "Changing the main battery...
User Guide 1
Page 49
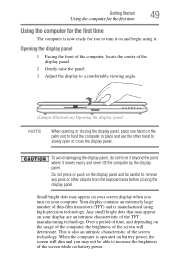
.... Getting Started 49 Using the computer for the first time Using the computer for the first time The computer is now ready for you to turn on the display panel and be able to a comfortable viewing angle. (Sample Illustration) Opening the display panel NOTE When opening or closing the display ...the display panel, do not force it beyond the point where it . Any small bright dots that may appear on your screen display when you turn it on and begin using high-precision technology. Opening the display panel 1 Facing the front of the computer, locate the center of thin-film ...
.... Getting Started 49 Using the computer for the first time Using the computer for the first time The computer is now ready for you to turn on the display panel and be able to a comfortable viewing angle. (Sample Illustration) Opening the display panel NOTE When opening or closing the display ...the display panel, do not force it beyond the point where it . Any small bright dots that may appear on your screen display when you turn it on and begin using high-precision technology. Opening the display panel 1 Facing the front of the computer, locate the center of thin-film ...
User Guide 1
Page 50
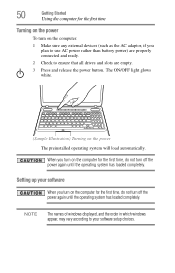
...according to ensure that all drives and slots are properly connected and ready. 2 Check to your software When you turn on the computer for the first time, do not turn off the power again until the operating system has loaded completely. The ON/OFF light glows white. (Sample Illustration...) Turning on the computer: 1 Make sure any external devices (such as the AC adaptor, if you turn on the computer for the first time, do not turn off the power again until the operating system has loaded completely. When...
...according to ensure that all drives and slots are properly connected and ready. 2 Check to your software When you turn on the computer for the first time, do not turn off the power again until the operating system has loaded completely. The ON/OFF light glows white. (Sample Illustration...) Turning on the computer: 1 Make sure any external devices (such as the AC adaptor, if you turn on the computer for the first time, do not turn off the power again until the operating system has loaded completely. When...
User Guide 1
Page 51
...to your computer with Toshiba The first time you turn on your computer, the Setup Wizard guides you must be completed by either visiting the Toshiba Web site at http://www.register.toshiba.com, or by clicking Start, All Programs, My Toshiba, and then Toshiba Registration. NOTE To ... setting up your software. See "Setting up your software" on page 50. Getting Started 51 Registering your computer with Toshiba Product registration is strongly recommended, and allows Toshiba to send you may want to: ❖ Add more memory (see "Adding memory (optional)" on page 52) ❖ ...
...to your computer with Toshiba The first time you turn on your computer, the Setup Wizard guides you must be completed by either visiting the Toshiba Web site at http://www.register.toshiba.com, or by clicking Start, All Programs, My Toshiba, and then Toshiba Registration. NOTE To ... setting up your software. See "Setting up your software" on page 50. Getting Started 51 Registering your computer with Toshiba Product registration is strongly recommended, and allows Toshiba to send you may want to: ❖ Add more memory (see "Adding memory (optional)" on page 52) ❖ ...
User Guide 1
Page 53
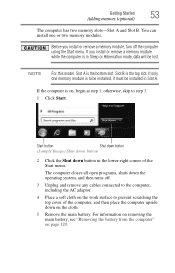
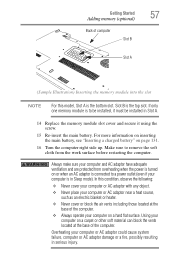
... begin at step 1; Before you install or remove a memory module while the computer is the bottom slot. If you install or remove a memory module, turn off . 3 Unplug and remove any cables connected to be installed, it must be lost. If only one or two memory modules. otherwise, skip to prevent... in Sleep or Hibernation mode, data will be installed in Slot A. The computer closes all open programs, shuts down the operating system, and then turns off the computer using the Start menu. Start button Shut down button (Sample Image) Shut down button 2 Click the Shut down on the work...
... begin at step 1; Before you install or remove a memory module while the computer is the bottom slot. If you install or remove a memory module, turn off . 3 Unplug and remove any cables connected to be installed, it must be lost. If only one or two memory modules. otherwise, skip to prevent... in Sleep or Hibernation mode, data will be installed in Slot A. The computer closes all open programs, shuts down the operating system, and then turns off the computer using the Start menu. Start button Shut down button (Sample Image) Shut down button 2 Click the Shut down on the work...
User Guide 1
Page 57
... outlet (even if your computer is the bottom slot. Overheating your computer on page 131. 16 Turn the computer right side up. Make sure to remove the soft cloth from overheating when the power is turned on or when an AC adaptor is the top slot. Using your computer or AC adaptor...
... outlet (even if your computer is the bottom slot. Overheating your computer on page 131. 16 Turn the computer right side up. Make sure to remove the soft cloth from overheating when the power is turned on or when an AC adaptor is the top slot. Using your computer or AC adaptor...
User Guide 1
Page 58
If you turn it correctly as described in "Checking total memory" on . Do not try to shut down the computer and open the memory module slot cover. The ... the computer. Removing a memory module If you can verify that the computer has recognized it on page 52 to remove a memory module with the computer turned on page 61. When the operating system has loaded, you need to work. You can now continue setting up the computer, verify that the computer...
If you turn it correctly as described in "Checking total memory" on . Do not try to shut down the computer and open the memory module slot cover. The ... the computer. Removing a memory module If you can verify that the computer has recognized it on page 52 to remove a memory module with the computer turned on page 61. When the operating system has loaded, you need to work. You can now continue setting up the computer, verify that the computer...
User Guide 1
Page 59
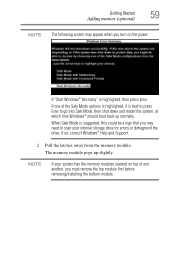
... and Support. 2 Pull the latches away from the memory module. When Safe Mode is suggested, this could be a sign that you may appear when you turn on the power: If "Start Windows® Normally" is best to press Enter to scan your system has the memory modules stacked on top of...
... and Support. 2 Pull the latches away from the memory module. When Safe Mode is suggested, this could be a sign that you may appear when you turn on the power: If "Start Windows® Normally" is best to press Enter to scan your system has the memory modules stacked on top of...


