
Satellite A215-S5807 Detailed Specs
Page 1
... graphics memory Sound • Built-in stereo speakers • Sound Volume Control Dial Input Devices • 86 key US keyboard • TouchPad™ pointing device • TouchPad™ Enable/Disable Communications • Modem9 • 10/100 Ethernet • Integrated Wi-Fi® compliant wireless:10 o TOSHIBA Recovery Disc Creator o TOSHIBA DVD Player o TOSHIBA Extended Tiles for Windows Mobility Center o TOSHIBA Speech System o Hard disc (HDD) recovery • Third-party Software o TOSHIBA Game Console, designed by WildTangent® o Microsoft Works...
... graphics memory Sound • Built-in stereo speakers • Sound Volume Control Dial Input Devices • 86 key US keyboard • TouchPad™ pointing device • TouchPad™ Enable/Disable Communications • Modem9 • 10/100 Ethernet • Integrated Wi-Fi® compliant wireless:10 o TOSHIBA Recovery Disc Creator o TOSHIBA DVD Player o TOSHIBA Extended Tiles for Windows Mobility Center o TOSHIBA Speech System o Hard disc (HDD) recovery • Third-party Software o TOSHIBA Game Console, designed by WildTangent® o Microsoft Works...
Satellite A215-S5807 Detailed Specs
Page 2
..., duration and product availability all the features and specifications listed or illustrated. use of the operating system is subject to stay current with the various computer software or hardware options, visit Toshiba's Web site at high altitude (all program functionality. use of battery power instead of complex modeling software, such as high end computer aided design applications 6. Satellite A215-S5807 BTS Rev. 1.00 2007-11-13 MCL...
..., duration and product availability all the features and specifications listed or illustrated. use of the operating system is subject to stay current with the various computer software or hardware options, visit Toshiba's Web site at high altitude (all program functionality. use of battery power instead of complex modeling software, such as high end computer aided design applications 6. Satellite A215-S5807 BTS Rev. 1.00 2007-11-13 MCL...
Satellite A215-S5807 Detailed Specs
Page 3
... your Toshiba optical drive may charge a fee. Product activation procedures will be less if the product includes one or more pre-installed operating systems, such as applicable, Dedicated Video Memory, System Video Memory and Shared System Memory. Also, you turn on product configuration, vendor components, manufacturing variability and options selected. 12 Battery Life. All Rights reserved. Recording or viewing of certain optical media may be replaced. Over...
... your Toshiba optical drive may charge a fee. Product activation procedures will be less if the product includes one or more pre-installed operating systems, such as applicable, Dedicated Video Memory, System Video Memory and Shared System Memory. Also, you turn on product configuration, vendor components, manufacturing variability and options selected. 12 Battery Life. All Rights reserved. Recording or viewing of certain optical media may be replaced. Over...

Resource Guide for Satellite A210/A215
Page 24
... you install or remove a memory module while the computer is in minor bodily injury. Installing a memory module with the computer's power on the base of the Start menu. You can be hot. 24 Adding memory (optional) Installing a memory module Memory modules can install one or two memory modules. You will be hot. If you install or remove a memory module, turn off the computer. 3 Unplug and remove any cables connected to follow these directions could result in Sleep or Hibernation mode, data will need...
... you install or remove a memory module while the computer is in minor bodily injury. Installing a memory module with the computer's power on the base of the Start menu. You can be hot. 24 Adding memory (optional) Installing a memory module Memory modules can install one or two memory modules. You will be hot. If you install or remove a memory module, turn off the computer. 3 Unplug and remove any cables connected to follow these directions could result in Sleep or Hibernation mode, data will need...

Resource Guide for Satellite A210/A215
Page 25
.... 5 Close the display panel and turn the computer upside down to locate the memory module slot cover. Front of computer (Sample Illustration) Locating the memory module slot cover 6 Using a small Phillips screwdriver, loosen the captive screw that you can retrieve them later. Adding memory (optional) 25 4 Remove the main battery. Memory module slot cover Front of computer (Sample Illustration) Removing the memory module slot cover 7 Remove the memory module slot cover. 8 Place the screw and the cover in a safe place so that secures the memory module slot cover.
.... 5 Close the display panel and turn the computer upside down to locate the memory module slot cover. Front of computer (Sample Illustration) Locating the memory module slot cover 6 Using a small Phillips screwdriver, loosen the captive screw that you can retrieve them later. Adding memory (optional) 25 4 Remove the main battery. Memory module slot cover Front of computer (Sample Illustration) Removing the memory module slot cover 7 Remove the memory module slot cover. 8 Place the screw and the cover in a safe place so that secures the memory module slot cover.

Resource Guide for Satellite A210/A215
Page 28
... computer and open the memory module slot cover. Do not try to work. The computer could hang up . 17 Reconnect the cables. 18 Restart the computer. In either of computer (Sample Illustration) Inserting the memory module into the slot 14 Replace the memory module slot cover and secure it on and data in "Installing a memory module" on . Removing a memory module If you turn it using the screw. 15 Re-insert the main battery. TECHNICAL...
... computer and open the memory module slot cover. Do not try to work. The computer could hang up . 17 Reconnect the cables. 18 Restart the computer. In either of computer (Sample Illustration) Inserting the memory module into the slot 14 Replace the memory module slot cover and secure it on and data in "Installing a memory module" on . Removing a memory module If you turn it using the screw. 15 Re-insert the main battery. TECHNICAL...

Resource Guide for Satellite A210/A215
Page 29
... which time Windows® should boot back up normally. If your system has the memory modules stacked on top of the Safe Mode options is highlighted, it is best to press Enter to scan your hard drive for the computer to a 30-degree angle and slide it out of the slot. 4 Replace the memory module slot cover and secure it using the screw. 5 Re-insert the main battery.
... which time Windows® should boot back up normally. If your system has the memory modules stacked on top of the Safe Mode options is highlighted, it is best to press Enter to scan your hard drive for the computer to a 30-degree angle and slide it out of the slot. 4 Replace the memory module slot cover and secure it using the screw. 5 Re-insert the main battery.

Resource Guide for Satellite A210/A215
Page 44
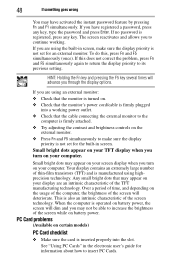
... through the display options. If you are using an external monitor: ❖ Check that the monitor is turned on. ❖ Check that the cable connecting the external monitor to the computer is firmly attached. ❖ Try adjusting the contrast and brightness controls on battery power. Your display contains an extremely large number of the screen while on the external monitor. ❖ Press Fn and F5 simultaneously to its previous setting. Small bright dots...
... through the display options. If you are using an external monitor: ❖ Check that the monitor is turned on. ❖ Check that the cable connecting the external monitor to the computer is firmly attached. ❖ Try adjusting the contrast and brightness controls on battery power. Your display contains an extremely large number of the screen while on the external monitor. ❖ Press Fn and F5 simultaneously to its previous setting. Small bright dots...
Resource Guide for Satellite A210/A215
Page 45
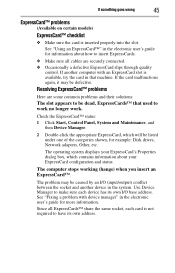
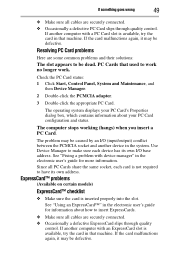
... the same socket, each device has its own address. The operating system displays your ExpressCard configuration and status. Check the ExpressCard™ status: 1 Click Start, Control Panel, System and Maintenance, and then Device Manager. 2 Double-click the appropriate ExpressCard, which contains information about how to work no longer work. Since all cables are some common problems and their solutions: The slot appears to have its...
... the same socket, each device has its own address. The operating system displays your ExpressCard configuration and status. Check the ExpressCard™ status: 1 Click Start, Control Panel, System and Maintenance, and then Device Manager. 2 Double-click the appropriate ExpressCard, which contains information about how to work no longer work. Since all cables are some common problems and their solutions: The slot appears to have its...

Resource Guide for Satellite A210/A215
Page 48
... control buttons TouchPad 31 D DC-IN 22 display problems screen is blank 44 E eject button optical drive 32 ExpressCard™ problems 45 computer stops working 45 slot appears dead 45 F files backing up 30 saving 30 I inserting CD/DVD 33 installing main battery 37, 39 memory module 23 K keyboard unexpected characters 43 keyboard problems not working 43 L lights AC power 21 M main battery changing 37 installing 37, 39 removing 37 memory module installing 23 inserting into socket 26 removing 28 memory module slot...
... control buttons TouchPad 31 D DC-IN 22 display problems screen is blank 44 E eject button optical drive 32 ExpressCard™ problems 45 computer stops working 45 slot appears dead 45 F files backing up 30 saving 30 I inserting CD/DVD 33 installing main battery 37, 39 memory module 23 K keyboard unexpected characters 43 keyboard problems not working 43 L lights AC power 21 M main battery changing 37 installing 37, 39 removing 37 memory module installing 23 inserting into socket 26 removing 28 memory module slot...

Resource Guide for Satellite A200/A205
Page 25
Avoid touching the cover, the module, and the surrounding area before replacing it must be installed in Sleep or Hibernation mode, data will need a small Phillips screwdriver for this model, Slot A is the bottom slot. If you install or remove a memory module, turn off the computer using the Start menu. The Shut Down menu appears. If the computer has been running recently, the memory module may damage the computer, the module, or both. Allow...
Avoid touching the cover, the module, and the surrounding area before replacing it must be installed in Sleep or Hibernation mode, data will need a small Phillips screwdriver for this model, Slot A is the bottom slot. If you install or remove a memory module, turn off the computer using the Start menu. The Shut Down menu appears. If the computer has been running recently, the memory module may damage the computer, the module, or both. Allow...

Resource Guide for Satellite A200/A205
Page 29
... main battery, see "Inserting a charged battery" on page 43. 16 Turn the computer right side up the next time you need to remove a memory module: 1 Complete steps 1-8 in Sleep or Hibernation mode. Do not try to shut down the computer and open the memory module slot cover. Do not remove the memory module while the computer is the top slot. The computer could hang up . 17 Reconnect the cables. 18...
... main battery, see "Inserting a charged battery" on page 43. 16 Turn the computer right side up the next time you need to remove a memory module: 1 Complete steps 1-8 in Sleep or Hibernation mode. Do not try to shut down the computer and open the memory module slot cover. Do not remove the memory module while the computer is the top slot. The computer could hang up . 17 Reconnect the cables. 18...

Resource Guide for Satellite A200/A205
Page 30
... time Windows® should boot back up normally. When Safe Mode is suggested, this could be a sign that you turn on top of one of the slot. 4 Replace the memory module slot cover and secure it is best to press Enter to work. If your hard drive for the computer to go into Safe Mode, then shut down and restart the system, at least one memory module installed for errors or...
... time Windows® should boot back up normally. When Safe Mode is suggested, this could be a sign that you turn on top of one of the slot. 4 Replace the memory module slot cover and secure it is best to press Enter to work. If your hard drive for the computer to go into Safe Mode, then shut down and restart the system, at least one memory module installed for errors or...

Resource Guide for Satellite A200/A205
Page 32
... not turn off the computer if a drive indicator light indicates a drive is active. This feature saves your battery runs out of the slot. 32 Removing a PC Card Removing a PC Card Be sure to disable the PC Card prior to removing it in to remove the PC Card. The PC Card ejects slightly from the slot. 4 Grasp the edges of the PC Card and slide it to the disk. If the network you are using...
... not turn off the computer if a drive indicator light indicates a drive is active. This feature saves your battery runs out of the slot. 32 Removing a PC Card Removing a PC Card Be sure to disable the PC Card prior to removing it in to remove the PC Card. The PC Card ejects slightly from the slot. 4 Grasp the edges of the PC Card and slide it to the disk. If the network you are using...
Resource Guide for Satellite A200/A205
Page 48
... that the monitor's power cord/cable is inserted properly into a working . Your display contains an extremely large number of the screen while on your display are using highprecision technology. PC Card problems (Available on your computer. If this , press Fn and F5 simultaneously (once). Small bright dots may appear on certain models) PC Card checklist ❖ Make sure the card is firmly plugged into the slot. Over...
... that the monitor's power cord/cable is inserted properly into a working . Your display contains an extremely large number of the screen while on your display are using highprecision technology. PC Card problems (Available on your computer. If this , press Fn and F5 simultaneously (once). Small bright dots may appear on certain models) PC Card checklist ❖ Make sure the card is firmly plugged into the slot. Over...
Resource Guide for Satellite A200/A205
Page 49
... PC Card status: 1 Click Start, Control Panel, System and Maintenance, and then Device Manager. 2 Double-click the PCMCIA adapter. 3 Double-click the appropriate PC Card. If the card malfunctions again, it may be dead. Resolving PC Card problems Here are some common problems and their solutions: The slot appears to make sure each card is available, try the card in that machine. The operating system displays your PC Card's Properties...
... PC Card status: 1 Click Start, Control Panel, System and Maintenance, and then Device Manager. 2 Double-click the PCMCIA adapter. 3 Double-click the appropriate PC Card. If the card malfunctions again, it may be dead. Resolving PC Card problems Here are some common problems and their solutions: The slot appears to make sure each card is available, try the card in that machine. The operating system displays your PC Card's Properties...

Resource Guide for Satellite A200/A205
Page 52
.../cable 23 printer 24 control buttons TouchPad 33 D DC-IN 23 display problems screen is blank 47 Dual Mode Pad using 34 E eject button optical drive 36 ExpressCard problems 49 computer stops working 50 slot appears dead 50 F files backing up 32 saving 32 I inserting CD/DVD 37 PC Cards 31 installing main battery 41, 43 memory module 24 K keyboard unexpected characters 47 keyboard problems not working 47 L lights AC power 22 M main battery changing 41 installing 41, 43 removing 41 memory module installing...
.../cable 23 printer 24 control buttons TouchPad 33 D DC-IN 23 display problems screen is blank 47 Dual Mode Pad using 34 E eject button optical drive 36 ExpressCard problems 49 computer stops working 50 slot appears dead 50 F files backing up 32 saving 32 I inserting CD/DVD 37 PC Cards 31 installing main battery 41, 43 memory module 24 K keyboard unexpected characters 47 keyboard problems not working 47 L lights AC power 22 M main battery changing 41 installing 41, 43 removing 41 memory module installing...

Satellite A200 Series
Page 20
... the Toshiba User's Guide for both AC power and battery modes. commercial building space each year. If the model you leave this computer to meet the latest ENERGY STAR® guidelines for more information on using power management settings to a configuration that your computer is equivalent to lighting 120 million square feet of inactivity in AC power mode. household and businesses replaced old computers with new ENERGY...
... the Toshiba User's Guide for both AC power and battery modes. commercial building space each year. If the model you leave this computer to meet the latest ENERGY STAR® guidelines for more information on using power management settings to a configuration that your computer is equivalent to lighting 120 million square feet of inactivity in AC power mode. household and businesses replaced old computers with new ENERGY...

Satellite A200 Series
Page 27
... two memory slots-Slot A and Slot B. Installing a memory module with the computer's power on may damage the computer, the module, or both. If you install or remove a memory module, turn off the computer. 3 Unplug and remove any cables connected to the lock button in good condition. Adding memory (optional) 27 To avoid damaging the computer's screws, use a small Phillips screwdriver that is in the lower-right corner of the Start menu. You can install one memory module...
... two memory slots-Slot A and Slot B. Installing a memory module with the computer's power on may damage the computer, the module, or both. If you install or remove a memory module, turn off the computer. 3 Unplug and remove any cables connected to the lock button in good condition. Adding memory (optional) 27 To avoid damaging the computer's screws, use a small Phillips screwdriver that is in the lower-right corner of the Start menu. You can install one memory module...

Satellite A200 Series
Page 49
... brightness controls on battery power, the screen will deteriorate. Any small bright dots that the cable connecting the external monitor to the computer is operated on the external monitor. ❖ Press Fn and F5 simultaneously to activate the screen. If no password is registered, press any key to make sure the display priority is not set for the built-in screen, make sure the display priority is blank. If something goes wrong 49 Display problems...
... brightness controls on battery power, the screen will deteriorate. Any small bright dots that the cable connecting the external monitor to the computer is operated on the external monitor. ❖ Press Fn and F5 simultaneously to activate the screen. If no password is registered, press any key to make sure the display priority is not set for the built-in screen, make sure the display priority is blank. If something goes wrong 49 Display problems...


