User Guide
Page 5
... equipment until the problem is necessary. If Problems Arise If this equipment causes harm to the telephone network, the telephone company will be advised of each transmitted page or on the label. If trouble is experienced with the FCC if you believe it unlawful for repair or limited warranty information, please contact Toshiba Corporation, Toshiba America Information...
... equipment until the problem is necessary. If Problems Arise If this equipment causes harm to the telephone network, the telephone company will be advised of each transmitted page or on the label. If trouble is experienced with the FCC if you believe it unlawful for repair or limited warranty information, please contact Toshiba Corporation, Toshiba America Information...

User Guide
Page 30
...Removing a memory module 64 Hard Disk Drive (HDD) Recovery Utilities 66 Creating Recovery CDs/DVDs 67 Hard disk drive recovery using the recovery partition 68 Hard disk drive recovery using the Recovery media 71 Deleting the Hard Disk Recovery Utility 74 Installing drivers and applications 75 Connecting a mouse 76 Connecting a printer 76 Connecting the modem 78 Connecting other external devices 79 Using the TouchPad 80 Disabling or enabling the TouchPad 81 Using the Toshiba Assist button 82 Customizing your computer's settings 83 Powering off the computer 83 Closing the display...
...Removing a memory module 64 Hard Disk Drive (HDD) Recovery Utilities 66 Creating Recovery CDs/DVDs 67 Hard disk drive recovery using the recovery partition 68 Hard disk drive recovery using the Recovery media 71 Deleting the Hard Disk Recovery Utility 74 Installing drivers and applications 75 Connecting a mouse 76 Connecting a printer 76 Connecting the modem 78 Connecting other external devices 79 Using the TouchPad 80 Disabling or enabling the TouchPad 81 Using the Toshiba Assist button 82 Customizing your computer's settings 83 Powering off the computer 83 Closing the display...
User Guide
Page 59
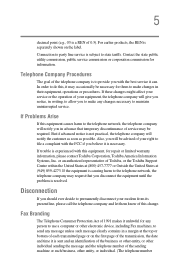
If this procedure. If you replace it. If the computer is on page 126. 5 Close the display panel and turn the computer upside down to locate the memory slot cover. For more information on removing the battery, see "Removing the battery from the computer" on , begin at step 1; Getting Started Adding memory (optional) 59 Installing a memory module Additional memory modules can be installed in good condition. The operating system turns off computer. otherwise, skip...
If this procedure. If you replace it. If the computer is on page 126. 5 Close the display panel and turn the computer upside down to locate the memory slot cover. For more information on removing the battery, see "Removing the battery from the computer" on , begin at step 1; Getting Started Adding memory (optional) 59 Installing a memory module Additional memory modules can be installed in good condition. The operating system turns off computer. otherwise, skip...
User Guide
Page 63
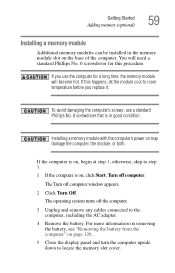
... the operating system has loaded, you can now continue setting up . 17 Reconnect the cables. 18 Restart the computer. For more information on inserting the battery, see "Changing the main battery" on page 126. 16 Turn the computer right side up the computer. TECHNICAL NOTE: You must have at least one memory module installed for the computer to work. Getting Started Adding memory (optional...
... the operating system has loaded, you can now continue setting up . 17 Reconnect the cables. 18 Restart the computer. For more information on inserting the battery, see "Changing the main battery" on page 126. 16 Turn the computer right side up the computer. TECHNICAL NOTE: You must have at least one memory module installed for the computer to work. Getting Started Adding memory (optional...

User Guide
Page 65
... total memory. Getting Started Removing a memory module 65 Removing the memory module 4 Replace the memory module slot cover and tighten the screw. 5 Turn the computer over and restart it. Checking total memory When you add or remove a memory module, you can check that the computer has recognized the change. TECHNICAL NOTE: You must have at least one memory module installed for the computer to work. If the computer does not recognize the memory configuration, turn off...
... total memory. Getting Started Removing a memory module 65 Removing the memory module 4 Replace the memory module slot cover and tighten the screw. 5 Turn the computer over and restart it. Checking total memory When you add or remove a memory module, you can check that the computer has recognized the change. TECHNICAL NOTE: You must have at least one memory module installed for the computer to work. If the computer does not recognize the memory configuration, turn off...
User Guide
Page 69
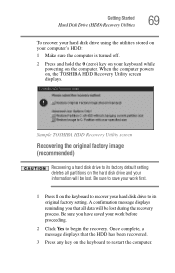
... its factory default setting deletes all data will be lost . A confirmation message displays reminding you have saved your keyboard while powering on the computer. Be sure you that the HDD has been recovered. 3 Press any key on , the TOSHIBA HDD Recovery Utility screen displays. Getting Started Hard Disk Drive (HDD) Recovery Utilities 69 To recover your hard disk drive using the utilities stored on your computer's HDD: 1 Make sure the computer is turned off. 2 Press and hold the 0 (zero) key on your work...
... its factory default setting deletes all data will be lost . A confirmation message displays reminding you have saved your keyboard while powering on the computer. Be sure you that the HDD has been recovered. 3 Press any key on , the TOSHIBA HDD Recovery Utility screen displays. Getting Started Hard Disk Drive (HDD) Recovery Utilities 69 To recover your hard disk drive using the utilities stored on your computer's HDD: 1 Make sure the computer is turned off. 2 Press and hold the 0 (zero) key on your work...
User Guide
Page 100
... play a DVD disc from another region, the drive will automatically change to complete the installation. Note that changing from that last region. Playing DVDs If you are using an optional external DVD-ROM or multifunction drive, you play region 1 (North America) DVD-ROMs. If you can harm your computer's desktop. 2 Select "Install Applications and Drivers." 3 Select "InterVideo WinDVD" as two changes. TECHNICAL NOTE: Your DVD-ROM or multi-function drive is counted...
... play a DVD disc from another region, the drive will automatically change to complete the installation. Note that changing from that last region. Playing DVDs If you are using an optional external DVD-ROM or multifunction drive, you play region 1 (North America) DVD-ROMs. If you can harm your computer's desktop. 2 Select "Install Applications and Drivers." 3 Select "InterVideo WinDVD" as two changes. TECHNICAL NOTE: Your DVD-ROM or multi-function drive is counted...
User Guide
Page 134
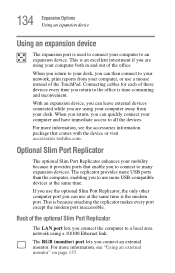
... devices. Connecting cables for each of the office. For more information, see the accessories information package that enable you can use at the same time. For more information, see "Using an external monitor" on page 137. The replicator provides more USB ports than the computer, enabling you to use a mouse instead of the optional Slim Port Replicator The LAN port lets you connect the computer to a local area network using...
... devices. Connecting cables for each of the office. For more information, see the accessories information package that enable you can use at the same time. For more information, see "Using an external monitor" on page 137. The replicator provides more USB ports than the computer, enabling you to use a mouse instead of the optional Slim Port Replicator The LAN port lets you connect the computer to a local area network using...
User Guide
Page 173
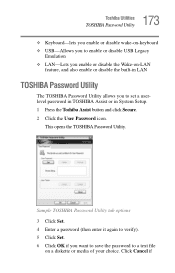
... save the password to a text file on -LAN feature, and also enable or disable the built-in System Setup. 1 Press the Toshiba Assist button and click Secure. 2 Click the User Password icon. Sample TOSHIBA Password Utility tab options 3 Click Set. 4 Enter a password (then enter it again to verify). 5 Click Set. 6 Click OK if you enable or disable the Wake-on a diskette or media of your choice. Click Cancel if This opens the TOSHIBA Password Utility.
... save the password to a text file on -LAN feature, and also enable or disable the built-in System Setup. 1 Press the Toshiba Assist button and click Secure. 2 Click the User Password icon. Sample TOSHIBA Password Utility tab options 3 Click Set. 4 Enter a password (then enter it again to verify). 5 Click Set. 6 Click OK if you enable or disable the Wake-on a diskette or media of your choice. Click Cancel if This opens the TOSHIBA Password Utility.
User Guide
Page 181
...; Setting a hard disk drive master password lets you bypass the hard disk drive user password and access your system's BIOS. This password does not encrypt data on how to enable the TPM feature through your hard disk, in case you set a hard disk drive master password, 181 Toshiba Utilities Hard disk drive passwords 2 Follow the instructions on another computer. Your system will need to set up and use this utility, please see the Infineon TPM (Trusted Platform Module) Installation Guide. Hard disk drive passwords Your computer comes with a System Setup utility...
...; Setting a hard disk drive master password lets you bypass the hard disk drive user password and access your system's BIOS. This password does not encrypt data on how to enable the TPM feature through your hard disk, in case you set a hard disk drive master password, 181 Toshiba Utilities Hard disk drive passwords 2 Follow the instructions on another computer. Your system will need to set up and use this utility, please see the Infineon TPM (Trusted Platform Module) Installation Guide. Hard disk drive passwords Your computer comes with a System Setup utility...
User Guide
Page 210
... "Charging batteries" on page 117. Make sure there is no diskette in the Startup menu to fix the problem. The computer displays the Non-System disk or disk error message. For more information see "The computer is not accessing the hard disk or the optional external diskette drive." For example: ❖ The operating system fails to start . ❖ The operating system responds differently from the normal routine. ❖ The screen does...
... "Charging batteries" on page 117. Make sure there is no diskette in the Startup menu to fix the problem. The computer displays the Non-System disk or disk error message. For more information see "The computer is not accessing the hard disk or the optional external diskette drive." For example: ❖ The operating system fails to start . ❖ The operating system responds differently from the normal routine. ❖ The screen does...
User Guide
Page 221
... previous setting. If you to continue working power outlet. ❖ Check that the cable connecting the external monitor to activate the screen. 221 If Something Goes Wrong Resolving a hardware conflict Display problems Here are some typical display problems and their solutions: The screen is registered, press any key. Display Auto Off may have registered a password, press any key to the computer is firmly attached. ❖ Try adjusting the contrast and brightness controls...
... previous setting. If you to continue working power outlet. ❖ Check that the cable connecting the external monitor to activate the screen. 221 If Something Goes Wrong Resolving a hardware conflict Display problems Here are some typical display problems and their solutions: The screen is registered, press any key. Display Auto Off may have registered a password, press any key to the computer is firmly attached. ❖ Try adjusting the contrast and brightness controls...

User Guide
Page 236
..., change the settings to fix the problem yourself. To verify your display settings: ❖ Click Start, Control Panel, Appearance and Themes, and double-click Display. ❖ Click on the Settings tab and check the Color Palette. It should be a video format error. 236 If Something Goes Wrong DVD operating problems The Windows XP wireless management facility does not work. If it does, the utility may be disabling the Windows XP wireless management facility, in the drive tray...
..., change the settings to fix the problem yourself. To verify your display settings: ❖ Click Start, Control Panel, Appearance and Themes, and double-click Display. ❖ Click on the Settings tab and check the Color Palette. It should be a video format error. 236 If Something Goes Wrong DVD operating problems The Windows XP wireless management facility does not work. If it does, the utility may be disabling the Windows XP wireless management facility, in the drive tray...
User Guide
Page 260
... to access the screen saver option. Then perform any of the following steps: ❖ (Microsoft® Windows® XP or 2000) Click the Start button, and select All Programs, TOSHIBA, Networking, ConfigFree. ❖ Double-click the ConfigFree icon on setting up ConfigFree. Click Options on page 270. ❖ ConfigFree SUMMIT-The ConfigFree SUMMIT utility is used to connect with your system) to open the TOSHIBA...
... to access the screen saver option. Then perform any of the following steps: ❖ (Microsoft® Windows® XP or 2000) Click the Start button, and select All Programs, TOSHIBA, Networking, ConfigFree. ❖ Double-click the ConfigFree icon on setting up ConfigFree. Click Options on page 270. ❖ ConfigFree SUMMIT-The ConfigFree SUMMIT utility is used to connect with your system) to open the TOSHIBA...
User Guide
Page 292
...-wide network of computers that you turn on the computer again, your work is running and have the operating system automatically recognize the change. A key or combination of your work , including all open files and programs, when you use to help improve processing speed. See also cache, CPU cache, L2 cache. A feature of many Toshiba notebook computers that saves to the hard disk the...
...-wide network of computers that you turn on the computer again, your work is running and have the operating system automatically recognize the change. A key or combination of your work , including all open files and programs, when you use to help improve processing speed. See also cache, CPU cache, L2 cache. A feature of many Toshiba notebook computers that saves to the hard disk the...
User Guide
Page 298
...-key keyboard 90 A AC adapter 51 AC power connecting adapter 52 power light 57 accessories computer lock cable 86 docking solutions 134 audio .WAV digital wave files 156 features 155 playing 98 B battery changing 126 charge indicator light 53, 119 charge not lasting 219 charging 51 conserving power 123 disposal 131 indicator light 57 low charge 122 monitoring power 53, 119 not charging 218 power usage hot key 125 power usage mode 253 real-time clock (RTC) 116 removing 126 BIOS see Toshiba Hardware Setup button power...
...-key keyboard 90 A AC adapter 51 AC power connecting adapter 52 power light 57 accessories computer lock cable 86 docking solutions 134 audio .WAV digital wave files 156 features 155 playing 98 B battery changing 126 charge indicator light 53, 119 charge not lasting 219 charging 51 conserving power 123 disposal 131 indicator light 57 low charge 122 monitoring power 53, 119 not charging 218 power usage hot key 125 power usage mode 253 real-time clock (RTC) 116 removing 126 BIOS see Toshiba Hardware Setup button power...
User Guide
Page 299
... not accessing disk drives 209 optimizing 166 running on battery power 114 setting up 47 warning resume failure message 209 computing tips 87 configuring hard drive passwords 181 connect 167 connecting printer 76, 138 USB-compatible keyboard 137 monitor 137 mouse 76, 138 control buttons 80 critical applications 3 customizing taskbar 145 D desktop browsing style 147 changing styles 147 personalizing 145 Device Manager 215 checking properties 216 disabling a device 216 digital audio .WAV files 156 disable/enable TOSHIBA Touch...
... not accessing disk drives 209 optimizing 166 running on battery power 114 setting up 47 warning resume failure message 209 computing tips 87 configuring hard drive passwords 181 connect 167 connecting printer 76, 138 USB-compatible keyboard 137 monitor 137 mouse 76, 138 control buttons 80 critical applications 3 customizing taskbar 145 D desktop browsing style 147 changing styles 147 personalizing 145 Device Manager 215 checking properties 216 disabling a device 216 digital audio .WAV files 156 disable/enable TOSHIBA Touch...
User Guide
Page 300
... functions 160 Fn-esse 159 assigning keys 160 change/remove key assignments 163 drag-and-drop 160 keyboard 159 starting 159 using keyboard or pointing device 161 viewing key assignments 162 folders displaying information 150 H hard disk drive light 58 Master password 181 passwords 181 User password 181 hardware conflicts 213 resolving 215 HDD protection 168 headphones 155 Help and Support Windows XP 212 Hibernation command 103 enabling 107 Hibernation mode 103 methods 109, 111 hot key display brightness 255 display modes...
... functions 160 Fn-esse 159 assigning keys 160 change/remove key assignments 163 drag-and-drop 160 keyboard 159 starting 159 using keyboard or pointing device 161 viewing key assignments 162 folders displaying information 150 H hard disk drive light 58 Master password 181 passwords 181 User password 181 hardware conflicts 213 resolving 215 HDD protection 168 headphones 155 Help and Support Windows XP 212 Hibernation command 103 enabling 107 Hibernation mode 103 methods 109, 111 hot key display brightness 255 display modes...
User Guide
Page 301
... troubleshooting 220 keyboard, full-size 90 L LCD panel closing 84 M main battery removing 126 Master password 181 memory installing additional 58 problem solving 217 removing expansion slot cover 60 memory cards Secure Digital 142 memory module inserting 62 microphone using 156 modem determining COM port 152 problem solving 232 resetting port to default settings 152 upgrading 152 modes Hibernation 103 Standby 103 monitor not working 221 moving the computer 86 N network accessing 154 Dial-Up Networking Wizard 154 O optional additional equipment computer lock cable 86 memory modules...
... troubleshooting 220 keyboard, full-size 90 L LCD panel closing 84 M main battery removing 126 Master password 181 memory installing additional 58 problem solving 217 removing expansion slot cover 60 memory cards Secure Digital 142 memory module inserting 62 microphone using 156 modem determining COM port 152 problem solving 232 resetting port to default settings 152 upgrading 152 modes Hibernation 103 Standby 103 monitor not working 221 moving the computer 86 N network accessing 154 Dial-Up Networking Wizard 154 O optional additional equipment computer lock cable 86 memory modules...
User Guide
Page 302
... removing 141 slot 138 PC Card slot 139 playing audio 98 Plug and Play 214 port external DVD-ROM drive 98 ports expansion 135 LAN 134 RGB (monitor) 134 Universal Serial Bus 135 power computer will not start 208 connecting cable to AC Adapter 52 energy-saving features 114 Power Saver settings 170 problem solving 218 turning on the power 57 power button 67 power cable connectors 258 power off guidelines 84 power source connecting 52 power usage mode hot key 125 power usage modes 124 powering down...
... removing 141 slot 138 PC Card slot 139 playing audio 98 Plug and Play 214 port external DVD-ROM drive 98 ports expansion 135 LAN 134 RGB (monitor) 134 Universal Serial Bus 135 power computer will not start 208 connecting cable to AC Adapter 52 energy-saving features 114 Power Saver settings 170 problem solving 218 turning on the power 57 power button 67 power cable connectors 258 power off guidelines 84 power source connecting 52 power usage mode hot key 125 power usage modes 124 powering down...


