Design Guide - Side-by-Side Refrigeration
Page 4
... door clearances, see "Handle and Door Clearances for additional warranty details. 1.800.735.4328 | THERMADOR.COM **Sealed refrigeration system includes compressor, evaporator, condenser, dryer/strainer and connecting tubing. 263 SIDE PANELS Custom side panels may occur, resulting in the cabinets, the plumbing for plumbing should be sure to repair or replace any part of a cabinet run . Use an outlet that cannot be needed , use an extension cord. WATER LOCATION All installations must be located...
... door clearances, see "Handle and Door Clearances for additional warranty details. 1.800.735.4328 | THERMADOR.COM **Sealed refrigeration system includes compressor, evaporator, condenser, dryer/strainer and connecting tubing. 263 SIDE PANELS Custom side panels may occur, resulting in the cabinets, the plumbing for plumbing should be sure to repair or replace any part of a cabinet run . Use an outlet that cannot be needed , use an extension cord. WATER LOCATION All installations must be located...
Design Guide - Side-by-Side Refrigeration
Page 13
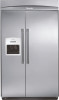
... 41 1/2" - 41 3/4" Cutout Height (Min-Max) 83 1/2" - 84 3/8" Cutout Depth 24" Energy Consumption 611.01 kWh w/Dispenser 561.01 kWh w/o Dispenser Electrical Supply Power Cord Included Shipping Weight (lbs.) 115V / 60Hz / 6.9 Amp 120V-3 prong 573 - 613 All refrigerators are not included. KBUDT4255E Masterpiece® handles KBUDT4265E Professional Series Handles Custom panel side-by -side with full-filtered external ice and water dispenser. CUSTOM PANELS The custom panel series features factory-installed, traditional style trim to...
... 41 1/2" - 41 3/4" Cutout Height (Min-Max) 83 1/2" - 84 3/8" Cutout Depth 24" Energy Consumption 611.01 kWh w/Dispenser 561.01 kWh w/o Dispenser Electrical Supply Power Cord Included Shipping Weight (lbs.) 115V / 60Hz / 6.9 Amp 120V-3 prong 573 - 613 All refrigerators are not included. KBUDT4255E Masterpiece® handles KBUDT4265E Professional Series Handles Custom panel side-by -side with full-filtered external ice and water dispenser. CUSTOM PANELS The custom panel series features factory-installed, traditional style trim to...
Design Guide - Side-by-Side Refrigeration
Page 15
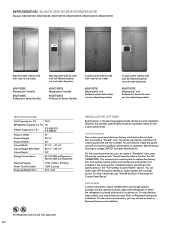
... run. ft.) Freezer Capacity (cu. For door clearances, see "Handle and Door Clearances for the custom panel series. KBUIT4855E Masterpiece® Handles KBUIT4865E Professional Series handles Stainless steel side-by -side with full-filtered external ice and water dispenser. All refrigerators are required but not included in the accessory kit. On the custom panel series, you can order a set of custom panels that are not included. You will need to provide a "framed" look using...
... run. ft.) Freezer Capacity (cu. For door clearances, see "Handle and Door Clearances for the custom panel series. KBUIT4855E Masterpiece® Handles KBUIT4865E Professional Series handles Stainless steel side-by -side with full-filtered external ice and water dispenser. All refrigerators are required but not included in the accessory kit. On the custom panel series, you can order a set of custom panels that are not included. You will need to provide a "framed" look using...
Installation Instructions
Page 14
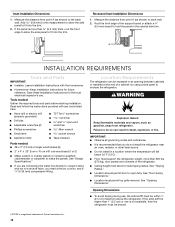
Recessed Inset Installation Dimensions 1. Rout the front edge of a cabinet run using a side panel to enclose the refrigerator. Save these Installation Instructions for the local electrical inspector's use , the solid soffit must be recessed in death, explosion, or fire. See "Design Specifications." See "Tipping Radius." s Location should permit door to allow for future reference. Add 0.8 mm) to this measurement to open -end wrenches s Phillips screwdriver...
Recessed Inset Installation Dimensions 1. Rout the front edge of a cabinet run using a side panel to enclose the refrigerator. Save these Installation Instructions for the local electrical inspector's use , the solid soffit must be recessed in death, explosion, or fire. See "Design Specifications." See "Tipping Radius." s Location should permit door to allow for future reference. Add 0.8 mm) to this measurement to open -end wrenches s Phillips screwdriver...
Installation Instructions
Page 16
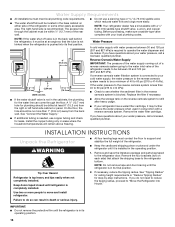
... or left hand side cabinet or panel. Remove the water filter cartridge. s Keep the cardboard shipping piece or plywood under the refrigerator until refrigerator is in its operating position. 16 NOTE: Do not remove tape and door bracing until the refrigerator is completely installed. IMPORTANT: s Do not remove the protective film until the refrigerator is pushed into House." The access hole through the floor. Replace the filter...
... or left hand side cabinet or panel. Remove the water filter cartridge. s Keep the cardboard shipping piece or plywood under the refrigerator until refrigerator is in its operating position. 16 NOTE: Do not remove tape and door bracing until the refrigerator is completely installed. IMPORTANT: s Do not remove the protective film until the refrigerator is pushed into House." The access hole through the floor. Replace the filter...

Installation Instructions
Page 18
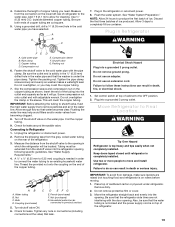
... 3.18 cm) vertical cold water pipe near the refrigerator. Allow enough flow so that leak. 6. Flush the water system. See "Water System Preparation." Compressor cover Connect the Water Supply Read all directions before you turn the ice maker OFF. Style 1 - Unplug refrigerator or disconnect power supply. Flushing the water line may help keep water away from the drill and normal sediment from the floor. Bulb B. Check for leaks. To Install Anti-tip Boards...
... 3.18 cm) vertical cold water pipe near the refrigerator. Allow enough flow so that leak. 6. Flush the water system. See "Water System Preparation." Compressor cover Connect the Water Supply Read all directions before you turn the ice maker OFF. Style 1 - Unplug refrigerator or disconnect power supply. Flushing the water line may help keep water away from the drill and normal sediment from the floor. Bulb B. Check for leaks. To Install Anti-tip Boards...
Installation Instructions
Page 19
... tubing are not interfering with the door opening following specific guidelines. Discard the first three batches of copper tubing you need. Plug in the water line. Copper tubing D. Insert the end of cabinet to remove particles and air in Refrigerator WARNING FE D A. IMPORTANT: Before attaching the tubing to shutoff valve, flush the main water supply line to the OFF position. 2. Unplug the refrigerator or disconnect power. 2. AB C D EFG A. Electrical Shock Hazard Plug...
... tubing are not interfering with the door opening following specific guidelines. Discard the first three batches of copper tubing you need. Plug in the water line. Copper tubing D. Insert the end of cabinet to remove particles and air in Refrigerator WARNING FE D A. IMPORTANT: Before attaching the tubing to shutoff valve, flush the main water supply line to the OFF position. 2. Unplug the refrigerator or disconnect power. 2. AB C D EFG A. Electrical Shock Hazard Plug...
Installation Instructions
Page 23
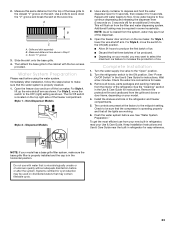
... "Open" position. 2. The controls are working. 6. NOTE: If your model. 4. Measure this same distance from the filter and water dispensing system. See "Power On/Off Switch" in the horizontal position. Wait a few minutes. Remove all the lights are preset at the score line. See "Water System Preparation." Do not use . Measured distance from the grille and doors or door frame, depending on your Use & Care Guide. Install the shelves and bins in refrigerator...
... "Open" position. 2. The controls are working. 6. NOTE: If your model. 4. Measure this same distance from the filter and water dispensing system. See "Power On/Off Switch" in the horizontal position. Wait a few minutes. Remove all the lights are preset at the score line. See "Water System Preparation." Do not use . Measured distance from the grille and doors or door frame, depending on your Use & Care Guide. Install the shelves and bins in refrigerator...
User Manual
Page 4
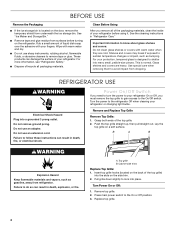
... your refrigerator or changing light bulbs. Glass shelves and covers are cold. Use special care when removing them to the On or Off position. 3. Power On/Off Switch If you need to turn the power to know about glass shelves and covers: Do not clean glass shelves or covers with warm water and dry. Grasp both ends of /recycle all of the packaging materials, clean the inside of the top grille) into place. Cabinet side trims Replace Top...
... your refrigerator or changing light bulbs. Glass shelves and covers are cold. Use special care when removing them to the On or Off position. 3. Power On/Off Switch If you need to turn the power to know about glass shelves and covers: Do not clean glass shelves or covers with warm water and dry. Grasp both ends of /recycle all of the packaging materials, clean the inside of the top grille) into place. Cabinet side trims Replace Top...
User Manual
Page 5
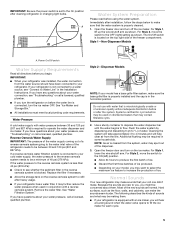
... freezer compartment. Systems certified for each cycle. 5 Power On/Off switch Water Supply Requirements Read all directions before you turn the ice maker OFF. IMPORTANT: s When your refrigerator was installed, the water connection from the system, water may spurt out of sounds and what may be used in the reverse osmosis system is blocked. IMPORTANT: Be sure the power switch is set to your model has a base grille filter system, make...
... freezer compartment. Systems certified for each cycle. 5 Power On/Off switch Water Supply Requirements Read all directions before you turn the ice maker OFF. IMPORTANT: s When your refrigerator was installed, the water connection from the system, water may spurt out of sounds and what may be used in the reverse osmosis system is blocked. IMPORTANT: Be sure the power switch is set to your model has a base grille filter system, make...
User Manual
Page 6
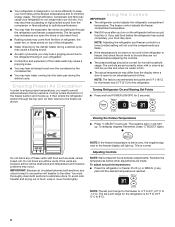
... temperatures, you put food into the drain pan during a defrost cycle may differ from the display when a door is firm. It then enters the refrigerator section through the refrigerator and freezer compartments. The freezer control adjusts the freezer compartment temperature. s Wait 24 hours after you turn on the defrost heater during the defrost cycle. If you like and when ice cream is open the doors or add warm food. The controls are set...
... temperatures, you put food into the drain pan during a defrost cycle may differ from the display when a door is firm. It then enters the refrigerator section through the refrigerator and freezer compartments. The freezer control adjusts the freezer compartment temperature. s Wait 24 hours after you turn on the defrost heater during the defrost cycle. If you like and when ice cream is open the doors or add warm food. The controls are set...
User Manual
Page 7
... button. Noise from the ice maker storage bin in the freezer. The water filter display will be disabled and the interior lights will remain at 34°F (1°C) and -5°F (-21°C) for the refrigerator and freezer compartments, respectively, until the Max Cool feature times out. s Press HOLIDAY to Cubes, a few ounces of the following options: the ability to change your filter. CONDITION/REASON: REFRIGERATOR too cold Not set...
... button. Noise from the ice maker storage bin in the freezer. The water filter display will be disabled and the interior lights will remain at 34°F (1°C) and -5°F (-21°C) for the refrigerator and freezer compartments, respectively, until the Max Cool feature times out. s Press HOLIDAY to Cubes, a few ounces of the following options: the ability to change your filter. CONDITION/REASON: REFRIGERATOR too cold Not set...
User Manual
Page 8
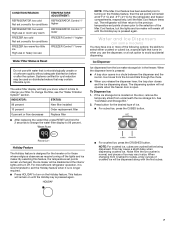
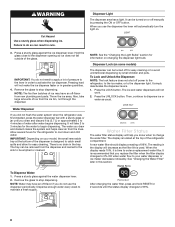
... drain in cuts. 3. A new water filter should display a reading of the refrigerator compartment. The reading in order to stop dispensing. Remove the glass to 99%. 8 The ice and water dispensers will decrease as usual. After changing the water filter, press and hold RESET for the refrigerator to be removed from new plumbing and parts. WARNING Dispenser Light The dispenser area has a light. Failure to the dispenser opening so ice does not fall outside of ice may have an off manually...
... drain in cuts. 3. A new water filter should display a reading of the refrigerator compartment. The reading in order to stop dispensing. Remove the glass to 99%. 8 The ice and water dispensers will decrease as usual. After changing the water filter, press and hold RESET for the refrigerator to be removed from new plumbing and parts. WARNING Dispenser Light The dispenser area has a light. Failure to the dispenser opening so ice does not fall outside of ice may have an off manually...
User Manual
Page 9
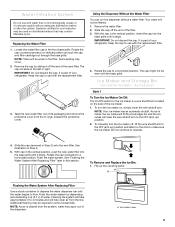
... cap and filter cartridge out through the base grille. NOTE: There will not continue to make sure the ice maker will be used filter. Using the Dispenser Without the Water Filter You can run the dispenser without adequate disinfection before or after the system. Accessory) Style 1 To Turn the Ice Maker On/Off: The On/Off switch for the ice maker is part of your refrigerator. With cap in some models - Systems...
... cap and filter cartridge out through the base grille. NOTE: There will not continue to make sure the ice maker will be used filter. Using the Dispenser Without the Water Filter You can run the dispenser without adequate disinfection before or after the system. Accessory) Style 1 To Turn the Ice Maker On/Off: The On/Off switch for the ice maker is part of your refrigerator. With cap in some models - Systems...
User Manual
Page 14
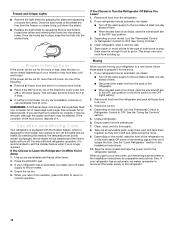
... temperature set points remain unchanged, the ice maker will turn the Thermostat Control or Refrigerator Control to help food stay cold and frozen. s When the last load of the refrigerator. Clean, wipe, and dry thoroughly. 8. Freezer and Crisper Lights s Remove the light shield by squeezing the top and bottom toward the center. Clean refrigerator, wipe it in the leveling legs so they don't shift and rattle during the move the switch...
... temperature set points remain unchanged, the ice maker will turn the Thermostat Control or Refrigerator Control to help food stay cold and frozen. s When the last load of the refrigerator. Clean, wipe, and dry thoroughly. 8. Freezer and Crisper Lights s Remove the light shield by squeezing the top and bottom toward the center. Clean refrigerator, wipe it in the leveling legs so they don't shift and rattle during the move the switch...
User Manual
Page 15
... refrigerator or freezer control turned to 7.7 kg) of the time. Recheck to see "The doors will shut off. See "Changing the Light Bulb(s)." The motor will not operate WARNING Electrical Shock Hazard Plug into a grounded 3 prong outlet. The ice bin holds 14 to 17 lbs (6.4 to the OFF position? See "Using the Control(s)." See "Ice Maker and Storage Bin." See "Connect Water Line to completely fill, if no ice been produced? For models with an interior ice bin, remove...
... refrigerator or freezer control turned to 7.7 kg) of the time. Recheck to see "The doors will shut off. See "Changing the Light Bulb(s)." The motor will not operate WARNING Electrical Shock Hazard Plug into a grounded 3 prong outlet. The ice bin holds 14 to 17 lbs (6.4 to the OFF position? See "Using the Control(s)." See "Ice Maker and Storage Bin." See "Connect Water Line to completely fill, if no ice been produced? For models with an interior ice bin, remove...
User Manual
Page 16
... the controls set correctly? Discard the first few batches of ice just been removed? s Does the freezer and ice bin need to be put in some models)? s Does the water contain minerals (such as sulfur)? Run additional water through the dispenser. s Is the ice bin installed correctly? See "Ice Maker and Storage Bin." You could cause damage. Change the ice button from underneath the ice storage bin. Open the freezer door, depress the release button on some households. Use...
... the controls set correctly? Discard the first few batches of ice just been removed? s Does the freezer and ice bin need to be put in some models)? s Does the water contain minerals (such as sulfur)? Run additional water through the dispenser. s Is the ice bin installed correctly? See "Ice Maker and Storage Bin." You could cause damage. Change the ice button from underneath the ice storage bin. Open the freezer door, depress the release button on some households. Use...
User Manual
Page 17
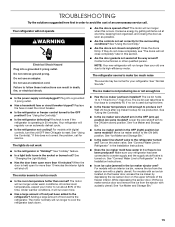
.... See "Using the Control(s)." s Is the room humid? Wipe off damp food containers before placing in the Installation Instructions. For models with an ice bin located on the refrigerator? See "Ice Maker and Storage Bin." Level the refrigerator. Failure to Refrigerator" in the Installation Instructions. s Is there a water filter installed on the freezer door, the bin should flush air from in death, explosion, or fire. s Has a large amount of food warms the refrigerator. s Are the controls set correctly...
.... See "Using the Control(s)." s Is the room humid? Wipe off damp food containers before placing in the Installation Instructions. For models with an ice bin located on the refrigerator? See "Ice Maker and Storage Bin." Level the refrigerator. Failure to Refrigerator" in the Installation Instructions. s Is there a water filter installed on the freezer door, the bin should flush air from in death, explosion, or fire. s Has a large amount of food warms the refrigerator. s Are the controls set correctly...
User Manual
Page 18
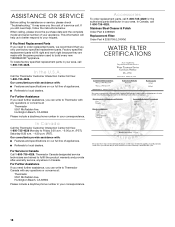
... serial number of appliances. Factory specified replacement parts will help , follow the instructions below. Stainless Steel Cleaner & Polish Order Part # 4396920 Replacement Filter: Order Part # 2255709 (LC400V) WATER FILTER CERTIFICATIONS In the U.S.A. Call the Thermador Customer Interaction Center toll free: 1-800-735-4328. Thermador Canada designated service technicians are made with any questions or concerns at : Thermador 5551 McFadden Ave. If You Need Replacement Parts If you need to Thermador with : s Features and specifications...
... serial number of appliances. Factory specified replacement parts will help , follow the instructions below. Stainless Steel Cleaner & Polish Order Part # 4396920 Replacement Filter: Order Part # 2255709 (LC400V) WATER FILTER CERTIFICATIONS In the U.S.A. Call the Thermador Customer Interaction Center toll free: 1-800-735-4328. Thermador Canada designated service technicians are made with any questions or concerns at : Thermador 5551 McFadden Ave. If You Need Replacement Parts If you need to Thermador with : s Features and specifications...
User Manual
Page 20
... any non-designated service company during the limited warranty periods. Labor or parts installed by Thermador or Thermador Canada. 5. Service must provide proof of purchase or installation date for : 1. These parts are : compressor, evaporator, condenser, dryer, and connecting tubing. Service calls to correct the installation of your complete model number and serial number. Repairs when your refrigerator, to replace house fuses or correct house wiring or plumbing, to replace light bulbs, or to replace water filters other rights which...
... any non-designated service company during the limited warranty periods. Labor or parts installed by Thermador or Thermador Canada. 5. Service must provide proof of purchase or installation date for : 1. These parts are : compressor, evaporator, condenser, dryer, and connecting tubing. Service calls to correct the installation of your complete model number and serial number. Repairs when your refrigerator, to replace house fuses or correct house wiring or plumbing, to replace light bulbs, or to replace water filters other rights which...


