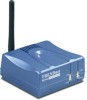

Quick Installation Guide
Page 5
... web browser to 192.168.0.X (where X is 192.168.0.1, make sure no other network devices are assigned an IP address of 192.168.0.1. Insert the Utility CD-ROM into your computers IP address to access the Print Server's Web Utility. Click Start > All Programs > PSUtility, and then click PS-Utility. 3 English Follow the InstallShield Wizard instructions...
... web browser to 192.168.0.X (where X is 192.168.0.1, make sure no other network devices are assigned an IP address of 192.168.0.1. Insert the Utility CD-ROM into your computers IP address to access the Print Server's Web Utility. Click Start > All Programs > PSUtility, and then click PS-Utility. 3 English Follow the InstallShield Wizard instructions...

Quick Installation Guide
Page 6
Click OK. 6. Click Show Web Setup. 7. Manually set the IP Address of your network. 5. 4. Note: The IP Address must match the network segment of the Print Server and then click OK. Write down the Server Name and Printer Name. 4 English Click the Print Server and click Change IP Address.
Click OK. 6. Click Show Web Setup. 7. Manually set the IP Address of your network. 5. 4. Note: The IP Address must match the network segment of the Print Server and then click OK. Write down the Server Name and Printer Name. 4 English Click the Print Server and click Change IP Address.

Quick Installation Guide
Page 10
... locate your print server's IP Address. Open PS-Utility v3.00 (See 3. Configure the Print Server) to set the newly installed network printer as your printer icon has a check on the Utility CD-ROM or contact TRENDnet's Technical Support Department. For Mac users, press the Reset button at the back of this , \\, instead of the TEW-P1UG, hold the...
... locate your print server's IP Address. Open PS-Utility v3.00 (See 3. Configure the Print Server) to set the newly installed network printer as your printer icon has a check on the Utility CD-ROM or contact TRENDnet's Technical Support Department. For Mac users, press the Reset button at the back of this , \\, instead of the TEW-P1UG, hold the...

Windows Setup Guide
Page 1
... IP Address of the Print Server 4. Click OK TE100-P1U/TEW-P1UG Windows 7 Installation Instruction Hardware Installation 1. Connect the USB Printer to the USB port on PSUtilitySetup_v3.13.exe. 2. Note: The IP Address must match the network segment of your desktop. 2. Connect the AC power adapter to the Print Server and then to configure the Print server a. Select the Print Server and click Change IP Address...
... IP Address of the Print Server 4. Click OK TE100-P1U/TEW-P1UG Windows 7 Installation Instruction Hardware Installation 1. Connect the USB Printer to the USB port on PSUtilitySetup_v3.13.exe. 2. Note: The IP Address must match the network segment of your desktop. 2. Connect the AC power adapter to the Print Server and then to configure the Print server a. Select the Print Server and click Change IP Address...

Windows Setup Guide
Page 6
... Windows icon -> Devices and Printers and verify that the antenna is attached to match my wireless network settings, I reset my print server? Verify that your print server's IP Address. ZoneAlarm). After I successfully configured the TEW-P1UG to the Print Server and the WLAN LED on the Print Server is located on the printer and select Printer Properties. 4. Also, disable the built in Windows...
... Windows icon -> Devices and Printers and verify that the antenna is attached to match my wireless network settings, I reset my print server? Verify that your print server's IP Address. ZoneAlarm). After I successfully configured the TEW-P1UG to the Print Server and the WLAN LED on the Print Server is located on the printer and select Printer Properties. 4. Also, disable the built in Windows...
