
Data Sheet
Page 1
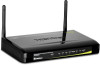
...Setup (WPS) connects WPS peripheral devices at the touch of Service (QoS) technology prioritizes gaming, Internet calls, and streaming video • Advance Firewall protection with ADSL, ASDL2, and ADSL2+ standards • Supports up to the built-in wireless encryption and a double firewall protect your valuable data. TEW-658BRM...* Maximum wireless signal rates are referenced from IEEE 802.11 theoretical specifications. 300Mbps Wireless N ADSL 2/2+ Modem Router TEW-658BRM(V1.0R) The 300Mbps Wireless N ADSL 2/2+ Modem Router, model TEW658BRM, provides both Internet access and a high...
...Setup (WPS) connects WPS peripheral devices at the touch of Service (QoS) technology prioritizes gaming, Internet calls, and streaming video • Advance Firewall protection with ADSL, ASDL2, and ADSL2+ standards • Supports up to the built-in wireless encryption and a double firewall protect your valuable data. TEW-658BRM...* Maximum wireless signal rates are referenced from IEEE 802.11 theoretical specifications. 300Mbps Wireless N ADSL 2/2+ Modem Router TEW-658BRM(V1.0R) The 300Mbps Wireless N ADSL 2/2+ Modem Router, model TEW658BRM, provides both Internet access and a high...

Data Sheet
Page 2
...Support • SW upgrade • 4 x 10/100Mbps Auto-MDIX ports • Power: On/off power button • WPS: Enables Wi-Fi Protected Setup (WPS) function • Reset: Reset to 300Mbps • WEP(HEX/ASCII): 64/128-bit • WPA(AES/TKIP): WPA/WPA2-RADIUS, WPA-PSK... 802.11b: -80dBm (typical) @ 11Mbps • 802.11g: -65dBm (typical) @ 54Mbps • 802.11n: -64dBm (typical) @ 300Mbps • 1~ 11 (FCC), 1~13 (ETSI) TEW-658BRM rev: 02.17.2011 IP, MAC, Domain, and Keyword • Power, LAN1~LAN4, WLAN, ADSL and Internet, WPS • 12V DC, 1A external power adapter...
...Support • SW upgrade • 4 x 10/100Mbps Auto-MDIX ports • Power: On/off power button • WPS: Enables Wi-Fi Protected Setup (WPS) function • Reset: Reset to 300Mbps • WEP(HEX/ASCII): 64/128-bit • WPA(AES/TKIP): WPA/WPA2-RADIUS, WPA-PSK... 802.11b: -80dBm (typical) @ 11Mbps • 802.11g: -65dBm (typical) @ 54Mbps • 802.11n: -64dBm (typical) @ 300Mbps • 1~ 11 (FCC), 1~13 (ETSI) TEW-658BRM rev: 02.17.2011 IP, MAC, Domain, and Keyword • Power, LAN1~LAN4, WLAN, ADSL and Internet, WPS • 12V DC, 1A external power adapter...

Quick Installation Guide
Page 4
... PPPoE AC Name optional) ŸConnection Trigger (OnDemand/ AlwayOn/ Manual) ŸIdle Disconnect Time (30~3600 seconds) ŸAs system default route (Current setting : pppoe ) (Setup " Internet Setup) ŸICMP Reply Enable (Setup " Internet Setup) ŸLCP Interval (0~86400 seconds) ŸProxy ARP Enable 2
... PPPoE AC Name optional) ŸConnection Trigger (OnDemand/ AlwayOn/ Manual) ŸIdle Disconnect Time (30~3600 seconds) ŸAs system default route (Current setting : pppoe ) (Setup " Internet Setup) ŸICMP Reply Enable (Setup " Internet Setup) ŸLCP Interval (0~86400 seconds) ŸProxy ARP Enable 2

Quick Installation Guide
Page 5
... Trigger (OnDemand/ AlwayOn/ Manual) ŸIdle Disconnect Time (30~3600 seconds) ŸLCP Interval: _____ (0~86400 seconds) ŸAs system default route (Current setting : pppoe ) (Setup " Interent Setup) ŸICMP Reply Enable (Setup " Interent Setup) ŸProxy ARP Enable 3. 2.
... Trigger (OnDemand/ AlwayOn/ Manual) ŸIdle Disconnect Time (30~3600 seconds) ŸLCP Interval: _____ (0~86400 seconds) ŸAs system default route (Current setting : pppoe ) (Setup " Interent Setup) ŸICMP Reply Enable (Setup " Interent Setup) ŸProxy ARP Enable 3. 2.

Quick Installation Guide
Page 6
...Allowed (Enable/Disable) ŸDNS Server 1 optional) ŸDNS Server 2 optional) ŸAs system default route (Current setting : pppoe ) (Setup " Interent Setup) ŸICMP Reply Enable (Setup -> Interent Setup) ŸProxy ARP Enable 4. ŸState of Connection (Enable/Disable) ŸName NAT (Enable/Disable) ŸAddress Type (DHCP/Static) Ÿ...) ŸOption 61 IAID: _____ (optional) ŸOption 61 DUID : _____ (optional) ŸAs system default route (Current setting : pppoe ) (Setup " Interent Setup) ŸICMP Reply Enable (Setup -> Interent Setup) ŸProxy ARP Enable 4
...Allowed (Enable/Disable) ŸDNS Server 1 optional) ŸDNS Server 2 optional) ŸAs system default route (Current setting : pppoe ) (Setup " Interent Setup) ŸICMP Reply Enable (Setup -> Interent Setup) ŸProxy ARP Enable 4. ŸState of Connection (Enable/Disable) ŸName NAT (Enable/Disable) ŸAddress Type (DHCP/Static) Ÿ...) ŸOption 61 IAID: _____ (optional) ŸOption 61 DUID : _____ (optional) ŸAs system default route (Current setting : pppoe ) (Setup " Interent Setup) ŸICMP Reply Enable (Setup -> Interent Setup) ŸProxy ARP Enable 4

Quick Installation Guide
Page 7
.../Disable) ŸDNS Override Allowed (Enable/Disable) ŸDNS Server 1 optional) ŸDNS Server 2 optional) ŸMac Address As system default route (Current setting : pppoe ) (Setup " Interent Setup) ŸICMP Reply Enable (Setup -> Interent Setup) ŸProxy ARP Enable 6. 5.
.../Disable) ŸDNS Override Allowed (Enable/Disable) ŸDNS Server 1 optional) ŸDNS Server 2 optional) ŸMac Address As system default route (Current setting : pppoe ) (Setup " Interent Setup) ŸICMP Reply Enable (Setup -> Interent Setup) ŸProxy ARP Enable 6. 5.

Quick Installation Guide
Page 8
... Enabled (Enable/Disable) ŸDNS Override Allowed (Enable/Disable) ŸDNS Server 1 optional) ŸDNS Server 2 optional) ŸAs system default route (Current setting : pppoe ) (Setup " Interent Setup) ŸICMP Reply Enable (Setup -> Interent Setup) ŸProxy ARP Enable 6 7.
... Enabled (Enable/Disable) ŸDNS Override Allowed (Enable/Disable) ŸDNS Server 1 optional) ŸDNS Server 2 optional) ŸAs system default route (Current setting : pppoe ) (Setup " Interent Setup) ŸICMP Reply Enable (Setup -> Interent Setup) ŸProxy ARP Enable 6 7.

Quick Installation Guide
Page 10
Open your web browser, type http://192.168.10.1 in the Address bar, and then press Enter. 2. Enter the User Name and password and then click OK. By default: User name: admin Password: admin Note: User name and Password are case sensitive. 3. Click Setup Wizard if the Setup Wizard does not automatically appear. 4. The Setup wizard will automatically appear. 3. Configure the Modem Note: It is recommended that you configure the Modem from a wired computer. 1. Select PVCO and click Next. 8
Open your web browser, type http://192.168.10.1 in the Address bar, and then press Enter. 2. Enter the User Name and password and then click OK. By default: User name: admin Password: admin Note: User name and Password are case sensitive. 3. Click Setup Wizard if the Setup Wizard does not automatically appear. 4. The Setup wizard will automatically appear. 3. Configure the Modem Note: It is recommended that you configure the Modem from a wired computer. 1. Select PVCO and click Next. 8
User's Guide
Page 2
... 95 / 98 / ME ...12 Windows 2000 ...13 Windows XP ...13 Windows Vista ...14 Windows 7 ...14 Log In to the Modem Router ...15 Setup Wizard...16 Menu ...19 Setup ...19 Internet Setup...19 Internet Connection Settings...19 Internet Settings ...20 Protocol ...21 PPPoE (RFC-2516 PPP over Ethernet 21 PPPoA (RFC-2364 PPP over...
... 95 / 98 / ME ...12 Windows 2000 ...13 Windows XP ...13 Windows Vista ...14 Windows 7 ...14 Log In to the Modem Router ...15 Setup Wizard...16 Menu ...19 Setup ...19 Internet Setup...19 Internet Connection Settings...19 Internet Settings ...20 Protocol ...21 PPPoE (RFC-2516 PPP over Ethernet 21 PPPoA (RFC-2364 PPP over...

User's Guide
Page 6
...• Supports Wi-Fi Multimedia (WMM) • Supports Wi-Fi Protected Setup (WPS) for easy connection • Supports wireless data encryption with 64/128-bit WEP standard • Supports enhance security for choosing Trendnet Wireless N ADSL2 Modem Router. The web-based utility allows you for... WPA-TKIP, WPA2-AES, WPA, and WPA2 Package Contents Check if your package contains the following items. If any item is missing or appears damaged, contact your dealer. • TEW-658BRM •...
...• Supports Wi-Fi Multimedia (WMM) • Supports Wi-Fi Protected Setup (WPS) for easy connection • Supports wireless data encryption with 64/128-bit WEP standard • Supports enhance security for choosing Trendnet Wireless N ADSL2 Modem Router. The web-based utility allows you for... WPA-TKIP, WPA2-AES, WPA, and WPA2 Package Contents Check if your package contains the following items. If any item is missing or appears damaged, contact your dealer. • TEW-658BRM •...

User's Guide
Page 8
Rear Panel No. Ports / Buttons Description 1 DSL port Connects to the DSL line using the RJ-11 cable. 2 WPS button Press to search for devices that support Wi-Fi Protected Setup (WPS). 3 Reset button Press and hold this button for 5 seconds to restore your device to its original factory default setting. 4 Ethernet port Connects a computer and other Ethernet network devices to the Modem 1, 2, 3, 4 Router using RJ-45 cables. 5 Power port Connects the power adapter. 6 Power button Press to turn your device on or off.
Rear Panel No. Ports / Buttons Description 1 DSL port Connects to the DSL line using the RJ-11 cable. 2 WPS button Press to search for devices that support Wi-Fi Protected Setup (WPS). 3 Reset button Press and hold this button for 5 seconds to restore your device to its original factory default setting. 4 Ethernet port Connects a computer and other Ethernet network devices to the Modem 1, 2, 3, 4 Router using RJ-45 cables. 5 Power port Connects the power adapter. 6 Power button Press to turn your device on or off.

User's Guide
Page 16
... Default VLAN and PPPoE PassThrough. Set the Encapsulation mode, ATMQoS, and Peak Cell Rate. b. d. The information required on the screen. It is recommended to continue. Setup Wizard After you log in, the Setup Wizard appears on the page below can be obtained from your ISP and do the following: a.
... Default VLAN and PPPoE PassThrough. Set the Encapsulation mode, ATMQoS, and Peak Cell Rate. b. d. The information required on the screen. It is recommended to continue. Setup Wizard After you log in, the Setup Wizard appears on the page below can be obtained from your ISP and do the following: a.

User's Guide
Page 19
... to enable or disable the Internet connection. To access the Internet Setup page, click SETUP > Internet Setup. Select the Permanent Virtual Circuit (PVC). Select whether to view the options. Internet Setup The Internet Setup page is divided into three sections: Internet Connection Settings, Internet Settings..., and Protocol. The Modem Router supports up to configure the Internet connection of the screen, to your Modem Router manually. Setup The Setup menu allows you to 8 PVCs. Enter the Virtual Path Identifier (VPI) Click a menu item, then a submenu to display ...
... to enable or disable the Internet connection. To access the Internet Setup page, click SETUP > Internet Setup. Select the Permanent Virtual Circuit (PVC). Select whether to view the options. Internet Setup The Internet Setup page is divided into three sections: Internet Connection Settings, Internet Settings..., and Protocol. The Modem Router supports up to configure the Internet connection of the screen, to your Modem Router manually. Setup The Setup menu allows you to 8 PVCs. Enter the Virtual Path Identifier (VPI) Click a menu item, then a submenu to display ...

User's Guide
Page 29
... your wireless network. SSID - Check this box to enable the wireless function of your network settings. Wireless Channel - To access the Basics Settings page, click SETUP > Wireless Settings > Basic Setting or click the Wireless Setting button. Enter the service set its SSID. The SSID is case-sensitive and must not exceed...
... your wireless network. SSID - Check this box to enable the wireless function of your network settings. Wireless Channel - To access the Basics Settings page, click SETUP > Wireless Settings > Basic Setting or click the Wireless Setting button. Enter the service set its SSID. The SSID is case-sensitive and must not exceed...

User's Guide
Page 30
....11b wireless devices can connect to the network. Options are unsure which authentication is the basic security method. To access the Security Setting page, click SETUP > Wireless Settings > Security Setting or click the Security Setting button. Open System allows public access to the network. With WEP security, all wireless devices must...
....11b wireless devices can connect to the network. Options are unsure which authentication is the basic security method. To access the Security Setting page, click SETUP > Wireless Settings > Security Setting or click the Security Setting button. Open System allows public access to the network. With WEP security, all wireless devices must...

User's Guide
Page 33
... of devices that matches the authentication server. Authentication Type - Select an authentication type. Group Rekey Time - Local Network To access the Local Network page, click SETUP > Local Network.
... of devices that matches the authentication server. Authentication Type - Select an authentication type. Group Rekey Time - Local Network To access the Local Network page, click SETUP > Local Network.

User's Guide
Page 37
Time Zone - down list. Daylight Saving - To access the Time and Date page, click SETUP > Time and Date. To set the network time and date according to end the daylight saving time. Select the time zone in seconds of another ...
Time Zone - down list. Daylight Saving - To access the Time and Date page, click SETUP > Time and Date. To set the network time and date according to end the daylight saving time. Select the time zone in seconds of another ...

User's Guide
Page 40
... button to apply the MAC filter or click the Cancel button to discard your Modem Router. NOTE: This feature is designed to make wireless setup easy and yet secure. To Remove MAC Filter 13.On the MAC ADDRESS LIST, click the icon to remove the restriction on the corresponding MAC... to join the wireless network. This page allows you want to deny or allow a device to access to your changes. WPS Setting Wi-Fi Protected Setup (WPS) is available only in WPA-PSK, WPA2PSK, or OPEN mode. Options are: • Disable: No restriction. • Deny: To deny access to the wireless...
... button to apply the MAC filter or click the Cancel button to discard your Modem Router. NOTE: This feature is designed to make wireless setup easy and yet secure. To Remove MAC Filter 13.On the MAC ADDRESS LIST, click the icon to remove the restriction on the corresponding MAC... to join the wireless network. This page allows you want to deny or allow a device to access to your changes. WPS Setting Wi-Fi Protected Setup (WPS) is available only in WPA-PSK, WPA2PSK, or OPEN mode. Options are: • Disable: No restriction. • Deny: To deny access to the wireless...

User's Guide
Page 41
... button to save your changes or click the Cancel button to your changes. To generate a new PIN, click the Generate New PIN button. Add Client Setup Methods - Basic Setting Enable WPS - Click Advanced > Advanced Wireless > WPS Setting or click the WPS Setting button. Click the Add button to enable the WPS...
... button to save your changes or click the Cancel button to your changes. To generate a new PIN, click the Generate New PIN button. Add Client Setup Methods - Basic Setting Enable WPS - Click Advanced > Advanced Wireless > WPS Setting or click the WPS Setting button. Click the Add button to enable the WPS...

User's Guide
Page 92
... TR-069 Remote Management IGMP v1/v2 Support SW upgrade 4 x 10/100Mbps Auto-MDIX ports Power: On/off power button WPS: Enables Wi-Fi Protected Setup (WPS) function Reset: Reset to factory defaults NAT, SPI, Content Filter; G.992.3 (G.dmt.bis) Complies with ADSL2 standard - G.992.1 (G.dmt, Annex A) - Specifications Hardware Standards RJ...
... TR-069 Remote Management IGMP v1/v2 Support SW upgrade 4 x 10/100Mbps Auto-MDIX ports Power: On/off power button WPS: Enables Wi-Fi Protected Setup (WPS) function Reset: Reset to factory defaults NAT, SPI, Content Filter; G.992.3 (G.dmt.bis) Complies with ADSL2 standard - G.992.1 (G.dmt, Annex A) - Specifications Hardware Standards RJ...

