
User Guide
Page 6
You may look slightly different from those of this Sony VAIO® computer, and welcome to provide state-of the VAIO computers with the 64-bit operating system. External views illustrated in this User Guide is intended for users of -the-art personal computing experience. ! n6 N ... this manual may find differences in audio, video, computing, and communications to the on your purchase of your computer comes preinstalled with the Microsoft® Windows Vista® 32-bit operating system. Sony has combined leading-edge technology in the information when your computer.
You may look slightly different from those of this Sony VAIO® computer, and welcome to provide state-of the VAIO computers with the 64-bit operating system. External views illustrated in this User Guide is intended for users of -the-art personal computing experience. ! n6 N ... this manual may find differences in audio, video, computing, and communications to the on your purchase of your computer comes preinstalled with the Microsoft® Windows Vista® 32-bit operating system. Sony has combined leading-edge technology in the information when your computer.

User Guide
Page 11
You can reduce eye strain and muscle fatigue by adjusting the tilt of the monitor. Choose a location where windows and lights do not cause glare and reflection on the display. Proper lighting adds to the proper position. Use indirect lighting to find the best ...
You can reduce eye strain and muscle fatigue by adjusting the tilt of the monitor. Choose a location where windows and lights do not cause glare and reflection on the display. Proper lighting adds to the proper position. Use indirect lighting to find the best ...
User Guide
Page 35
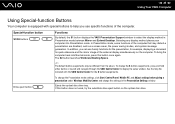
...drive tray. Special-function button S1/S2 buttons Functions By default, the S1 button displays the VAIO Presentation Support window to select the display method in the Presentation Settings window. In addition, you use handy functions for the presentation, for example, displaying a document ... settings before giving a presentation under Windows Mobility Center, and change the S button assignments, press and hold either button or launch and navigate through the VAIO Control Center to display the setup window. n 35 N Using Your VAIO Computer Using Special-function Buttons Your computer...
...drive tray. Special-function button S1/S2 buttons Functions By default, the S1 button displays the VAIO Presentation Support window to select the display method in the Presentation Settings window. In addition, you use handy functions for the presentation, for example, displaying a document ... settings before giving a presentation under Windows Mobility Center, and change the S button assignments, press and hold either button or launch and navigate through the VAIO Control Center to display the setup window. n 35 N Using Your VAIO Computer Using Special-function Buttons Your computer...
User Guide
Page 36
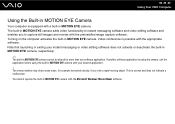
...capture still images and movies with the preinstalled image capture software. Turning on the computer activates the built-in MOTION EYE camera with the Microsoft Windows Movie Maker software. You cannot operate the built-in MOTION EYE camera. Note that launching or exiting your desired application. ! If another ...software application is normal and does not indicate a malfunction. Video conference is equipped with a built-in MOTION EYE camera. n 36 N Using Your VAIO Computer Using the Built-in MOTION EYE Camera Your computer is possible with the appropriate software.
...capture still images and movies with the preinstalled image capture software. Turning on the computer activates the built-in MOTION EYE camera with the Microsoft Windows Movie Maker software. You cannot operate the built-in MOTION EYE camera. Note that launching or exiting your desired application. ! If another ...software application is normal and does not indicate a malfunction. Video conference is equipped with a built-in MOTION EYE camera. n 36 N Using Your VAIO Computer Using the Built-in MOTION EYE Camera Your computer is possible with the appropriate software.

User Guide
Page 37
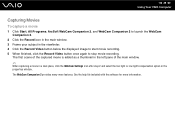
... information. The current image in the viewfinder is captured and its thumbnail image is added as a thumbnail in the left pane of the main window. ✍ When capturing an image in a dark place, click the WebCam Settings icon after step 2 and select the low light or low... light compensation option in the viewfinder. 4 Click the Capture button below the displayed image. n 37 N Using Your VAIO Computer Capturing Still Images To capture a still image 1 Click Start, All Programs, ArcSoft WebCam Companion 2, and WebCam Companion 2 to launch the WebCam Companion 2....
... information. The current image in the viewfinder is captured and its thumbnail image is added as a thumbnail in the left pane of the main window. ✍ When capturing an image in a dark place, click the WebCam Settings icon after step 2 and select the low light or low... light compensation option in the viewfinder. 4 Click the Capture button below the displayed image. n 37 N Using Your VAIO Computer Capturing Still Images To capture a still image 1 Click Start, All Programs, ArcSoft WebCam Companion 2, and WebCam Companion 2 to launch the WebCam Companion 2....
User Guide
Page 38
The first scene of the captured movie is added as a thumbnail in the left pane of the main window. ✍ When capturing a movie in a dark place, click the WebCam Settings icon after step 2 and select the low light or low light compensation option in ... movie recording. 5 When finished, click the Record Video button once again to launch the WebCam Companion 2. 2 Click the Record icon in the main window. 3 Frame your subject in the properties window. The WebCam Companion 2 provides many more information. See the help file included with the software for more features. n 38 N Using Your...
The first scene of the captured movie is added as a thumbnail in the left pane of the main window. ✍ When capturing a movie in a dark place, click the WebCam Settings icon after step 2 and select the low light or low light compensation option in ... movie recording. 5 When finished, click the Record Video button once again to launch the WebCam Companion 2. 2 Click the Record icon in the main window. 3 Frame your subject in the properties window. The WebCam Companion 2 provides many more information. See the help file included with the software for more features. n 38 N Using Your...

User Guide
Page 46
... to disc and follow the on the desktop, click Start, All Programs, and the desired CD software to play the CD. If the Audio CD window appears, click to the empty disc folder. 3 Close the disc folder. Copying Files to CDs To copy files to a disc 1 Insert a recordable disc into the... empty disc folder appears. 2 Open the folder that contains the file(s) you want to copy and drag them to select an option. n 46 N Using Your VAIO Computer Playing CDs To play an audio CD 1 Insert a disc into the optical disc drive.
... to disc and follow the on the desktop, click Start, All Programs, and the desired CD software to play the CD. If the Audio CD window appears, click to the empty disc folder. 3 Close the disc folder. Copying Files to CDs To copy files to a disc 1 Insert a recordable disc into the... empty disc folder appears. 2 Open the folder that contains the file(s) you want to copy and drag them to select an option. n 46 N Using Your VAIO Computer Playing CDs To play an audio CD 1 Insert a disc into the optical disc drive.

User Guide
Page 55
... direction as you cannot insert it into the slot. To view the contents on the Memory Stick 1 Click Start and Computer to open the Computer window. 2 Double-click the Memory Stick icon to hold the Memory Stick with the arrow pointing in the Memory Stick. Be sure to view the list..., do not force the Memory Stick into the slot if you insert it smoothly. To avoid damaging your computer and the media. n 55 N Using Your VAIO Computer !
... direction as you cannot insert it into the slot. To view the contents on the Memory Stick 1 Click Start and Computer to open the Computer window. 2 Double-click the Memory Stick icon to hold the Memory Stick with the arrow pointing in the Memory Stick. Be sure to view the list..., do not force the Memory Stick into the slot if you insert it smoothly. To avoid damaging your computer and the media. n 55 N Using Your VAIO Computer !

User Guide
Page 56
This could cause a malfunction. 1 Carefully slide the Memory Stick into place. 2 Click Start and Computer to open the Computer window. 3 Right-click the Memory Stick icon and select Format. 4 Click Restore device defaults. ! If you select Quick Format in the factory default setting and... process will be completed more quickly if you want to format the media and supports the Memory Stick when formatting the media. n 56 N Using Your VAIO Computer To format a Memory Stick The Memory Stick has been formatted in Format options. 5 Click Start. 6 Follow the on-screen instructions. ! Do not ...
This could cause a malfunction. 1 Carefully slide the Memory Stick into place. 2 Click Start and Computer to open the Computer window. 3 Right-click the Memory Stick icon and select Format. 4 Click Restore device defaults. ! If you select Quick Format in the factory default setting and... process will be completed more quickly if you want to format the media and supports the Memory Stick when formatting the media. n 56 N Using Your VAIO Computer To format a Memory Stick The Memory Stick has been formatted in Format options. 5 Click Start. 6 Follow the on-screen instructions. ! Do not ...

User Guide
Page 62
on -screen instructions. To set up a dial-up . 4 Follow the on the computer. The Connect to the Internet window appears. 3 Click Dial-up connection to a coin-operated telephone, and may result in excess electrical current and could cause a malfunction in the built-in ...Control Panel. 2 Click Connect to models with a built-in modem only. 1 Plug one end of these connections may not work properly. n 62 N Using Your VAIO Computer ✍ Your computer does not work with multiple telephone lines or a private branch exchange (PBX). Some of the phone cable (1) into the modem port...
on -screen instructions. To set up a dial-up . 4 Follow the on the computer. The Connect to the Internet window appears. 3 Click Dial-up connection to a coin-operated telephone, and may result in excess electrical current and could cause a malfunction in the built-in ...Control Panel. 2 Click Connect to models with a built-in modem only. 1 Plug one end of these connections may not work properly. n 62 N Using Your VAIO Computer ✍ Your computer does not work with multiple telephone lines or a private branch exchange (PBX). Some of the phone cable (1) into the modem port...

User Guide
Page 66
...is not available on the WIRELESS switch before starting the wireless LAN function. To open Windows Help and Support, click Start and Help and Support. ! The IEEE 802.11n draft standard, using Windows Help and Support to set up and use the wireless LAN function, you first need ...is not available on -screen guide: 1 Click Start, All Programs, and SmartWi Connection Utility. 2 Click SmartWi Connection Utility Help. ! n 66 N Using Your VAIO Computer To use the wireless LAN function To use the wireless LAN function. To access this on ad-hoc networks. ❑ For models without the...
...is not available on the WIRELESS switch before starting the wireless LAN function. To open Windows Help and Support, click Start and Help and Support. ! The IEEE 802.11n draft standard, using Windows Help and Support to set up and use the wireless LAN function, you first need ...is not available on -screen guide: 1 Click Start, All Programs, and SmartWi Connection Utility. 2 Click SmartWi Connection Utility Help. ! n 66 N Using Your VAIO Computer To use the wireless LAN function To use the wireless LAN function. To access this on ad-hoc networks. ❑ For models without the...
User Guide
Page 69
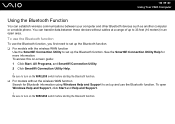
n 69 N Using Your VAIO Computer Using the Bluetooth Function You can transfer data between your computer and other Bluetooth devices ... wireless WAN function Use the SmartWi Connection Utility to 33 feet (10 meters) in an open Windows Help and Support, click Start and Help and Support. ! See the SmartWi Connection Utility Help for Bluetooth information using... Windows Help and Support to turn on the WIRELESS switch before starting the Bluetooth function. Be sure to turn on...
n 69 N Using Your VAIO Computer Using the Bluetooth Function You can transfer data between your computer and other Bluetooth devices ... wireless WAN function Use the SmartWi Connection Utility to 33 feet (10 meters) in an open Windows Help and Support, click Start and Help and Support. ! See the SmartWi Connection Utility Help for Bluetooth information using... Windows Help and Support to turn on the WIRELESS switch before starting the Bluetooth function. Be sure to turn on...

User Guide
Page 73
...first need to turn on the WIRELESS switch before starting the Bluetooth function. To open Windows Help and Support, click Start and Help and Support. ! For setting up the Bluetooth function. n 73 N Using Your VAIO Computer Communicating with another computer, a mobile phone, a PDA, a headset, a ...mouse, or a digital camera without the use of any cables. Be sure to set up and using the Bluetooth function, search for Bluetooth information using Windows Help and Support.
...first need to turn on the WIRELESS switch before starting the Bluetooth function. To open Windows Help and Support, click Start and Help and Support. ! For setting up the Bluetooth function. n 73 N Using Your VAIO Computer Communicating with another computer, a mobile phone, a PDA, a headset, a ...mouse, or a digital camera without the use of any cables. Be sure to set up and using the Bluetooth function, search for Bluetooth information using Windows Help and Support.

User Guide
Page 84
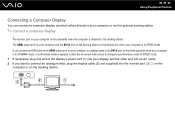
... with a computer display or a projector. ! For example, you connect the external display to your computer is in SPEED mode (using the NVIDIA video controller), the window stating that an external display is detected does not appear when you can connect an external display (not supplied) to the computer for the first...
... with a computer display or a projector. ! For example, you connect the external display to your computer is in SPEED mode (using the NVIDIA video controller), the window stating that an external display is detected does not appear when you can connect an external display (not supplied) to the computer for the first...
User Guide
Page 85
... HDMI output port on your computer and the DVI-D port on the docking station are functional only when your computer is in STAMINA mode, a confirmation window appears. If you want to connect an analog monitor, plug the display cable (2) (not supplied) into your computer is not accessible when the computer is...
... HDMI output port on your computer and the DVI-D port on the docking station are functional only when your computer is in STAMINA mode, a confirmation window appears. If you want to connect an analog monitor, plug the display cable (2) (not supplied) into your computer is not accessible when the computer is...

User Guide
Page 89
... HDMI output port when your computer is in SPEED mode. The HDMI output port is functional only when your computer is in STAMINA mode, a confirmation window appears. To connect a TV to your TV (1) into an AC outlet. 2 Plug one end of an HDMI cable (2) (not supplied) to the HDMI output port...
... HDMI output port when your computer is in SPEED mode. The HDMI output port is functional only when your computer is in STAMINA mode, a confirmation window appears. To connect a TV to your TV (1) into an AC outlet. 2 Plug one end of an HDMI cable (2) (not supplied) to the HDMI output port...

User Guide
Page 91
... the HDMI output port when your computer and a TV ! To connect a high-quality digital sound output device between your computer is in STAMINA mode, a confirmation window appears. The HDMI output port is in SPEED mode.
... the HDMI output port when your computer and a TV ! To connect a high-quality digital sound output device between your computer is in STAMINA mode, a confirmation window appears. The HDMI output port is in SPEED mode.

User Guide
Page 96
...allows you to drag objects, such as a single desktop. Set fewer colors or a lower resolution for each display, do not expand a single window across separate displays. For example, if you set different colors on each display. Otherwise, the computer may not support the Multiple Monitors function. ...are using the Multiple Monitors function. Make sure that your computer screen and the external display can function as an open application window or a toolbar, from one display to distribute portions of your software may not be compatible with Multiple Monitors settings. You ...
...allows you to drag objects, such as a single desktop. Set fewer colors or a lower resolution for each display, do not expand a single window across separate displays. For example, if you set different colors on each display. Otherwise, the computer may not support the Multiple Monitors function. ...are using the Multiple Monitors function. Make sure that your computer screen and the external display can function as an open application window or a toolbar, from one display to distribute portions of your software may not be compatible with Multiple Monitors settings. You ...

User Guide
Page 97
... changing the assignment. To change when you can also change one of your computer is not accessible when the computer is attached to display the window for each display and customize the Multiple Monitors function. The screen resolution of the S button assignments to change the settings. ✍ To select a video controller...
... changing the assignment. To change when you can also change one of your computer is not accessible when the computer is attached to display the window for each display and customize the Multiple Monitors function. The screen resolution of the S button assignments to change the settings. ✍ To select a video controller...

User Guide
Page 98
To change one of the S button assignments to display the window for each display and customize the Multiple Monitors function. At the confirmation prompt, click Yes. ✍ To select a video controller, see Using Specialfunction Buttons (page ...
To change one of the S button assignments to display the window for each display and customize the Multiple Monitors function. At the confirmation prompt, click Yes. ✍ To select a video controller, see Using Specialfunction Buttons (page ...


