
User Guide
Page 2
n2 N Contents Before Use ...6 Documentation ...6 Ergonomic Considerations ...8 Getting Started ...10 Locating Controls and Ports...11 About the Indicator Lights ...18 Connecting a Power Source ...19 Using the Battery Pack ...20 Shutting Down Your Computer Safely ...25 Using Your VAIO Computer ...26 Using the Keyboard ...27 Using the Touch Pad ...29 Using Special-function Buttons ...30 Using the Built-in MOTION EYE Camera...31 Using the Optical Disc Drive ...32 Using PC Cards ...39 Using the Memory Stick Media ...42 Using the Internet...46 Using Wireless LAN (WLAN) ...47
n2 N Contents Before Use ...6 Documentation ...6 Ergonomic Considerations ...8 Getting Started ...10 Locating Controls and Ports...11 About the Indicator Lights ...18 Connecting a Power Source ...19 Using the Battery Pack ...20 Shutting Down Your Computer Safely ...25 Using Your VAIO Computer ...26 Using the Keyboard ...27 Using the Touch Pad ...29 Using Special-function Buttons ...30 Using the Built-in MOTION EYE Camera...31 Using the Optical Disc Drive ...32 Using PC Cards ...39 Using the Memory Stick Media ...42 Using the Internet...46 Using Wireless LAN (WLAN) ...47

User Guide
Page 10
Getting Started This section describes how to get started with using your VAIO computer. ❑ Locating Controls and Ports (page 11) ❑ About the Indicator Lights (page 18) ❑ Connecting a Power Source (page 19) ❑ Using the Battery Pack (page 20) ❑ Shutting Down Your Computer Safely (page 25) n 10 N Getting Started
Getting Started This section describes how to get started with using your VAIO computer. ❑ Locating Controls and Ports (page 11) ❑ About the Indicator Lights (page 18) ❑ Connecting a Power Source (page 19) ❑ Using the Battery Pack (page 20) ❑ Shutting Down Your Computer Safely (page 25) n 10 N Getting Started
User Guide
Page 34
...any other shape (star, heart, card, etc.), as this process, follow the instructions included with DVD-RW version 1.1/1.2. n 34 N Using Your VAIO Computer ✍ Supports writing to DVD-R discs compliant with DVD-R for General version 2.0/2.1. Supports 8cm disc reading, but does not support 8cm disc... software and while using your software. ❑ Only use memory-resident utility software while writing data to burn discs, make sure your battery is available only on the surface of the disc. Fingerprints and dust on discs supporting DVD+R DL (Double Layer) recording. Writing to...
...any other shape (star, heart, card, etc.), as this process, follow the instructions included with DVD-RW version 1.1/1.2. n 34 N Using Your VAIO Computer ✍ Supports writing to DVD-R discs compliant with DVD-R for General version 2.0/2.1. Supports 8cm disc reading, but does not support 8cm disc... software and while using your software. ❑ Only use memory-resident utility software while writing data to burn discs, make sure your battery is available only on the surface of the disc. Fingerprints and dust on discs supporting DVD+R DL (Double Layer) recording. Writing to...

User Guide
Page 86
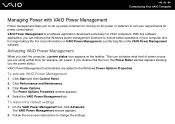
...not working, you can take advantage of power management settings to recharge the battery or shut down the computer and install a fully charged battery. Using Normal Mode This is in this mode. If the battery level falls below 10 percent, you should be aware that the computer ...automatically enters Hibernate mode when the remaining battery charge becomes short, regardless of the computer when it is the normal state of the power management setting you select. ! n 86 N Customizing Your VAIO Computer Using the Power Saving Modes When you use .
...not working, you can take advantage of power management settings to recharge the battery or shut down the computer and install a fully charged battery. Using Normal Mode This is in this mode. If the battery level falls below 10 percent, you should be aware that the computer ...automatically enters Hibernate mode when the remaining battery charge becomes short, regardless of the computer when it is the normal state of the power management setting you select. ! n 86 N Customizing Your VAIO Computer Using the Power Saving Modes When you use .

User Guide
Page 87
... the hard disk and the CPU to the previous work state is in this , you remove both the AC adapter and the battery. See Setting Up Your Computer with VAIO Central (page 85). ! Going back to a low power consumption mode. If you open the LCD screen lid. To return ...data, you will enter Standby mode. You can change the Standby mode settings. If the battery runs down when the computer enters Standby mode, you should save your data frequently. n 87 N Customizing Your VAIO Computer Using Standby Mode Standby mode turns off automatically. The umber power light flashes in ...
... the hard disk and the CPU to the previous work state is in this , you remove both the AC adapter and the battery. See Setting Up Your Computer with VAIO Central (page 85). ! Going back to a low power consumption mode. If you open the LCD screen lid. To return ...data, you will enter Standby mode. You can change the Standby mode settings. If the battery runs down when the computer enters Standby mode, you should save your data frequently. n 87 N Customizing Your VAIO Computer Using Standby Mode Standby mode turns off automatically. The umber power light flashes in ...

User Guide
Page 89
... mode Press the Fn+F12 keys. To return to its previous state. ! The Hibernating screen appears and the computer enters Hibernate mode. Even when the battery runs down, no data will switch off in this mode. Alternatively, 1 Click Start and then Turn Off Computer. 2 Click Hibernate. The computer returns to ...disk and power is turned off. If you press the power button for more than four seconds, the computer will be lost. n 89 N Customizing Your VAIO Computer Using Hibernate Mode In Hibernate mode, the state of the system is saved on the computer by pressing the power button.
... mode Press the Fn+F12 keys. To return to its previous state. ! The Hibernating screen appears and the computer enters Hibernate mode. Even when the battery runs down, no data will switch off in this mode. Alternatively, 1 Click Start and then Turn Off Computer. 2 Click Hibernate. The computer returns to ...disk and power is turned off. If you press the power button for more than four seconds, the computer will be lost. n 89 N Customizing Your VAIO Computer Using Hibernate Mode In Hibernate mode, the state of the system is saved on the computer by pressing the power button.

User Guide
Page 90
... mode to Normal mode from Hibernate mode than Standby mode. Hibernate mode uses less power than from Standby mode. See Setting Up Your Computer with VAIO Central (page 85). ! Do not move the computer until its power indicator light turns off. Hibernate mode requires more time to return to be... lost if you remove both the AC adapter and the battery. When the computer is in the normal way. This power resuming setting will be activated. n 90 N Customizing Your VAIO Computer ✍ If you do not use VAIO Central to configure the computer to return to Normal mode when you...
... mode to Normal mode from Hibernate mode than Standby mode. Hibernate mode uses less power than from Standby mode. See Setting Up Your Computer with VAIO Central (page 85). ! Do not move the computer until its power indicator light turns off. Hibernate mode requires more time to return to be... lost if you remove both the AC adapter and the battery. When the computer is in the normal way. This power resuming setting will be activated. n 90 N Customizing Your VAIO Computer ✍ If you do not use VAIO Central to configure the computer to return to Normal mode when you...
User Guide
Page 91
... status icon appears on -screen instructions to change the settings. VAIO Power Management is a software application developed exclusively for longer battery life. For more information on VAIO Power Management, see the help file on AC power or batteries to suit your computer and for VAIO computers. With this icon, the Power Meter window appears showing...
... status icon appears on -screen instructions to change the settings. VAIO Power Management is a software application developed exclusively for longer battery life. For more information on VAIO Power Management, see the help file on AC power or batteries to suit your computer and for VAIO computers. With this icon, the Power Meter window appears showing...

User Guide
Page 94
...power source (that are ready to change the module. Install the memory module only at an ESD workstation. If such a station is , battery or AC adapter) and from any telecommunication links, networks, or modems before you open the memory module package until you are compatible with ... the configuration of memory modules may cause damage to your system. Ground yourself by installing optional memory modules. n 94 N Upgrading Your VAIO Computer Adding and Removing Memory If you want to expand the functionality of your computer, you can increase the memory by maintaining contact with...
...power source (that are ready to change the module. Install the memory module only at an ESD workstation. If such a station is , battery or AC adapter) and from any telecommunication links, networks, or modems before you open the memory module package until you are compatible with ... the configuration of memory modules may cause damage to your system. Ground yourself by installing optional memory modules. n 94 N Upgrading Your VAIO Computer Adding and Removing Memory If you want to expand the functionality of your computer, you can increase the memory by maintaining contact with...

User Guide
Page 96
Removing and Installing a Memory Module To change or add a memory module 1 Shut down the computer and disconnect all peripheral devices. 2 Unplug the computer and remove the battery. 3 Wait until the computer cools down. 4 Unscrew the screw at the bottom of the computer) to discharge static electricity. n 96 N Upgrading Your VAIO Computer 5 Touch a metal object (such as the connector panel on the back of the computer.
Removing and Installing a Memory Module To change or add a memory module 1 Shut down the computer and disconnect all peripheral devices. 2 Unplug the computer and remove the battery. 3 Wait until the computer cools down. 4 Unscrew the screw at the bottom of the computer) to discharge static electricity. n 96 N Upgrading Your VAIO Computer 5 Touch a metal object (such as the connector panel on the back of the computer.

User Guide
Page 98
Do not touch any other components on the computer. Make sure to insert the memory module edge with a notch into place. ! n 98 N Upgrading Your VAIO Computer 7 Slide the memory module into the memory module slot and push it in until it clicks into the memory module slot. 8 Close the module cover and then tighten the screws on the bottom of the computer. 9 Reinsert the battery and turn on the motherboard.
Do not touch any other components on the computer. Make sure to insert the memory module edge with a notch into place. ! n 98 N Upgrading Your VAIO Computer 7 Slide the memory module into the memory module slot and push it in until it clicks into the memory module slot. 8 Close the module cover and then tighten the screws on the bottom of the computer. 9 Reinsert the battery and turn on the motherboard.

User Guide
Page 112
... on the computer. ❑ Condensation may have inserted since purchase. ❑ Check that came with your VAIO computer. Make sure the brightness and contrast controls are supplied by Sony for at least one hour. ❑ Remove any extra memory modules you may cause the computer to malfunction.... n 112 N Troubleshooting Computer What should I do not use only genuine Sony rechargeable battery packs and AC adapters, which are adjusted correctly. Make sure the power indicator shows the power is on. ❑ Make sure the...
... on the computer. ❑ Condensation may have inserted since purchase. ❑ Check that came with your VAIO computer. Make sure the brightness and contrast controls are supplied by Sony for at least one hour. ❑ Remove any extra memory modules you may cause the computer to malfunction.... n 112 N Troubleshooting Computer What should I do not use only genuine Sony rechargeable battery packs and AC adapters, which are adjusted correctly. Make sure the power indicator shows the power is on. ❑ Make sure the...

