
Operating Instructions
Page 6
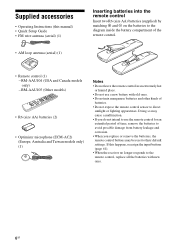
... intend to use a new battery with new ones. 6GB Doing so may be reset to direct sunlight or lighting apparatuses. If this manual) • Quick Setup Guide • FM wire antenna (aerial) (1) • AM loop antenna (aerial) (1) Inserting batteries into the remote control Insert two R6 (size AA) batteries (supplied) by...
... intend to use a new battery with new ones. 6GB Doing so may be reset to direct sunlight or lighting apparatuses. If this manual) • Quick Setup Guide • FM wire antenna (aerial) (1) • AM loop antenna (aerial) (1) Inserting batteries into the remote control Insert two R6 (size AA) batteries (supplied) by...
Operating Instructions
Page 23
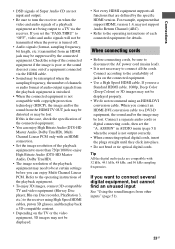
... cords, insert the plugs straight until they click into place. • Do not bend or tie optical digital cords. If you set the "A. Check the setup of the connected equipment if the image is poor or the sound does not come out of a equipment connected via the receiver. When connecting cords...
... cords, insert the plugs straight until they click into place. • Do not bend or tie optical digital cords. If you set the "A. Check the setup of the connected equipment if the image is poor or the sound does not come out of a equipment connected via the receiver. When connecting cords...
Operating Instructions
Page 32
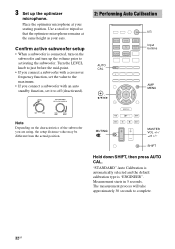
Use a stool or tripod so that the optimizer microphone remains at your ears. Confirm active subwoofer setup • When a subwoofer is "ENGINEER". Measurement starts in 5 seconds. SHIFT Hold down SHIFT, then press AUTO CAL. The measurement process will take approximately 30 ...the characteristics of the subwoofer you connect a subwoofer with an auto standby function, set the value to the maximum. • If you are using, the setup distance value may be different from the actual position. Turn the LEVEL knob to just before the mid-point. • If you connect a subwoofer with...
Use a stool or tripod so that the optimizer microphone remains at your ears. Confirm active subwoofer setup • When a subwoofer is "ENGINEER". Measurement starts in 5 seconds. SHIFT Hold down SHIFT, then press AUTO CAL. The measurement process will take approximately 30 ...the characteristics of the subwoofer you connect a subwoofer with an auto standby function, set the value to the maximum. • If you are using, the setup distance value may be different from the actual position. Turn the LEVEL knob to just before the mid-point. • If you connect a subwoofer with...
Operating Instructions
Page 48
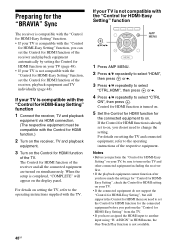
The Control for HDMI function of the receiver and all the connected equipment are turned on the display panel. When the setup is completed, "COMPLETE" will appear on simultaneously. If the Control for HDMI function is already set to on the Control for HDMI function of the ...
The Control for HDMI function of the receiver and all the connected equipment are turned on the display panel. When the setup is completed, "COMPLETE" will appear on simultaneously. If the Control for HDMI function is already set to on the Control for HDMI function of the ...
Operating Instructions
Page 64
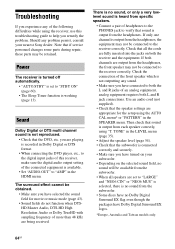
... Digital or DTS multi channel sound is working (page 13). There is connected correctly and securely. • Make sure you have turned on your nearest Sony dealer. Check that all speakers are set to "STBY ON" (page 60). • The Sleep Timer function is not reproduced. • Check that ... inserted into the jacks on the selected sound field, no sound will be obtained. • Make sure you have selected the sound field for the setup using "T. TONE" in the LEVEL menu (page 35). • Adjust the speaker level (page 54). • Check that sound is available. • Set "...
... Digital or DTS multi channel sound is working (page 13). There is connected correctly and securely. • Make sure you have turned on your nearest Sony dealer. Check that all speakers are set to "STBY ON" (page 60). • The Sleep Timer function is not reproduced. • Check that ... inserted into the jacks on the selected sound field, no sound will be obtained. • Make sure you have selected the sound field for the setup using "T. TONE" in the LEVEL menu (page 35). • Adjust the speaker level (page 54). • Check that sound is available. • Set "...
Operating Instructions
Page 71
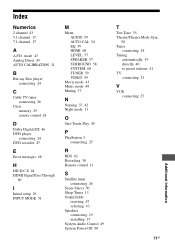
... remote control 62 D Dolby Digital EX 46 DVD player connecting 24 DVD recorder 27 E Error messages 68 H HD-D.C.S 44 HDMI Signal Pass Through 60 I Initial setup 29 INPUT MODE 51 M Menu AUDIO 59 AUTO CAL 54 EQ 59 HDMI 60 LEVEL 57 SPEAKER 57 SURROUND 58 SYSTEM 60 TUNER 59 VIDEO...
... remote control 62 D Dolby Digital EX 46 DVD player connecting 24 DVD recorder 27 E Error messages 68 H HD-D.C.S 44 HDMI Signal Pass Through 60 I Initial setup 29 INPUT MODE 51 M Menu AUDIO 59 AUTO CAL 54 EQ 59 HDMI 60 LEVEL 57 SPEAKER 57 SURROUND 58 SYSTEM 60 TUNER 59 VIDEO...
Quick Setup Guide
Page 1
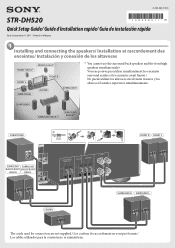
... de raccordement ne sont pas fournis./ Los cables utilizados para la conexión no se suministran. 4-263-363-11(1) STR-DH520 Quick Setup Guide/ Guide d'installation rapide/ Guía de instalación rápida Sony Corporation © 2011 Printed in Malaysia 1 Installing and connecting the speakers/ Installation et raccordement des enceintes/ Instalación y conexi...
... de raccordement ne sont pas fournis./ Los cables utilizados para la conexión no se suministran. 4-263-363-11(1) STR-DH520 Quick Setup Guide/ Guide d'installation rapide/ Guía de instalación rápida Sony Corporation © 2011 Printed in Malaysia 1 Installing and connecting the speakers/ Installation et raccordement des enceintes/ Instalación y conexi...


